Advertisement
SAFETY INFORMATION
The installation of the Recordall® Disc Series Meters must
comply with all applicable federal, state, and local rules,
regulations, and codes.
Failure to read and follow these instructions can lead to
misapplication or misuse of the Recordall® Disc Series Meters,
resulting in personal injury and damage to equipment.
PRODUCT UNPACKING AND
INSPECTION
Upon opening the shipping container, visually inspect the
product and applicable accessories for any physical damage
such as scratches, loose or broken parts, or any other sign of
damage that may have occurred during shipment.
N
OTEE:
If damage is found, request an inspection by
the carrier's agent within 48 hours of delivery
and file a claim with the carrier. A claim for
equipment damage in transit is the sole
responsibility of the purchaser.
RDM-UM-00059-EN-05 (January 2018)
Recordall® Disc Series Meters
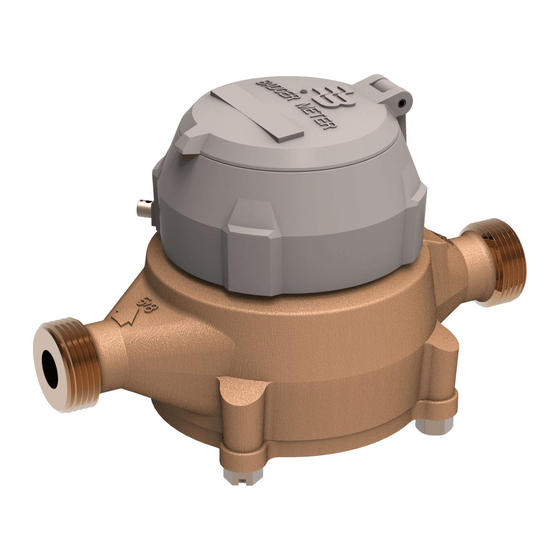
Cold Water Disc Meters, 5/8 in. to 2 in.
METER PRE-INSTALLATION
Take into account the following considerations before you
begin an installation:
• Inspect the piping around the meter for suitable
• Install the meter in the pipeline in a horizontal position
• Position the meter so it is accessible for installation,
• Verify that a suitable electrical grounding wire is properly
•
•
•
•
•
•
conditions. The service line, valves, connections and
meter must be watertight. Repair the piping system if
pipes are corroded or damaged.
so that the flow arrow on the meter housing points in
the same direction as water flow. Registration should be
upright and protected from damage, freezing,
and tampering.
removal and reading.
attached to the upstream and downstream pipe
connections of the meter. The grounding wire provides an
alternative path for any electrical current that may exist
across the opening in the line.
Close the curb (shutoff ) valve to relieve water pressure in
the line before starting the cutting operation. Provide a
high-quality upstream shut-off valve with a low
pressure drop.
When cutting into a new section of service pipe,
flush the pipe to clear chips, pipe dope or other
plumbing residue.
The installed meter must not be an obstacle or a hazard
to the customer or interfere with public safety.
DO NOT ATTEMPT TO USE ANY METER AS A LEVER OR
CROWBAR TO STRAIGHTEN A MISALIGNED METER
POSITION. THIS COULD DAMAGE THE METER.
DO NOT ATTEMPT TO INSTALL A METER INTO AN
OPENING THAT IS TOO LONG BY FORCING THE PIPING
INTO PLACE WITH THE METER'S COUPLING NUTS. THIS
WILL CAUSE SERIOUS DAMAGE TO THE THREADED ENDS
OF THE METER AND HOUSING.
TO AVOID POTENTIAL PROBLEMS, CORRECT ANY
IRREGULARITIES IN PIPE SPACING AND MISALIGNMENT
BEFORE PLACING THE METER INTO ITS POSITION.
Installation Manual
Advertisement
Table of Contents

Subscribe to Our Youtube Channel
Summary of Contents for Badger Meter Recordall Disc Series
- Page 1 Recordall® Disc Series Meters Cold Water Disc Meters, 5/8 in. to 2 in. METER PRE-INSTALLATION Take into account the following considerations before you begin an installation: • Inspect the piping around the meter for suitable conditions. The service line, valves, connections and meter must be watertight.
- Page 2 The metal setters and meter yokes can provide an electrical continuity to protect meters and consumers from electrical shocks. NL bronze connections are available from Badger Meter. To compensate for minor service pipe and setting misalignment for a 5/8 in., 3/4 in. and 1 in. meter, plastic swivel connections are also available.
- Page 3 Installation Manual INSTALLATION INSTRUCTIONS To prepare for meter installation, follow these steps: Close the meter's inlet-side valve. Open a faucet and wait until water flow stops, to depressurize the system. Do not remove the meter until the flow stops. Check valves and make necessary repairs to the curb (shut-off ) valve or inlet side valve if necessary. Close the meter's outlet-side valve.
- Page 4 The Americas | Badger Meter | 4545 West Brown Deer Rd | PO Box 245036 | Milwaukee, WI 53224-9536 | 800-876-3837 | 414-355-0400 México | Badger Meter de las Americas, S.A. de C.V. | Pedro Luis Ogazón N°32 | Esq. Angelina N°24 | Colonia Guadalupe Inn | CP 01050 | México, DF | México | +52-55-5662-0882 Europe, Eastern Europe Branch Office (for Poland, Latvia, Lithuania, Estonia, Ukraine, Belarus) | Badger Meter Europe | ul.


Need help?
Do you have a question about the Recordall Disc Series and is the answer not in the manual?
Questions and answers