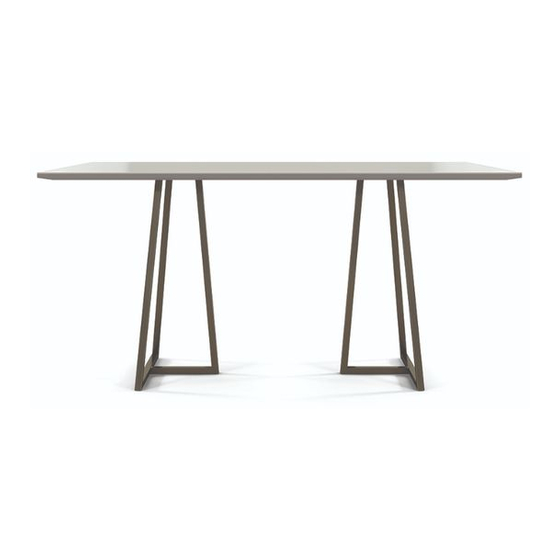
Nucraft Two4Six Meeting Table Installation Instructions Manual
Hide thumbs
Also See for Two4Six Meeting Table:
- Installation instructions manual (27 pages) ,
- Installation instructions manual (16 pages) ,
- Installation instructions manual (9 pages)
Advertisement
Quick Links
Advertisement

Summary of Contents for Nucraft Two4Six Meeting Table
- Page 1 Two4Six Meeting Table Installation Instructions ID: 0075...
-
Page 2: Before Beginning Installation
Before Beginning Installation Read through the entire instruction thoroughly A minimum of 2 people are required for this assembly These instructions reflect typical assemblies; They may not match your specific configuration Nucraft – Two4Six 2015... -
Page 3: Required Tools
Required Tools Drill Driver #2 and #3 Phillips Bit Level Nucraft – Two4Six 2015... -
Page 4: Base Options
Base Options Nucraft – Two4Six 2015... - Page 5 Top Shapes Nucraft – Two4Six 2015...
- Page 6 Table Types Table Type Pages Rectangular Table Pages 7 - 12 Round Table Pages 13 – 18 Square Table Pages 19 - 23 Nucraft – Two4Six 2015...
- Page 7 Table Type Rectangular Table w/Post Legs Soft Rectangle Table w/Open Frame Soft Rectangle Table w/Post Leg Rectangular Table w/Open Frame Nucraft – Two4Six 2015...
- Page 8 Standard *Make sure the legs are angled toward the outside corners of the table Inset Secure with screws HW0741 NOTE: Do not overtighten The screws as this may damage the worksurface Nucraft – Two4Six 2015...
- Page 9 Step 1 Open Frame Setup Align the predrilled holes in the top with the holes in the base and secure with screws HW0741 NOTE: Do not overtighten The screws as this may damage the worksurface Nucraft – Two4Six 2015...
- Page 10 4 bored locations to the worksurface. No pre-drills are provided, therefore center the wire chase under the center of the table and secure. HW0741 NOTE: Do not overtighten The screws as this may damage the worksurface Nucraft – Two4Six 2015...
- Page 11 Check for levelness and extend or retract glides as needed Repeat the above procedure along the width of the top Double check both directions NOTE: Glides are located at these locations for adjustment Nucraft – Two4Six 2015...
- Page 12 Part can be attached at ends or along the length of the table. Additionally the power rail can be adjusted toward or away from the edge of the table Nucraft – Two4Six 2015...
- Page 13 Table Type Round Top w/Cylinder Base Round Top w/Open Frame Round Top w/Post Leg Base Nucraft – Two4Six 2015...
- Page 14 *Make sure the legs are angled toward the outside corners of the table Secure with screws HW0741 NOTE: Do not overtighten The screws as this may damage the worksurface Nucraft – Two4Six 2015...
- Page 15 Square Open Frame Base: Align holes in top of base with the two predrilled holes in top and secure with screws HW0741 NOTE: Do not overtighten The screws as this may damage the worksurface Nucraft – Two4Six 2015...
- Page 16 Round Base Align the 4 plates on the top of the base with the corresponding holes in the top and secure with screws HW0581 NOTE: Do not overtighten The screws as this may damage the worksurface Nucraft – Two4Six 2015...
- Page 17 Check for levelness and extend or retract glides as needed Repeat the above procedure along the width of the top Double check both directions NOTE: Glides are located at these locations for adjustment Nucraft – Two4Six 2015...
- Page 18 Part can be attached at ends or along the length of the table. Additionally the power rail can be adjusted toward or away from the edge of the table Nucraft – Two4Six 2015...
- Page 19 Table Type Soft Square w/Open Frame Soft Square w/Post Leg Square Table w/Open Frame Square Table w/Post Leg Nucraft – Two4Six 2015...
- Page 20 Standard *Make sure the legs are angled toward the outside corners of the table Inset Secure with screws HW0741 NOTE: Do not overtighten The screws as this may damage the worksurface Nucraft – Two4Six 2015...
- Page 21 Open Frame Base Align the predrilled holes in the top with the holes in the base and secure with screws HW0741 NOTE: Do not overtighten The screws as this may damage the worksurface Nucraft – Two4Six 2015...
- Page 22 Check for levelness and extend or retract glides as needed Repeat the above procedure along the width of the top Double check both directions NOTE: Glides are located at these locations for adjustment Nucraft – Two4Six 2015...
- Page 23 Part can be attached at ends or along the length of the table. Additionally the power rail can be adjusted toward or away from the edge of the table Nucraft – Two4Six 2015...


Need help?
Do you have a question about the Two4Six Meeting Table and is the answer not in the manual?
Questions and answers