Nucraft Tesano Monitor Table Installation Instructions Manual
Hide thumbs
Also See for Tesano Monitor Table:
- Installation instructions manual (14 pages) ,
- Installation instructions manual (12 pages) ,
- Installation instructions manual (13 pages)
Advertisement
Quick Links
Advertisement

Related Manuals for Nucraft Tesano Monitor Table


Summary of Contents for Nucraft Tesano Monitor Table
- Page 1 Tesano Monitor Table Installation Instructions ID: 091...
-
Page 2: Before Beginning Installation
Before Beginning Installation • Read through the entire instruction thoroughly • A minimum of 1-2 persons is required for this assembly • These instructions reflect typical assemblies. They may not match your specific configuration. -
Page 3: Required Tools
Required Tools • Drill Driver • #6 Hex Drill Bit • Phillips Bit • Bit Extender • Level... - Page 4 Provided Hardware HW0543 HW0747 HW3774 HW0666 HW2248 HW0615...
- Page 5 Tesano Monitor Table...
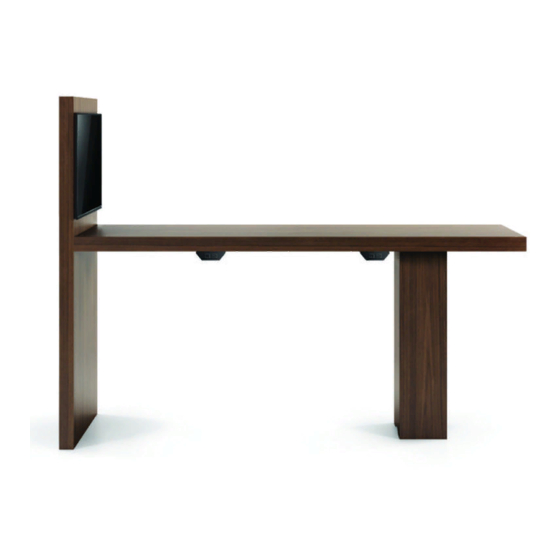
- Page 6 Tesano Monitor Table Exploded 1. Top 2. Monitor Panel 3. Column Base 4. Beams 5. Wire Management 6. Wood Rails 7. Apron...
- Page 7 Step 1: Center Column and Beams Place Column in desired location. Secure the support beams in place with HW0543 screws and HW3774 washers. • Have a person or item to support the other end of the beams. • Note: The beam ends that match with the column brackets are labeled.
-
Page 8: Step 2: Monitor Panel
Step 2: Monitor Panel • Prop up the monitor panel to be in line with the support beams. • Slide beams into brackets and secure with HW2248. NOTE: Do not tighten screws, but keep loose. - Page 9 Step 3: Top • Place top on to support beams. • Keep the end of the top tight to the monitor wall, no gap. • Flush the sides of the top to the sides of the monitor wall. Flush • Secure the top to the support, by inserting HW0615 screws through the support beams into the wood rails.
- Page 10 Step 4: Level Monitor Panel • Level the monitor panel to be straight. • It is easy for the panel to veer left or right so be sure it is at a right angle to the top/ • Now tighten the fasteners from earlier that 90 degrees attached the monitor panel to the support beams.
- Page 11 Step 5: Rails and Aprons Then add the aprons by securing with HW0666 through the metal channel into the wood rail.
- Page 12 Step 6: Electrical • The duplexes will already be attached to the support beams. Front Panel • Connect the “U” shaped jumper to connect the two duplexes. • Connect the infeed wire to one of the duplexes, and the other end will run out through the column base.
Need help?
Do you have a question about the Tesano Monitor Table and is the answer not in the manual?
Questions and answers