Table of Contents
Advertisement
Advertisement
Table of Contents
Troubleshooting

Related Manuals for Respironics SmartMonitor2


Summary of Contents for Respironics SmartMonitor2
- Page 1 Professional Operator’s Manual...
- Page 2 Respironics warrants that the monitor will be free from defects in materials and workmanship for a period of one year from the time of purchase. Respironics accessories are warranted to be free of defects in materials and workmanship for a period of 90 days from the time of purchase.
-
Page 3: Table Of Contents
Setting Alarm and Recording Limits................19 Manual Set-Up............................19 To Set or Modify Parameters Manually, Enter Menu Mode..............19 The SmartMonitor 2 Parameters......................20 System Set-up Menu ..........................27 View Menu Mode .............................28 Using Auxiliary Equipment .................... 29 Using the Respironics Model 930 Oximeter ....................29... - Page 4 Table of Contents Dealer Preparation for Home Setup................31 Home Setup ........................33 Step 1: Set the SmartMonitor 2 on a Clean, Flat Surface..............33 Step 2: Connect the Patient Cable to the SmartMonitor 2..............33 Step 3: Connect the Lead Wires to the Patient Cable................34 Step 4: Connect the Lead Wires to the Electrodes.................
- Page 5 Table of Contents Performing a Functional Self-Test ......................60 Self-Test Troubleshooting .......................... 61 Troubleshooting ......................63 Ordering Information ..................... 65 Glossary........................67 Appendix A ........................69 Flow Chart of SmartMonitor 2 Parameters....................69 Specifications........................ 71 Index ..........................73...
- Page 6 Table of Contents...
-
Page 7: Introduction
Report anything missing or damaged to Respironics. About this Manual This manual provides all the information you need to set up and operate the Respironics SmartMonitor 2 and explains how to use it to monitor the baby's vital functions. Carefully read and understand this manual before using the system. - Page 8 • Presence of a cardiac or diaphragmatic pacemaker Each patient was connected to a data acquisition system that included the Respironics Inc. SmartMonitor and SmartMonitor 2 and the Alice System. Respiration and heart rate signals were recorded using infant electrocardiogram electrodes. The Alice system was used to gather physiological signals and record signals for airflow, breathing effort, and movement.
- Page 9 Introduction Recruitment Summary Total # Enrolled # Evaluated # with 1 or more central apneas Total # of apneas in analysis 54 patients 52 patients 35 patients Two patients were enrolled but not included in the evaluation. Only the first six apneas were used from any individual patient.
- Page 10 Introduction Diagnosis Summary Totals by Diagnosis Site # 1 Site #2 Site #3 Site #4 Site #5 Site #6 Diagnosis Prematurity RDS, Resp. Failure, HMD ALTE, Apnea, AOI, AOP Bronchiolitis, Pneumonia, RSV Gastro-Esophageal Reflux Broncho-Pulmonary Dysplasia Other Totals by Site Results for Both Monitors by Site SmartMonitor SmartMonitor 2...
- Page 11 Introduction SmartMonitor SmartMonitor 2 Difference % Difference No Apnea with Alarm No Apnea with Alarm (SmartMonitor 2 – SmartMonitor) (False Alarm) (False Alarm) -12.3% The false apnea rate for SmartMonitor is 97/(95.95) = 1.01. The false apnea rate for SmartMonitor 2 is 85/95.95 = 0.89. SmartMonitor Apnea SmartMonitor 2 Difference...
- Page 12 Introduction...
-
Page 13: Warnings And Cautions
8. Do not place the monitor in the crib. The baby may roll on the hard surface and be injured. 9. Use only those accessories provided by Respironics with this monitor. 10. Do not allow the patient cable, lead wires or power cord/battery charger cable to become tangled, coiled, crossed, or wrapped around the baby’s neck, arms, or legs. - Page 14 18. In some locations, the monitor will not work properly. If the monitor is affected by external interference in the area, you may not be able to use the monitor. Contact Respironics for further assistance. Use of a third (RL) electrode may help reduce electrical interference.
-
Page 15: Cautions
1. Perform the functional self-test if the SmartMonitor 2 has been x-rayed by an airport security check. 2. Do not place liquids on or near the SmartMonitor 2. Liquids may damage the electronic components inside the monitor. Should liquid spill onto monitor, shut monitor off and call Respironics to have it serviced. - Page 16 Warnings and Cautions...
-
Page 17: How Does The Smartmonitor 2 Work
LCD display on the bottom of the unit. If there is an internal error, a code will be displayed and logged into the memory. Discontinue use of monitor and contact Respironics Technical Support 1-800-345-6443. -
Page 18: Electrical Ratings
How Does the SmartMonitor 2 Work? Electrical Ratings Model 4009 power cord/battery charger: 120VAC 60Hz 7.2W Model 4011 power cord/battery charger: 230VAC 50Hz 7.2W SmartMonitor 2: 10.5-11.5VDC 0.1-1A Model 418 Ni-MH Rechargeable Battery Pack: 6VDC 1.85Ah or greater Environmental Conditions Operating Temperature: 5ºC to 45ºC Operating Humidity:... -
Page 19: Fcc Part 68 Notice
If trouble is experienced with the SmartMonitor 2, please contact the Respironics Service Center at 1- 800-345-6443 for repair and/or warranty information. If the trouble is causing harm to the telephone network, your telephone company may request that you remove the equipment from the network until the problem is resolved. -
Page 20: Industry Canada Cs-03 Notice
The customer should be aware that compliance with the above conditions might not prevent degradation of service in some situations. The Respironics Service Center should coordinate repairs to certified equipment at 1-800-345-6443. Any repairs or alterations made by the user to this equipment, or equipment malfunctions, may give the telecommunications company cause to request the user to disconnect the equipment. -
Page 21: Getting To Know The Monitor
Getting to Know the Monitor When you receive the SmartMonitor 2, make sure that you have all the necessary items and that they are not damaged. Immediately report anything missing or damaged to Respironics. The standard package should include the following:... -
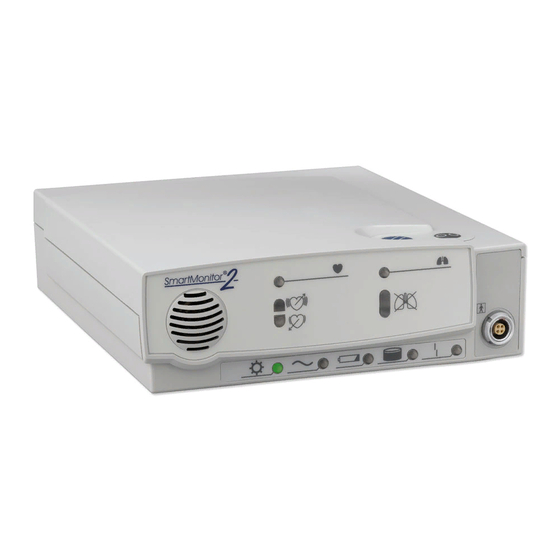
Page 22: Front Panel Features
Getting to Know the Monitor Front Panel Features Patient Input Connector The Patient Input connector is for the Patient Cable. Respiration Lights The green respiration light blinks with each breath the SmartMonitor 2 detects. The red apnea light will come on if the SmartMonitor 2 detects a pause in breathing that is longer than the limit set by the physician. -
Page 23: Side Panel Features
Getting to Know the Monitor Side Panel Features Connection Connection Self-Test Connector You use the self-test connector when performing a Functional Self-Test to make sure the lead wires, patient cable, and SmartMonitor 2 are working properly. See the section, Performing a Functional Self- Test for more information. -
Page 24: Back Panel Features
Getting to Know the Monitor Back Panel Features Remote Alarm (Optional) The Remote Alarm allows you to hear the audible alarms from a different room. Modem (Optional) The SmartMonitor 2 may be equipped with a modem to transfer the SmartMonitor 2 memory to the physician. -
Page 25: Setting Alarm And Recording Limits
Setting Alarm and Recording Limits Setting Alarm and Recording Limits The SmartMonitor 2 has the ability to program alarm and recording limits as prescribed by the physician. There are two methods, including direct connect via serial link to a computer or manually through the display on the bottom of the monitor. -
Page 26: The Smartmonitor 2 Parameters
Setting Alarm and Recording Limits Recording Menu System Menu The SmartMonitor 2 parameters for these menus are in the chart located in Appendix A. Once the changes are completed turn the SmartMonitor 2 off by pressing the following buttons: Press and hold the blue RESET button. Press and release the gray POWER button. - Page 27 Setting Alarm and Recording Limits Menu Option LCD Display Description of Option or Instructions Menu Path STD Alarm Are Selected Press Enter to activate. All Menus Parameters Alarm Menu Press t or u to change the selection. Are Not When you have your selection displayed Selected press Enter.
- Page 28 Setting Alarm and Recording Limits Menu Option LCD Display Description of Option or Instructions Menu Path Tachycardia TACHY ALARM Enables a delay to the audible alarm. All Menus Alarm Delay DELAY Values: Alarm Menu In seconds 0 and 5 seconds Standard value: 5 seconds If this parameter is set to 5 seconds, the audible alarm will not activate unless the alarm...
- Page 29 Setting Alarm and Recording Limits Menu Option LCD Display Description of Option or Instructions Menu Path Bradycardia BRADY Allows active waveforms to be recorded during a All Menus for Record RECORD LIMIT bradycardia event prior to activation of the Record Menu Bradycardia alarm.
- Page 30 Setting Alarm and Recording Limits Menu Option LCD Display Description of Option or Instructions Menu Path ECG Record RECORD ECG? This parameter allows the user to select whether All Menus or not the ECG waveform will be recorded. Record Menu Values: YES or NO Standard value: YES...
- Page 31 Setting Alarm and Recording Limits Menu Option LCD Display Description of Option or Instructions Menu Path When the auxiliary equipment channels are turned on and the auxiliary equipment is not connected to the SmartMonitor 2, a flat line will be recorded and reported. The auxiliary channels enable you to interface other signals to SmartMonitor 2.
- Page 32 Setting Alarm and Recording Limits Menu Option LCD Display Description of Option or Instructions Menu Path Time To Call WHEN TO To enter the Time to call: All Menus the Computer CALL System Menu Press t or u until WHEN To CALL is displayed.
-
Page 33: System Set-Up Menu
NOTE: This parameter does not affect the visual indicator; it cannot be disabled. Values: ON, OFF Standard Value: OFF Modem Speed - Modem Speed-Monitor The default setting is 38,400Bps. This Monitor setting should not be change unless directed to do so by Respironics Technical Support. -
Page 34: View Menu Mode
Description of Option or Instructions Modem Speed - Host Modem Speed – Host The default setting is 115,500Bps. This setting should not be change unless directed to do so by Respironics Technical Support. Software Revision SOFTWARE REVISION Display-only menu. Displays the revision of the Embedded Application Code. -
Page 35: Using Auxiliary Equipment
Information required to setup or change the “definition” includes the devices voltage and value range. This information must come from the Manufacturer of the device. Using the Respironics Model 930 Oximeter When the SmartMonitor 2 is interfaced to the 930 Oximeter, it can be configured to trigger recordings when the Oximeter alarms. - Page 36 Using Auxiliary Equipment...
-
Page 37: Dealer Preparation For Home Setup
If the monitor continues to fail the test, it is an indication that the monitor may not function properly in its current environment. Contact Respironics for further assistance. Use of a third (RL) electrode may help reduce EMI. - Page 38 Dealer Preparation for Home Setup...
-
Page 39: Home Setup
Home Setup Home Setup This section is an overview of the steps you should follow to set up the SmartMonitor 2 in the patient's home. Read the entire manual prior to relying upon this section (alone) to set up a SmartMonitor 2. Ensure Memory has been cleared prior to delivery to new patient. -
Page 40: Step 3: Connect The Lead Wires To The Patient Cable
Home Setup Step 3: Connect the Lead Wires to the Patient Cable. The larger end of the patient cable has three openings, marked LA (black), RL (green), and RA (white). Take the white lead wire and insert it into the opening marked Take the black lead wire and insert it into the opening marked Strain Relief... -
Page 41: Step 5: Attach The Electrodes To The Infant Belt
Home Setup Step 5: Attach the Electrodes to the Infant Belt. Place the electrode belt on a flat surface. Lay the baby on the belt so the belt is aligned with the baby’s nipples (see illustration). Place the electrodes, Velcro-side down, on either side of the belt as follows: Place the electrode with the white lead wire on the baby’s right side. - Page 42 Home Setup Baby’s right side Baby’s left side...
- Page 43 Home Setup Disposable Self Adhesive Electrodes Follow the steps below if you are using disposable electrodes. Attach lead wire to the Self Adhesive Electrodes if not pre-attached. Ensure the infant’s skin is clean and dry. Place the electrode with the white lead wire on the baby’s right side, along the mid-line of the side, two finger widths below or lined up with nipples.
-
Page 44: Step 7: Connect The Power Cord/Battery Charger
Home Setup Step 7: Connect the Power Cord/Battery Charger. Insert the round connector of the power cord/battery charger into the socket on the back panel of the SmartMonitor 2 (see illustration). Push until the connector is fully inserted into place. Then plug the power cord/battery charger into a power outlet. -
Page 45: Responding To Alarms
A Patient Alarm indicates that the baby’s breathing or heart activity is outside the limits prescribed by the physician. The information in this section can help you respond appropriately to patient alarms. Read this section carefully. If you have any questions, please contact Respironics. Testing the Alarm Before you use the monitor, test to see if you can hear the alarm from different rooms while there is noise in the house. - Page 46 Responding to Alarms Light Alarm Check Baby's Respond like this Condition Red Apnea Intermittent Baby is breathing Wait for a few seconds. Watch to see if and/or Low (1beep/sec.) and is responsive. the baby’s breathing and color remain (Heart) normal. Color is good.
-
Page 47: Responding To System Alarms
Responding to Alarms Responding to System Alarms A System Alarm indicates that the monitor may not be functioning properly or at optimum capacity. The information in this section will help you respond appropriately to system alarms. When a SmartMonitor 2 system alarm occurs, one of the lights at the bottom of the front panel will come on. - Page 48 Responding to Alarms If this light is And this condition It means... exists Loose Lead Continuous yellow The yellow loose lead light and the alarm may sound light and continuous continuously when there is a problem with any of the following: alarm Lead wires Electrodes...
-
Page 49: Reducing False Alarms
Reducing False Alarms Reducing False Alarms Proper electrode placement will minimize false alarms. Make sure the electrodes are placed along the mid-line of the side, two finger widths below or lined up with the nipples. If using the black reusable electrodes with the Velcro belt, ensure the belt is quite snug. - Page 50 Reducing False Alarms...
-
Page 51: Monitoring The Baby
Monitoring the Baby Monitoring the Baby Turning the SmartMonitor 2 on You have properly set up the SmartMonitor 2, understand how the monitor functions and how to respond to alarms, you are now ready to begin monitoring the baby’s breathing and heart activity according to the schedule prescribed by the physician. -
Page 52: Monitoring The Baby's Breathing
If the SmartMonitor 2 detects a pause in breathing longer than the limit set by the physician, during a Low Breath Rate alarm, the apnea light will change from flashing to constant. Contact Respironics immediately if apnea alarms occur while the baby is breathing. -
Page 53: Monitoring The Baby's Heart Activity
Monitoring the Baby Monitoring the Baby's Heart Activity Heart Rate Light The green light marked with a heart blinks with each heartbeat the SmartMonitor 2 detects. High Heart Rate Light SmartMonitor 2 determines if the baby’s heart rate is higher than the limit set by the physician. - Page 54 Monitoring the Baby...
-
Page 55: Portable Operation Of The Smartmonitor 2
The SmartMonitor 2 is designed for portable use. When the power cord is not used, the monitor relies on a previously charged internal battery for power. Respironics recommends that the SmartMonitor 2 be used with the power cord/battery charger whenever possible. However, when the monitor is used without the power cord/battery charger the SmartMonitor 2 is fully functional. -
Page 56: Smartmonitor 2 Battery Pack
The battery pack has a locking connector. Do not attempt to remove the battery pack without releasing the latch on the connector. Doing so will damage the battery wires. Use only Respironics-supplied battery packs. Use of other battery packs could cause malfunction. -
Page 57: Battery Installation Instructions
Portable Operation of the SmartMonitor 2 Battery Installation Instructions 1. Turn the monitors’ power off using the correct Power-off procedure, and unplug the external power supply from the SmartMonitor 2. 2. Loosen (counter clock-wise) both screws from the battery pack cover and remove the cover. See figure 1. - Page 58 Transferring SmartMonitor 2 Information...
-
Page 59: Transferring Smartmonitor 2 Information
Transferring SmartMonitor 2 Information Transferring SmartMonitor 2 Information The SmartMonitor 2 contains a memory system that automatically records information about each monitoring session. This information can be transferred (or downloaded) to a computer to be reviewed by the physician. There are several different ways to transfer this information. Whatever method you use, you must transfer data when you get a memory 100% full condition. -
Page 60: Modem Auto Dial
Transferring SmartMonitor 2 Information Modem Auto Dial The SmartMonitor 2 must be connected to AC power during modem download. To have SmartMonitor 2 call the computer for a download it must be programmed with a Host Phone Number, which is the phone number to be called for a connection with the computer as well as the date and time to call. -
Page 61: Modem Auto Answer In Monitor Mode
Transferring SmartMonitor 2 Information SmartMonitor 2 will beep 5 times. After the transfer, you may disconnect the phone line from the monitor and the phone will work normally. Turn the monitor off in the normal way. Press and hold the blue RESET button. Press and release the gray POWER button. -
Page 62: Transferring Smartmonitor 2 Data To A Memory Card
Transferring SmartMonitor 2 Information Transferring SmartMonitor 2 Data to a Memory Card The Memory Card is a credit-card-sized electronic memory transfer device that transfers monitor data. This is an optional feature of SmartMonitor 2 and may not be installed on every unit. All data in the memory card at the time of a download will be overwritten. -
Page 63: Transferring Smartmonitor 2 Data Using A Computer
Transferring SmartMonitor 2 Information Transferring SmartMonitor 2 Data Using a Computer Direct Connection can download the SmartMonitor 2 data to a computer. The Synergy-E software is required to download the SmartMonitor 2. The SmartMonitor 2 can be placed in Communication Mode or Monitoring Mode. If Monitoring Mode is chosen, all alarms and record parameters are functional. - Page 64 Transferring SmartMonitor 2 Information...
-
Page 65: Caring For The Smartmonitor 2
Although the care label in the carrying case suggests machine washing in warm water, the appearance of the carrying case will change noticeably after washing. Respironics recommends that you wipe the case with a damp cloth or sponge using a light detergent, if necessary. Air-dry only. Insect Infestation Decontamination Procedures 1: Fumigating a Roach/Insect-infested Unit ... -
Page 66: Performing A Functional Self-Test
Use a clean cloth with an unscented, alcohol-free dishwashing detergent or 3% Hydrogen Peroxide solution to clean the outside of the monitor. If necessary, return the unit to Respironics for repair. • Units under warranty will not be charged for labor / re-certification, but will be charged for any damaged or repaired components. -
Page 67: Self-Test Troubleshooting
The SmartMonitor 2 lights and alarms should respond as described above. If not, contact Respironics Service before using the unit to monitor a baby. Do not use the monitor if the alarm sounds weak or does not activate upon initial power-on. - Page 68 Caring for the SmartMonitor 2...
-
Page 69: Troubleshooting
No Power at outlet. Locate an outlet with power. Defective power cord/battery Contact Respironics. charger. Internal part failure. Contact Respironics. All lights will flash Internal error condition Reduce likelihood of electrostatic together and the alarm detected by SmartMonitor 2. - Page 70 Allow the battery to charge for 6 hours before using the monitor on battery power. Internal part failure. Contact Respironics. Internal part failure. Contact Respironics. Alarm sounds weak. Low battery Charge battery.
-
Page 71: Ordering Information
16510-1 Electrodes, Reusable 16530-1 Electrode Belt 1030192 SmartMonitor 2 PS Homecare Patient Cable, Metal Visit www.respironics.com for a complete list of products and reorder numbers, or contact Customer Service at 1-800-345-6443 or 724-387-4000 to obtain a product catalog (#1027825). - Page 72 Ordering Information...
-
Page 73: Glossary
Glossary Glossary Apnea - An absence of breathing (respirations). Central apnea – No respiratory effort, caused when the brain fails to send the appropriate signals to the breathing muscles to initiate respirations. Obstructive apnea – Cessation of airflow into or out of the mouth or nose although efforts to breath continue. - Page 74 Appendices...
-
Page 75: Flow Chart Of Smartmonitor 2 Parameters
Appendices Appendix A Flow Chart of SmartMonitor 2 Parameters Menu Mode System Setup All Menus Alarm Menus Recording Menus System Menus Menus Patient Name Record Auxiliary 3 Patient Name Record Impedance Patient Name Patient Name Patient Name Patient ID Record Auxiliary 4 Patient ID Record Resp Rate Patient ID... - Page 76 Appendices...
-
Page 77: Specifications
Specifications Specifications Input Signal ECG Sensitivity 10 to 275 BPM, 0.5 mV; 10 to 150 BPM, 0.2 mV Range Respiration Sensitivity 4 to 150 BrPM @ 2 Ohms; 8 to 75 BrPM @ 0.5 Ohm; 30 BrPM @ 0.15 Ohm Alarms Apnea Delay settings of 10, 15, 20, 25, 30, 40 seconds... - Page 78 Specifications...
-
Page 79: Index
Index Index alarm sounds, 39 setting up the SmartMonitor 2, steps, 33 alarm, testing the, 39 sibling alarm, 45 apnea light, 46 SmartMonitor 2 contents, 15 SmartMonitor 2 features back panel, 18 front panel, 16 charging the battery, 49 side panel, 17 top panel, 15 SmartMonitor 2, turning it off, 45 SmartMonitor 2, turning it on, 45... - Page 80 H577-4000-10 KK 5/3/06...
Need help?
Do you have a question about the SmartMonitor2 and is the answer not in the manual?
Questions and answers