
Subscribe to Our Youtube Channel
Related Manuals for Keithley KPCI-PIO32IOA


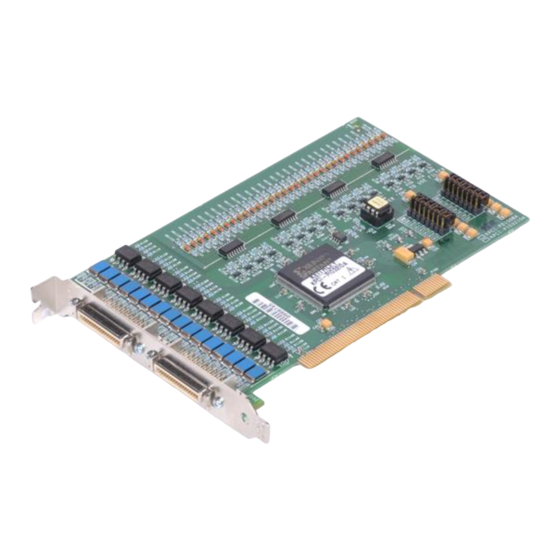
Summary of Contents for Keithley KPCI-PIO32IOA
- Page 1 KPCI-PIO32IOA & KPCI-PDISO8A PCI Bus Isolated I/O Board User’s Manual A G R E A T E R M E A S U R E O F C O N F I D E N C E...
- Page 2 This warranty will be honored provided the defect has not been caused by use of the Keithley Hardware not in accordance with the instructions for the product. This warranty shall be null and void upon: (1) any modification of Keithley Hardware that is made by other than Kei- thley and not approved in writing by Keithley or (2) operation of the Keithley Hardware outside of the environmental specifications therefore.
- Page 3 KPCI-PIO32IOA & KPCI-PDISO8A PCI Bus Isolated I/O Board User’s Manual Windows and WindowsNT are registered trademarks of Microsoft Corporation. DriverLINX is a registered trademark of Scientific Software Tools, Inc. ©2002, Keithley Instruments, Inc. All rights reserved. Cleveland, Ohio, U.S.A. Second Printing, August 2002...
- Page 4 Revision A (Document Number KPCIPIO32IOA-901-01A) ............February 2002 Revision B (Document Number KPCIPIO32IOA-901-01A) ............... August 2002 All Keithley product names are trademarks or registered trademarks of Keithley Instruments, Inc. Other brand and product names are trademarks or registered trademarks of their respective holders.
- Page 5 Keithley products are designed for use with electrical signals that The instrument and accessories must be used in accordance with its are rated Installation Category I and Installation Category II, as de- specifications and operating instructions or the safety of the equip-...
- Page 6 Keithley Instru- symbol on an instrument indicates that the user should re- ments. Standard fuses, with applicable national safety approvals, fer to the operating instructions located in the manual.
-
Page 7: Table Of Contents
Software options ............................Installing DriverLINX ..........................Installing application software and drivers ....................Installing the KPCI-PIO32IOA and KPCI-PDISO8A boards ................Configuring and checking the board and DriverLINX installations ..............Configuring the combined board and DriverLINX installations ............... Checking the combined board and DriverLINX installations .............. - Page 8 Troubleshooting Identifying symptoms and possible causes ......................Systematic problem isolation ..........................General problem isolation procedure ......................Specified tests ..............................5-11 Checking for board as a PCI resource ...................... 5-11 I/O test ..............................5-12 Block diagram ..............................5-14 Technical support ............................. 5-15 Specifications I/O Address Mapping...
- Page 9 Figure 3-2 KPCI-PDISO8A board configuration ......................Figure 3-3 Connections to STP-36 screw terminal connector accessory ..............3-11 Figure 3-4 Typical KPCI-PIO32IOA and KPCI-PDISO8A input/output connections ..........3-13 Troubleshooting Figure 5-1 Problem isolation flowchart ........................Figure 5-2 Mating connector wiring for I/O test .......................
- Page 10 List of Tables General Description Table 2-1 System requirements ..........................Installation Table 3-1 KPCI-PIO32IOA and KPCI-PDISO8A I/O connector pin assignments ........... Table 3-2 STP-36 screw terminal designations ......................3-10 External Interrupts Table 4-1 Connector pins used for external interrupt function ..................
-
Page 11: Overview
Overview... -
Page 12: How The Manual Is Organized
PIO32IOA and KPCI-PDISO8A isolated I/O boards. The manual is intended for data acquisition system designers, engineers, technicians, scientists, and other users responsible for setting up, cabling, and wiring signals to KPCI-PIO32IOA and KPCI-PDISO8A boards. To follow the information and instructions contained in this manual, you must be familiar with the operation of Windows 98, Me, NT, 2000, or XP with basic data- acquisition principles, and with your application. -
Page 13: Safety Symbols And Terms
KPCI-PIO32IOA and KPCI-PDISO8A User’s Manual Overview • 10 POINT TIMES UPPER CASE distinguishes the following: – Switches, such as ON and OFF. – Keyboard keys, such as ENTER. • 10 point Courier distinguishes software code statements. • “Double quote marks” distinguish the following: –... -
Page 14: General Description
General Description... -
Page 15: Specifications
KPCI-PDISO8A). Maximum control input voltages are: ±60V DC (logic high); ±1V DC (logic low). • Relay outputs are solid-state, opto-isolated, N.O. form A (16 for the KPCI-PIO32IOA; 8 for the KPCI-PDISO8A). Outputs can switch both DC voltages (±60V DC maximum) and AC voltages (30V RMS maximum) with a maximum load current of 350mA. -
Page 16: Other I/O Characteristics
Under Windows 98/Me, most existing port I/O application programs and data acquisition pack- ages designed for ISA boards work with the KPCI-PIO32IOA and KPCI-PDISO8A board. The PCI-BIOS-assigned base address is entered in place of a user-assigned base address. (Use of such programs under Windows NT/2000/XP, not recommended, is much more involved.) -
Page 17: Installation
Installation... -
Page 18: Installing The Software
(included with the hardware). A summary of the pros and cons of using integrated packages or writing custom programs is provided in the Keithley Full Line Catalog. The KPCI-PIO32IOA and KPCI-PDISO8A have fully functional driver support for use under Windows. -
Page 19: Installing Driverlinx
flow execution. LabVIEW can be used to create professional applications with minimal programming. Virtual instruments (VIs) compatible with LabVIEW are available for the KPCI-PIO32IOA and KPCI-PDISO8A. Installing DriverLINX Refer to the Read this first document that accompanies your board for installation instructions. -
Page 20: Installing Application Software And Drivers
• The TestPoint manufacturer, Capital Equipment Corporation (CEC). Installing the LabVIEW software and driver If you plan to use only run-time LabVIEW applications with your KPCI-PIO32IOA or KPCI-PDISO8A board, you need not install DriverLINX’s LabVIEW support package. LabVIEW run-time support is automatically installed when you install and configure DriverLINX. - Page 21 System responsibility The system integrator has final responsibility for the EMC of a system containing Keithley KPCI-PIO32IOA and KPCI-PDISO8A boards. The user must not assume that installation of the CE-marked KPCI-PIO32IOA or KPCI-PDISO8A in a CE-marked PC will result in a system with acceptable RFI emissions.
-
Page 22: Configuring And Checking The Board And Driverlinx Installations
Installation KPCI-PIO32IOA and KPCI-PDISO8A User’s Manual Configuring and checking the board and DriverLINX installations This subsection helps you to do the following: • Configure the combined board and DriverLINX installations, using the DriverLINX Plug and Play Wizard. • Check the combined board and DriverLINX installations by checking the ability to start the DriverLINX PIO Control Panel. - Page 23 Configuration. f. Under Configuration, click Hardware References. A list of documents appears. g. In the list of documents, click on Using DriverLINX with Your Hardware—Keithley KPCI-PIO32IOA and KPCI-PDISO8A. The manual opens via Acrobat Reader. h. Print the manual now, if possible, to make reference easier.
-
Page 24: Connecting The Kpci-Pio32Ioa And Kpci-Pdiso8A Boards
• Wire the KPCI-PIO32IOA or KPCI-PDISO8A I/O to your external circuits. Identifying I/O connector pin assignments The KPCI-PIO32IOA board has two 36-pin mini-D type I/O connectors for I/O, while the KPCI-PDISO8A board has one 36-pin mini-D type I/O connector for I/O. -
Page 25: Table 3-1 Kpci-Pio32Ioa And Kpci-Pdiso8A I/O Connector Pin Assignments
Installation Figure 3-2 KPCI-PDISO8A board configuration J101 (Channels 0 through 7) Low-pass Filter Jumpers Table 3-1 KPCI-PIO32IOA and KPCI-PDISO8A I/O connector pin assignments Top Connector (J101) Bottom Connector (J102. KPCI-PIO32IOA Only) Pin Number Signal Pin Number Signal Pin Number Signal... -
Page 26: Connecting Interface Accessories
Using cable assemblies The KPCI-PIO32IOA and KPCI-PDISO8A I/O connectors can be mated directly to your external circuits using locally fabricated cable assemblies. To mate a locally fabricated cable to an I/O connector, install an IEEE-1284 (1994) connector on the cable. (Mating plug 3M part number: 10136-6000EC.) - Page 27 KPCI-PIO32IOA and KPCI-PDISO8A User’s Manual Installation 3-11 Figure 3-3 shows typical STP-36 connections to the KPCI board using the designated cables. Figure 3-3 Connections to STP-36 screw terminal connector accessory STP-36 Cable (CAB-1284CC-0.5 1/2 Meter Long) (CAB-1284CC-2.0 2 Meters Long)
-
Page 28: Wiring I/O To Your External Circuits
3-12 Installation KPCI-PIO32IOA and KPCI-PDISO8A User’s Manual Wiring I/O to your external circuits WARNING Ensure that both the computer and the external circuits are turned OFF before making any connections to avoid a possible shock hazard. Input and output precautions... -
Page 29: Input And Output Connections
NOTE DC control inputs require approximately 80µA at 2.5V input and approximately 3.5mA at 60V input. Figure 3-4 Typical KPCI-PIO32IOA and KPCI-PDISO8A input/output connections Vec (Source) Optional OPnA* IPnA*... -
Page 30: I/O Considerations
Do not draw more than 1A, total. Drawing excessive current may damage the KPCI-PIO32IOA or KPCI-PDISO8A board and, poten- tially, the computer. The board extends fuse-protected power from the +5V DC computer supply to the I/O connec- tor(s). -
Page 31: Combining Output Channels
KPCI-PIO32IOA and KPCI-PDISO8A User’s Manual Installation 3-15 Combining output channels In some applications, it may be desired to attempt parallel operation of multiple output channels to provide a load current that is higher than specified for one individual output channel. With some care and a good understanding of the limitations, this method can be used successfully with the KPCI board output channels. -
Page 32: External Interrupts
External Interrupts... -
Page 33: External Interrupt Description
• INT_ENN (external interrupt enable, active low) • INT_REQ (external interrupt request, edge triggered) Interrupt pins The interrupt pins on the I/O connector of the KPCI-PIO32IOA and KPCI-PDISO8A boards, and the corresponding screw terminal on the STP-36 screw terminal accessory, are identified in Table 4-1. -
Page 34: Data Latching
2) space important data and interrupts accordingly. Of course, this requirement is not specific to the KPCI-PIO32IOA and KPCI-PDISO8A boards. It applies to any data acquisition board. See the specifications in Appendix A for hardware input response times. - Page 35 External Interrupts KPCI-PIO32IOA and KPCI-PDISO8A User’s Manual Refer to Table 4-2 for a list of external-interrupt responses. For an additional application illustration, refer to the “Interrupt example scenario” subsection in Appendix B. For information on setting and configuration of external interrupts, refer to your DriverLINX software manuals.
-
Page 36: Troubleshooting
Troubleshooting... -
Page 37: Identifying Symptoms And Possible Causes
Troubleshooting KPCI-PIO32IOA and KPCI-PDISO8A User’s Manual If your KPCI-PIO32IOA or KPCI-PDISO8A board is not operating properly, use the informa- tion in this section to isolate the problem before calling Keithley Applications Engineering. If you then need to contact an applications engineer, refer to “Technical... -
Page 38: Systematic Problem Isolation
The corresponding written procedure amplifies the flow- chart steps with more detail. WARNING To avoid a possible shock hazard, always turn OFF your computer and any external circuits connected to the KPCI-PIO32IOA or KPCI-PDISO8A board before removing or replacing the board. CAUTION Handle the board at the mounting bracket, using a grounded wrist strap. - Page 39 Troubleshooting KPCI-PIO32IOA and KPCI-PDISO8A User’s Manual Figure 5-1 Problem isolation flowchart Start [1] Board damaged? [2] Replace [3] Computer board check OK? [4] Have board [4] Fix computer known to be OK? To “Verify” [5-7] Check if OK board To “Verify”...
- Page 40 KPCI-PIO32IOA and KPCI-PDISO8A User’s Manual Troubleshooting To further isolate the problem to the KPCI-PIO32IOA or KPCI-PDISO8A board or to the host computer, use the following steps: 1. Check if board damage is seen on inspection. Proceed as follows: NOTE If more than one KPCI-PIO32IOA or KPCI-PDISO8A board is installed in your computer, disconnect, remove, and check all KPCI-PIO32IOA and KPCI-PDISO8A boards.
- Page 41 + sign. A second level list may appear containing one or more boards. • If you do not find a DriverLINX drivers item, skip to step 6. e. Delete any KPCI-PIO32IOA and KPCI-PDISO8A boards, only, from the list by high- lighting the item and clicking the Remove button.
- Page 42 Troubleshooting Proceed as follows: a. Turn OFF power to the host computer. b. Move the KPCI-PIO32IOA or KPCI-PDISO8A board to the slot that was unused before you started the problem isolation scheme. c. Reinstall the cover of the computer. d. Perform step 3, only, of the procedure “Checking for board as a PCI...
- Page 43 Continue with step 22. 22. Check for external wiring faults as follows: a. Into the OK KPCI-PIO32IOA or KPCI-PDISO8A board, plug back one of the STP-36 accessories (or an in-house-wired 36-pin mating connector) that is wired to external cir- cuits.
- Page 44 Turn OFF the computer. h. Install one of the original KPCI-PIO32IOA or KPCI-PDISO8A boards in a PCI slot known to be satisfactory. i. Reinstall the computer cover. j. Perform step 3, only, of the procedure “Checking for board as a PCI...
- Page 45 26b through 26e for additional original KPCI-PIO32IOA and KPCI-PDISO8A boards until you find a faulty board. Replace the faulty board with the OK board. (To repair the faulty board or obtain a new one, contact Keithley as described in “Technical...
-
Page 46: Specified Tests
The following procedure provides details to help you determine whether Windows Plug and Play finds your KPCI-PIO32IOA or KPCI-PDISO8A board as a PCI resource. 1. Determine the PCI resources that Plug and Play detects before any KPCI-PIO32IOA and KPCI-PDISO8A boards are installed. Proceed as follows: a. -
Page 47: I/O Test
Troubleshooting KPCI-PIO32IOA and KPCI-PDISO8A User’s Manual 3. Again determine the PCI resources detected by your computer after the KPCI-PIO32IOA and KPCI-PDISO8A board is installed. Windows Plug and Play should find and configure the new board as a PCI resource if all of the following are true: •... - Page 48 KPCI-PIO32IOA and KPCI-PDISO8A User’s Manual Troubleshooting 5-13 Test procedure The I/O test checks input and output performance. Perform the test as follows: 1. Prepare a test connector using a female 36-pin connector or the STP-36 screw terminal accessory, as shown in Figure 5-2.
-
Page 49: Block Diagram
D OUT 60V ISOLATION CONFIGURATION DATA N Channels +3.3V LOGIC +3.3V PROM REGULATOR TRANSIENT OPTO PROTECTION ISOLATION OUTPUT CHANNEL N RESETTABLE 60V ISOLATION NON-ISOLATED +5 VOLTS KPCI-PIO32IOA N = 15 In, 15 Out KPCI-PDISO8A N = 7 In, 7 Out... -
Page 50: Technical Support
Troubleshooting 5-15 Technical support Before returning any equipment for repair, call Keithley for technical support at: 1-888-KEITHLEY Monday - Friday, 8:00 a.m. - 5:00 p.m., Eastern Time An applications engineer will help you diagnose and resolve your problem over the telephone. - Page 51 If you are submitting your equipment for repair under warranty, you must include the invoice number and date of purchase. To enable Keithley to respond as quickly as possible, you must include the RMA number on the outside of the package.
- Page 52 Specifications...
- Page 53 KPCI-PDISO8A and KPCI-PIO32IOA Specifications These two products are to achieve a PCI version of the PDISO-8 and PIO32-IO ISA cards. Control Inputs Quantity: 8 KPCI-PDISO8A KPCI-PIO32IOA Type: Solid-State, Opto-isolated DC Inputs without optional filter PARAMETER MIN. TYP. MAX. UNIT Voltage Input Logic High +/- 2.5...
- Page 54 Operating Temperature: 0 to 50°C Storage Temperature: -20 to 70°C Humidity (non condensing): 0 to 80% at 35°C DIMENSION: 18.1cm x 10.8cm x 1.9cm (7.1in x 4.25in x 0.75in) WEIGHT: KPCI-PIO32IOA – 0.13kg (0.30lbs) KPCI-PDISO8A – 0.12kg (0.26lbs) ACCESSORIES: Cables: CAB-1284CC-0.5, CAB-1284CC-2...
- Page 55 Read Only (KPCI-PIO32IOA Only) Control Latching control (R/W) Port A’ Readback / Write – Output Register Port B’ Readback / Write (KPCI-PIO32IOA Only) … 34 - 37 FW Rev ASCII format: “A0xx” (Read Only) 38 - 3A INT CSR Interrupt Control Register (R/W)
- Page 56 KPCI-PIO32IOA and KPCI-PDISO8A Pin Assignment Top Connector Bottom Connector (For KPCI-PIO32IOA only) Pin # Signal Pin # Signal Pin # Signal Pin # Signal IP15 IP15 IP14 IP14 IP13 IP13 IP12 IP12 IP11 IP11 IP10 IP10 OP15 OP15 OP14 OP14...
-
Page 57: I/O Address Mapping
I/O Address Mapping... -
Page 58: General Pci Address Assignments
DriverLINX entirely and write their own drivers. Alternatively, advanced users may wish to program the KPCI-PIO32IOA or KPCI-PDISO8A at the register level using an ActiveX hosting language. Finally, some users may wish to reuse an existing application program that makes port I/O calls to an ISA-bus digital I/O board. -
Page 59: Register Assignments
NOTE The term “base” address, as used in the following subsections, does not have the same meaning for a PCI board, such as the KPCI-PIO32IOA and KPCI-PDISO8A, as for an ISA board. The base address for your KPCI-PIO32IOA or KPCI-PDISO8A board is an address BADDR0 that... -
Page 60: Interrupt Control/Status Register
INT_REQ signal. Interrupt control/status register The firmware of the KPCI-PIO32IOA and KPCI-PDISO8A boards implement a 32-bit interrupt control/status register. This register is located at BADDR0 + 0x38 offset, where 0x designates hexadecimal. A control bit of the interrupt control/status register is used to configure the board for interrupt-based data transfer and processing. -
Page 61: Table B-3 Bit Functions For Interrupt Control/Status Register
The following example is one possible scenario that may help you to understand and use the KPCI-PIO32IOA and KPCI-PDISO8A interrupt feature. (This example is simplified, and some details may not apply to your specific system or to your requirements.) It illustrates the workings of the interrupts and bits 6, 12, 17, and 23 of the interrupt control/status register. - Page 62 I/O Address Mapping KPCI-PIO32IOA and KPCI-PDISO8A User’s Manual 3. Prior to sending data, a user circuit sets INT_ENN to logic low. Board firmware detects that INT_ENN is low and allows the edges of interrupt signals at INT_REQ to be detected.
-
Page 63: Manipulating Control And Data Registers
KPCI-PIO32IOA and KPCI-PDISO8A User’s Manual I/O Address Mapping Manipulating control and data registers Be aware that software programming for a PCI board, such as the KPCI-PIO32IOA and KPCI- PDISO8A, is more involved than for an ISA board. As mentioned in the Appendix B introduc- tion, DriverLINX eliminates the need for user interaction with control and data registers. - Page 64 Glossary...
- Page 65 Glossary KPCI-PIO32IOA and KPCI-PDISO8A User’s Manual Address A number specifying a location in memory where data is stored. See application programming interface. Application programming interface A set of routines used by an application program to direct the performance of a procedure by the computer’s operating system.
- Page 66 KPCI-PIO32IOA and KPCI-PDISO8A User’s Manual Glossary FIFO First-in/first-out memory buffer. The first data into the buffer is the first data out of the buffer. GPIB Abbreviation for General Purpose Interface Bus. It is a standard for parallel interfaces. IEEE-488 See GPIB.
- Page 67 Microsoft Press Computer Dictionary, Third Edition. Refer to “Sources” below. Sources: Keithley Instruments, Inc., Catalog and Reference Guide (full line catalog), glossary, 1998 Microsoft Press Computer Dictionary, Third Edition (ISBN: 1-57231-446-X) by Microsoft Press. Reproduced by permission of Microsoft Press. All rights reserved.
- Page 68 3-10 handling Contact bounce 3-4, 3-10 PCI resource, checking for definition 5-11 returning to Keithley Control register 5-15 spare, using in troubleshooting bit functions 5-3, unwrapping and inspecting Conventions, font/typeface Boards, multiple Cross references, using in electronic manual...
- Page 69 3-4, 3-10 Darlington definition Delphi Help, getting Keithley. See technical support DriverLINX driver for 3-2, Digital common. See grounding, signal, I/O pin assignment Direct I/O. See ports, configuration, direct Direct Memory Access 8255 PPI chip emulation...
- Page 70 Interrupt-missed bit Port group Interrupt-pending bit assignments 3-8, 3-9, ISA Bus control register bit functions definition definition Port I/O call definition Port I/O. See ports, configuration, direct LabVIEW Ports installation configuration, direct B-2, LabVIEW software configuration, on power-up/reset configuration, PIO Control Panel. See PIO Control Panel, using, in bit tests Power 5 VDC for external circuits...
- Page 71 See register level programming setting Unwrapping board Repairs, board 5-15 Resources, checking Returning board 5-15 Returning board to Keithley Visual Basic 5-15 DriverLINX driver for 3-2, Visual C++ DriverLINX driver for Shielding Visual C/C++ definition...
- Page 72 Specifications are subject to change without notice. All Keithley trademarks and trade names are the property of Keithley Instruments, Inc. All other trademarks and trade names are the property of their respective companies. Keithley Instruments, Inc. 28775 Aurora Road • Cleveland, Ohio 44139 • 440-248-0400 • Fax: 440-248-6168 1-888-KEITHLEY (534-8453) •...
Need help?
Do you have a question about the KPCI-PIO32IOA and is the answer not in the manual?
Questions and answers