Table of Contents
Advertisement
Quick Links
Advertisement
Table of Contents

Related Manuals for DARAY SL720


Summary of Contents for DARAY SL720
- Page 1 SL720 LED Minor Surgical Light Operating & Installation Manual QAM.SL720.0219.4...
- Page 2 Page 1 of 29...
-
Page 3: Table Of Contents
Table of Contents 1. Introduction ................... 3 1.1 Supported Lights ................4 1.2 Technical Specifications ............... 4 1.3 Pre-Installation Responsibilities .............. 4 1.4 Component packing list ................ 5 2. Operation ....................6 2.1 Range of Motion ................. 6 2.2 Pre-Start Checks ................7 2.3 Battery Back-up (Optional) .............. -
Page 4: Introduction
DARAY. Changes made to the information in this document will be incorporated in new editions of the publication. No responsibility is assumed by DARAY for the use or reliability of software or equipment that is not supplied by DARAY. -
Page 5: Supported Lights
1.3 Pre-Installation Responsibilities This document is a guide to the steps that need to be performed to correctly install the SL720 Minor surgery light. However, the work required to be performed is the responsibility of the owner or designated contractor/s. -
Page 6: Component Packing List
1.4 Component packing list The components supplied by DARAY for fitting / installation should be the following items in the specified quantities. SL720 Ceiling Mounted Packing List Qty. Light head and hook arm Ceiling mount with primary rotation arm Suspension arm first section... -
Page 7: Operation
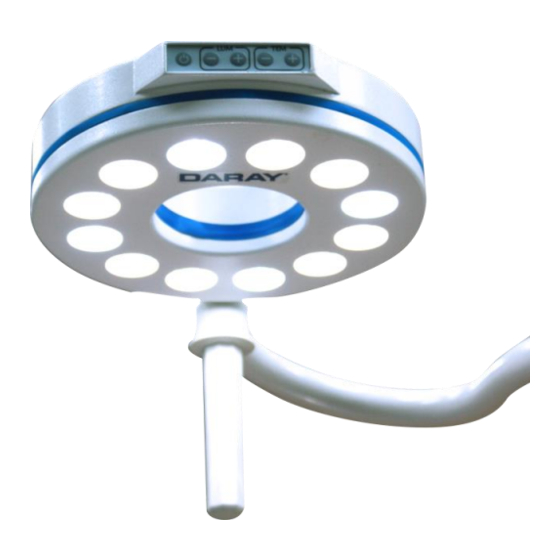
2. Operation 2.1 Range of Motion The range of motion between the SL720 series varies. This dimensional image depicts the range of movement on a standard ceiling mounted unit. Ceiling Mount Cover Downtube arm boss Rotation Arm Control Panel Suspension Arm... -
Page 8: Pre-Start Checks
LED’s are present in the lighthead. 2.3 Battery Back-up (Optional) The SL720 series has the capability of using a battery back-up system. The battery should be conditioned before being used for the first time. Battery conditioning involves removing all the charge from the battery. Batteries should be conditioned regularly. -
Page 9: Powering On & Variable Intensity
2.4 Powering On & Variable Intensity The SL720 uses a single button (on the side of the head) to power the light on and off. Next to this switch are four buttons split into paired controls for variable intensity (LUM - Luminence) and colour temperature (TEM - Temperature);... -
Page 10: Assembly Guide Section
3. Assembly Guide Section Page 9 of 29... -
Page 11: Ceiling Mounted Version
The normal life span of the SL720 series is up to ten years. We recommend the equipment should be discarded and recycled when reaching the end of its life... -
Page 12: Attachment Methods And Void Suspension
The standard SL720 has an integrated ceiling plate, downtube and rotation arm system which cannot be modified after leaving DARAY. If you require a customised SL720 for a different fixing height please contact DARAY to discuss options. -
Page 13: Installing The Ceiling Plate
Once the fixings are fitted and secured, you will need to attach a locking nut to each bolt before attaching the ceiling plate. The SL720 series integrates the ceiling plate, downtube and primary rotation arm all together as one piece, this will therefore be a minimum two man lift for safe installation of this unit. -
Page 14: Wiring And Transformer Layout
IEC60601-1 requirements.) Ideally the cable used to power the light should be of a 1.5mm twin and earth type. DARAY recommends that the power supplied uses an earthed switched fused spur, protected with a 3 amp fuse. -
Page 15: Primary Rotation Arm Installation
All cables leading to the transformer are pre-attached. The mains connection will need to be attached to the high voltage cables running off the transformer. You will not need to conduct any electrical wiring on the transformer. The mains connection should be connected through a switched fused spur and is the only connection that you will need to wire in. -
Page 16: Suspension Arm Installation
3.1.6 Suspension arm Installation The Suspension arm uses an internal rotary system which allows the joint to have 360 degree rotation. To install the arm you will need to first remove the screws from each side of the arm joint spigot. Warning, please observe the cable polarities and ensure that they match, incorrectly wiring the device will cause damage to the system Connect the power cables and then push the suspension arm’s... -
Page 17: Attaching The Ceiling Cover
If the head is drifting, or if the movement of the arm is stiff, use a hex tool to adjust the tensions detailed in maintenance section of this manual. Your new DARAY light is now ready for use. -
Page 18: Wall Mounted Version
The normal life span of the SL720 series is up to ten years. We recommend the equipment should be discarded and recycled when reaching the end of its life These instructions are based on the assumption of a fresh fit into a room with no previous lighting structures. -
Page 19: Lighting Configuration
With the use of the pre-installed plug on the wall mounted SL720; you will be able to fully install the light without the need to perform any electrical wiring except for connecting the Molex plugs between the arms. -
Page 20: Suspension Arm Installation
3.2.6 Suspension arm Installation With the wall mount and primary arm connected; the vertical suspension arm should be connected. This arm uses an internal rotary system which allows the joint to have 360 degree rotation. To install the arm you will need to first remove all the screws from each side of the arm joint spigot. -
Page 21: Attaching The Wall Cover
If the head is drifting, or if the movement of the arm is stiff, use a hex tool to adjust the tensions detailed in maintenance section of this manual. Your new DARAY light is now ready for use. -
Page 22: Maintenance
The proposed maintenance is only a suggestion. Depending on the use of the product and the operating environment, this may need to be revised more often. DARAY would strongly recommend against “quick fixes” with tape, etc. If you cannot resolve a problem then please contact our helpline on 0800 878 9864 or email support@DARAY.co.uk... -
Page 23: Product Cleaning & Care Guidelines
Acetone-based cleaners (e.g. nail polish remover, Goo-off™) MEK (Methyl Ethyl Ketone) If you are unsure whether you are using the correct cleaning fluids on your DARAY equipment, please feel free to get in touch with us for advice. Page 22 of 29... -
Page 24: Fuses And Their Replacement
4.5 Replacing the LED Bulbs The LED bulbs in the SL720 are high quality and should not need to be replaced in the lifetime of the light, however if any bulbs need to be replaced, please consult a qualified electrician or contact a DARAY authorised service centre. - Page 25 The horizontal rotation of the suspension arm is controlled by grub screws located on the connection point between the rotation arm and the suspension arm. Tension grub screw for suspension arm rotation Rotation arm (Wall version) If the Rotation arm starts to drift then the wall plate may have become uneven; to correct this issue you will need to adjust the relevant nuts on the mount fixings to balance the rotation arm.
-
Page 26: Detaching Parts
Keep control of the arm at all times and avoid any obstructions in its path. The SL720 is a completely enclosed lighthead as such, the head should not be opened and is only serviceable by a DARAY Authorised service centre. -
Page 27: Troubleshooting Guide
DARAY If a screw has worked loose please check all Loosened grub screw grub screws and follow the tension adjustment procedure detailed in section 4.6. -
Page 28: Warranty Information
DARAY Ltd, please read the following information carefully. The DARAY Ltd returns policy provides guidance on when you can return goods we have supplied, and what you can expect from us once you do. To see our detailed returns policy and procedure visit www.daray.co.uk/returns... -
Page 29: Warranty Details
Direct damage to your property caused by the proven negligence of Daray. 6. This agreement does not give any rights other than those expressly set out above and in particular, Daray will not be responsible for any loss of income, profits or contracts or any direct or indirect consequential loss, damage caused to or suffered by the purchaser as a direct result of this agreement. - Page 30 Service Notes Page 29 of 29...
- Page 31 Page 1 of 29...
- Page 32 DARAY Ltd. Edison House Robian Way Swadlincote Derbyshire United Kingdom DE11 9DH +44 (0)800 878 9864 +44 (0)333 321 0973 sales@daray.co.uk www.daray.co.uk...
Need help?
Do you have a question about the SL720 and is the answer not in the manual?
Questions and answers