Table of Contents
Advertisement
Advertisement
Table of Contents

Related Manuals for LINET TOM 2 USA


Summary of Contents for LINET TOM 2 USA
- Page 1 SERVICE MANUAL TOM 2 USA D9S001K2B-0110 Publication Date 2016-12 Version 01...
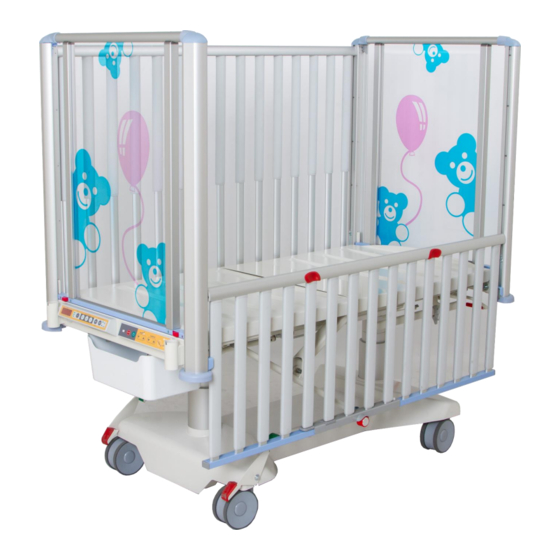
- Page 2 TOM 2 USA – Service Manual Pediatric hospital bed Author: LINET, s. r. o. Related links: www.linet.com D9S001K2B-0110 Version: 01 Print date: 2016-12 Copyright © LINET, s. r. o., 2016 Translation © LINET, s. r. o., 2016 All right reserved.
-
Page 3: Table Of Contents
Contents 1 Introduction – General Information ................4 1.1 Product label and technical label – location ..................4 1.1.1 Product label description and Technical label description............. 4 1.2 Identification of bed parts ........................5 1.3 List of tools and equipment needed for servicing the bed ..............6 2 Technical data and Symbols ................... -
Page 4: Introduction - General Information
1 Introduction – General Information The exclamation mark in a triangle indicates a particular risk during handling, operation and control. The „hand“ symbol indicates special tips and operating notes. Product label and technical label – location 1.1.1 Product label description and Technical label description Position of product label D9S001K2B-0110_01... -
Page 5: Identification Of Bed Parts
Identification of bed parts D9S001K2B-0110_01 5/48... -
Page 6: List Of Tools And Equipment Needed For Servicing The Bed
List of tools and equipment needed for servicing the bed Tools (metric) Socket set Screwdriver set Engineer‘s wrench set Hex key bits set Torx bits set Hex key set Knife Set of pincers Torgue wrench Hammer, nylon hammer Tape measure Crimping pincers for RJ connectors Multimeter D9S001K2B-0110_01... -
Page 7: Technical Data And Symbols
2 Technical data and Symbols Follow actual User Manual for Tom 2 (D9U001K2B-0110) to find Technical Data and used Symbols. D9S001K2B-0110_01 7/48... -
Page 8: Components
3 Components Castors Part name Pieces Castor central braked antistatic; 5944USC125R36-32S0OH130, RAL7001 Castor central braked 5946UAP125R36-2S30OH130, RAL7001 D9S001K2B-0110_01 8/48... -
Page 9: Central Braking System
Central braking system Part name Pieces Lever, screw – assembly Braking rod 11x690, S235JRG2 – (11373) Stopper, PA 6+30%GF Cog 6x25, 11SMn30 – (11109) Pull rod, central braking system, 2 columns, SPT360 – (11353) Starlock deep 11, Steel/Cr/Powder coated Distance ring plastic, 12,5/25/3, NP 212 Pa6 – white Starlock rounded 6, Cr/Powder coated Braking rod 11x653, S235JRG2 –... -
Page 10: Undercarriage Of The Bed
Undercarriage of the bed (torque 8+2 Nm) (torque 8+2 Nm) Part name Pieces Undercarriage frame Column support, PA 6 Clamp, PA 6 (RAL 7035) Clamp, DC01 – (11321.21) Carriage bolt, M6x110, DIN603, Zn Connecting lens screw, M6x12, IMB ISO 7380, Steel/Zn Distance washer, 6.4.-.18-1.6 Zn/Cr DIN 9021, Steel/Zn Selflocking nut M6 DIN985, Zn Connecting screw, M6x12 IMB DIN 7984, Steel/Zn... -
Page 11: Undercarriage Cover
Undercarriage cover Part name Pieces Undercarriage cover, Senosan 1000X RAL 9010 Cap of screw, ABS D9S001K2B-0110_01 11/48... -
Page 12: Mattress Platform (S6013283Nd)
Mattress platform (S6013283ND) D9S001K2B-0110_01 12/48... - Page 13 position description amount frame; steel; weldment; lacquered; TOMCM01 colour: RAL9002 pattern; steel; bent; lacqueredCM01 colour metal: RAL9002 holder; steel; lacqueredCM01 colour: RAL9002 guiding element; POM; workpiece; TOM shoulder cog; steel; workpiece; Zn; D10 L30 bush; PA; injected; light grey; W26 L26 H51 bush;...
-
Page 14: Mechanism Of Cpr
Mechanism of CPR Part name Pieces Bearing I-24, PA 6+15% GF Attachement of CPR Bowden, S235JRG2, REmin 235MPa – (11375.1) CPR complete Sleeve of CPR handle, PVC Tapping screw, M5x12 VALCOC Torx 25 DIN7500-C, Zn Screw of Bowden, 42 3212 Nut M6 DIN934, Zn Cog, 11 373 Cable holder... -
Page 15: Accesorry Rails
Accesorry rails Part name Pieces Accessory holder Side accessory holder Tapping screw M5x12 VALCOC Torx 25, DIN7500-C, Zn Oval stopper 30x15x1,5-2, 145-034 Accessory hook D9S001K2B-0110_01 15/48... -
Page 16: Electronic Equipment
Electronic equipment Part name Pieces Cable ribbon 11x10-950 Cable holder, S235JRG2 – (11373) Tapping screw, M5x12 VALCOC Torx 25 DIN 7500-C, Zn D9S001K2B-0110_01 16/48... -
Page 17: Box For Toys
Box for toys Part name Pieces Leading of the shelf, S235JRG2, Remin, 235MPa (11373.1) Shelf for the box Box for toys, PET Stopper of the shelf, POM Insert, ABS Stopper of the shelf’s drawer, Pa 6 Self-tapping screw, 3,9x19 VALCOC Torx Din7981 TX, Fe/Zn Circular stopper GL, 18x0,8-2, RAL7042 Special screw, 4,3x18 Tapping screw, M5x12 VALCOC, Torx 25, DIN7500-C, Zn... -
Page 18: Undercarriage Illumination
3.10 Undercarriage illumination Part name Pieces Light – Elegnaza LED 1x Light holder, DC01 – (11321.21) D9S001K2B-0110_01 18/48... -
Page 19: Mattress Platform Shelters
3.11 Mattress platform shelters Part name Pieces Thighrest shelter, ABS Fixed part shelter, S235JRG2 – (11-343) Back rest shelter, ABS Deformation rivet 8x20 COC DIN660, Zn Starlock ring 8, Ak Fastener, Plastic D9S001K2B-0110_01 19/48... -
Page 20: Corner Columns Of The Bed Ends (S6015358Nd)
3.12 Corner columns of the bed ends (S6015358ND) D9S001K2B-0110_01 20/48... -
Page 21: Mattress Platform Actuator
position description amount corner bumper; plastic; Pantone 644;R, Altura 2-52 special stopper; PA; injected special stopper; PA; injected flange; steel; cauterized; Zn; TOM ribbon; steel; cauterized; Zn; T5 connecting screw steel/zinc M8x55 ZAP imbus DIN 7991 nut wing steel/Zn 315-A-PM8 / USA form self-cutting screw steel/zinc connecting screw steel/zinc M 8x20 corner bumper;... -
Page 22: Bed Ends
3.14 Bed ends Part name Pieces Bracket of column - right Bracket of column – left Bed end handle Corned of bed end RH + LF, PA6x15%GF Corned of bed end LH + RF, PA6x15%GF Bed end filling, PC AR Bed end column, PVC Bed end ribbon –... - Page 23 Part name Pieces Bed end of the TOM 2 pediatric bed Tapping screw, M5x12 VALCOC Torx 25 DIN7500-C D9S001K2B-0110_01 23/48...
-
Page 24: Siderails (S6015221Nd)
3.15 Siderails (S6015221ND) D9S001K2B-0110_01 24/48... - Page 25 Part name Pieces Side rail telescopic - right Side rail telescopic - left Tearing rivet, 5x14 DIN7337A D9S001K2B-0110_01 25/48...
-
Page 26: Siderails Assembly
3.16 Siderails assembly D9S001K2B-0110_01 26/48... - Page 27 Part Name Pieces distance washer,steel,sawn,D12; d9; L10 cylindrical bolt imbus,steel,Zn,M8x25; 10.9;DIN 7500-E pin,steel,Zn,D4 L20; DIN 1474 crossrail,assembly plastic,TOM2 distance washer,steel,sawn,D12; d9; L18 lens bolt imbus,steel,Zn,M8x25; ISO 7380 screw 10.9 nut square,steel,Zn,M8 DIN 562 profile special divided,aluminium,workpiece,ELOX,L452 special stopper,POM,injected,RAL7035 special screw,steel,Zn,M3.5 L20 B52004 10.9 VZ stopper, silicone clear D6.4, H1.9/3M - SJ5382 four-sided plastic cap 30x20x1-3 RAL7042 VL 30x20x1-3 profile special divided,aluminium,workpiece,ELOX,L1392...
-
Page 28: Siderail Unlocking Mechanism
3.17 Siderail unlocking mechanism Part name Pieces Toothed wheel. M1Z16, X5CrNi18-10 (17240) Locking rod – right, S235JRG2 – (11375) Locking rod – left, S235JRG2 – (11375) Comb, POM Shelter of mechanism, DC01 – (11321.21) Casing, POM Starlock ring 4, Anti corrosive Spring Pin D4 L20 Lock ring 8 DIN6799, Steel/Zn/Cr... -
Page 29: Lifting Mechanism Of The Side Rails
3.18 Lifting mechanism of the side rails D9S001K2B-0110_01 29/48... - Page 30 Part name Pieces Lifting arm Lever of the lifting mechanism Lever of the lifting mechanism Lever of the lifting mechanism - right Lever of the lifting mechanism - left Sliding leading, S235JRG2 + MOR, Rem in, 235Mpa (11375.1) Sliding stone. POM Bushing –...
-
Page 31: Integrated Infusion Stand
3.19 Integrated infusion stand Part name Pieces Special stopper RF, PA6+15% GF Bushing of the infusion stand, 17 242 DIN 17 224 x 12 CrNi1 88 Tube of the infusion stand – Provita Slider of the infusion stand, POM Rossette screw M6x12-18 Embedded screw M4x6 DR DIN963, Zn Holder Provita (Z2K0644N), PP Damping stopper, PP... -
Page 32: Power Box
3.20 Power box Part name Pieces Control unit PB43.02, with expansion D9S001K2B-0110_01 32/48... -
Page 33: Battery Back-Up
3.21 Battery back-up Part name Pieces Acumulators,RAL7035,1,2Ah, Screw for plastic parts,Fe,Zn-Cr,D3,5 L16,plasfast 30T torx, valcoc Self-stick label,plastic,white,W30H12|Seal Protection plastic seal D9S001K2B-0110_01 33/48... -
Page 34: Electrical Devices - Component Connections
4 Electrical devices – component connections Complete wiring diagram – control unit PB43.x D9S001K2B-0110_01 34/48... -
Page 35: Equipotential Bonding Connections
Equipotential bonding connections D9S001K2B-0110_01 35/48... - Page 36 Part name Pieces Grounding cable 5/5-130 Toothed washer, Steel/Zn, 5,3/10/0,6 DIN6797A Selflocking nut, M5 DIN985, Zn Grounding cable 5/5-170 Grounding pin, Cu/Nickel Toothed washer, 6,4/11/07 DIN6798A In case that there is one wheel on the bed with antistatic performance, there is no chain installed on the undercarriage.
-
Page 37: Positions Of Tensometers
Positions of tensometers D9S001K2B-0110_01 37/48... - Page 38 Part Name Pieces scale control,TOM2 pressure sensor,8xM6,125mm,cable 1650mm,ZEMICxxxxx, XC electronic module holder,steel,bent,lacquered,TOM2 sheet screw,steel,Zn-Cr,D6.3 L19 distance washer steel/Zn 4.3/ 9.0/0.8 DIN 125A screw for plastic parts,steel,Zn-Cr,D4 L40 toothed washer,steel,Zn,d6.4 D11.0 H0.7 DIN 6797A self-adhesive label,polyester,22mm self-adhesive label,41x100 mm self-adhesive label,30mm, destructive self-adhesive label Screw tensometers with moment 6+2 Nm.
-
Page 39: Scale Tensometers
4.3.1 Scale tensometers Model number of 8300-0674A Model number of 8300-0674A tensometer tensometer Meaning Colour Meaning Colour shielding transparent shielding transparent T1 – supply T3 – supply brown brown T1 + Output green T3 + Output green T1 – Output T3 –... -
Page 40: Bed Setting
5 Bed setting Due to inability to switch functions in service menu (e.g. RC circuit etc.) it is forbidden to use used or reused control unit! Always use new control unit for Tom 2 bed when changing broken one. Column calibration Always calibrate after replacing: a) Any column b) Main control box... -
Page 41: Weighing System
Weighing System 5.2.1 Introduction The display shows the load value. This can be adjusted to the required value by using the ZERO or HOLD functions. Value is displayed at a accuracy 0.1 kg (actual scale interval). If the value is negative, the first segment shows a minus sign. If the value is lower than -1,5kg, the display shows “Lo”. -
Page 42: Date, Time And Weighing Unit Setup
save the change, press the HOLD button again. The function can be deactivated (at any time before saving the correction) by using the CLEAR button. BedExit (BE) To set BedExit Zone Mode press the BE button for the first time. To set BedExit Weighing Mode press the BE button for the second time. -
Page 43: Sensor Constants, Latitude Range, And Calibration Constant Setup
0 – Cumulative converted value from the transducer module – absolute weight 1 – Absolute unconverted reading of tensometer 1 – quick 2 – Absolute unconverted reading of tensometer 2 3 – Absolute unconverted reading of tensometer 3 4 – Absolute unconverted reading of tensometer 4 5 –... -
Page 44: Calibration Constant Setup
To exit this mode, press the CLEAR button. The set-up constants must be verified in the diagnostic mode! 5.2.6 Calibration constant setup The operator must set up the local latitude range before setting the calibration constant. When the calibration constant setup is completed, the operator can set the latitude range of the target user. To enter the calibration constant setup mode, press the BE button on the CAL position in the constants setup mode for 3 seconds. -
Page 45: Troubleshooting
6 Troubleshooting Troubleshooting table Error/Fault Cause Solution Adjusting with position buttons not GO button was not pressed Press the GO button. possible Drive motors have no power Check the mains connection. Defective drive motors Defective Notify the service department. battery Plug inserted incorrectly Insert the mains plug correctly. -
Page 46: Installation Of Infusion Stand
7 Installation of Infusion Stand In some cases the infusion stand for the bed TOM 2 may be delivered disassembled. Only person authorized by manufacturer is permitted to assemble and install infusion stand on the bed. Service set after unpacking: ... - Page 47 STEP 3: STEP 4: Remove the bed end Remove the screw on the top of the side rail profile STEP 6: STEP 5: Insert the foam stopper into the profile using the infusion Remove the top plastic part stand STEP 7: STEP 8: Insert the infusion stand completely into the profile Secure the plastic infusion stand bushing with the screw...
- Page 48 STEP 9: STEP 10: Install the top plastic cross on the infusion stand Mount the bed end using two Torx screws STEP 12: STEP 11: When the assembly is done, these parts should left Mount the accessory rail using two Torx screws (from the original bed) D9S001K2B-0110_01 48/48...
Need help?
Do you have a question about the TOM 2 USA and is the answer not in the manual?
Questions and answers