
Related Manuals for LINET Essenza 300


Summary of Contents for LINET Essenza 300
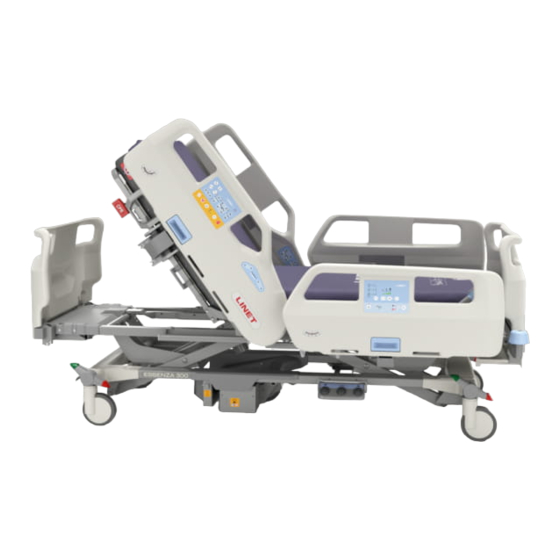
- Page 1 Instructions for Use and Technical Description Essenza ® Medical Bed for Acute Care and Long-term Care D9U001EZ3-0101 Version: 00 Publication Date: 2023-02...
- Page 2 274 01 Slaný Tel.: +420 312 576 111 Fax: +420 312 522 668 E-mail: info@linet.cz http://www.linet.com Service department: service@linetgroup.com Authorized Representative in Great Britain: LINET UK Ltd 11 Brunel Way Segensworth East Fareham Hampshire PO15 5TX United Kingdom Authorized Representative in Switzerland:...
- Page 3 Essenza 300 Medical bed Author: L I N E T, s.r.o. Related links: www.linet.com D9U001EZ3-0101 Version: 00 Publication Date: 2023-02 Copyright © L I N E T, s.r.o., 2023 Translation © L I N E T, s.r.o., 2023 All rights reserved.
-
Page 4: Table Of Contents
12.5 Handset Control Panel ..........76 2 Safety Instructions ............20 12.6 Patient Control Panel ..........77 3 Intended use of the Essenza 300 Medical Bed ..24 12.7 Bed Height Foot Control ...........77 3.1 User population ............24 12.8 Lateral Tilt Foot Control ..........78 3.2 Contraindications ............24... - Page 5 17.26.1 Leatherette Siderail Cover ........193 17.27 SafeSense 3 ............193 18 Cleaning and Disinfection .........195 18.1 Cleaning the Essenza 300 bed ......... 196 18.1.1 Cleaning before Changing Patients ....... 196 18.1.2 Daily Cleaning ............196 18.1.3 Complete Cleaning and Disinfection ...... 196 19 Troubleshooting ............197...
- Page 6 List of Figures Fig. Accumulator Activation Instructions: Remove isolating foil from the control unit under the Backrest .......14 Fig. Visual Signalling of Attendant Control Panel for Essenza 300 with Lateral Tilt ..............17 Fig. Position of Isolating Foil under the Backrest ........................41 Fig.
- Page 7 Fig. Arrow-like symbol indicating bed centre on Head Board and Foot Board ..............161 Fig. Fixation of the mattress with straps on the mattress support platform of the Essenza 300 bed ........161 Fig. Control Panel of the Integrated Mattress (keyboard) .......................163 Fig.
-
Page 8: Symbols And Definitions
Fig. Positioning Cushion ................................192 Fig. Transparent Accessory Box ...............................192 Fig. Essenza 300 bed with SafeSense 3 ...........................194 1 Symbols and Definitions 1.1 Warning Notices 1.1.1 Types of Warning Notices Warning notices are differentiated by the type of danger using the following signal words: ► CAUTION warns about the risk of material damage. ► WARNING warns about the risk of physical injury. -
Page 9: Symbols On The Package
1.4 Symbols on the Package FRAGILE, HANDLE WITH CARE THIS WAY UP KEEP DRY (PROTECT FROM HUMIDITY) PAPER RECYCLING SYMBOL DO NOT USE HAND TRUCK HERE DO NOT STACK DURING STORAGE OVERSEAS PACKAGE: STACKING LIMIT BY NUMBER (4 PACKAGES FOR STORAGE) OVERSEAS PACKAGE: STACKING LIMIT BY NUMBER (2 PACKAGES FOR TRANS- PORT) READ INSTRUCTIONS FOR USE... -
Page 10: Symbols On The Bed
1.5 Symbols on the Bed READ INSTRUCTIONS FOR USE SAFE WORKING LOAD WARNING AGAINST CRUSHING OR TRAPPING JACK FOR ATTACHMENT OF CONDUCTOR FOR POTENTIAL EQUALISATI- GENERAL WARNING SIGN CAUTION SIGN ONLY SUITABLE FOR INDOOR USE MAXIMUM WEIGHT OF PATIENT WEIGHT OF Bed (depending on confi guration) RECYCLING SYMBOLS DO NOT POLLUTE THE ENVIRONMENT D9U001EZ3-0101_00... - Page 11 THE HOUSEHOLD WASTE) BATCH NUMBER (ACCESSORIES) UNIQUE DEVICE IDENTIFICATION (FOR MEDICAL DEVICES) MAXIMUM MASS OF MOBILE HOSPITAL BED (MAXIMUM MASS OF EMPTY Bed + SAFE WORKING LOAD) CE MARKING FOR Essenza 300 (PRODUCT NORMATIVELY HARMONIZED FOR EUROPEAN ECONOMIC AREA) D9U001EZ3-0101_00...
- Page 12 UK CONFORMITY ASSESSED (UKCA) MARKING (PRODUCT NORMATIVE- LY HARMONIZED FOR GREAT BRITAIN ECONOMIC AREA) AUTHORIZED REPRESENTATIVE IN GREAT BRITAIN AUTHORIZED REPRESENTATIVE IN SWITZERLAND STOP BUTTON (PRESS TO INTERRUPT BED POSITIONING) DESIGNATION OF MEDICAL BED FOR ADULTS (PHYSICAL DESCRIPTION OF AN ADULT) ONLY USE MATTRESS RECOMMENDED BY MANUFACTURER DO NOT PUT ANY OBJECTS ON UNDERCARRIAGE LEVER INTENDED FOR EMERGENCY CPR POSITION ADJUSTMENT...
- Page 13 GENERAL SAFETY ISOLATING TRANSFORMER DO NOT OPEN A CASE MARKED WITH THIS SYMBOL CALFREST LOAD LIMIT EARTH GROUND APPLIED PARTS TYPE B WARNING, READ INSTRUCTIONS FOR USE D9U001EZ3-0101_00...
-
Page 14: Fig. Accumulator Activation Instructions: Remove Isolating Foil From The Control Unit Under The Backrest
Fig. Accumulator Activation Instructions: Remove isolating foil from the control unit under the Backrest D9U001EZ3-0101_00... -
Page 15: Symbols On The Easydrive
1.7 Serial Label with UDI 1.7.1 Essenza 300 Serial label of the Essenza 300 is placed on the left head end side of the mattress support platform frame. The serial label contains information about Address of Manufacturer, Manufacturing Date (Year-Month-Day), Product Reference Number, Product Serial Number, Global Trade Item Number (GTIN), Unique Device Identifi ... -
Page 16: Acoustic Signalling
1.8 Acoustic Signalling SOUND MEANING REPEATED BEEP: 0,6s sound / 2,6s silence STOP error (all STOP buttons are disabled) BEEP lasting 0,3s actuator stopped after overcurrent a button of a locked function was pressed adjustment to the Extra Low Position started transition from tilt (lateral tilt, Trendelenburg, Reverse-Trende- lenburg) to horizontal position REPEATED BEEP during 3 minutes: 1,1s sound / 1,1s... -
Page 17: Fig. Visual Signalling Of Attendant Control Panel For Essenza 300 With Lateral Tilt
(OFF) unlocked function flashing once per second unlocked function but in the mode of lock selection flashing 4 times per second locked function but in the mode of lock selection Fig. Visual Signalling of Attendant Control Panel for Essenza 300 with Lateral Tilt D9U001EZ3-0101_00... -
Page 18: Definitions
1.10 Definitions Adult Patient having a physical size equal to or more than 146 cm, a mass equal to or more than 40 kg and a body mass index (BMI) equal to or more than 17 (according to IEC 60601-2-52). Basic Bed Configuration The pricelist model configuration, not including a mattress. -
Page 19: Abbreviations
1.11 Abbreviations AC ( ~ ) Alternating Current Automatic Lateral Therapy European Conformity Cardiopulmonary Resuscitation Sound Intensity Unit Direct Current DC ( Configuration number Electromagnetic Compatibility Field-effect transistor High Frequency High Pressure Laminate Intensive Care Unit INT. Duty Cycle Ingress Protection Intravenous Liquid Crystal Display Light Emitting Diodes... -
Page 20: Safety Instructions
WARNING! Risk of injury due to incorrect use! ► Essenza 300 bed should be left in its lowest position when the patient is unattended in order to redu- ce risk of injury due to falls! WARNING! Risk of injury due to incorrect use! ►... - Page 21 An additional multiple socket-outlet or extension cord shall not be connected to the medical electrical system of Essenza 300. WARNING! Inappropriate handling of the power supply cord of Essenza 300, e. g. by kinking, shearing or other mechani- cal damages is hazardous! WARNING! During specific investigations or treatments, the significant risks of reciprocal interference posed by Essenza ...
- Page 22 Make sure the duty cycle (2 min ON/18 min OFF) is not exceeded during bed positioning! WARNING! No part of the Essenza 300 ME equipment shall be serviced or maintained while in use with a patient! WARNING! Patient is allowed to use selected control elements of the ME equipment unless servicing and maintenance of...
- Page 23 ► When adjusting the Lateral Tilt in the case of Essenza 300 with Lateral Tilt, ensure that the process does not pose any risk of the patient falling or getting injured, or of any lines or tracheal tubes getting pulled out.
-
Page 24: Intended Use Of The Essenza 300 Medical Bed
Patient (based on individual patient status assessment by caregiver the patient can utilize dedicated device functions) 4 Product Description Following pictures show basic visible features of the Essenza 300 medical bed in Essenza 300 with Lateral Tilt configuration and Essenza 300 without Lateral Tilt configuration together with 3 types of the siderails. -
Page 25: Essenza 300 With Lateral Tilt With Plastic Siderails
4.1 Essenza 300 with Lateral Tilt with plastic siderails 11 12 Corner Bumper Foot Board Safety Lock Angle Indicator Linen Shelf (also for Attendant Control Panel) Siderail Control Panel Castor Head Board Bed Extension Handle (Advanced Bed Extension) Backrest Bed Height Foot Control... -
Page 26: Essenza 300 With Lateral Tilt With Telescopic Siderails
4.2 Essenza 300 with Lateral Tilt with telescopic siderails 10 11 Corner Bumper Foot Board Safety Lock Siderail Release Mechanism Linen Shelf (also for Attendant Control Panel) Head Board Castor Head Telescopic Siderail Bed Extension Handle (Advanced Bed Extension) Backrest... -
Page 27: Essenza 300 With Lateral Tilt With Collapsible Siderails
4.3 Essenza 300 with Lateral Tilt with collapsible siderails 15 14 Corner Bumper Bed Extension Handle (Advanced Bed Extension) Head Board Mobi-Lift Handle Backrest Siderail Release Mechanism Collapsible Siderail Bed Height Foot Control Seat Section Lateral Tilt Foot Control Thighrest... -
Page 28: Essenza 300 With Plastic Siderails
4.4 Essenza 300 with plastic siderails Angle Indicator Foot Board Safety Lock Siderail Control Panel Castor Head Board Bed Extension Safety Catch (Simple Bed Extension) Backrest Bed Height Foot Control Head Plastic Siderail Mobi Pad Patient Control Panel Siderail Release Mechanism... -
Page 29: Essenza 300 With Telescopic Siderails
4.5 Essenza 300 with telescopic siderails 11 10 Siderail Release Mechanism Castor HPL Head Board Bed Height Foot Control Head Telescopic Siderail CPR Lever for Emergency Backrest Release Backrest Castor Control Lever Seat Section Corner Bumper Thighrest Foot Telescopic Siderail... -
Page 30: Essenza 300 With Collapsible Siderails
4.6 Essenza 300 with collapsible siderails 14 13 Corner Bumper Bed Extension Safety Catch (Simple Bed Extension) Head Board Calfrest Handle Backrest Siderail Release Mechanism Collapsible Siderail Bed Height Foot Control Seat Section CPR Lever for Emergency Backrest Release Thighrest... -
Page 31: Technical Specification
5 Technical Specification All technical data are rated data and are subject to construction and manufacturing tolerances. 5.1 Identification of Type B Applied Parts All part of the bed (and accessories) the patient can reach are type B Applied Parts. ■ Mattress Support Platform Frame, Parts of Mattress Support Platform ■... -
Page 32: Mechanical Specifications Of The Essenza 300
25,5 cm – 37,4 cm – 75,9 cm Essenza 300 with 150 Tente Linea castors 28 cm – 39,9 cm – 78,4 cm Essenza 300 with 150 Tente Integral Soft brake simple cas- 30,8 cm – 42,7 cm – 81,2 cm tors... -
Page 33: Mechanical Specifications Of The Essenza 300 With Lateral Tilt
15 cm Minimum — Middle — Maximum Mattress Support Platform Height Adjustment above floor (without mattress): Essenza 300 with Lateral Tilt with 125 Tente Linea castors 39,4 cm – 51,3 cm – 89,8 cm Essenza 300 with Lateral Tilt with 150 Tente Linea castors 41,9 cm – 53,8 cm – 92,3 cm Essenza 300 with Lateral Tilt with 150 Tente Integral Soft 44,7 cm –... -
Page 34: Electrical Specifications
WARNING! Risk of damaging the product due to incorrect environment conditions! ► Do not use the Essenza 300 bed under the environmental conditions outside of those specified in the Environment Conditions chapter! CAUTION! Risk of damaging the product if its packaging is exposed to environmental conditions outside of those speci-... -
Page 35: Electromagnetic Compatibility
WARNING! Mobile RF communication device (including end use devices like antenna cables and external antenna) should not be used closer than 30 cm (12 inches) from any part of this stetcher Essenza 300, including cables speci- fied by manufacturer. Otherwise this could lead to deterioration of functionality of this bed. WARNING! Do not overload the bed (SWL), respect the duty cycle (INT. -
Page 36: Manufacturer Instructions - Electromagnetic Susceptibility
5.5.2 Manufacturer instructions - electromagnetic susceptibility Immunity Tests Compliance level Electrostatic discharge (ESD) ± 8 kV for contact discharge IEC 61000-4-2 ± 15 kV for air discharge Radiated RF 3 V/m IEC 61000-4-3 80 MHz – 2,7 GHz 80 % AM at 1 kHz Proximity fields from RF wireless communications equipment IEC 61000-4-3 See Table 1... -
Page 37: Available Connectors
5.6 Available Connectors WARNING! Use the connectors only according to their intended use and with the respect to special restrictions in order to avoid possible damage of the bed. 1. Plug&Play for Handset Control Panel 2. Plug&Play for Attendant Control Panel D9U001EZ3-0101_00... -
Page 38: Use And Storage Conditions
Use exclusively Hospital Grade or Hospital Only receptacles for grounding. Essenza 300 is designed for use in rooms for medical purposes. Electrical installations connected to the Essenza 300 must there- fore meet local norms laying down the necessary conditions for electrical installations. -
Page 39: Essenza 300 Variants
Bushings for Lifting Pole at bed head end (only compatible with Plastic Siderails and with Narrow Plastic Head Board without side corner bumpers at bed head end) ■ Control Elements □ Attendant Control Panel for Essenza 300 with Lateral Tilt □ Attendant Control Panel for Essenza 300 □ Siderail Control Panel for Essenza 300 with Lateral Tilt □... -
Page 40: Putting Into Service
If there is a considerable temperature difference between the bed and the place of operation (after transport/ storage), leave bed unconnected for 24 hours for the difference to balance itself. NOTE For safe, easy handling, LINET ® recommends having two technicians put the bed into service. Set up the bed as follows: ►... -
Page 41: Accumulator Activation
8.1 Accumulator Activation Fig. Position of Isolating Foil under the Backrest 8.1.1 Removing the Isolating Foil To remove isolating foil: ► Remove isolating foil from the control unit under the Backrest by pulling the strap. ► Check if isolating foil is complete and undamaged as shown in figure Shape of Isolating Foil. ►... -
Page 42: Plastic Foot Board
8.2 Plastic Foot Board There are 2 types of the Plastic Head Board and Foot Board depending on the compatibility of Head Board with additional 2 Bu- shings for Lifting Pole in the undercarriage at bed head end. Only the Narrow Head Board without side corner bumpers is compa- tible with the additional 2 Bushings for Lifting Pole. -
Page 43: Plastic Head Board
8.3 Plastic Head Board CAUTION! Risk of collision due to a Standard Head Board incompatible with the additional 2 Bushings for Lifting Pole in the undercarriage at bed head end! ► Ensure the Head Board you want to fix at bed head end is compatible with your bed configuration if Standard Head Board and Narrow Head Board are available in your ward! There are 2 types of the Plastic Head Board and Foot Board depending on the compatibility of Head Board with additional 2 Bu- shings for Lifting Pole in the undercarriage at bed head end. -
Page 44: Fig. Narrow Plastic Head Board
1. Accumulator Box (behind the head end crossbar) 2. Control Unit (behind the head end crossbar) 3. Power Supply Cord 4. Bushings for Lifting Pole Fig. Narrow Plastic Head Board D9U001EZ3-0101_00... -
Page 45: Hpl Foot Board
8.4 HPL Foot Board HPL Head Board and HPL Foot Board are only compatible with telescopic siderails. Essenza 300 bed compatible with HPL Head Board and HPL Foot Board is equipped with two Head Board Locks and two Foot Board Locks. HPL Head Board and HPL Foot Board are interchangeable in the case of the compatible configuration with telescopic siderails. -
Page 46: Hpl Head Board
8.5 HPL Head Board HPL Head Board and HPL Foot Board are only compatible with telescopic siderails. Essenza 300 bed compatible with HPL Head Board and HPL Foot Board is equipped with two Head Board Locks and two Foot Board Locks. HPL Head Board and HPL Foot Board are interchangeable in the case of the compatible configuration with telescopic siderails. -
Page 47: Fig. Hpl Head Board Safety Locks
Fig. HPL Head Board Safety Locks 1. Locked Lock 2. Unlocking Fig. Correctly inserted HPL Head Board D9U001EZ3-0101_00... -
Page 48: Mattress Support Platform
8.6 Mattress Support Platform Essenza 300 has Mattress Support Platform with four sections. HEAD END BACKREST KREST 1. Bushings for Lifting Pole or Infusion Stand 2. Backrest Handles / Backrest Mattress Holders 3. Patient Restraint Points SEAT SECTION SEAT SECTION 4. -
Page 49: Fig. 4-Part Mattress Support Platform With Telescopic Siderails
HEAD END BACKREST KREST 1. Bushings for Lifting Pole or Infusion Stand 2. Backrest Handles / Backrest Mattress Holders SEAT SECTION SEAT SECTION 3. Patient Restraint Points 4. Calfrest Handles / Calfrest Mattress Holders 5. Bushings for accessories THIGHREST THIGHREST CALFREST CALFREST FOOT END... -
Page 50: Fig. 4-Part Mattress Support Platform With Collapsible Siderails
HEAD END BACKREST KREST 1. Bushings for Lifting Pole or Infusion Stand 2. Backrest Handles / Backrest Mattress Holders 3. Patient Restraint Points 4. Calfrest Handles / Calfrest SEAT SECTION SEAT SECTION Mattress Holders THIGHREST THIGHREST CALFREST CALFREST FOOT END Fig. -
Page 51: Handles And Patient Restraint Points
8.6.1 Handles and Patient Restraint Points Variants of Handles / Mattress Holders: ■ in the middle of the Backrest upper part and on the sides of the Backrest upper part ■ on the sides of the Calfrest lower part (configuration not compatible with Mobi-Lift) Variants of Patient Restraint Points: ■... -
Page 52: Before Use
The bed is equipped with a standard protective connector. This connector is used for potential equalisation between the bed and any intravascular or intracardiac device connected to the patient to protect the patient from static electric shocks. Use equalisation connector if the patient is connected to any intravascular or intracardiac device. Before connecting the patient to an intravascular/intracardiac device: ►... -
Page 53: Transport Position
Essenza 300 bed! WARNING! Siderails in down position can cause patient‘s fall from the Essenza 300 bed during transport of the Essenza 300 bed! Transport Position of the Essenza 300 bed: ►... -
Page 54: Power Supply Cord
Inappropriate handling of the power supply cord, e. g. by kinking, shearing or other mechanical damages is hazardous! WARNING! When routing Power Supply Cord in a Essenza 300 avoid squeezing the cable between parts of the Essenza 300! WARNING! An additional multiple socket-outlet or extension cord shall not be connected to the Essenza 300! -
Page 55: Accumulator Of The Bed
10 Accumulator of the bed WARNING! Risk of material damage to the bed accumulator due to incorrect charging! ► When the bed is not connected to the mains and accumulator is not sufficiently charged all electrical functions of the bed are blocked! After some long period without charging the battery, the battery will be deep- ly discharged and loose its full functionality! WARNING! Risk of damaging the product due to incorrect maintenance! ►... -
Page 56: Replacing The Accumulator
10.1 Replacing the accumulator CAUTION! Damage to the bed due to incorrect accumulator replacement! ► Have the accumulator replaced exclusively by qualified personnel. ► Exclusively use the accumulator approved by the manufacturer. CAUTION! Material damage due to overheating! If the accumulator is faulty, degassing may occur. In rare cases this might cause deformations of the accumulator case, control panel housing or cable. -
Page 57: Manipulation
11 Manipulation WARNING! Risk of injury when adjusting the bed position and siderail position! ► Ensure that there are no body parts between the Mattress Support Platform elements and the Mattress Supp- ort Platform frame when adjusting the bed. ► Ensure that there are no body parts between the siderails and the Mattress Support Platform frame when adjusting the bed position and siderail position. -
Page 58: Description Of The Plastic Siderails
11.1.1 Description of the Plastic Siderails Fig. Manipulation with Plastic Siderails 1. Angle Indicator 2. Siderail Handle 3. Siderail Release Mechanism with Siderail Release Handle 4. Siderail Control Panel 5. Mobi Pad 6. Control Panel of the Integrated Mattress (Air2Care IN) MANIPULATION To raise siderail up: ►... -
Page 59: Fig. Correct Positions Of The Handset Control Panel On The Plastic Siderails
Fig. Correct positions of the Handset Control Panel on the Plastic Siderails Fig. Correct positions of the Attendant Control Panel on the Plastic Siderails D9U001EZ3-0101_00... -
Page 60: Fig. Cpr Lever Hidden Behind The Plastic Head Siderail In Lower Position
Fig. CPR lever hidden behind the Plastic Head Siderail in lower position D9U001EZ3-0101_00... -
Page 61: Collapsible Siderails
11.2 Collapsible Siderails The siderails are components of the bed in contact with patient. The nursing personnel are responsible for the siderails being raised up while the patient is in the bed. WARNING! Risk of injury due to incorrectly latched siderail! ►... -
Page 62: Fig. Manipulation With Siderail Release Mechanism In Version With Collapsible Siderails
MANIPULATION To raise siderail up: ► Grab an upper Siderail Bar (1) and push the siderail up. Siderail will click into place and lock automatically. You will hear audible „click“. ► Push the siderail towards head end and towards foot end to ensure the siderail is fixed in place. To fold siderail down: ►... -
Page 63: Fig. Correct Positions Of The Handset Control Panel On The Collapsible Siderails
Fig. Correct positions of the Handset Control Panel on the Collapsible Siderails Fig. Correct positions of the Attendant Control Panel on the Collapsible Siderails D9U001EZ3-0101_00... -
Page 64: Telescopic Siderails
11.3 Telescopic Siderails The siderails are components of the bed in contact with patient. The nursing personnel are responsible for the siderails being raised up while the patient is in the bed. WARNING! Risk of injury due to incorrectly latched siderail! ►... -
Page 65: Description Of The Telescopic Siderails With Din Rails
11.3.2 Description of the Telescopic Siderails with DIN Rails Fig. Manipulation with Telescopic Siderails with DIN Rails 1. Siderail Release Mechanism (with red button) 2. Check Latch (with yellow catch) 3. Head Telescopic Siderail 4. Foot Telescopic Siderail 5. DIN Rail (for accessories) MANIPULATION To raise siderail up: ►... -
Page 66: Fig. Red Buttons Of Head Siderail Release Mechanism
Fig. Red Buttons of Head Siderail Release Mechanism Fig. Telescopic Siderail in highest (1) and lowest (4) positions D9U001EZ3-0101_00... -
Page 67: Fig. Telescopic Siderail In Two Interpositions (2, 3)
Fig. Telescopic Siderail in two interpositions (2, 3) Fig. Correct positions of the Handset Control Panel on the Telescopic Siderails D9U001EZ3-0101_00... -
Page 68: Castor Control
A directional castor can be situated at bed head end or bed foot end depending on bed configuration. The castor control levers are located in the four corners of the undercarriage. Castor Configurations of the Essenza 300 bed: □ 125 mm Tente Integral simple castors + Fifth castor □... -
Page 69: Fig. Three Positions Of Castor Control Lever
Each castor control lever is equipped with green pedal and red pedal. Red colour refers to braking and green colour refers to steering. Each castor control lever has 3 control positions. All castor control levers are interconnected such that all pedal functions belong to each pedal. In following table the pedal functions are described. -
Page 70: Control Elements
► Always ensure any control panel keyboard is not covered by anything, loaded by anything or pressed by anything! The Essenza 300 medical bed is operated by different control elements. Control elements depending on the Essenza 300 configuration: ■ Attendant Control Panel for Essenza 300 with Lateral Tilt ■ ... - Page 71 Control Elements for Essenza 300 with Lateral Tilt Attendant Siderail Handset Patient Lateral Mobi Control Control Control Control Height Tilt Foot Panel for Panel for Panel Panel Foot Control Essenza Essenza Control 300 with 300 with Lateral Lateral Tilt Tilt...
-
Page 72: Attendant Control Panel For Essenza 300 With Lateral Tilt
Ensure that exclusively trained nursing staff operates the Attendant Control Panel for Essenza 300 with Lateral Tilt. The use of the Attendant Control Panel for Essenza 300 with Lateral Tilt is described in the chapter Bed Positioning (see „13 Bed Positioning“... -
Page 73: Attendant Control Panel For Essenza 300
12.2 Attendant Control Panel for Essenza 300 Ensure that exclusively trained nursing staff operates the Attendant Control Panel for Essenza 300. The use of the Attendant Control Panel for Essenza 300 is described in the chapter Bed Positioning (see „13 Bed Positioning“ on the page 79). -
Page 74: Siderail Control Panel For Essenza 300 With Lateral Tilt
Ensure that exclusively trained nursing staff operates the Siderail Control Panel for Essenza 300 with Lateral Tilt. The use of the Siderail Control Panel for Essenza 300 with Lateral Tilt is described in the chapter Bed Positioning (see „13 Bed Positioning“... -
Page 75: Siderail Control Panel For Essenza 300
12.4 Siderail Control Panel for Essenza 300 Ensure that exclusively trained nursing staff operates the Siderail Control Panel for Essenza 300. The use of the Siderail Control Panel for Essenza 300 is described in the chapter Bed Positioning (see „13 Bed Positioning“ on the page 79). -
Page 76: Handset Control Panel
Press and hold Flashlight button. Flashlight emits light as long as the Flashlight button is pressed. To disable bed positioning functions for patient, use: ► Attendant Control Panel for Essenza 300 with Lateral Tilt ► Attendant Control Panel for Essenza 300 ►... -
Page 77: Patient Control Panel
(up/down) Fig. Patient Control Panel To disable bed positioning functions for patient, use: ► Attendant Control Panel for Essenza 300 with Lateral Tilt ► Attendant Control Panel for Essenza 300 ► Siderail Control Panel for Essenza 300 with Lateral Tilt ►... -
Page 78: Lateral Tilt Foot Control
Mattress Support Platform Up Fig. Mobi Pad To disable bed positioning functions for patient, use: ► Attendant Control Panel for Essenza 300 with Lateral Tilt ► Attendant Control Panel for Essenza 300 ► Siderail Control Panel for Essenza 300 with Lateral Tilt ►... -
Page 79: Bed Positioning
13 Bed Positioning WARNING! Risk of inappropriate reduction of the available bed positiong ways! Foot Control Pedals are not accessible in the Extra Low Position! Backrest Handles and Calfrest Handles are not ready for use when siderails are in lower position! ►... -
Page 80: Backrest Adjustment
13.1 Backrest Adjustment To adjust Backrest, use: ► Attendant Control Panel for Essenza 300 with Lateral Tilt ► Attendant Control Panel for Essenza 300 ► Siderail Control Panel for Essenza 300 with Lateral Tilt ► Siderail Control Panel for Essenza 300 ►... - Page 81 To adjust Backrest, use: ► Attendant Control Panel for Essenza 300 with Lateral Tilt ► Attendant Control Panel for Essenza 300 ► Handset Control Panel Buttons intended for Backrest adjustment: D9U001EZ3-0101_00...
- Page 82 To adjust Backrest, use: ► Attendant Control Panel for Essenza 300 with Lateral Tilt ► Attendant Control Panel for Essenza 300 ► Handset Control Panel Buttons intended for Backrest adjustment: D9U001EZ3-0101_00...
-
Page 83: Fig. Bed Adjustment Unsuitable For Sitting In The Middle Of The Bed
WARNING! Risk of injury due to incorrect use! ► Ensure that there is no leg or the other body part between the Plastic Head Siderail folded down and the Plastic Foot Siderail folded down when patient sits in the middle of the bed and somebody lowers Backrest! Medical personnel are responsible for instructing the patient to avoid this risk if the patient is allowed to use Handset Control Panel or Patient Control Panel! Fig. -
Page 84: Thighrest Adjustment
13.2 Thighrest Adjustment To adjust Thighrest, use: ► Attendant Control Panel for Essenza 300 with Lateral Tilt ► Attendant Control Panel for Essenza 300 ► Siderail Control Panel for Essenza 300 with Lateral Tilt ► Siderail Control Panel for Essenza 300 ►... - Page 85 To adjust Thighrest, use: ► Attendant Control Panel for Essenza 300 with Lateral Tilt ► Attendant Control Panel for Essenza 300 ► Handset Control Panel Buttons intended for Thighrest adjustment: D9U001EZ3-0101_00...
- Page 86 To adjust Thighrest, use: ► Attendant Control Panel for Essenza 300 with Lateral Tilt ► Attendant Control Panel for Essenza 300 ► Handset Control Panel Buttons intended for Thighrest adjustment: D9U001EZ3-0101_00...
-
Page 87: Calfrest Adjustment
13.3 Calfrest Adjustment To lift Calfrest: ► Grab the bottom part of the Calfrest Handle with one hand and the Siderail Release Handle with the other hand. ► Lift Calfrest with one hand to intended position and fold the foot siderail down with the other hand. ►... -
Page 88: Fig. Bottom Part Of The Calfrest Handle
To lift Calfrest: ► Lift Calfrest by the Calfrest Handle to intended position. ► Lower the Calfrest so that catch fits in the ratchet-bar. To lower Calfrest: ► Lift Calfrest slightly by the Calfrest Handle. ► Lower Calfrest to intended position. ►... -
Page 89: Fig. Bottom Part Of The Calfrest Handle
To lift Calfrest: ► Lift Calfrest by the Calfrest Handle to intended position. ► Lower the Calfrest so that catch fits in the ratchet-bar. To lower Calfrest: ► Lift Calfrest slightly by the Calfrest Handle. ► Lower Calfrest to intended position. ►... -
Page 90: Autocontour Adjustment
13.4 Autocontour Adjustment To adjust Autocontour, use: ► Attendant Control Panel for Essenza 300 with Lateral Tilt ► Attendant Control Panel for Essenza 300 ► Siderail Control Panel for Essenza 300 with Lateral Tilt ► Siderail Control Panel for Essenza 300 ►... - Page 91 To adjust Autocontour, use: ► Attendant Control Panel for Essenza 300 with Lateral Tilt ► Attendant Control Panel for Essenza 300 ► Handset Control Panel Buttons intended for Autocontour adjustment: D9U001EZ3-0101_00...
- Page 92 To adjust Autocontour, use: ► Attendant Control Panel for Essenza 300 with Lateral Tilt ► Attendant Control Panel for Essenza 300 ► Handset Control Panel Buttons intended for Autocontour adjustment: D9U001EZ3-0101_00...
-
Page 93: Bed Height Adjustment
13.5 Bed Height Adjustment To adjust Bed Height, use: ► Attendant Control Panel for Essenza 300 with Lateral Tilt ► Attendant Control Panel for Essenza 300 ► Siderail Control Panel for Essenza 300 with Lateral Tilt ► Siderail Control Panel for Essenza 300 ►... - Page 94 To adjust Bed Height, use: ► Attendant Control Panel for Essenza 300 with Lateral Tilt ► Attendant Control Panel for Essenza 300 ► Handset Control Panel ► Bed Height Foot Control Buttons intended for Bed Height adjustment: D9U001EZ3-0101_00...
- Page 95 To adjust Bed Height, use: ► Attendant Control Panel for Essenza 300 with Lateral Tilt ► Attendant Control Panel for Essenza 300 ► Handset Control Panel ► Bed Height Foot Control Buttons intended for Bed Height adjustment: D9U001EZ3-0101_00...
-
Page 96: Examination Position
13.6 Examination Position To adjust Examination Position, use: ► Bed Height Foot Control Button intended for Examination Position adjustment: D9U001EZ3-0101_00... - Page 97 To adjust Examination Position, use: ► Bed Height Foot Control Button intended for Examination Position adjustment: D9U001EZ3-0101_00...
- Page 98 To adjust Examination Position, use: ► Bed Height Foot Control Button intended for Examination Position adjustment: D9U001EZ3-0101_00...
-
Page 99: Emergency Trendelenburg Position
It is possible to adjust either bed longitudinal tilt or bed lateral tilt outside the bed horizontal position, but not both at the same time in the case of the Essenza 300 with Lateral Tilt. To adjust Emergency Trendelenburg Position, use: ►... - Page 100 It is possible to adjust either bed longitudinal tilt or bed lateral tilt outside the bed horizontal position, but not both at the same time in the case of the Essenza 300 with Lateral Tilt. To adjust Emergency Trendelenburg Position, use: ►...
- Page 101 It is possible to adjust either bed longitudinal tilt or bed lateral tilt outside the bed horizontal position, but not both at the same time in the case of the Essenza 300 with Lateral Tilt. To adjust Emergency Trendelenburg Position, use: ►...
-
Page 102: Trendelenburg Tilt
It is possible to adjust either bed longitudinal tilt or bed lateral tilt outside the bed horizontal position, but not both at the same time in the case of the Essenza 300 with Lateral Tilt. To adjust Trendelenburg Tilt, use: ►... - Page 103 It is possible to adjust either bed longitudinal tilt or bed lateral tilt outside the bed horizontal position, but not both at the same time in the case of the Essenza 300 with Lateral Tilt. To adjust Trendelenburg Tilt, use: ►...
- Page 104 It is possible to adjust either bed longitudinal tilt or bed lateral tilt outside the bed horizontal position, but not both at the same time in the case of the Essenza 300 with Lateral Tilt. To adjust Trendelenburg Tilt, use: ►...
-
Page 105: Reverse-Trendelenburg Tilt
It is possible to adjust either bed longitudinal tilt or bed lateral tilt outside the bed horizontal position, but not both at the same time in the case of the Essenza 300 with Lateral Tilt. To adjust Reverse-Trendelenburg Tilt, use: ►... - Page 106 It is possible to adjust either bed longitudinal tilt or bed lateral tilt outside the bed horizontal position, but not both at the same time in the case of the Essenza 300 with Lateral Tilt. To adjust Reverse-Trendelenburg Tilt, use: ►...
- Page 107 It is possible to adjust either bed longitudinal tilt or bed lateral tilt outside the bed horizontal position, but not both at the same time in the case of the Essenza 300 with Lateral Tilt. To adjust Reverse-Trendelenburg Tilt, use: ►...
-
Page 108: Bed Extension Adjustment
13.10 Bed Extension Adjustment Simple Bed Extension To extend the bed: ► Pull out the Safety Catches at Foot End on the both sides of the frame. ► Turn the Safety Catches by 90°. The Safety Catches are released. ► Pull the Foot Board to the selected position. -
Page 109: Fig. Position Of Bed Extension Handles Under The Foot Board
Advanced Bed Extension To extend the bed: ► Pull Bed Extension Handle to you and keep it in this position. ► Extend the bed by pulling the foot board to you. ► Push the foot board to fix it in the required extended position. -
Page 110: Fig. Position Of Bed Extension Safety Catch
Simple Bed Extension To extend the bed: ► Pull out the Safety Catches at Foot End on the both sides of the frame. ► Turn the Safety Catches by 90°. The Safety Catches are released. ► Pull the Foot Board to the selected position. ►... -
Page 111: Fig. Position Of Bed Extension Handles Under The Foot Board
Advanced Bed Extension To extend the bed: ► Pull Bed Extension Handle to you and keep it in this position. ► Extend the bed by pulling the foot board to you. ► Push the foot board to fix it in the required extended position. -
Page 112: Fig. Position Of Bed Extension Safety Catch
Simple Bed Extension To extend the bed: ► Pull out the Safety Catches at Foot End on the both sides of the frame. ► Turn the Safety Catches by 90°. The Safety Catches are released. ► Pull the Foot Board to the selected position. ►... -
Page 113: Fig. Position Of Bed Extension Handles Under The Foot Board
Advanced Bed Extension To extend the bed: ► Pull Bed Extension Handle to you and keep it in this position. ► Extend the bed by pulling the foot board to you. ► Push the foot board to fix it in the required extended position. -
Page 114: Calfrest Extension Adjustment
It is necessary to adjust Bed Extension before adjusting the Calfrest Extension. Calfrest Extension allows mattress support plat- form to be extended by 20 cm for use of the 220 cm long mattress on the Essenza 300 bed. It is allowed to use also 200 cm long mattress in combination with 20 cm long mattress foam extension. -
Page 115: Calfrest Extension Adjustment
Mattress support platform is prepared to be used with 220 cm long mattress or with 200 cm long mattress in combination with 20 cm long mattress extension. To prepare Essenza 300 bed for use with 200 cm long mattress again: ►... -
Page 116: Emergency Cpr Position
13.12 Emergency CPR Position To adjust Emergency CPR Position, use: ► Attendant Control Panel for Essenza 300 with Lateral Tilt ► Attendant Control Panel for Essenza 300 ► Siderail Control Panel for Essenza 300 with Lateral Tilt ► Siderail Control Panel for Essenza 300 ►... -
Page 117: Fig. Cpr Lever Under The Backrest Of The Bed With Plastic Siderails
Fig. CPR lever under the Backrest of the bed with Plastic siderails WARNING! Risk of injury due to lowering the backrest too quickly! ► Ensure that there are no body parts between any movable parts of the bed. ► Push the Backrest down by the Backrest handle only. To adjust Emergency CPR Position manually: ►... - Page 118 To adjust Emergency CPR Position, use: ► Attendant Control Panel for Essenza 300 with Lateral Tilt ► Attendant Control Panel for Essenza 300 ► Lateral Tilt Foot Control Buttons intended for Emergency CPR Position adjustment: D9U001EZ3-0101_00...
-
Page 119: Fig. Cpr Lever Under The Seat Section Of The Bed With Telescopic Siderails
Fig. CPR lever under the Seat Section of the bed with Telescopic siderails WARNING! Risk of injury due to lowering the backrest too quickly! ► Ensure that the siderails are in the down position. ► Ensure that there are no body parts between any movable parts of the bed. ►... - Page 120 To adjust Emergency CPR Position, use: ► Attendant Control Panel for Essenza 300 with Lateral Tilt ► Attendant Control Panel for Essenza 300 ► Lateral Tilt Foot Control Buttons intended for Emergency CPR Position adjustment: D9U001EZ3-0101_00...
-
Page 121: Fig. Cpr Lever Under The Seat Section Of The Bed With Collapsible Siderails
Fig. CPR lever under the Seat Section of the bed with Collapsible siderails WARNING! Risk of injury due to lowering the backrest too quickly! ► Ensure that the siderails are in the down position. ► Ensure that there are no body parts between any movable parts of the bed. ►... -
Page 122: Cardiac Chair Position
13.13 Cardiac Chair Position To adjust Cardiac Chair Position, use: ► Attendant Control Panel for Essenza 300 with Lateral Tilt ► Attendant Control Panel for Essenza 300 ► Siderail Control Panel for Essenza 300 with Lateral Tilt ► Siderail Control Panel for Essenza 300... - Page 123 To adjust Cardiac Chair Position, use: ► Attendant Control Panel for Essenza 300 with Lateral Tilt ► Attendant Control Panel for Essenza 300 Button intended for Cardiac Chair Position adjustment: D9U001EZ3-0101_00...
- Page 124 To adjust Cardiac Chair Position, use: ► Attendant Control Panel for Essenza 300 with Lateral Tilt ► Attendant Control Panel for Essenza 300 Button intended for Cardiac Chair Position adjustment: D9U001EZ3-0101_00...
-
Page 125: Mobilisation Position
13.14 Mobilisation Position To adjust Mobilisation Position, use: ► Attendant Control Panel for Essenza 300 with Lateral Tilt ► Attendant Control Panel for Essenza 300 ► Siderail Control Panel for Essenza 300 with Lateral Tilt ► Siderail Control Panel for Essenza 300... - Page 126 To adjust Mobilisation Position, use: ► Attendant Control Panel for Essenza 300 with Lateral Tilt ► Attendant Control Panel for Essenza 300 Button intended for Mobilisation Position adjustment: D9U001EZ3-0101_00...
- Page 127 To adjust Mobilisation Position, use: ► Attendant Control Panel for Essenza 300 with Lateral Tilt ► Attendant Control Panel for Essenza 300 Button intended for Mobilisation Position adjustment: D9U001EZ3-0101_00...
-
Page 128: Lateral Tilt (Only Essenza 300 With Lateral Tilt)
13.15 Lateral Tilt (only Essenza 300 with Lateral Tilt) To adjust Lateral Tilt, use: ► Attendant Control Panel for Essenza 300 with Lateral Tilt ► Siderail Control Panel for Essenza 300 with Lateral Tilt ► Lateral Tilt Foot Control Buttons intended for Lateral Tilt adjustment:... - Page 129 To adjust Lateral Tilt, use: ► Attendant Control Panel for Essenza 300 with Lateral Tilt ► Lateral Tilt Foot Control Buttons intended for Lateral Tilt adjustment: D9U001EZ3-0101_00...
- Page 130 To adjust Lateral Tilt, use: ► Attendant Control Panel for Essenza 300 with Lateral Tilt ► Lateral Tilt Foot Control Buttons intended for Lateral Tilt adjustment: D9U001EZ3-0101_00...
- Page 131 It is possible to adjust either bed longitudinal tilt or bed lateral tilt outside the bed horizontal position, but not both at the same time in the case of the Essenza 300 with Lateral Tilt. The Lateral Tilt adjustment can only be performed by medical personnel who have been professionally trained by the manufacturer or by persons authorized by the manufacturer.
-
Page 132: Extra Low Position
Siderail Control Panel for Essenza 300 with Lateral Tilt ► Siderail Control Panel for Essenza 300 ► Handset Control Panel (only for Essenza 300 with Lateral Tilt) ► Patient Control Panel (only for Essenza 300 with Lateral Tilt) ► Mobi Pad (only for Essenza 300 with Lateral Tilt) - Page 133 To adjust Extra Low Position, use: ► Attendant Control Panel for Essenza 300 with Lateral Tilt ► Attendant Control Panel for Essenza 300 ► Handset Control Panel (only for Essenza 300 with Lateral Tilt) Buttons intended for Extra Low Position adjustment: D9U001EZ3-0101_00...
- Page 134 To adjust Extra Low Position, use: ► Attendant Control Panel for Essenza 300 with Lateral Tilt ► Attendant Control Panel for Essenza 300 ► Handset Control Panel (only for Essenza 300 with Lateral Tilt) Buttons intended for Extra Low Position adjustment: D9U001EZ3-0101_00...
-
Page 135: Ergoframe
Take extra care during Extra Low Position adjustment! Essenza 300 has the possibility of adjusting the bed height to the lowest position in accordance with the table of technical parame- ters. The lowest bed height is intended as part of measures to reduce the risk of patient falls, especially for high-risk patients. -
Page 136: Locking And Unlocking The Bed Positioning Functions
14 Locking and Unlocking the Bed Positioning Functions To disable Bed Positioning Functions for patient, use: ► Attendant Control Panel for Essenza 300 with Lateral Tilt ► Attendant Control Panel for Essenza 300 ► Siderail Control Panel for Essenza 300 with Lateral Tilt ►... -
Page 137: Fig. Lock Button And Lock Led Indicators On The Siderail Control Panel
Bed Height Adjustment Lock LED Indicator / Lateral Tilt Lock LED Indicator / Trendelen- burg Tilt Lock LED Indicator / Reverse-Trendelenburg Tilt Lock LED Indicator (ON - locked) Backrest Adjustment Lock LED Indicator (ON - locked) Thighrest Adjustment Lock LED Indicator (ON - locked) Foot Control Lock LED Indicator (ON - locked) Lock Button... -
Page 138: Locking
14.1 Locking Lock Button for Locking and Unlocking: To lock Backrest Adjustment: ► Press Lock Button. Lock LED Indicators 2, 3, 6 and 8 on the Attendant Control Panel are flashing. Lock LED Indicators 3, 5, 8 and 9 on the Siderail Control Panel are flashing. Lock LED Indicators 4, 7 and 8 on the Handset Control Panel are flashing. -
Page 139: Unlocking
14.2 Unlocking Lock Button for Locking and Unlocking: To unlock Backrest Adjustment: ► Press Lock Button. Lock LED Indicators 2, 3, 6 and 8 on the Attendant Control Panel are flashing. Lock LED Indicators 3, 5, 8 and 9 on the Siderail Control Panel are flashing. Lock LED Indicators 4, 7 and 8 on the Handset Control Panel are flashing. -
Page 140: Equipment
15 Equipment Product equipment depends on product configuration. 15.1 Accessory Rail with plastic hooks Accessory rail with plastic hooks is intended for hanging accessories. It is located on the sides of bed. Maximum load of the Accessory Rail is 10 kg without leverage. Maximum load of the plastic hook intended for the Accessory Rail is 2 kg. -
Page 141: Fig. Accessory Rails With Plastic Hooks On The Bed With Telescopic Siderails
Fig. Accessory Rails with plastic hooks on the bed with Telescopic Siderails Fig. Accessory Rails with plastic hooks on the bed with Collapsible Siderails D9U001EZ3-0101_00... -
Page 142: Urinary Bag Holders In Plastic Siderails
15.2 Urinary Bag Holders in Plastic Siderails CAUTION! Risk of collision between Urinary Bags suspended from the Urinary Bag Holders and bed undercarriage or floor! ► Take extra care during lowering to the Extra Low Position if an Urinary Bag is suspended from an Urinary Bag Holder! Eyelets in the Plastic Siderails are intended for hanging Urinary Bags. -
Page 143: Bed Illumination And Handset Control Panel Illumination
Fig. Bed Illumination source on the Essenza 300 medical bed The Essenza 300 bed is optionally equipped with three-phase illumination: Full intensity of illumination, Lowered intensity of illumi- nation and Illumination is turned off. -
Page 144: Safe Height Visual Signalling
The green light is emitted during the lowering of the mattress support platform to the Extra Low Position after the stopping of the mattress support platform in the standard low bed position. Fig. Green light source on the Essenza 300 medical bed D9U001EZ3-0101_00... -
Page 145: Fifth Castor
15.5 Fifth Castor WARNING! Risk of damaging the Fifth Castor during its movement across slope greater than 15%! ► Ensure the bed does not move over the slope! The bed can be equipped with the Fifth Castor to make it easier to manoeuvre and control the bed movement. The standard locking castor will automatically be excluded from the bed confi guration if the bed is equipped with the Fifth Castor as this will replace the need for this function. -
Page 146: Angle Indicators In Plastic Siderails
15.6 Angle Indicators in Plastic Siderails Angle Indicators are situated on both outer sides of plastic siderails. Head siderail indicators are intended for an approximate Bac- krest angle measurement. Foot siderail indicators are intended for an approximate measurement of Trendelenburg tilt and Reverse- -Trendelenburg tilt. -
Page 147: Linen Shelf
15.7 Linen Shelf WARNING! Risk of injury due to incorrect placement of the Attendant Control Panel in the Linen Shelf! Ensure any button of the Attendant Control Panel is not pressed in the Linen Shelf! ► Only place the Attendant Control Panel into the Linen Shelf without any other things! ►... -
Page 148: Mobi-Lift Handles
15.8 Mobi-Lift Handles Mobi-Lift® is intended as support handle when patient gets up. Fig. Mobi-Lift Handle on the bed with Plastic Siderails To fold Mobi-Lift Handle down: ► Lift the Mobi-Lift Handle up to unlock it. ► Fold the Mobi-Lift Handle down. To lift Mobi-Lift Handle up: ►... -
Page 149: Fig. Mobi-Lift Handle On The Bed With Telescopic Siderails
Fig. Mobi-Lift Handle on the bed with Telescopic Siderails Fig. Mobi-Lift Handle on the bed with Collapsible Siderails D9U001EZ3-0101_00... -
Page 150: Usb Charger
WARNING! Risk of injury due to incorrect use! ► Only use the USB charger when the Essenza 300 bed is connected into the mains! User of the bed is responsible for meeting this requirement. WARNING! Risk of injury due to squeezed cable! ►... -
Page 151: Fig. Usb Connector Under The Seat Section Of The Bed With Plastic Siderails
Fig. USB connector under the seat section of the bed with Plastic Siderails Fig. USB label with electric specifications Fig. Detail of the USB connector under the seat section of the bed with Plastic Siderails D9U001EZ3-0101_00... -
Page 152: Fig. Usb Connector Between The Telescopic Siderails
Fig. USB connector between the Telescopic Siderails Fig. USB label with electric specifications Fig. Detail of the USB connector between the Telescopic Siderails D9U001EZ3-0101_00... -
Page 153: Brake Signal
Fig. USB connector next to the CPR lever of the bed with Collapsible Siderails Fig. USB label with electric specifications Fig. Detail of the USB connector next to the CPR lever of the bed with Collap- sible Siderails 15.10 Brake Signal If bed is equipped with Brake Signal and this bed is connected to the mains power, the Brake Signal sounds when the bed is not braked. -
Page 154: Easydrive
EasyDrive system is compatible with Tente Integral Soft brake simple castors with diameter 150 mm. 15.11.4 Manipulation Essenza 300 medical bed can transport only single patient at a time and cannot be used to transport other items (except bed acce- ssories in secured position). -
Page 155: Fig. Preparation Of The Easydrive System For Use
WARNING! Risk of injury due to careless driving! ► Always drive safely and carefully. ► Observe the path for any obstacles and avoid collisions. ► Ensure there are no people in your way. ► Manipulate with the bed carefully not to drive over any staff or patients. CAUTION! Maximal clearance underneath the bed equipped with EasyDrive is limited! ►... -
Page 156: Fig. Position Of The Easydrive Control Panel
Fig. Position of the EasyDrive Control Panel EasyDrive Control Panel WARNING! Risk of incorrect use of the EasyDrive system! ► Disconnect cable of the EasyDrive Control Panel from the bed and do not use the EasyDrive system if corre- sponding Head Board or Foot Board is removed on the side where the EasyDrive Control Panel is installed! Intended position of the EasyDrive Control Panel is on the upper edge of the Head Board or Foot Board on the right side from the perspective of operator. -
Page 157: Easydrive Accumulator
Fig. EasyDrive Control Panel 2. FORWARD Button 3. REVERSE Button 4. ON/OFF Button (control panel activation) 5. Fault LED Indicator 6. Mains Power LED Indicator (bed connected to the mains) 7. ON LED Indicator (indicator is lit when the control panel is activated) 8. -
Page 158: Visual Signalling
To charge the batteries: ► Connect the mains cable of the Essenza 300 with EasyDrive to mains power. ► EasyDrive system will be charged (with the accumulator discharged, the charging may take up to 6 hours). -
Page 159: Safesense® 3 Ready Bed
15.12 SafeSense® 3 ready bed WARNING! Before use of the SafeSense® 3 Monitoring System with Essenza 300 medical bed read the instructions for use for SafeSense® 3 Monitoring System! Specific configuration of the Essenza 300 medical bed is compatible with SafeSense® 3 Monitoring system. - Page 160 WULFF MED TEC: 4PW521100LS, 4PW551100LS, 17,82 kg 4PW581100LS, 4PW5H1300LS, 4PW52I100LS, 4PW55I100LS, 4PW58I100LS Air2Care IN LINET: 4VEM000340F00 (Air2Care 6 IN), 4VEM000340G00 9 kg (Air2Care 6 IN); 10 kg (Air2Care 8 IN) (Air2Care 8 IN) Air2Care 5, 6, 8 AIRFLO (XIAMEN) MEDICAL: 4VEM000340B00, 6 kg (4VEM000340B00);...
-
Page 161: Fig. Arrow-Like Symbol Indicating Bed Centre On Head Board And Foot Board
Compatible mattresses are equipped with straps intended for fixing mattress on the Mattress support platform. LEFT SIDE RI GHT SIDE Fig. Fixation of the mattress with straps on the mattress support platform of the Essenza 300 bed Patient on Mattress To put patient in bed with mattress: ►... -
Page 162: Passive Mattress
Adjust the bed to maximum Cardiac Chair Position before fixing all the straps of the inflated mattress to the mattress support platform! CAUTION! Material damage due to incorrect installation of SCU! ► If the SCU does not come factory-fitted, have it installed by a service engineer authorised by LINET ®. D9U001EZ3-0101_00... -
Page 163: Installation Of The 3 Air Hoses To The Scu
1. APT Mode LED Indicator 2. CLP Mode LED Indicator 3. MAX Mode LED Indicator 4. MODE Button 5. Decrease Button (MINUS) for Ma- nual Pressure Settings 6. Increase Button (PLUS) for Manual Pressure Settings 7. AUTO Pressure Setting Button 8. -
Page 164: Cleaning Of Mattress
16.4 Cleaning of Mattress CAUTION! Incorrect cleaning/disinfection can damage the mattress! ► Do not use pressure or steam cleaners. ► Follow the instructions and observe the dosages recommended by the manufacturer. ► Ensure that disinfectants are selected and applied by qualified hygiene experts only. ►... -
Page 165: Routine Cleaning And Disinfection
16.4.2 Routine Cleaning and Disinfection Cleaning the mattress: ► Check mattress cover top for any signs of damage or for liquid ingress. ► Replace or repair and completely disinfect mattress cover top if damaged. Also check if the mattress core is not contami- nated. -
Page 166: Accessories
Risk of injury or material damage due to incorrect use! ► Compatible accessories manufactured by different manufacturers have their own instructions for use. It is necessary to read instructions for use of a compatible accessory with instructions for use of the compatible LINET product to respect especially technical parameters, warning notifications, cleaning and maintenance instructions of LINET products and their compatible accessories! WARNING! Risk of injury or material damage when adjusting the bed! ► Ensure that there are no installed accessories that may collide with moving parts of the bed. - Page 167 Compatible Accessories for Essenza 300 bed Compatible Accessories Manufacturers and Identification Numbers Compatibility for Essenza 300 Lifting Pole LINET: 11011410A0000, 11011410B0000, 1101141000000 bed without Lateral Tilt, bed without Accessory Adaptor Extended Lifting Pole LINET: 11011460A0000, 11011460B0000, 1101146000000 bed with Lateral Tilt, bed with Accessory Adaptor...
- Page 168 Compatible Accessories Manufacturers and Identification Numbers Compatibility for Essenza 300 Towel Holder for Plastic Foot LINET: 11025002B0000 bed with Plastic Head Board Board and Foot Board Towel Holder for HPL Foot Board LINET: 11025001A0000 bed with HPL Head Board and Foot Board Name Holder for Plastic Foot...
- Page 169 Compatible Accessories Materials (surfaces of the accessories mentioned Accessory for Essenza 300 for the sake of cleaning and disinfection) Mass Lifting Pole 11011410A0000 Lacquered steel 5,76 kg 75 kg Lifting Pole 11011410B0000 Lacquered steel 5,76 kg 75 kg Lifting Pole 1101141000000...
- Page 170 Compatible Accessories Materials (surfaces of the accessories mentioned Accessory for Essenza 300 for the sake of cleaning and disinfection) Mass Horizontal Oxygen Bottle Stainless steel 1,7 kg 15 kg Holder for HPL Head Board 4MAR2010PC003 Urinary Bag Holder 11023700A0000 Lacquered steel...
-
Page 171: Lifting Pole
Lifting Pole is intended for supporting a patient who uses it to sit or lift by himself / herself or with the help of a caregiver. Standard Lifting Pole is not compatible with the Essenza 300 with Lateral Tilt or with Accessory Adaptor. -
Page 172: Extended Lifting Pole
Extended Lifting Pole is intended for supporting a patient who uses it to sit or lift by himself / herself or with the help of a caregiver. Extended Lifting Pole is compatible with the Essenza 300 with Lateral Tilt or with Accessory Adaptor. -
Page 173: Triangular Holder For Lifting Pole
17.3 Triangular Holder for Lifting Pole WARNING! Read Instructions for use of the Triangular Holder before use of this product! WARNING! Replace Triangular Holder when this replacement is recommended by its manufacturer! Read Instructions for use of the Triangular Holder before use of this product! Triangular Holder is intended for supporting a patient who uses it to sit or lift by himself / herself or with the help of a caregiver. -
Page 174: Infusion Pump Holder
17.5 Infusion Pump Holder WARNING! Risk of injury due to incorrect use! ► Ensure the Infusion Pump Holder will not collide with any movable parts of the bed (especially Backrest bed part) or with the patient. This must be verified during installation. ►... -
Page 175: Telescopic Infusion Stand
17.7 Telescopic Infusion Stand WARNING! Risk of injury due to incorrect use! Infusion Stands must only be used for their intended use. Always read the instructions for use of the corre- sponding infusion stand! ► Only mount an infusion pump to the lower (wider) telescopic section of an infusion stand above the Head Board or Foot Board. -
Page 176: Monitor Shelf
Fig. Infusion Stand in the bushing at head end of the mattre- Fig. S-shaped Infusion Stand in the bushing at head end ss support platform of the mattress support platform 17.8 Monitor Shelf WARNING! Risk of injury due to incorrect use! ►... -
Page 177: Fig. Monitor Shelf Placed In Bed Foot End Corner Bumpers
Fig. Monitor Shelf placed in bed foot end corner bumpers Fig. Manipulation with Monitor Shelf Control Lever (1) To change position of the board: ► Pull a control lever (1). ► Change position of the Monitor Shelf Board. ► Release the control lever (1) in order to lock the position of the Monitor Shelf board. -
Page 178: Writing Shelf
HOOKS FOR ACCESSORIES The position of hooks placed on the frame of Monitor Shelf can be changed to a more convenient position. Respect maximum load of the Monitor Shelf when hanging things on the hooks! Maximum load of the plastic hook is 2 kg. 17.9 Writing Shelf Writing Shelf is intended for writing of nursing staff. -
Page 179: Utility Shelf
17.10 Utility Shelf The Utility Shelf is intended for linens or sheets. It is intended to be placed on the Plastic Head Board or the Plastic Foot Board. Maximum Load for the Utility Shelf is 10 kg. To place Utility Shelf on the Plastic Head Board or Foot Board: ►... -
Page 180: Oxygen Bottle Holder
17.11 Oxygen Bottle Holder WARNING! Risk of injury with Oxygen Bottle Holder due to incorrect use or due to careless driving! ► Ensure the Plastic Head Board is correctly inserted into the bed before placing the Oxygen Bottle Holder onto the Plastic Head Board. -
Page 181: Horizontal Oxygen Bottle Holder For Plastic Head Board
17.11.2 Horizontal Oxygen Bottle Holder for Plastic Head Board To place Horizontal Oxygen Bottle Holder on the bed: ► Put Horizontal Oxygen Bottle Holder onto the Plastic Head Board so that Horizontal Oxygen Bottle Holder is hanging from both windows in the Plastic Head Board. To insert any compatible oxygen bottle into the Horizontal Oxygen Bottle Holder safely: ►... -
Page 182: Urinary Bag Holder
Fig. Horizontal Oxygen Bottle Holder under the HPL Foot Board 17.12 Urinary Bag Holder Urinary Bag Holder is intended for holding the urinary bags. Urinary Bag Holder is intended to be placed on the Accessory Rail towards the centre of the bed. Maximum Load of the Urinary Bag Holder is 5 kg. -
Page 183: Urinary Bottle Holder
17.13 Urinary Bottle Holder Urinary Bottle Holder is intended for holding the compatible urinary bottles. 17.13.1 Urinary Bottle Holder for Plastic Siderails Urinary Bottle Holder for Plastic Siderails is intended to be placed on the Accessory Rail or on the plastic Foot Siderail. Fig. -
Page 184: Urinary Bottle Holder For Collapsible Siderails
17.13.3 Urinary Bottle Holder for Collapsible Siderails Urinary Bottle Holder for Collapsible Siderails is intended to be placed on the Accessory Rail. Fig. Urinary Bag Holder in the hook on the Accessory Rail 17.14 Redon Bottle Holder Redon Bottle Holder is intended for holding redon bottles. Redon Bottle Holder in configuration with Plastic Siderails is intended to be placed on the Accessory Rail under the Backrest only. -
Page 185: Crutch Holder
17.15 Crutch Holder Crutch Holder is intended for holding the pair of crutches only. 17.15.1 Crutch Holder for Plastic Foot Board Crutch Holder is intended to be placed on the Plastic Foot Board or Plastic Head Board only. Fig. Crutch Holder on the Plastic Foot Board 17.15.2 Crutch Holder for HPL Foot Board Crutch Holder is intended to be placed on the HPL Foot Board or HPL Head Board only. -
Page 186: Towel Holder
17.16 Towel Holder Towel Holder is intended for holding towels or linens. 17.16.1 Towel Holder for Plastic Foot Board Towel Holder for Plastic Foot Board is intended to be suspended from both windows in the Plastic Foot Board or Plastic Head Board. -
Page 187: Name Holder
17.17 Name Holder Name Holder is intended for holding a card with patient‘s name. 17.17.1 Name Holder for Plastic Foot Board Name Holder for Plastic Foot Board is intended to be placed on the upper edge of the Plastic Foot Board or Plastic Head Board. Fig. -
Page 188: Chart Holder
17.18 Chart Holder Chart Holder is intended for holding a chart that is registering the development of health condition of the patient. 17.18.1 Chart Holder for Plastic Foot Board Chart Holder for Plastic Foot Board is intended to be placed on the upper edge of the Plastic Foot Board or Plastic Head Board. Fig. -
Page 189: Holder For Small Accessories
17.19 Holder for Small Accessories Holder for Small Accessories is intended to be placed on the Plastic Foot Board or Plastic Head Board or on the Plastic Siderails. Fig. Holder for Small Accessories on the Plastic Foot Board 17.20 Hook for Small Accessories Hook for Small Accessories is intended to be placed on the upper edge of the HPL part of the HPL Foot Board or HPL Head Board or on the Telescopic Siderails or on the DIN Rail if Telescopic Siderails are equipped with it. -
Page 190: Extender For Telescopic Siderails
17.21 Extender for Telescopic Siderails WARNING! Risk of injury due to incorrect installation! ► Ensure the Extender for Telescopic Siderails was installed correctly before use! ► Ensure the fixing elements of the Extender for Telescopic Siderails are locked correctly before use! Extender for Telescopic Siderails is intended to be placed on the Telescopic Siderails only. -
Page 191: Handset Control Panel Holders
Fig. Extender for Collapsible Siderails 17.23 Handset Control Panel Holders Handset Control Panel Holder is intended for holding the Handset Control Panel to facilitate patient‘s access to the Handset Control Panel. Handset Control Panel Holder is intended to be placed on the upper edge of the Telescopic Siderails. Vertical Handset Cont- rol Panel Holder and Horizontal Handset Control Panel Holder differ in the way how Handset Control Panel should be placed to the corresponding holder. -
Page 192: Transparent Accessory Box
Fig. Transparent Accessory Box on the Plastic Head Board 17.25 Positioning Cushion Positioning Cushion is intended to provide additional support for a patient during lateral tilting of the Essenza 300 bed with Lateral Tilt. Positioning Cushion is intended to be placed on the mattress. -
Page 193: Siderail Cover
Follow instructions for use of the SafeSense 3 Monitoring System carefully! CAUTION! Essenza 300 bed is compatible with Stand-alone version of the SafeSense® 3 Monitoring System and with Sa- feSense® 3 Monitoring System in Version for Essenza 300. Essenza 300 bed must be SafeSense® 3 ready for use with SafeSense® 3 in Version for Essenza 300 so the compatilility depends on configuration of the bed. Purpose: The SafeSense®... - Page 194 Placement: Hub Box must be safely placed on the accessory rail on the right side of the Essenza 300 bed. Air Pad must be fixed on the Bac- krest of the Essenza 300 bed and under the compatible mattress. Wetness Pad must be placed on the seat section of the compa- tible mattress and Air Hose and each cable must be safely installed according to the Instructions for use for SafeSense®...
-
Page 195: Cleaning And Disinfection
Risk of injury due to incorrect preparation! ► Ensure pedals will not be pressed accidentally during cleaning. ► Ensure the Essenza 300 is disconnected from the mains before cleaning the Essenza 300. CAUTION! Material damage due to incorrect cleaning/disinfection! ►... -
Page 196: Cleaning The Essenza 300 Bed
■ by the environmental protection agency of the country in which the mattress replacement system is to be used. 18.1 Cleaning the Essenza 300 bed Prepare for cleaning as follows: ►... -
Page 197: Troubleshooting
■ Freely accessible mattress surface ■ Accessory rails ■ All Mattress Support Platform covers ■ Plastic undercarriage covers ■ Column covers ■ Mattress on all sides ■ Freely accessible metal parts of Mattress Support Platform ■ Infusion stand sleeve fitting ■... -
Page 198: Maintenance
Ensure that the castors are locked prior to installation, putting into service, maintenance and deinstallation. ► No part of the Essenza 300 ME equipment shall be serviced or maintained while in use with a patient. WARNING! Risk of injury due to defective bed! ►... -
Page 199: Disposal
Based on the Directive No. 2002/96/ EC (Directive WEEE - Waste, Electric and Electronic Equipments) the company LINET, s. r. o. is registered in the List of Electric and Electronic Equipment Producers (Seznam výrobců elektrozařízení) on the Ministry of the Environment of the Czech Republic... -
Page 200: Warranty
22 Warranty LINET ® will only be held responsible for the safety and reliability of products that are regularly serviced, maintained and used in accordance with the safety guidelines included in the instructions for use. Should a serious defect arise that cannot be repaired during maintenance: ►...
Need help?
Do you have a question about the Essenza 300 and is the answer not in the manual?
Questions and answers
Why pepe sound stay after connect power cord
como descargar en español el manual