Polycom VVX 201 User Manual
Hide thumbs
Also See for VVX 201:
- User manual (166 pages) ,
- Owner's manual (58 pages) ,
- Getting started (49 pages)

Subscribe to Our Youtube Channel
Related Manuals for Polycom VVX 201


Summary of Contents for Polycom VVX 201
- Page 1 USER GUIDE 5.6.0 | July 2017 | 3725-49085-002A ® ® Polycom Business Media Phones with Better Together over Ethernet...
- Page 2 Open Source Software Used in this Product This product may contain open source software. You may receive the open source software from Polycom up to three (3) years after the distribution date of the applicable product or software at a charge not greater than the cost to Polycom of shipping or distributing the software to you.
-
Page 3: Table Of Contents
Unlock the Phone....................26 Change Your Lock Code..................26 Reset Your Lock Code................... 26 Disable Device Lock....................27 Connecting to Skype for Business on Your Phone using Better Together over Ethernet................28 Installing the Polycom Better Together over Ethernet Connector........28 Polycom, Inc. - Page 4 Download the Polycom BToE Connector............... 28 Install the Polycom BToE Connector..............29 Start the Polycom BToE Connector............... 30 Disable Auto-Start for the Polycom BToE Connector..........30 Pairing Your Phone with Your Computer................30 Automatically Pair Your Phone with Your Computer using BToE......31 Manually Pair Your Phone with Your Computer using BToE.........
- Page 5 Update Your Skype for Business Presence..............52 Adding a Profile Photo to Display on the Lock Screen............52 Troubleshooting....................53 Better Together over Ethernet...................53 Troubleshoot Polycom BToE Connector Installation..........53 Troubleshoot Polycom BToE Connector Start Issues..........53 Troubleshoot Pairing....................54 Polycom, Inc.
-
Page 6: Before You Begin
Audience, Purpose, and Required Skills • Related Documentation ▪ Get Help This Polycom VVX Business Media Phones with Better Together over Ethernet - User Guide contains ® ® overview information for navigating and performing tasks on Polycom Business Media Phones. -
Page 7: Get Help
To register with the Polycom Community, simply create a Polycom online account. When logged in, you can access Polycom support personnel and participate in developer and support forums to find the latest information on hardware, software, and partner solutions topics. -
Page 8: Getting Started With A Vvx Business Media Phone
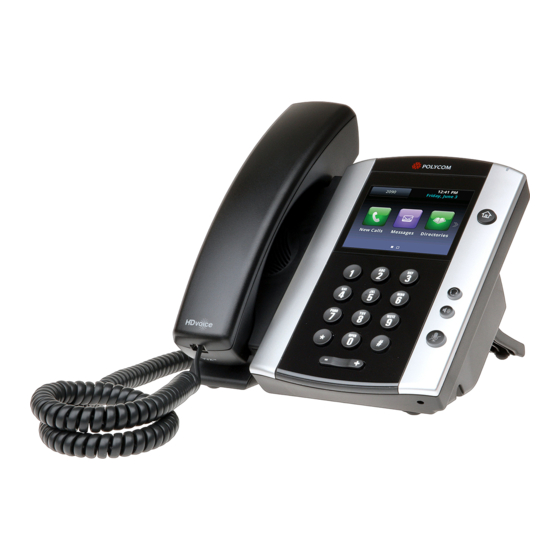
Quick Start Guide for your phone available on your phone's support page on Polycom Voice Support. VVX 201 Hardware The following figure displays the hardware features on the VVX 201 business media phones. The table lists each feature numbered in the figure. VVX 201 hardware features Polycom, Inc. -
Page 9: Vvx 300 Series Hardware
Getting Started with a VVX Business Media Phone VVX 201 Hardware Feature Descriptions Reference Feature Feature Description Number Hookswitch Holds the handset and end calls. Line keys Enable you to select a phone line, view calls on a line, or quickly call a favorite contact. - Page 10 Holds an active call or resumes a held call. Microphone Transmits audio to other phones. Volume keys Adjust the volume of the handset, headset, speaker, and ringer. Mute key Mutes local audio during calls and conferences. The key glows red when activated. Polycom, Inc.
-
Page 11: Vvx 400 Series Hardware
The following figure displays the hardware features on the VVX 400, 401, 410, and 411 business media phones. The table lists each feature numbered in the figure. VVX 400 series hardware features VVX 400 Series Hardware Feature Descriptions Reference Feature Feature Description Number Polycom, Inc. - Page 12 Enable you to select a phone line, view calls on a line, or quickly call a favorite contact. Screen Shows a 3.5-inch (8.89 cm) diagonal screen with a backlight that enables you to view menus and data. Message Flashes red to indicate when you have new messages. Waiting Indicator Polycom, Inc.
-
Page 13: Vvx 500 Series And Vvx 600 Series Hardware
Microphone Transmits audio to other phones. Volume keys Adjust the volume of the handset, headset, speaker, and ringer. Mute key Mutes local audio during calls and conferences. The key glows red when activated. Polycom, Inc. -
Page 14: Securing Your Phone With The Security Slot
By fastening one end of a universal security cable to a stationary object such as a desk or table, and the other end to the security slot available on Polycom VVX phones, you can prevent your phone from being stolen or otherwise removed. Refer to the universal security documentation for more information on securing your phone. - Page 15 Procedure 1. During a call, do one of the following: • Press the Home key • On VVX 201 phones, press the L > C soft key. • On VVX 500/501 and 600/601 phones, tap in the status bar. •...
- Page 16 You can access certain screens in the following scenarios: • If your phone is not in use, you can access the Home and Lines screen. • If your phone has an active call, you can access all screens. Polycom, Inc.
-
Page 17: Icons And Status Indicators
Home screen from the Lines, Calls, or Active Call screen. • On VVX 201 phones, press the C > L soft key to display the Lines screen from the Calls screen. • On VVX 201 phones, press the L > C soft key to display the Calls screen from the Lines screen. - Page 18 Presence status (Do Not Disturb) Favorite Presence status (Offline) Do Not Disturb enabled Presence status (Unknown) Icons on VVX 300 Series Phones Icon Description Icon Description Registered line Phone warning Unregistered line Login credentials invalid Placing a call Shared line Polycom, Inc.
- Page 19 Getting Started with a VVX Business Media Phone Active call using Polycom HD Shared line with a held call Voice Held call Call forwarding is enabled Incoming call New message Active conference Presence status (Available) Placed call Presence status (Busy or In a Call)
- Page 20 Getting Started with a VVX Business Media Phone Placing a call Shared line Active call using Polycom HD Shared line with a held call Voice Held call Call forwarding is enabled Incoming call New message Active conference Presence status (Available)
- Page 21 A green bar indicates an active call. Unregistered line Do Not Disturb enabled Placing a call Phone warning Active call using Polycom HD Voice Login credentials invalid Held call Shared line Incoming call Call forwarding is enabled...
-
Page 22: Entering Information In Data Fields
ASCII (for regular text) Latin (to enter accented characters) Katakana (for Japanese characters) Unicode (to store characters as double bytes) Cyrillic (for Russian characters) When the onscreen keyboard is displayed, the Encoding and Mode soft keys are not available. Polycom, Inc. -
Page 23: Entering Information Using The Dial Pad
The onscreen keyboard available on VVX 500 and 600 phones enables you to enter information into text fields using the touchscreen. The onscreen keyboard displays on screen automatically when a text field is shown. When a text field requires only numbers, the onscreen keyboard displays only numbers. Polycom, Inc. -
Page 24: Entering Chinese Characters With Pinyin
PinYin input widget and the dial pad keys or onscreen keyboard. When you select a data field to edit, the PinYin input widget is automatically displayed when Simplified or Traditional Chinese is set as the displayed language on your phone. Polycom, Inc. - Page 25 3. Ensure that XT9 PinYin is selected. 4. Enter the PinYin text using the onscreen keyboard. 5. Tap on the onscreen keyboard to select the character from the recommendation area. 6. Repeat preceding steps until entry is complete. Polycom, Inc.
-
Page 26: Logging Into And Locking Your Phone
After you sign into your phone with your Skype for Business credentials, you have the option to set the time zone and select a time and date format. If you do not choose to set up your phone when you first sign in, you can set the time and date formats later. Polycom, Inc. -
Page 27: Locking Your Phone
Lock Your Phone After you create a lock code, you can lock your phone anytime you leave your desk. Your phone also automatically locks after being idle for a set amount of time, which is set by your system administrator. Polycom, Inc. -
Page 28: Unlock The Phone
2. Select Change Lock Code and enter your current lock code. 3. Enter a new lock code and confirm your new lock code. 4. Select Submit. Reset Your Lock Code If you forget your lock code, you can reset the code from a phone using your login password. Polycom, Inc. -
Page 29: Disable Device Lock
Device Lock is enabled by default, however, if you do not want to lock your phone, you can disable Device Lock. Procedure 1. Navigate to Settings > Basic > Device Lock. 2. Select Device Lock: Enabled, and select Disabled. Polycom, Inc. -
Page 30: Connecting To Skype For Business On Your Phone Using Better Together Over Ethernet
In order to use BToE, you need to download and install the Polycom BToE Connector application. Installing the Polycom Better Together over Ethernet Connector The Polycom BToE Connector enables you to use the BToE feature on your VVX phone when it’s ® ®... -
Page 31: Install The Polycom Btoe Connector
A User Account Control dialog box is displayed. 4. Ensure that the dialog box lists Polycom Inc. as the verified publisher and click Yes. If Polycom Inc. is not listed as the publisher, click No and download the application again from the Polycom Voice Support site. -
Page 32: Start The Polycom Btoe Connector
Before you can begin using BToE, you must pair your Polycom phone with your computer. By default, your phone is set to pair with your computer automatically when Better Together over Ethernet is enabled, and you connect your phone to your computer over Ethernet. -
Page 33: Automatically Pair Your Phone With Your Computer Using Btoe
Polycom VVX Phone is displayed in your list of audio devices in your Skype for Business client. When the same user account is signed into the phone and the Skype for Business client, your computer and phone are paired, and BToE is activated. - Page 34 Connecting to Skype for Business on Your Phone using Better Together over Ethernet 4. On your computer, click the Polycom BToE Connector desktop icon to start the application. 5. Right-click the application icon then click Pair with Phone. 6. Enter the six-digit pairing code shown on the phone into the notification on your computer, as shown, then click Pair.
-
Page 35: Set Your Phone As Your Primary Audio Device
Set Your Phone as Your Primary Audio Device Before you begin using the BToE feature, you need to ensure that your Polycom VVX phone is set as your primary audio device in your Skype for Business client on your computer. -
Page 36: Using Btoe To Lock And Unlock Your Phone
10 seconds after your computer, or a designated time set by your administrator, if your phone is not in use. When you unlock your computer, your phone unlocks immediately after your computer. Related Links Locking Your Phone on page 25 Polycom, Inc. -
Page 37: Using Btoe To Manage Calls On Your Phone And Skype For Business Client
Note: If you want to route audio from media that uses the computer's speakers, such as from web videos or media players, you must manually change the computer's default audio speaker device to use Polycom VVX Phone. Answer BToE Calls... -
Page 38: Place Btoe Calls
2. Click Devices and do one of the following: • Click Handset to move the call audio from your computer to your phone. • Click PC Mic and Speakers to move the call audio from your phone to your computer. Polycom, Inc. -
Page 39: Disabling Btoe And Uninstalling The Btoe Connector Application
• Uninstall the Polycom BToE Connector If you want to temporarily stop using BToE, you can disable BToE on your phone or stop the Polycom BToE Connector application on your computer. You can also uninstall the BToE Connector application if you no longer want to use the feature. - Page 40 Disabling BToE and Uninstalling the BToE Connector Application If you decide to start using the BToE feature again, you must reinstall the Polycom BToE Connector and repeat the steps for enabling and pairing your Polycom phone and computer. Procedure 1. In the Start menu, select All Programs > Polycom > Polycom BToE Connector > Uninstall Polycom BToE Connector.
-
Page 41: Vvx Business Media Phone Settings
The phone supports several languages that you can choose to display. Check with your system administrator to find out exactly which languages are supported. Procedure 1. Navigate to Settings > Basic > Preferences. 2. Select Language and select a language. The language on the phone updates automatically. Polycom, Inc. -
Page 42: Change The Time And Date Format
When you change the Maximum Intensity, you modify the entire backlight intensity scale. For example, if you decrease the Maximum Intensity, the low, medium, and high levels for both Backlight On and Backlight Idle intensities decrease. Polycom, Inc. -
Page 43: Set The Backlight Timeout
You can also add personal photos on your phone using the Web Configuration Utility or a USB flash drive. This feature is not available on VVX 201 phones. Check with your system administrator to find out if this feature is available on your phone. -
Page 44: Adding Personal Photos As Your Background
You can add one or multiple images for your phone background using the Web Configuration Utility. Note: On Polycom phones with UC Software 5.1.1 or later and registered with Skype for Business Server, access to the Web Configuration Utility is disabled by default as a security precaution. -
Page 45: Reset Your Background
Clear a contact from a line key or delete a line key • Reset all custom line keys This feature is not available on VVX 201 phones. Check with your system administrator to find out if this feature is supported on your phone. Polycom, Inc. -
Page 46: Customize The Columns On The Lines Screen
Lines screen. You can choose to set your phone to only display your line registration on the Lines screen. If you have a VVX Expansion Module connected to your phone, your contacts and favorites are moved onto the expansion module. Polycom, Inc. -
Page 47: Enable Line Key Customization
You can clear a contact from a line so that the line is blank. Clearing a contact does not change the position of other contacts. Procedure 1. Navigate to Settings > Basic > Line Key Customization. 2. Choose one of the following: • Phone Line Keys • Expansion Module Line Keys. 3. Select a line and press Clear. Polycom, Inc. -
Page 48: Delete A Line Key
You can stop the screen saver at any time by pressing any key or touching the screen. When your phone is idle again for a specified period of time, the screen saver starts again. Procedure 1. Navigate to Settings >Basic > Preferences > Screen Saver. 2. From the Screen Saver screen, select Screen Saver and select Enabled. Polycom, Inc. -
Page 49: Use Personal Photos As Screen Savers
9. Select Wait Time, and enter the number of minutes the phone should wait, after no activity, before displaying the screen saver. You can enter any time between one minute and of 9999 minutes. The default is 15 minutes. 10. Select Save. Polycom, Inc. -
Page 50: Disable The Screen Saver
Contact your system administrator. Procedure 1. Select Settings > Features > Removable Storage Media > Picture Frame. Your pictures display one-by-one, like a slide show, and navigation icons display beneath your pictures, as shown next. Polycom, Inc. -
Page 51: Picture Frame Icons
You can update the following power-saving settings: • Office Hours—When you start work and how long you're in the office each day. • Timeouts—The period of time the phone should be idle before the screen turns off. Polycom, Inc. -
Page 52: Change Your Office Hours
6. Select Save. Changing Audio Settings You control certain audio settings on your phone, including the ringtone for incoming calls from all contacts or a specific contact, where call notifications play, and the volume or the ringtone or call audio. Polycom, Inc. -
Page 53: Change Incoming Call Notifications
5. From the Edit Contact screen, select Save. Change the Volume You can increase the volume of your ringtone and the audio during a call. Procedure 1. Press one of the Volume keys to increase or decrease the audio. Polycom, Inc. -
Page 54: Update Your Skype For Business Presence
Lock screen when you lock your phone. You can add a profile photo in the Skype for Business client, and the photo will display on the phone. Profile photos do not display on VVX 201 or VVX 300 series business media phones. For help with setting a profile photo, refer to the... -
Page 55: Troubleshooting
2. Select the folders AppData > Local > Temp > MSI*.LOG. Troubleshoot Polycom BToE Connector Start Issues If the Polycom BToE Connector successfully installs, but the application fails to start or you experience other application-related failures, uninstall the Polycom BToE Connector and reinstall the application. -
Page 56: Troubleshoot Pairing
1. Navigate to Start > Control Panel > System and Security > Windows Firewall > Allow a program through Windows Firewall. 2. Click Change Settings. 3. Search for Polycom BToE Connector in the list of applications and click the check boxes for Domain, Home/Work, and Public networks. 4. Click OK.
Need help?
Do you have a question about the VVX 201 and is the answer not in the manual?
Questions and answers