Polycom VVX 201 Getting Started
Verizon
Hide thumbs
Also See for VVX 201:
- User manual (166 pages) ,
- Owner's manual (58 pages) ,
- Configuration manual (13 pages)
Table of Contents
Advertisement
Quick Links
Advertisement
Table of Contents

Subscribe to Our Youtube Channel
Related Manuals for Polycom VVX 201


Summary of Contents for Polycom VVX 201
- Page 1 Getting Started with the Polycom VVX 201 Phone...
- Page 2 VVX 201 Phone Course Objectives In today’s session we will learn how to: Phone Objectives Navigate the Polycom VCE hard phones Make, answer, and transfer a call Manage call logs and directories Originate and manage a conference call Navigate and manage voice mail...
- Page 3 Objective 1 Phone Navigation...
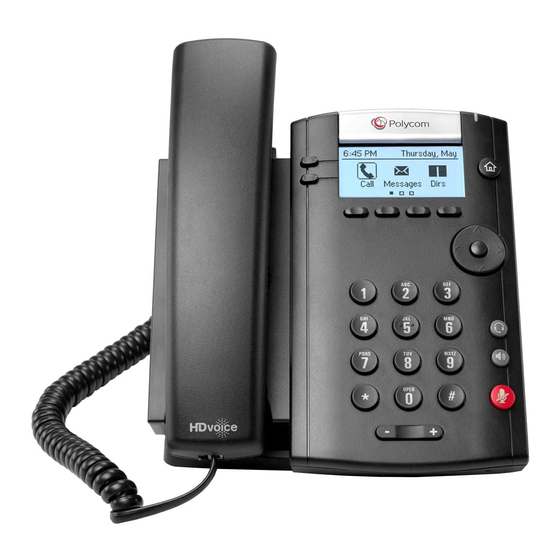
- Page 4 Polycom VVX 201 Phone Tour...
- Page 5 Polycom VVX 201 Phone Tour...
- Page 6 Polycom VVX 201 Phone Screen Views The Polycom VVX 201 has 3 distinct screen views To access each of the views use the Home icon Home Lines – Default Calls...
- Page 7 Polycom VVX 201 Phone Screen Views The Home View The Home view displays icons you can select to access phone functions. You can use the right, left, up, and down arrows to display more icons. At the bottom of Home view is a Page Indicator that shows how many pages of icons are available Icons on page 2 include - Forward, Do Not Disturb and Settings...
- Page 8 Polycom VVX 201 Phone Screen Views The Lines View The Lines view displays phone lines, favorites, and soft keys You can press the Line key to access the dialer if your phone is idle If your phone has active calls, the phone line indicates the number of calls you have, and if they’re active or held...
- Page 9 Polycom VVX 201 Phone Screen Views The Calls view The Calls view displays active calls, held calls and number of calls You can access Calls view if your phone has multiple calls in progress, or you have one held call Use the up and down arrow keys to see all your calls...
- Page 10 Objective 2 Make, answer, and transfer a call...
-
Page 11: Making A Call
Making a Call To make a call, use one of the following options: Lift the handset and dial the number Press the speaker key and dial the number Press the headset key and dial the number Press the New Call soft key Locate an entry in your contacts list, call log, or directory and press the Dial button or soft key Speed Dial –... -
Page 12: Dialing A Number
Dialing a Number There are three ways to dial a number: Do not dial a “9”, or a “1” to place a call Dial the X-digit extension of the person you are trying to reach Dial the full 10 digits ... - Page 13 Dialing a Number...
-
Page 14: Answering A Call
Answering a Call To answer a call, use one of the following options: Lift the handset Press the speaker key Press the headset key Press the Answer soft key... - Page 15 Answering a Call When receiving an incoming call, you can also: Turn off the ringer without answering by pressing the ignore soft key Send a caller directly to voice mail by pressing the reject soft key You can press the forward soft key to send a call to another extension...
- Page 16 Answering a Call...
- Page 17 Place and Resume A Call on Hold You can place any active call on hold: From Lines or Calls view, press the Hold soft key (VVX 201) From Calls view, be sure to highlight the call first To resume a held call: From Lines view, press the Resume soft key the last call you held will be...
- Page 18 Place and Resume A Call on Hold...
- Page 19 Place and Resume A Call on Hold...
-
Page 20: Transferring A Call
Transferring a Call There are three ways to transfer an active call: Announce the transfer Blind transfer Send the call directly to voice mail... -
Page 21: Transfer A Call Announced
Transfer a Call Announced To announce the transfer of an active call: Press the Transfer key, to place the caller on hold Dial the number to which you want to transfer the call Announce the transfer when the party answers Press the transfer key (or transfer soft key) to complete the transfer... - Page 22 Transfer a Call Announced...
- Page 23 Transfer a Call Announced...
-
Page 24: Transfer A Call Blind
Transfer a Call Blind To blind transfer an active call: Press the Transfer key to place the caller on hold Press the Blind Soft Key Dial the number to which you want to transfer the call to followed by the “#” sign... - Page 25 Transfer a Call Blind...
- Page 26 Transfer a Call Direct to Voice Mail To transfer an active call directly to voice mail: Press the transfer key to place the call on hold Dial *55# Dial the mailbox number to which you want to transfer the call followed by # (pound) key You can also transfer a call to your own voice mail by pressing the # key instead of another extension...
- Page 27 Transfer a Call Direct to Voice Mail...
- Page 28 Objective 3 Manage call logs and directory...
- Page 29 Call Logs You can view up to 100 entries for each of the following call logs: The most recently dialed (outbound) numbers or calls placed The most recently received calls The most recently missed calls...
- Page 30 Accessing Recent Calls Logs – Polycom VVX 201 To access the recent call logs: Press the Home button to access the Home view Use the arrow navigation buttons to select Directories Use the arrow navigation buttons to select Recent Calls By default, the list displays all call types (missed, placed, and received), with...
- Page 31 Accessing Recent Calls Logs...
- Page 32 Accessing Recent Calls Logs...
- Page 33 Placing Calls From the Recent Calls Logs – VVX To place a call from the recent call logs: Press the Home button to access the Home view Use the arrow navigation buttons to select Directories Use the arrow navigation buttons to select Recent Calls From your Recent Calls list, use the up and down arrow keys to highlight an entry, and press the right arrow key to display the call detail screen Press the Dial soft key to call the selected entry...
- Page 34 Placing Calls From the Recent Call Logs – VVX 201...
-
Page 35: Phone Contacts
Phone Contacts You can save personal contacts in your Personal Directory Each phone can store up to 100 personal contacts You can view contact information You can search for contacts You can dial a contact directly from the directory You can add, update and delete contacts as needed... - Page 36 Accessing Contact Directory To access the Personal Directory : Press the Home button to access the Home view Use the arrow navigation buttons to select Directories Use the arrow navigation buttons to select Contact Directory Use the arrow navigation buttons to scroll through your contacts or press the Search soft key to enter specific search criteria Press the Info soft key to access the contact information screen or press the Dial soft key to place a call to the contact...
- Page 37 Accessing Contact Directory...
- Page 38 Accessing Contact Directory...
- Page 39 Adding Phone Contacts To add a contact to your directory Press the Home button to access the Home view Use the arrow navigation buttons to select Directories Use the arrow navigation buttons to select Contact Directory Press the Add soft key Enter the first and last name using the dial pad then press Enter the phone number in the Contact field then press The entry is automatically assigned the next available speed dial index number...
- Page 40 Objective 4 Originate and manage a conference call...
-
Page 41: Conference Calling
Dial the number of the person you want to add to the conference call Press the More soft key and then press the Conference soft key to add the person to the conference Polycom Note: The originator of the call CAN hang up without disconnecting the remaining parties... - Page 42 Conference Calling...
- Page 43 Objective 5 Navigate and manage voice mail...
-
Page 44: Voice Mail Overview
Voice Mail Overview Voice Mail Navigation Log in to your voice mailbox for the first time Change your password Record your name Main menu options... - Page 45 First Time Login to Mailbox To log in to your mailbox for the first time: From the Home view select Messages and select Message Center or press the Messages button and select Message Center Immediately upon hearing the recording press the “*” key on the dial pad Enter your default password (last 4 digits of y our phone number or your extension if different) followed by the “#”...
-
Page 46: Voice Mail Access
Voice Mail Access The message waiting indicator flashes when you have a new message From the Home view select Messages and select Message Center or press the Messages button and select Message Center Press the “*” key when you hear your outbound greeting message Enter your new PIN followed by # Listen to the prompts If you are checking messages from an outside line, dial the 10-digit number provided in the... -
Page 47: Message Waiting Indicator
Message Waiting Indicator... -
Page 48: Voice Mail Navigation
Voice Mail Navigation... - Page 49 Thank you for Attending!!!!
Need help?
Do you have a question about the VVX 201 and is the answer not in the manual?
Questions and answers