
Related Manuals for ProFlight ORBIT PFBD201


Summary of Contents for ProFlight ORBIT PFBD201
- Page 1 USER MANUAL ORBIT PFBD201 Thank you for choosing ProFlight. Please read this user manual before using this drone and keep it safe for future reference.
-
Page 2: Table Of Contents
CONTENTS SAFETY WARNINGS SAFETY PRECAUTIONS BATTERY CHARGING PREPARING FOR FIRST FLIGHT INSTALLING CONTROLLER BATTERIES CONTROLLER DIAGRAM DRONE DIAGRAM UNFOLDING THE ARMS FOLDING THE ARMS REPLACEMENT OF THE PROPELLERS BINDING OF CONTROLLER AND RECEIVER GPS COMPASS CALIBRATION GYROSCOPE CALIBRATION GPS LOCATION SEARCH PREPARING FOR TAKE OFF FLIGHT INSTRUCTIONS AIRCRAFT FUNCTIONS &... -
Page 3: Safety Warnings
SAFETY WARNINGS Read the entire instruction manual and familiarise yourself with the product and all its features before operating. Failure to operate the product correctly can result in damage to the product, surroundings or even serious injury. This product is not a toy and must be operated with caution and common sense. It requires some basic mechanical knowledge. -
Page 4: Safety Precautions
Never use any other type of battery charger other than the one supplied with the drone. Failure to charge the battery with a compatible charger may cause fire resulting in personal injury and/or property damage. Never exceed the recommended charge rate. ... -
Page 5: Battery Charging
BATTERY CHARGING Use only the supplied USB Li-Po charger to charge your battery. Remove the battery from the battery compartment on the right of the aircraft. Press down the release button and slide the battery out. Plug the charger into a USB socket before attaching the battery. When the battery is charging the green LED on the charger will flash. -
Page 6: Installing Controller Batteries
INSTALLING THE CONTROLLER BATTERIES Unclip the battery cover from the rear of the controller and insert 4 x AA batteries, making sure the correct polarity is followed. Once the batteries are correctly installed, the battery cover must be re fitted. CONTROLLER DIAGRAM Speed Button Power Button... -
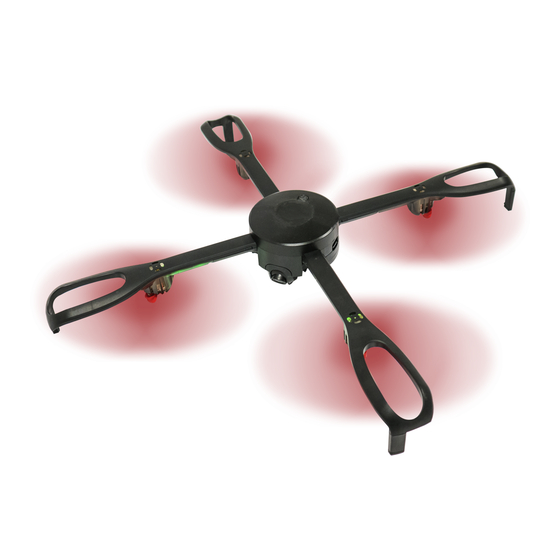
Page 7: Drone Diagram
DRONE DIAGRAM Switch Blades Motor Camera Battery UNFOLDING THE ARMS Unfold each arm, ensuring that they click into position FOLDING THE ARMS Fold each arm individually by sliding the switch on the underside of the arm to unlock the mechanism, and then carefully push the arm into the folded position. -
Page 8: Replacement Of The Propellers
REPLACEMENT OF THE PROPELLERS Should one of the fitted propellers become damaged, it can be replaced, by removing the screw from the side of the propeller before sliding the propeller off the motor shaft. Refitting is the reversal of removal. It is important for the correct blade to be placed on the correct motor or the aircraft will... -
Page 9: Gps Compass Calibration
GPS COMPASS CALIBRATION 1. Long press the GPS compass calibration button. The lights on the drone will flash. With the drone level, rotate it anticlockwise for 3 full revolutions. The lights at the rear of the drone will illuminate. 3. Then hold the drone with the front facing down, and rotate it anticlockwise for 3 full revolutions. -
Page 10: Gyroscope Calibration
GYROSCOPE CALIBRATION With the drone on a level surface, Pull both the joysticks to the lower right position at the same time, and hold in that position for 3-5 seconds. The four lights on the drone will flash to indicate it is calibrating. Release the joystick, which will complete the calibration. -
Page 11: Preparing For Take Off
PREPARING FOR TAKE OFF Once the controller has been calibrated the motors must be engaged. Before doing this, please ensure that the unit is in position, unfolded, and ready for flight. To do this push the left joystick to the bottom right position at the same time as pushing the right joystick to the bottom left position. -
Page 12: Aircraft Functions & Features
AIRCRAFT FUNCTIONS AND FEATURES HEADLESS MODE The aircraft can be made to fly in Headless mode by pressing the headless flight button. This will make the aircraft fly without a front or rear. It will fly in the orientation of the pilot. If you move the right joystick right, the aircraft will fly right. -
Page 13: Auto Return
AUTO RETURN The drone has an auto return feature which will return the drone to within 2 metres of the take off position. Please note it will return in a straight line, and it is the responsibility of the user to make sure that there are no obstacles in the return route. -
Page 14: App
The camera App can be downloaded by scanning the below QR code or search for LW FPV in your App Store: Android To connect the aircraft to your mobile device: Turn on the aircraft, while ensuring your controller is turned off. Go to the settings on your mobile device. - Page 15 MAIN SCREEN Auto Take Off 10 Attitude angle Lock / Unlock Drone Drone battery level & transmission signal Auto Home 12 Settings menu View Joystick Controls 13 Switch Map / Image view Flight mode 14 VR Split Screen Back to Main Menu 15 Record Video Altitude / Distance 16 Take Photo...
- Page 16 SETTINGS MENU The settings menu is separated into 4 sections: Joystick, Param, Map and Other. JOYSTICK Joystick mode: Allows the left and right joysticks to be swapped. Motion Mode: Allows the drone to be controlled by tilting your phone. Take off only when GPS Signal is good. Drone will only take off when the signal is above 8 when activated.
- Page 17 MAP VIEW Press the map (13) to change from camera view to map view. The map will then show the current position of the drone. FLIGHT MODE Use the flight mode button to choose the type of flight between joystick control, waypoint flight, follow me mode and Orbit flight.
- Page 18 FOLLOW ME MODE When follow me mode is selected, the drone will auto fly, following the position of the smartphone. Follow me mode can be exited by returning to joystick mode. ORBIT FLIGHT The camera will be automatically orientated to the APP signal position. The right joystick is then used to control the position on the drone Left Increase speed in anticlockwise direction, or increase speed in...
-
Page 19: Troubleshooting Guide
TROUBLESHOOTING Problem Cause Solution 1 The lights on the aircraft 1. The aircraft and 1. Repeat the are flashing but it does not transmitter are not connection respond to the control connected. procedure. 2. Insufficient battery power. 2. Recharge the battery. -
Page 20: Support
UK Support http://www.proflightuk.co.uk/support/ If you have been through the troubleshooting, and the unit is failing to operate, our service line can be contacted on: 0871 971 3141 Office hours: 9AM - 5PM Monday to Friday www.prolightuk.co.uk Unit J6, Lowfields Business Park Lowfields Way, Elland West Yorkshire, HX5 9DA 20 of 20...
Need help?
Do you have a question about the ORBIT PFBD201 and is the answer not in the manual?
Questions and answers