
Subscribe to Our Youtube Channel
Related Manuals for ProFlight PFBD302


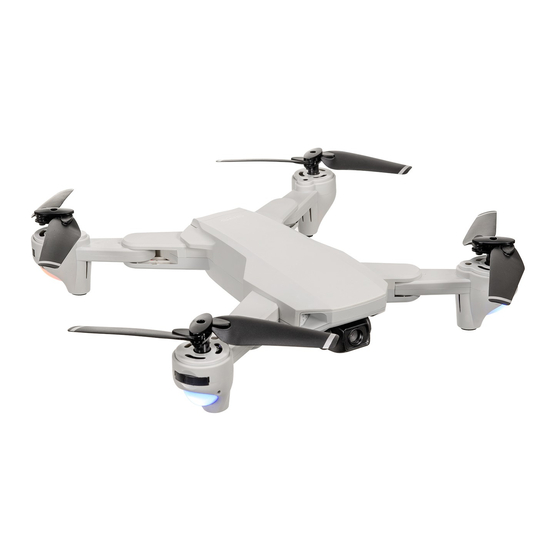
Summary of Contents for ProFlight PFBD302
- Page 1 USER MANUAL FOLDING DRONE WITH HD CAMERA AND APP CONTROL PFBD302 Thank you for choosing ProFlight. Please read this user manual before using this drone and keep it safe for future reference.
-
Page 2: Table Of Contents
CONTENTS SAFETY PREPARING FOR FIRST FLIGHT BATTERY INFORMATION MOBILE PHONE HOLDER DRONE DIAGRAM FOLDING THE ARMS PROPELLER REPLACEMENT BATTERY INSTALLATION CONTROLLER DIAGRAM MAIN FUNCTIONS PREPARING FOR FLIGHT HOW TO FLY WI-FI AND PHONE CONNECTION CONTROLLING THE DRONE USING THE APP TROUBLESHOOTING SPECIFICATION SUPPORT... -
Page 3: Safety
SAFETY WARNINGS • Read the entire instruction manual and familiarise yourself with the product and all its features before operating. • Failure to operate the product correctly can result in damage to the product, surroundings or even serious injury. • This product is not a toy and must be operated with caution and common sense. It requires some basic mechanical knowledge. - Page 4 SAFETY PRECAUTIONS Only fly in an Ensure good Keep within Fly at a height open space GPS signal line of sight below 80m When flying ensure that the drone is kept away from other people, trees, electric wires, buildings, airports or signal transmitting tower etc. Ensure that the weather conditions are suitable for flying.
-
Page 5: Preparing For First Flight
PREPARING FOR FIRST FLIGHT 1. Fully read and understand the safety warnings, and precautions. 2. Make sure both the transmitter and aircraft batteries are sufficiently charged. 3. Find a suitable place to fly the aircraft, away from people, buildings and vehicles. 4. -
Page 6: Mobile Phone Holder
MOBILE PHONE HOLDER Open the phone holder and place the phone securely onto the controller. DRONE DIAGRAM (Anticlockwise) (Clockwise) (Clockwise) (Anticlockwise) Foot... -
Page 7: Folding The Arms
FOLDING THE ARMS Fold the front arms backwards until they sit close to the body of the drone. Fold the rear arm down until it is parallel to the body. DO NOT FORCE THE ARMS AWAY FROM THE BODY AS THIS MAY RESULT IN DAMAGE. -
Page 8: Battery Installation
INSTALLING THE CONTROLLER BATTERIES Unclip the battery covers from the rear of the controller and insert 3 x AA batteries, making sure the correct polarity is followed. Once the batteries are correctly installed, the battery cover must be re-fitted. (Batteries not supplied) CONTROLLER DIAGRAM Power indicator... -
Page 9: Main Functions
MAIN FUNCTIONS CONTROLLER FUNCTIONS SPEED MODE Press speed to change the flight mode between low speed (Beginner) and high speed (Advanced). PHOTO Press once to take a photo, press and hold to start recording a video. COMPASS CORRECTION Press the compass correction button and the drone LED will flash quickly. Pick up the drone and hold it around 1 meter from the ground and with the base facing the ground. -
Page 10: Preparing For Flight
PREPARING FOR FLIGHT Power on the drone by pressing the power button on the underside of the aircraft. Then press and hold the power button for 3 seconds, the light will flash for around 3 seconds. Turn on the controller by pressing the power button, and the indicator light shown will appear. -
Page 11: How To Fly
HOW TO CONTROL YOUR DRONE Ascending and Descending Push the throttle lever up and the drone will gain height. Push the throttle lever down and the drone will descend. Moving Forward and Backwards Push the direction lever up to move the drone forward and down to move the drone backwards. - Page 12 Left and Right Turn Push the throttle to the left or right and the drone will turn in the corresponding direction. Left and Right Flying Push the direction lever left or right and the drone will fly in the corresponding direction.
-
Page 13: Wi-Fi And Phone Connection
Wi-Fi AND PHONE CONNECTION Install the GPS SKY app on your device by scanning the relevant QR code below. ANDROID After you have installed the app turn on the drone and open your phones wi-fi settings, the drone will have created a hotspot. Connect to the drone’s hotspot and then open the app. -
Page 14: Controlling The Drone Using The App
CONTROLLING THE DRONE VIA THE APP Once connected, press take off to access the controls. For ease of use we recommend you mount your phone in the provided phone holder. Press this button to exit the control EXIT menu and return to the homepage. Chose a flight mode. - Page 15 TAKE PHOTO Press once to take a picture. Press once to start video TAKE VIDEO capture. Press again to cancel and save video. Press once to turn on the on- screen joysticks. Press again TURN THE ON SCREEN to turn them off. The on- JOYSTICKS ON screen joysticks work in the same way as the controller...
- Page 16 TOP DISPLAY 1. ALTITUDE AND DISTANCE: Displays the current flight altitude and distance travelled. 2. SPEED: Shows how fast the drone is travelling vertically and horizontally. 3. SATELLITES: Shows the number of GPS satellites in the drone’s range. 4. LONGITUDE/LATITUDE: Shows the longitude and latitude position of the aircraft in its current flight.
-
Page 17: Troubleshooting
TROUBLESHOOTING Problem Cause Solution 1 The lights on the aircraft are 1. The aircraft and 1. Repeat the flashing but it does not transmitter are not connection respond to the control connected. procedure. 2. Insufficient battery power. 2. Recharge the battery. -
Page 18: Support
SUPPORT Disposal: Do not dispose this product as unsorted municipal waste. Collection of such waste must be handled separately as special treatment is necessary Recycling facilities are now available for all customers at which you can deposit your old electrical products. Customers will be able to take any old electrical equipment to participating civic amenity sites run by their local councils.
Need help?
Do you have a question about the PFBD302 and is the answer not in the manual?
Questions and answers