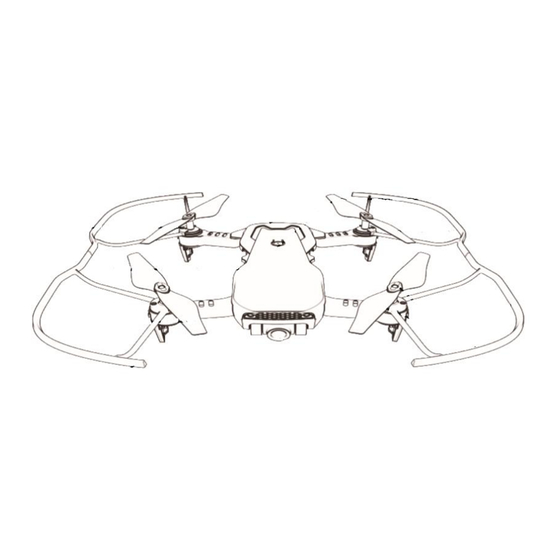
Summary of Contents for ProFlight MAVERICK AIR PFBD200
- Page 1 USER MANUAL MAVERICK AIR PFBD200 Thank you for choosing ProFlight. Please read this user manual before using this drone and keep it safe for future reference.
-
Page 2: Table Of Contents
CONTENTS SAFETY WARNINGS SAFETY PRECAUTIONS BATTERY CHARGING PREPARING FOR FIRST FLIGHT INSTALLING CONTROLLER BATTERIES CONTROLLER DIAGRAM ATTACHING THE LANDING GEAR DRONE DIAGRAM FOLDING THE ARMS FITTING THE BLADE GUARDS REPLACEMENT OF THE PROPELLERS BINDING OF CONTROLLER AND RECEIVER FLIGHT ADJUSTMENT AUTO TRIM TAKE OFF FLIGHT INSTRUCTIONS... -
Page 3: Safety Warnings
SAFETY WARNINGS Read the entire instruction manual and familiarise yourself with the product and all its features before operating. Failure to operate the product correctly can result in damage to the product, surroundings or even serious injury. This product is not a toy and must be operated with caution and common sense. It requires some basic mechanical knowledge. -
Page 4: Safety Precautions
Never use any other type of battery charger other than the one supplied with the drone. Failure to charge the battery with a compatible charger may cause fire resulting in personal injury and/or property damage. Never exceed the recommended charge rate. ... -
Page 5: Battery Charging
BATTERY CHARGING Use only the supplied USB Li-Po charger to charge your battery. Remove the battery from the battery compartment on the rear of the aircraft. Press down the release button and slide the battery out. Plug the charger into a USB socket before attaching the battery. -
Page 6: Installing Controller Batteries
INSTALLING THE CONTROLLER BATTERIES Unclip the battery cover from the rear of the controller and insert 3 x AA batteries, making sure the correct polarity is followed. Once the batteries are correctly installed, the battery cover must be re-fitted. CONTROLLER DIAGRAM * In order to take photos and videos using the controller both the app and the controller must be connected to the... -
Page 7: Attaching The Landing Gear
DRONE DIAGRAM FOLDING THE ARMS Fold the front arms backwards until they sit close to the body of the drone. Rotate the rear arm down 180 degrees until close to the body DO NOT FORCE THE ARMS IN A DIRECTION DIFFERENT TO ABOVE, AS THIS MAY RESULT IN DAMAGE. -
Page 8: Replacement Of The Propellers
ATTACHING THE LANDING GEAR The landing gear is attached to the base of each of the four motors as shown in the diagram below. They are fixed by pushing into position. REPLACEMENT OF THE PROPELLERS Should one of the fitted propellers become damaged, it can be replaced, by removing the screw from the side of the propeller before sliding the propeller off the motor shaft. -
Page 9: Flight Adjustment
FLIGHT ADJUSTMENT When you lift the Drone into the air, if the aircraft drifts in a particular direction you can trim the controls using the trim buttons. Select the trim key opposite the direction of drift. Trimming is always needed before your first flight. -
Page 10: Take Off
TAKE OFF There are two options for take-off. It can be triggered by using the take- off button which will result in the drone hovering at a set height above the ground. Alternatively push the left joystick to the bottom right corner, and the right joystick to the bottom left corner to engage the motors, before pushing the left joystick forward to take off. -
Page 11: Aircraft Functions & Features
AIRCRAFT FUNCTIONS AND FEATURES HEADLESS MODE The aircraft can be made to fly in Headless mode by pressing the headless flight button. This will make the aircraft fly without a front or rear. It will fly in the orientation of the pilot. If you move the right joystick right, the aircraft will fly right. -
Page 12: App
The camera App can be downloaded by scanning the below QR code or search for HT-UFO in your App Store: Android To connect the aircraft to your mobile device: Turn on the aircraft, while ensuring your controller is turned off. Go to the settings on your mobile device. - Page 13 MAIN SCREEN Return to opening screen 14 Left Joystick Take photo 15 Right and left turn trim Record video 16 3D Roll Photo and video playback 17 Take Off Altitude hold 18 Emergency stop Change speed (Low med or high) 19 Landing Gravity sensor mode 20 Microphone...
-
Page 14: Troubleshooting Guide
TROUBLESHOOTING Problem Cause Solution 1 The lights on the aircraft 1. The aircraft and 1. Repeat the are flashing but it does not transmitter are not connection respond to the control connected. procedure. 2. Insufficient battery power. 2. Recharge the battery. -
Page 15: Support
UK Support http://www.proflightuk.co.uk/support/ If you have been through the troubleshooting, and the unit is failing to operate, our service line can be contacted on: 0871 971 3141 Office hours: 9AM - 5PM Monday to Friday www.prolightuk.co.uk Unit J6, Lowfields Business Park Lowfields Way, Elland West Yorkshire, HX5 9DA 15 of 15...


Need help?
Do you have a question about the MAVERICK AIR PFBD200 and is the answer not in the manual?
Questions and answers