
Subscribe to Our Youtube Channel
Related Manuals for ICP DAS USA GW-7228


Summary of Contents for ICP DAS USA GW-7228
- Page 1 GW-7228 J1939/Modbus RTU Slave Gateway User’s Manual www.icpdas.com GW-7228 J1939/Modbus RTU Slave Gateway User’s Manual (Ver 1.3, Apr/2011) ------------- 1...
- Page 2 Description of changes T.H. 2010-07-26 First Release Revision T.H. 2011-04-29 Modify Modbus register define Add Parameter Download T.H. 2011-05-16 Function Embellish wire connection and Alan 2015-04-29 pin assignment graphs GW-7228 J1939/Modbus RTU Slave Gateway User’s Manual (Ver 1.3, Apr/2011) ------------- 2...
-
Page 3: Table Of Contents
J1939 Receiving Messages ............35 4.2.6 Transport Protocol for Large Messages ......... 35 5. Application ..................36 Hardware Installation ............... 36 GW-7228 Utility Configuration ............40 5.2.1 Modbus Network Configuration ............40 GW-7228 J1939/Modbus RTU Slave Gateway User’s Manual (Ver 1.3, Apr/2011) ------------- 3... - Page 4 5.2.2 J1939 Network Configuration ............40 5.2.3 J1939 I/O Configuration ..............41 5.2.4 Upload Parameter to the GW-7228 ..........43 Modbus Communication ..............44 6. Troubleshooting ................47 GW-7228 J1939/Modbus RTU Slave Gateway User’s Manual (Ver 1.3, Apr/2011) ------------- 4...
-
Page 5: Introduction
J1939 and Modbus RTU. For J1939 network, the GW-7228 supports PDU1, PDU2, broadcast and the destination specific type of J1939 messages. From the view of Modbus RTU network, the GW-7228 is a Modbus RTU slave to reply the request from Modbus RTU master. We provide Utility software for users to configure the parameters of J1939 / Modbus RTU of the GW-7228. -
Page 6: Mode Of Operation
The GW-7228 provides centralized data storage, for data that is shared between the Modbus and J1939 networks. Data is placed into the GW-7228 by one network interface, and allowing the data to be read or written through the other network interface. - Page 7 [ Application: ] Diesel power-train applications In-Vehicle networks for trucks and buses Truck-Trailer connections Fleet management systems On Board Diagnostics Vehicle Automation GW-7228 J1939/Modbus RTU Slave Gateway User’s Manual (Ver 1.3, Apr/2011) ------------- 7...
-
Page 8: Hardware
Figure 2-2 is a block diagram illustrating the functions on the GW- 7228 module. It provides the 3000Vrms Isolation in the CAN interface site. Figure 2-2: Block diagram of the GW-7228 GW-7228 J1939/Modbus RTU Slave Gateway User’s Manual (Ver 1.3, Apr/2011) ------------- 8... -
Page 9: Pin Assignment
RS-485 DATA+ RS-485 DATA- Not Connect RS-422 Tx+ RS-422 Tx- RS-422 Rx+ RS-422 Rx- Not Connect RS-232 RXD RS-232 TXD RS-232 GND Not Connect +Vs(+10 ~ +30 VDC) GW-7228 J1939/Modbus RTU Slave Gateway User’s Manual (Ver 1.3, Apr/2011) ------------- 9... -
Page 10: Hardware Connection
Modbus network. 2.3.1 CAN port connection The pin assignment of the CAN port on the GW-7228 (DB9 male) is defined in both the CANopen DS102 profile and in appendix C of the DeviceNet specifications. It is the standard pin assignment for CAN. The hardware connection between device and the GW-7228 is as Figure 2-4. -
Page 11: Serial Port Connection
COM port types to a serial device via serial network. Figure 2-5: RS-232 Wire Connection Figure 2-6: RS-422 Wire Connection Figure 2-7: RS-485 Wire Connection GW-7228 J1939/Modbus RTU Slave Gateway User’s Manual (Ver 1.3, Apr/2011) ------------- 11... -
Page 12: Terminator Resistor Settings
If users want to use this terminal resistor, Ω please open the GW-7228 cover and use the JP3 to activate the 120 terminal resistor built in the module, as the Figure 2-9. Note that the default setting is active. -
Page 13: Watchdog Timer Settings
Figure 2-11: Watchdog timer JP1 Jumper Position Init / Normal Dip-switch On the back of the GW-7228 module, there is a dip-switch used for firmware operation or firmware updating of the module. The following steps show how to use this dip-switch. - Page 14 GW-7228 module from computer’s RS-232 port via CA- 0910 cable shown as Figure 2-14. Figure 2-12: Init Position of Dip-Switch Figure 2-13: CA-0910 Cable Figure 2-14: Firmware downloads connection GW-7228 J1939/Modbus RTU Slave Gateway User’s Manual (Ver 1.3, Apr/2011) ------------- 14...
- Page 15 The result will show in “Firmware Update” field. Figure 2-15: GW-7228 firmware update process The GW-7228 firmware can be downloaded from http://ftp.icpdas.com/pub/cd/fieldbus_cd/J1939/gateway/gw- 7228/firmware. The Firmware_Update_Tool program can be downloaded from http://ftp.icpdas.com/pub/cd/fieldbus_cd/J1939/gateway/gw- 7228/software/tool. GW-7228 J1939/Modbus RTU Slave Gateway User’s Manual (Ver 1.3, Apr/2011) ------------- 15...
-
Page 16: Firmware Operation Mode
2.6.2 Firmware Operation Mode In the operation mode, users need to set the dip-switch to the “Normal” position as Figure 2-16 and reset the power. The GW-7228 can run in the operation mode. In this mode, users can use the Modbus Master command to set / get J1939 messages via COM port. -
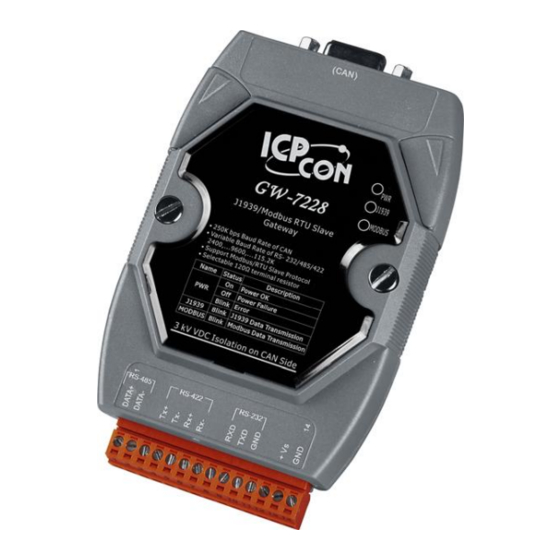
Page 17: Led Indication
LEDs and the position of these three LEDs shown as Figure 2-17. (1) PWR LED : It is used to help users to check whether the GW-7228 is standby. If the module is working in “firmware operation” mode, the PWR LED is always turned on. -
Page 18: Cable Selection
How to decide a cable type, cable length, and terminator depends on the baud rate in the CAN bus network, please refer to the following table 2-4. Figure 2-18: Un-shielded Twisted Pair (UTP) GW-7228 J1939/Modbus RTU Slave Gateway User’s Manual (Ver 1.3, Apr/2011) ------------- 18... - Page 19 (heavier) the wire, the lower the number. For example: a 24AWG wire is thicker/heavier than a 26AWG wire. GW-7228 J1939/Modbus RTU Slave Gateway User’s Manual (Ver 1.3, Apr/2011) ------------- 19...
-
Page 20: Software
485 serial link by using the PC serial port. It is compatible with Microsoft Windows 95, 98, NT, 2000, Vista and 7. The GW-7228 Utility can be downloaded from http://ftp.icpdas.com/pub/cd/fieldbus_cd/J1939/gateway/gw- 7228/software/utility. GW-7228 J1939/Modbus RTU Slave Gateway User’s Manual (Ver 1.3, Apr/2011) ------------- 20... -
Page 21: Gw-7228 Utility
The following is the main screens provided by GW-7228 Utility. 3.2.1 Connection Screen When users execute the GW-7228 Utility, it will show connection function screen first for connecting to the GW-7228 as Figure 3-1. The following is the illustration for connection parameters. [1] COM : The serial com port number. - Page 22 Figure 3-4: COM Connection Successful Screen Table 3-1 GW-7228 error status Error Code Status No Error Can’t Claim Address in J1939 Network CAN Bus-Off CAN Bus Transmission Fail GW-7228 J1939/Modbus RTU Slave Gateway User’s Manual (Ver 1.3, Apr/2011) ------------- 22...
-
Page 23: Main Screen
: Configuration of Modbus network parameters. [3] J1939 : Configuration of J1939 network parameters. [4] J1939 I/O table : Configuration of the contents and layout of the I/O tables. GW-7228 J1939/Modbus RTU Slave Gateway User’s Manual (Ver 1.3, Apr/2011) ------------- 23... - Page 24 The number of data bits used in the serial Fixed at 8 Data Bits communication. The number of stop bits used in the serial 1 / 2 Stop Bits communication. GW-7228 J1939/Modbus RTU Slave Gateway User’s Manual (Ver 1.3, Apr/2011) ------------- 24...
- Page 25 This is the list of possible addresses, the Address module only claims a single address at a 0~253 Configuration time. Up to 20 addresses may be in this list. GW-7228 J1939/Modbus RTU Slave Gateway User’s Manual (Ver 1.3, Apr/2011) ------------- 25...
- Page 26 The J1939 Input/Output table is used define the content and format of the J1939 messages. The Data from J1939 messages that are to be transmitted are mapped to the locations in the input or output table GW-7228 J1939/Modbus RTU Slave Gateway User’s Manual (Ver 1.3, Apr/2011) ------------- 26...
- Page 27 J1939 network. Output data points are associated with data of messages that will be transmitted on the J1939 network. Figure 3-7: J1939 Input/Output Configuration Table GW-7228 J1939/Modbus RTU Slave Gateway User’s Manual (Ver 1.3, Apr/2011) ------------- 27...
- Page 28 In Output Table, a message with this PGN will Number be built and transmitted using data from the Output table. Priority The data is used to optimize message latency GW-7228 J1939/Modbus RTU Slave Gateway User’s Manual (Ver 1.3, Apr/2011) ------------- 28...
- Page 29 PGN for the configured PGN. This is the J1939 message buffer location Message 0~1784 where data will be transferred input and Offset (bytes) output of the message buffer. GW-7228 J1939/Modbus RTU Slave Gateway User’s Manual (Ver 1.3, Apr/2011) ------------- 29...
-
Page 30: Communication Network
Only the areas of the Modbus I/O tables that are configured with J1939 I/O data are addressable, Modbus functions that use Word addressing address the I/O tables by using 16-bit words. GW-7228 J1939/Modbus RTU Slave Gateway User’s Manual (Ver 1.3, Apr/2011) ------------- 30... - Page 31 41536(LSB/MSB) The following register address is defined to start or stop the transmission of output J1939 messages in the GW-7228. It can use the Modbus functions code 6 (06 Hex) and 16 (10 Hex) to change the register. Table 4-4: Start/Stop the transmission register of J1939 output message...
-
Page 32: J1939 Network
The Parameter Groups (PG) architecture and Parameter Group Numbers (PGN) are described in SAE J1939/21 and defined in SAE J1939/71. GW-7228 J1939/Modbus RTU Slave Gateway User’s Manual (Ver 1.3, Apr/2011) ------------- 32... -
Page 33: Suspect Parameter Number (Spn)
Groups (PG) and they will be transmitted throughout the network using the Parameter Group Number (PGN). To follow up on the previous example (PGN 65262), the parameter Engine Coolant Temperature is described by SPN 110 as following Figure: GW-7228 J1939/Modbus RTU Slave Gateway User’s Manual (Ver 1.3, Apr/2011) ------------- 33... -
Page 34: J1939 Message Transmission
Messages are transmitted automatically based on the Update Time parameter in the output data associated with the message. GW-7228 J1939/Modbus RTU Slave Gateway User’s Manual (Ver 1.3, Apr/2011) ------------- 34... -
Page 35: J1939 Receiving Messages
GW-7228 now provides a BAM (Broadcast Announce Message) mechanism, when messages larger than 8 bytes in length and the destination address is 255, the message will be sent or receive using transport protocol BAM. GW-7228 J1939/Modbus RTU Slave Gateway User’s Manual (Ver 1.3, Apr/2011) ------------- 35... -
Page 36: Application
J1939 messages via the GW-7228 Users need to set the dip-switch to the “Normal” position as Figure 5-2 and reset the power, and that the GW-7228 can run in the operation mode. GW-7228 J1939/Modbus RTU Slave Gateway User’s Manual (Ver 1.3, Apr/2011) ------------- 36... - Page 37 Figure 5-2: Operation mode Position of Dip-Switch Step2: Enable the 120Ω terminator resistor Ω Please open the GW-7228 cover and use the JP3 to activate the 120 terminal resistor built in the module, as the Figure 5-3. Figure 5-3: JP3 Jumper Position...
- Page 38 It is recommended to use only one serial port (RS232, RS422 or RS485) of the gateway at the same time. The following figures describe the three COM port types to a serial device via serial network. GW-7228 J1939/Modbus RTU Slave Gateway User’s Manual (Ver 1.3, Apr/2011) ------------- 38...
- Page 39 Step5: Power wire connection Connect the power supply to the GW-7228 module’s power terminal connecter, please see the following connection as Figure 5-6. Figure 5-6: Power Wire Connection GW-7228 J1939/Modbus RTU Slave Gateway User’s Manual (Ver 1.3, Apr/2011) ------------- 39...
-
Page 40: Gw-7228 Utility Configuration
The device NAME should be set according to the application and the vendor where the module is being used based on the J1939 network specification. The J1939 network configuration screen from the GW-7228 is shown as Figure 5-9. GW-7228 J1939/Modbus RTU Slave Gateway User’s Manual (Ver 1.3, Apr/2011) ------------- 40... -
Page 41: J1939 I/O Configuration
Speed from the transmission and send the Transmission Input Shaft Speed to the transmission via the GW-7228. Figure 5-10: Example of a parameter group definition of SAE J1939/71 GW-7228 J1939/Modbus RTU Slave Gateway User’s Manual (Ver 1.3, Apr/2011) ------------- 41... - Page 42 ECU’s J1939 Address Byte Order Byte Data Priority Transm- ECU’s In J1939 Order In Length ission (Dec) J1939 Data Field Modbus Repetiti- Address Figure 5-11: J1939 configuration screen GW-7228 J1939/Modbus RTU Slave Gateway User’s Manual (Ver 1.3, Apr/2011) ------------- 42...
-
Page 43: Upload Parameter To The Gw-7228
5.2.4 Upload Parameter to the GW-7228 After the previous parameter settings, users need to upload the parameters to the GW-7228. Please refer to the following figure to finish the operation. Figure 5-12: Parameter upload screen Figure 5-13: Confirm Parameter upload screen Figure 5-14: Parameter upload successful screen GW-7228 J1939/Modbus RTU Slave Gateway User’s Manual (Ver 1.3, Apr/2011) ------------- 43... -
Page 44: Modbus Communication
01 10 00 00 00 01 02 12 34 AB 27 GW-7228’s response is OK. [Response] (Byte0, Byte1... Byten) (Hex) 01 10 00 00 00 01 01 C9 GW-7228 J1939/Modbus RTU Slave Gateway User’s Manual (Ver 1.3, Apr/2011) ------------- 44... - Page 45 01 04 00 00 00 01 31 CA GW-7228 responds a value of one word in the address 30001. [Response](Byte0, Byte1... Byten) (Hex) 01 04 02 12 34 B4 47 GW-7228 J1939/Modbus RTU Slave Gateway User’s Manual (Ver 1.3, Apr/2011) ------------- 45...
- Page 46 [Request Command] (Byte0, Byte1... Byten) (Hex) 01 06 07 D8 00 C9 45 GW-7228 responds the register value. [Response] (Byte0, Byte1... Byten) (Hex) 01 06 07 D8 00 C9 45 GW-7228 J1939/Modbus RTU Slave Gateway User’s Manual (Ver 1.3, Apr/2011) ------------- 46...
-
Page 47: Troubleshooting
3. When the correct implementation of the above steps, the J1939/Modbus LEDs of the GW-7228 should be turn on, and that should be turn off after 500 ms later. GW-7228 J1939/Modbus RTU Slave Gateway User’s Manual (Ver 1.3, Apr/2011) ------------- 47... - Page 48 7228, and the GW-7228 would back to factory defaults. 6. Reconnect the GW-7228 by using the network setting as 115200 baud with none parity, 1 stop bit and 1 Net ID. GW-7228 J1939/Modbus RTU Slave Gateway User’s Manual (Ver 1.3, Apr/2011) ------------- 48...
Need help?
Do you have a question about the GW-7228 and is the answer not in the manual?
Questions and answers