Advertisement
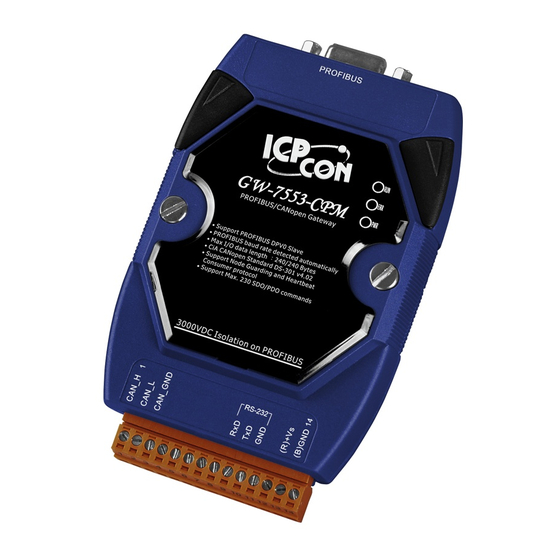
GW-7553 PROFIBUS/Modbus TCP Gateway
Quick Start User Guide
1. Introduction
This manual introduces the GW-7553's basic setting and operating quickly, the user
can refer to the user manual in the ICP DAS companion CD-ROM (Path:
"CD:\profibus\gateway\gw-7553\manual\gw-7553 user manual.pdf").
This manual helps users to understand about the GW-7553 module and application.
In the following examples the CIF50-PB PROFIBUS Master card from Hilscher is
used. The configuration and communication is done by the program "SyCon"
provided by Hilscher.
Application example of PROFIBUS to Modbus TCP
In this example the GW-7553 acts as a Modbus TCP Slave device. When the GW-
7553 module receives a write DO Modbus command from PC's Ethernet Port, the
GW-7553 module can send the message to the input data area of PROFIBUS Master
station. When the GW-7553 module receives a read DI Modbus command from
PC's Ethernet Port, GW-7553 module can refer to the output data area of
PROFIBUS Master station to produce response message and send it to PC's
Ethernet Port.
2. Hardware configuration
Power connection
RS-232 connection
Ethernet connection
GW-7553 PROFIBUS/Modbus TCP Gateway Quick Start (Version 1.10, May/2012)
PAGE:1
Advertisement
Table of Contents

Summary of Contents for ICP DAS USA GW-7553
- Page 1 Hilscher. Application example of PROFIBUS to Modbus TCP In this example the GW-7553 acts as a Modbus TCP Slave device. When the GW- 7553 module receives a write DO Modbus command from PC’s Ethernet Port, the GW-7553 module can send the message to the input data area of PROFIBUS Master station.
- Page 2 The GW-7553 is a slave device of PROFIBUS DP protocol. The station address of GW-7553 can be set by DIP switch. The DIP switch can be seen by open the cover, as shown in the below. The range of DIP switch is 0~126, here we set GW-7553 module’s DIP switch to 1.
-
Page 3: Software Configuration
4. Software configuration GSD file Please copy the GSD file (IPDS0C0D.gsd) and the bitmap file (ICP_7553. bmp, GW_7553.bmp) from the CD of the GW-7553 module into the Profibus configuration tool. File->CopyGSD (Directory: --> CD:\profibus\gateway\gw-7553\gsd\) the example of how to load GSD file Here, we use the hilscher CIF50-PB PROFIBUS communication interface to show how to load GW-7553’s GSD file step by step. - Page 4 Please refer to user manual section 4.3 The Configuration of the common parameters. Double click Click <Parameter Data> button 7553’s icon to enter the to enter the Parameter Data Slave configuration dialog dialog GW-7553 PROFIBUS/Modbus TCP Gateway Quick Start (Version 1.10, May/2012) PAGE:4...
- Page 5 When the user finishes the configuration and saves setting in the PROFIBUS Master station successfully, the 'RUN' LED indicator of GW-7553 is turned on. That shows the GW-7553 working in the data exchange mode. GW-7553 PROFIBUS/Modbus TCP Gateway Quick Start (Version 1.10, May/2012)
- Page 6 Set the network configuration of the GW-7553 1. Open MiniOS7 utility and press “F12” to find IP address of GW-7553. 2. Open web browser (ex. IE). Enter IP address of the GW-7553 in the Address field and press “Enter” to connect to GW-7553, and then enter default password (“icpdas”) to login to GW-7553 in Login page.
- Page 7 “MBTCP” are shown in the below. Input GW-7553’s IP (ex: 192.168.0.107) and click “Connect” button PROFIBUS input test --Send command to write DO of the GW-7553 The user needs to input command (” 01 0F 00 00 00 10 02 FF FF”) here and click <Send Command>...
- Page 8 Output 2 Byte 0x00 Output 3 Byte 0x00→ 0xFE Output module Output 4 Byte 0x00→ 0xDC Send Modbus command to read DI of the GW-7553 and receive data (0xFE, 0xDC) GW-7553 PROFIBUS/Modbus TCP Gateway Quick Start (Version 1.10, May/2012) PAGE:8...


Need help?
Do you have a question about the GW-7553 and is the answer not in the manual?
Questions and answers