Table of Contents
Advertisement
Quick Links
Advertisement
Table of Contents

Related Manuals for Kontron JRexplus LX


Summary of Contents for Kontron JRexplus LX
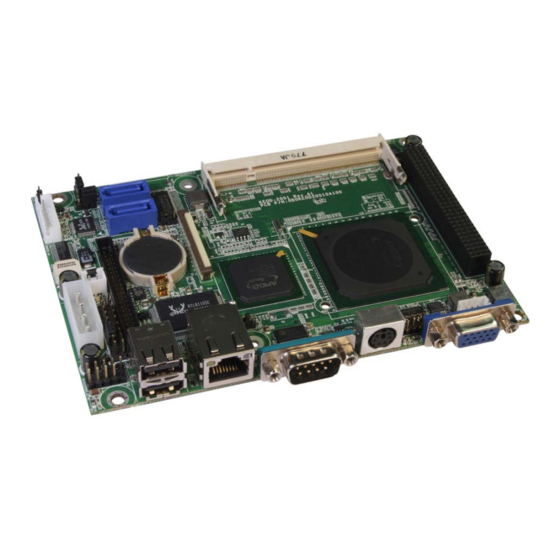
- Page 1 JRexplus LX KTD-S0001-0...
-
Page 2: Table Of Contents
Warranty ........................1 Life Support Policy ....................... 2 Technical Support ......................2 Introduction ...................3 JRex Embedded Line Family ................... 3 JRexplus LX Overview....................3 Specifications .................4 Functional Specifications ....................4 Block Diagram ......................6 Mechanical Specifications....................7 Electrical Specifications ....................7 Real-Time Clock Battery.................... - Page 3 Digital I/O Interface ............... 31 17.1 Electrical Specifications ....................31 17.2 Connector .........................31 Power Supply ................32 18.1 Main Power Connector (AT/ATX)..................32 18.2 Power Connector Supplement (ATX)................32 18.3 Power Pins.........................33 18.4 Power Front Panel Header.....................33 18.4.1 Power LED ..........................33 JRexplus LX User's Guide...
- Page 4 Appendix B: Connector Layout..............48 Connector Locations....................48 B.1.1 Top Side..........................48 B.1.2 Bottom Side ........................... 49 Mechanical Dimensions ....................50 Mating Connectors ......................51 Pinout Tables ......................52 Appendix C: Reference Documents .............. 55 Appendix D: Document Revision History ............56 JRexplus LX User's Guide...
-
Page 5: User Information
KONTRON Technology A/S will not be responsible for any defects or damages to third party products that are caused by a faulty KONTRON Technology A/S product. -
Page 6: Life Support Policy
Page 2 User Information Life Support Policy KONTRON Technology's products are not for use as critical components in life support devices or systems without express written approval of the general manager of KONTRON Technology A/S. As used herein: Life support devices or systems are devices or systems which... -
Page 7: Introduction
Introduction JRex Embedded Line Family Each JRex is a member of the 3.5" SBC family of KONTRON Technology A/S. JRex embedded line modules are characterized by the same surface pinouts and interfaces for reset logic and ATX power supply feature, 2 x USB, Fast LAN, PS/2 keyboard and mouse connector, Compact-Flash socket, CRT interface as well as one serial port. -
Page 8: Specifications
Four ports are capable to handle USB1.1 (OHCI) and USB2.0 (EHCI) Ë Onchip High Definition Audio Up to 16 bit sample resolution with 48 kHz sample rate Ë Use the onboard audio codec ALC203E (Realtek) Ë Supports LINE OUT, LINE IN and MICROPHONE IN Ë JRexplus LX User's Guide... - Page 9 Four inputs and four outputs, +5V signal level Ë External PCI bus One PCI-104 bus connector, only 3.3V PCI cards supported Ë BIOS: AWARD, 512 kb Flash BIOS Real-Time Clock (RTC) with CMOS RAM and battery JRexplus LX User's Guide...
-
Page 10: Block Diagram
(BIOS) Ethernet Serial-ATA LAN_ RTL8110 VT6421 S-ATA 0-1_ Eeprom JILI30 AT24C02 I2C_ GPI/O Watchdog Backlight Super-I/O DAC5571 W83627EHG PS/2 Mouse + Parallel Port Keyboard Floppy Serial Ports RS-232 Interface ADM213E RS-232 Interface ADM213E RS-485 Interface SP485E JRexplus LX User's Guide... -
Page 11: Mechanical Specifications
(100% load) and extensive 3D graphic. The boards were ran with 256 MB DDR SDRAM, CRT monitor, USB keyboard & mouse and a CF card as boot device (default BIOS settings). Full Load Idle Standby S3 1.80 9.00 1.20 6.00 JRexplus LX User's Guide... -
Page 12: Real-Time Clock Battery
The maximum operating temperature is the maximum measurable temperature on any spot on a module’s surface. You must maintain the temperature according to the above specification. Humidity Operating: 10% to 90% (non condensing) ® Non operating: 5% to 95% (non condensing) ® JRexplus LX User's Guide... -
Page 13: Mtbf
MTBF calculation. The RTC battery lifetime has to be considered separately. Battery life depends on both temperature and operating conditions. When the KONTRON unit has external power; the only battery drain is from leakage paths. -
Page 14: Getting Started
KTD-S0001-0 Page 10 Getting Started Getting Started Getting started with the JRexplus LX is very easy. Take the following steps: ‚ Plug a suitable DDR-SDRAM memory module into the RAM socket. ƒ Connect the CRT monitor to the CRT interface or a LCD panel to the JILI30 interface respecti- vely the 18 bit digital interface by using the corresponding adapter cable. -
Page 15: System Memory
A description of signals, including electrical characteristics and timings, is beyond the scope of this docu- ment. Please refer to the official PCI bus and PC/104-plus specifications for more details. Under no circumstances 5V PCI cards may be used on the JRexplus LX board. Only Universal and 3.3V add on cards are permitted. V is open or set to 3.3V on the PCI bus. -
Page 16: Graphics Interface
To protect the external power lines of peripheral devices make sure that - the wires have the right diameter to withstand the maximum available current. - to enclosure of the peripheral device fulfills the fire-protecting conditions of IEC/EN 60950. JRexplus LX User's Guide... -
Page 17: Flat Panel Connectors
The implementation of this subsystem complies with the JILI specification of KONTRON Tech- nology A/S. Another option for connecting a display to the JRexplus LX is a (LV)TTL compatible 18 bit RGB interface available on X17 (32 pins). A variety of cables for different display types are available from KONTRON. -
Page 18: 18 Bit Digital Connector
- to enclosure of the peripheral device fulfills the fire-protecting conditions of IEC/EN 60950. Warning: Check jumper JP6 (Panel Power) for correct settings for your panel – not doing so might cause permanent damage to your panel. JRexplus LX User's Guide... -
Page 19: 18 Bit Digital Jumper Settings
(Pos. 1-2 = High 2-3 = Low). Check Jumper JP1 for correct Backlight on/off polarity † Connect the cable to the flat panel connector X17 or X18 on the JRexplus LX and connect the other end to your display. ‡ Connect the backlight converter. -
Page 20: Flat Panel Jumper
Graphic 640 x 200 Text 80 x 25 Graphic 320 x 200 Graphic 640 x 200 Graphic 640 x 350 Graphic 640 x 350 Graphic 640 x 480 Graphic 640 x 480 Graphic 320 x 200 JRexplus LX User's Guide... -
Page 21: Extended Vesa Modes
To protect the external power lines of peripheral devices make sure that - the wires have the right diameter to withstand the maximum available current. - to enclosure of the peripheral device fulfills the fire-protecting conditions of IEC/EN 60950. JRexplus LX User's Guide... -
Page 22: Serial Port Interfaces
TRON (KAB-DSUB9-3, part number 96061-0000-00-0). Header Signal Name Function DSUB9 /DCD Data carrier detect /DSR Data set ready Receive data /RTS Request to send Transmit data /CTS Clear to send /DTR Data terminal ready Ring indicator Ground Power +5V JRexplus LX User's Guide... - Page 23 - the wires have the right diameter to withstand the maximum available current. - to enclosure of the peripheral device fulfills the fire-protecting conditions of IEC/EN 60950. Attention: A RS-422/RS-485 terminating resistor is not equipped on the JRexplus LX. JRexplus LX User's Guide...
-
Page 24: Parallel Port Interface
Page 20 Parallel Port Interface Parallel Port Interface The JRexplus LX incorporates a parallel port that can be set to uni-/bidirectional and supports EPP/ECP operating modes. Connector The parallel port is available through the connector X20 (32 pins). A DSUB25 adapter cable is deliverable from KONTRON (KAB-DSUB25-2, part number 61033). -
Page 25: Ps/2 Keyboard And Mouse Interface
PS/2 Keyboard and Mouse Interface The Super-I/O of the JRexplus LX supports a PS/2 keyboard and mouse. A PS/2 keyboard can be directly connected to this interface. If you intend to use a PS/2 mouse connect a Y-cable to this interface. There are many different Y-cables available on the market. -
Page 26: Usb Interface
To protect the external power lines of peripheral devices make sure that - the wires have the right diameter to withstand the maximum available current. - to enclosure of the peripheral device fulfills the fire-protecting conditions of IEC/EN 60950. JRexplus LX User's Guide... - Page 27 KTD-S0001-0 Page 23 USB Interface The following picture shows an example of a standard USB/Firewire slot adapter (10 pin USB connector with key). JRexplus LX User's Guide...
-
Page 28: Floppy Drive Interface
Floppy Drive Interface The floppy drive interface of the JRexplus LX uses a 2.88 MB Super-I/O floppy disk controller and can sup- port one floppy disk drive with densities that range from 360 kB to 2.88 MB. The controller is 100% IBM compatible. -
Page 29: Eide Interface (P-Ata)
EIDE Interface (P-ATA) EIDE Interface (P-ATA) The JRexplus LX features one EIDE interface (Primary channel, UDMA33/66 mode) that can drive two hard disks. When two devices share a single adapter they are connected in a master/slave, daisy-chain con- figuration. If only one drive is connected you must set it as master. Alternatively the same interface can be used for Compact Flash card applications. -
Page 30: Compact Flash Card Interface
/IOW I/O write Power +5V Interrupt Power +5V N.C. Ground Not connected /RESET IOCHRDY Reset I/O channel ready /DRQ DMA request /DACK DMA acknowledge Drive activity N.C. Not connected Data 8 Data 9 Data 10 Ground JRexplus LX User's Guide... -
Page 31: Bbs Support (Bios Boot Specification)
Windows The combination of a CF card that supports UDMA modes and one or two further EIDE drive(s) can lead to boot problems. This depends on the used devices. Detailled informations can be found in the KONTRON do- CF-Card Test Report. -
Page 32: Serial-Ata Interface (S-Ata)
Serial-ATA Interface (S-ATA) Serial-ATA Interface (S-ATA) The JRexplus LX has realized two S-ATA ports. Serial-ATA connections boost the data rate theoretically up to 150 MB/sec. In addition it changes the parallel interface requiring 40 separate wires to a serial inter- face requiring only 6 wires. -
Page 33: Lan Controller
LAN Controller LAN Controller The JRexplus LX uses a Realtek RTL8110SC Gigabit PCI LAN controller. The controller support 10/ 100/1000 Base-T interfaces. The devices auto-negotiates the use of a 10, 100 or 1000 Mbps connection. Additionally it is possible to enable the LAN PXE Boot in the BIOS Setup to allow the system to boot up via a network connection from a PXE server. -
Page 34: Audio Interface
Audio Interface Audio Interface The JRexplus LX supports an AC'97 V2.3 audio codec with 16 bit resolution and 48 kHz sample rate. The interface includes LINE OUT, LINE IN and MICROPHONE IN. The AC'97 specification provides low cost, high quality sound. This is done by embedding half of the required technology in the Southbridge and the other half in a separate chip from an OEM supplier. -
Page 35: Digital I/O Interface
KTD-S0001-0 Page 31 Digital I/O Interface Digital I/O Interface The JRexplus LX features four digital inputs and four digital outputs. All inputs/outputs are TTL compatible. 17.1 Electrical Specifications Digital Inputs Parameter Min. Typ. Max. Units Input LOW voltage Input HIGH voltage 5.25... -
Page 36: Power Supply
Power Supply Power Supply The JRexplus LX supports two power supply modes: AT and ATX. AT mode: Only one connector (4 pins) is required. After switching on the supply voltage a circuit generates a reset and the board immediately begins to work. The JRexplus board works fine in +5V only mode. The +12V supply voltage is optional and can be used for the backlight voltage for example. -
Page 37: Power Pins
Power button (positive) N.C. Not connected PWR_BTN- Power button (negative) PWR_LED- Power LED (negative) N.C. Not connected RSVD Reserved RSVD Reserved Ground RSVD Reserved 18.4.1 Power LED The following picture illustrates the onboard wiring. 470R Power LED JRexplus LX User's Guide... -
Page 38: Common Front Panel Pins
Speaker (positive) RST_BTN- Reset button (negative) N.C. Not connected HDD_LED+ Harddisk LED (positive) N.C. Not connected HDD_LED- Harddisk LED (negative) SPKR- Speaker (negative) 19.1.1 Harddisk LED The following picture illustrates the onboard wiring. +3.3V 300R Harddisk LED JRexplus LX User's Guide... -
Page 39: Crisis Management
Power down the board ƒ Switch the second jumper JP8 as depicted and wait for 3 seconds „ Put the jumper back as it was before Then continue with the steps from the no battery case. JRexplus LX User's Guide... -
Page 40: Cpu/Memory Speed
333 MHz DDR266 333 MHz DDR333 400 MHz DDR200 400 MHz DDR266 400 MHz DDR333 400 MHz DDR400 433 MHz DDR266 433 MHz DDR333 433 MHz DDR400 500 MHz DDR266 500 MHz DDR333 500 MHz DDR400 JRexplus LX User's Guide... -
Page 41: Setup Guide
Displaying Submenus Use the ← or → key to move the cursor to the submenu you want. Then press <Enter>. A pointer ( ) marks all submenus. Note: In the Option column bold shows default settings. JRexplus LX User's Guide... -
Page 42: Menu Bar
Extended Memory Displays amount of extended memory detected during boot-up Extended memory = capacity of memory modu- le – selected frame buffer memory size Total Memory Displays amount of total memory detected during boot-up JRexplus LX User's Guide... -
Page 43: 22.3.1 Ide Master Or Slave Submenu
System = Password required for system boot System JRC Extension Enabled Enables or disables the JRC extension (Remote Disabled Control) Darkboot / Custom Logo Disabled If enabled, normally Darkboot will be active. For Custom Logo contact KONTRON Enabled JRexplus LX User's Guide... -
Page 44: Advanced Chipset Features
(including the EHCI controller) Disabled EHCI Controller Enabled Enables or disables the internal EHCI control- ler (USB 2.0) Disabled Security Block Disabled Enables or disables the internal Security Block Enabled Watchdog Mode Disabled Selects operation mode Generate RESET JRexplus LX User's Guide... -
Page 45: Integrated Peripherals
Standard = bidirectional EPP = Enhanced Parallel Port specification ECP+EPP ECP = Extended Capabilities Port specification EPP Mode Select EPP1.9, EPP1.7 Selects the EPP specification ECP Mode Use DMA 1, 3 Selects the DMA channel for ECP specification JRexplus LX User's Guide... -
Page 46: Pnp/Pci Configurations
Feature Option Description Reserved Memory Base N/A, C800, CC00 Selects the base segment address of memory area D000, D400 D800, DC00 Reserved Memory Length 8K, 16K Selects the length of memory area (in kByte) 32K, 64K JRexplus LX User's Guide... -
Page 47: Power Management Setup
LX800 Chip Rev. Shows the Northbridge (LX800) chip revision CS5536 Chip Rev. Shows the Southbridge (CS5536) chip revision Board Class Shows the KONTRON specific board class Board Name Shows the KONTRON specific board name Hardware Version Shows the KONTRON specific hardware version... -
Page 48: Appendix A: System Resources
If the Used for device is disabled in the BIOS Setup the corresponding interrupt is free. Not available if ACPI is used. Not usable in Windows ® , since a PCI IDE controller uses always two channels. JRexplus LX User's Guide... -
Page 49: Direct Memory Access (Dma) Channels
Memory Range Used for Available Comment C0000h - C7FFFh VGA BIOS C8000h - CFFFFh if onboard graphic controller is used D0000h - DFFFFh E0000h - FFFFFh System BIOS JRexplus LX User's Guide... -
Page 50: I/O Address Map
Appendix A: System Resources I/O Address Map The I/O-port addresses of the JRexplus LX are functionally identical to a standard PC/AT. All addresses not mentioned in this table should be available. We recommend that you do not use I/O addresses below 0100h with additional hardware for compatibility reasons even though they are available. -
Page 51: Pci Devices
INTB PCI bus (AD29) System Management Bus (SMBus) The JRexplus LX uses an onboard System Management Bus (SMBus). This bus is not available on a peri- pheral connector and therefore cannot be used for external SMBus devices. SMBus Address Device... -
Page 52: Appendix B: Connector Layout
KTD-S0001-0 Page 48 Appendix B: Connector Layout Appendix B: Connector Layout Connector Locations B.1.1 Top Side Pin 1 JRexplus LX User's Guide... -
Page 53: Bottom Side
KTD-S0001-0 Page 49 Appendix B: Connector Layout B.1.2 Bottom Side Pin 1 JRexplus LX User's Guide... -
Page 54: Mechanical Dimensions
KTD-S0001-0 Page 50 Appendix B: Connector Layout Mechanical Dimensions Ø 4 x4 Ø 3,2 x2 98,4 94,1 14,1 JRexplus LX User's Guide... -
Page 55: Mating Connectors
DSUB9 adaptation (MOLEX 50058-8000 or comp.) 2.50 mm 6 pin for audio support (Line In, Line Out (JST SXH-002T-P0.6 or comp.) and Microphone) 1.25 mm 7 pin for backlight cables (MOLEX 51021-0700 or comp.) JRexplus LX User's Guide... -
Page 56: Pinout Tables
AD24 C/BE3 IDSEL3 (AD23) AD26 AD25 AD29 VCC5 AD28 AD27 VCC5 AD30 AD31 REQ0 REQ1 REQ2 VCC5 GNT0 GNT1 GNT2 VCC5 CLK0 CLK1 CLK2 VCC5 CLK3 INTD VCC5 VCC12 (+12V) INTA INTB INTC N.C. N.C. N.C. JRexplus LX User's Guide... - Page 57 /SLIN N.C. KEY (N.C.) /TRK0 N.C. N.C. /WRTPRT N.C. /IOW N.C. N.C. /RDATA /IOR /HDSEL DATAENA IOCHRDY CSEL /ACK /DACK /BUSY /SLCT N.C. /CS3 N.C. ATAD /IOR /IOW /CS1 /CS3 N.C. /RESET IOCHRDY N.C. /DACK N.C. JRexplus LX User's Guide...
- Page 58 RSVD RSVD Note: Not supported on the JRexplus LX board. To protect the external power lines of peripheral devices make sure that - the wires have the right diameter to withstand the maximum available current. - to enclosure of the peripheral device fulfills the fire-protecting conditions of IEC/EN 60950.
-
Page 59: Appendix C: Reference Documents
KTD-S0001-0 Page 55 Appendix C: Reference Documents Appendix C: Reference Documents KONTRON Technology A/S can't guarantee the availability of internet addresses. Document Internet Address Advanced Configuration and Power Interface (ACPI) http://www.acpi.info/spec.htm AT Attachment Storage Interface Specification (ATA) http://t13.org Digital Visual Interface (DVI) http://www.ddwg.org... -
Page 60: Appendix D: Document Revision History
Appendix D: Document Revision History Revision Date Author Changes S0001-0 12/10/09 M. Hüttmann Adapted to KONTRON Technology A/S guidelines 01/23/09 M. Hüttmann Some slightly changes 11/17/08 M. Hüttmann Added some notes in chapter PCI Bus Expansion and Problems with Boot Order 10/24/08 M.
Need help?
Do you have a question about the JRexplus LX and is the answer not in the manual?
Questions and answers