Table of Contents

Related Manuals for STIEBEL ELTRON HSBC 200


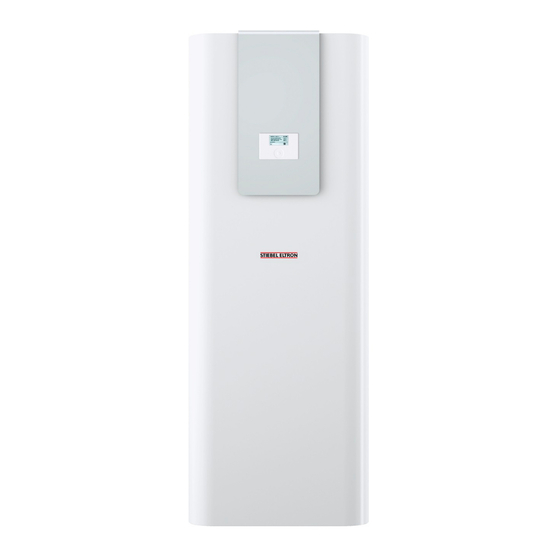
Summary of Contents for STIEBEL ELTRON HSBC 200
- Page 1 BEDIENUNG UND INSTALLATION OPERATION AND INSTALLATION UTILISATION ET INSTALLATION BEDIENING EN INSTALLATIE USO E INSTALLAZIONE Integral-Speicher | Integral cylinder | Ballon intégral | Combiboiler | Caldaia integrale » HSBC 200 » HSBC 200 S...
-
Page 2: Table Of Contents
16.1 Dimensions and connections ��������������������������������� 48 16.2 Wiring diagram for HSBC 200 �������������������������������� 50 16.3 Wiring diagram for HSBC 200 S ������������������������������ 52 16.4 Data table �������������������������������������������������������� 55 16.5 Details on energy consumption ������������������������������ 56 GUARANTEE | ENVIRONMENT AND RECYCLING | HSBC www.stiebel-eltron.com... -
Page 3: General Information
oPerATIoN general information oPerATIoN Other symbols in this documentation Note General information is identified by the adjacent symbol. f Read these texts carefully. General information The chapters "Special information" and "Operation" are intended Symbol Meaning for both users and qualified contractors. Material losses The chapter "Installation"... -
Page 4: Safety
oPerATIoN Safety Safety Appliance description The buffer cylinder and DHW cylinder with indirect coil are ar- Intended use ranged one above the other and can be separated for easier han- dling. This appliance is intended to be used for heating and cooling interiors (area cooling 18 °C / 23 °C) and for DHW heating. -
Page 5: Settings
oPerATIoN Settings Settings Signal anode with consumption indicator Material losses Material losses If the consumption indicator changes colour from white The system's active frost protection is not guaranteed if to red, have the signal anode checked by a qualified con- the power supply is interrupted. -
Page 6: Installation
INSTALLATIoN Safety INSTALLATIoN 10. Preparations 10.1 Installation site Safety Material losses Never install the appliance in wet rooms. Only a qualified contractor should carry out installation, commis- sioning, maintenance and repair of the appliance. Install the appliance near the draw-off point in a dry room free from the risk of frost. -
Page 7: Transport And Handling
INSTALLATIoN Preparations 10.2 Transport and handling Material losses Store and transport the appliance at temperatures be- tween -20 °C to +60 °C. Handling f Undo the 4 screws from the non-returnable pallet. f Detach the plug of the electronic assembly for operation and the earth connection from the front fascia. - Page 8 INSTALLATIoN Preparations f Place the upper section of the appliance on a base to prevent f Release the 4 screws on the tabs at the front of the appliance. damage. Joining appliance sections Rejoin the appliance sections in reverse order. The positioning aids and the dotted line marking provide assis- tance when positioning and inserting the upper appliance section into the guide groove on the lower section: f Pull the upper section of the appliance towards the front.
-
Page 9: Installation
INSTALLATIoN Installation 11. Installation 11.1 Positioning the appliance f When positioning the appliance, observe minimum clearanc- es (see chapter "Preparations / Installation site"). f Use the adjustable feet to compensate for any unevenness in the floor. 11.2 Heating water connection and safety valve 11.2.1 Safety instructions Material losses The heating system to which the appliance is connected... - Page 10 INSTALLATIoN Installation Supply lines 11.2.2 Fitting the pump assembly (accessory) if required f The maximum permissible line length between the appli- To extend the appliance with a heating circuit with mixer, you can ance and the heat pump will vary, depending on the version install pump assembly HSBC-HKM (available as accessory).
-
Page 11: Dhw Connection And Safety Assembly
INSTALLATIoN Installation 11.3 DHW connection and safety assembly 11.2.3 Connection Installation example: 11.3.1 Safety instructions Material losses The maximum permissible pressure must not be exceed- ed (see chapter "Specification / Data table"). Material losses Operate the appliance only with pressure-tested taps. Cold water line Galvanised steel, stainless steel, copper and plastic are approved materials. -
Page 12: Filling The System
INSTALLATIoN Installation 11.3.3 DHW connection and safety assembly 11.4.1 Filling the heating system f Flush the pipes thoroughly. In the delivered condition, the 3-way diverter valve of the mul- f Install the DHW outlet line and the cold water inlet line (see tifunction assembly is in its centre position, so that the heating chapter "Specification / Dimensions and connections"). -
Page 13: Venting The Appliance
INSTALLATIoN Power supply 12. Power supply 11.5 Venting the appliance f To ventilate, temporarily open the quick-action air vent valve in the multifunction assembly. WARNING Electrocution Carry out all electrical connection and installation work in accordance with relevant regulations. Before any work on the appliance, disconnect all poles from the power supply. -
Page 14: Electric Emergency/Booster Heater And Control Voltage
INSTALLATIoN Power supply Install cables with the following cross-sections in accordance with HSBC 200 S: Electrical connection single phase the respective fuse rating: MCB/fuse Assignment Cable cross-section rating B 16 A Electric emergency/ 2.5 mm² booster heater 1.5 mm² with only two live wires, rout-... -
Page 15: Low Voltage, Bus Cable
INSTALLATIoN Power supply 12.2 Low voltage, BUS cable Connecting BUS cables Material losses Bus cables, power cables and sensor leads must be in- stalled separately. f Install a J-Y (St) 2 x 2 x 0.8 mm² cable as bus to the heat pump. -
Page 16: Sensor Installation
INSTALLATIoN Power supply 12.3 Sensor installation 12.3.2 Fitting the temperature sensor (accessory) for area cooling 12.3.1 Outside temperature sensor AFS 2 Area cooling requires the fitting of a temperature sensor, available as an accessory. The outside temperature sensors have a significant influence on the function of your heating system. -
Page 17: Remote Control
INSTALLATIoN Commissioning 13. Commissioning 12.4 Remote control Our customer support can assist with commissioning, which is a 12.4.1 FE 7 remote control chargeable service. If the appliance is intended for commercial use, observe the rules of the relevant Health & Safety at Work Act during commissioning. For further details, check with your local authorising body (in Germany, for example, this is the TÜV). -
Page 18: Commissioning The Heat Pump Manager
INSTALLATIoN Appliance shutdown 13.2 Commissioning the heat pump manager 13.3 Appliance handover f Explain the appliance function to users and familiarise them Commission the heat pump manager and make all settings in with its operation. accordance with the operating and installation instructions for f Make users aware of potential dangers. - Page 19 INSTALLATIoN Maintenance Draining the DHW cylinder CAUTION Burns Hot water may escape during draining. f Close the shut-off valve in the cold water inlet line. f Open the hot water taps on all draw-off points. f Drain the buffer cylinder via the drain valve. Draining the DHW cylinder Material losses Never use descaling pumps or descaling agents to clean...
-
Page 20: Specification
INSTALLATIoN Specification 16. Specification 16.1 Dimensions and connections 16.1.1 HSBC 200 | HSBC 200 S HSBC 200 HSBC 200 S Cable entry Cold water inlet Diameter DHW outlet Diameter DHW circulation Diameter Safety valve drain Heat pump flow Diameter Heat pump return... - Page 21 INSTALLATIoN Specification Other dimensions and connections HSBC HSBC 200 S h09 Sensor heat pump Diameter cooling, optional Sensor DHW Diameter Sensor heating Diameter Flange Diameter Pitch circle diameter Screws M 10 M 10 Torque Protective anode Female thread G 1 1/4 G 1 1/4 16.1.2 HSBC-HKM accessories HSBC-HKM...
-
Page 22: Wiring Diagram For Hsbc 200
INSTALLATIoN Specification 16.2 Wiring diagram for HSBC 200 EB01 Steuerspannung AA08 “+” MISCHER (Netzteil) XD11 XE03 “+” 1 (L) “+” 2 (N) ws (PWM) br (GND) MA10 MA14 Yonos Para 7,5 Yonos Para 7,5 BT55 <T XD20 KF22 KF21 KF20... - Page 23 INSTALLATIoN Specification “+” AA08 AA07 (MFG) KF21 KF22 (Netzteil) KF20 “+” 1 (L) “+” 2 (N) 4 3 2 1 3 2 1 3 2 1 6 5 4 3 3 2 1 5 4 3 2 1 3 2 1 “+”...
-
Page 24: Wiring Diagram For Hsbc 200 S
INSTALLATIoN Specification 16.3 Wiring diagram for HSBC 200 S Steuerspannung EB01 AA08 “+” MISCHER (Netzteil) XD11 XE03 “+” 1 (L) “+” 2 (N) ws (PWM) br (GND) MA14 MA10 Yonos Para 7,5 Yonos Para 7,5 BT55 <T XD20 KF22 KF21... - Page 25 INSTALLATIoN Specification AA08 “+” AA07 (MFG) (Netzteil) KF20 KF21 KF22 “+” 1 (L) “+” 2 (N) 4 3 2 1 3 2 1 3 2 1 6 5 4 3 3 2 1 5 4 3 2 1 3 2 1 “+”...
- Page 26 BT20 Temperature sensor, DHW cylinder BT55 High limit safety cut-out MFG (manual reset) EB01 Booster heater MFG (not for HSBB 200 S classic BE or HSBC 200 S BE) KF20 Relay, booster heater MFG KF21 Relay, booster heater MFG KF22...
-
Page 27: Data Table
INSTALLATIoN Specification 16.4 Data table HSBC 200 HSBC 200 S 233510 234801 Hydraulic data Nominal capacity, DHW cylinder Nominal capacity, buffer cylinder Surface area, indirect coil m² Capacity, indirect coil External available pressure differential, circulation pump / heat pump at 1.0 m³/h External available pressure differential, circulation pump / heat pump at 1.5 m³/h... -
Page 28: Details On Energy Consumption
INSTALLATIoN Specification 16.5 Details on energy consumption The product data complies with EU regulations relating to the Directive on the ecodesign of energy related products (ErP). HSBC 200 HSBC 200 S 233510 234801 Manufacturer STIEBEL ELTRON STIEBEL ELTRON Energy efficiency class... - Page 29 Deutschland Verkauf Tel. 05531 702-110 | Fax 05531 702-95108 | info-center@stiebel-eltron.de STIEBEL ELTRON GmbH & Co. KG Kundendienst Tel. 05531 702-111 | Fax 05531 702-95890 | kundendienst@stiebel-eltron.de Dr.-Stiebel-Straße 33 | 37603 Holzminden Ersatzteilverkauf Tel. 05531 702-120 | Fax 05531 702-95335 | ersatzteile@stiebel-eltron.de Tel.
Need help?
Do you have a question about the HSBC 200 and is the answer not in the manual?
Questions and answers