Table of Contents
Advertisement
Quick Links
Energy
www.regency-fire.com
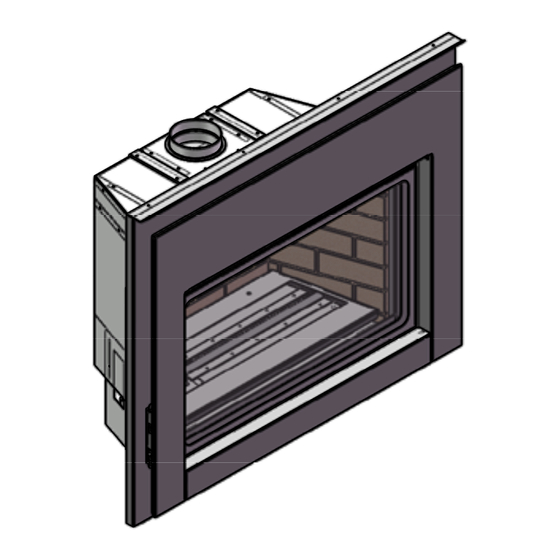
MODELS: E18E-NG Natural Gas E18E-LP Propane
WARNING
FIRE OR EXPLOSION HAZARD
Failure to follow safety warnings exactly could result in serious
injury, death, or property damage.
- Do not store or use gasoline or other flammable vapors and liquids in the vicinity of this or any other
appliance.
- WHAT TO DO IF YOU SMELL GAS
•
Do not try to light any appliance.
• Do not touch any electrical switch: do not use any phone in your building.
Leave the building immediately.
• Immediately call your gas supplier from a neighbour's phone. Follow the gas supplier's
instructions.
• If you cannot reach your gas supplier, call the fire department.
- Installation and service must be performed by a qualified installer, service agency or the gas supplier.
Tested by:
919-788c
FPI FIREPLACE PRODUCTS INTERNATIONAL LTD. 6988 Venture St., Delta, BC Canada, V4G 1H4
E18E Gas Insert
™
Installer: Please complete the details on the back cover
and leave this manual with the homeowner.
Homeowner: Please keep these instructions for future reference.
Owners &
Installation Manual
08.14.18
Advertisement
Table of Contents

Related Manuals for Regency Energy E18E


Summary of Contents for Regency Energy E18E
- Page 1 Owners & Energy E18E Gas Insert ™ Installation Manual www.regency-fire.com MODELS: E18E-NG Natural Gas E18E-LP Propane WARNING FIRE OR EXPLOSION HAZARD Failure to follow safety warnings exactly could result in serious injury, death, or property damage. - Do not store or use gasoline or other flammable vapors and liquids in the vicinity of this or any other appliance.
- Page 2 Intertek/Warnock Hersey for safety. As it also bears our own mark, it promises to provide you with economy, comfort and security for many trouble free years to follow. Please take a moment now to acquaint yourself with these instructions and the many features of your Regency Fireplace.
-
Page 3: U Nit Dimensions
616-928 - Low Profile Faceplate (Firesong FS120N) 32 5/8" Wide X 28 1/4" High 617-948 - Low Profile Faceplate Zero Clearance Applications 34 7/8" Wide X 29 3/8" High NOTE: also includes a perimeter finishing trim 37 3/8" Wide X 32 1/4" High Regency E18E Gas Fireplace Insert ®... -
Page 4: Table Of Contents
Enamel panel Installation ..........61 Glass Crystals and optional Ceramic spa or volcanic .62 stones Installation On Burner and Firebox Floor ..62 Optional Spa or volcanic Stones Installation ....62 Brick panel Installation ..........63 Log Tray Installation .............64 Regency ® E18E Gas Fireplace Insert... - Page 5 This is a copy of the label that accompanies each Regency Gas Insert. We have ® printed a copy of the contents here for your review. The safety label is located on the front inside base of the unit visible when the bottom louver is open.
- Page 6 (e) A copy of all installation instructions for all Product Approved side wall horizontally vented gas fueled equipm ent, all venting instructions, all parts lists for venting instructions, and/or all venting design instructions shall remain with the appliance or equipment at the completion of the installation. Regency ® E18E Gas Fireplace Insert...
-
Page 7: Installation
APPLIANCE CORRECTLY WILL VOID 8. Inspect the venting system annually for blockage YOUR WARRANTY AND MAY CAUSE A and any signs of deterioration. The Regency Gas Fireplace must be installed in ® SERIOUS HOUSE FIRE. accordance with these instructions. Carefully read 9. -
Page 8: Installation Checklist
Important: Always check for gas leaks age is not the responsibility of the manufacturer. with a soap and water solution or gas leak detector. Do not use open flame for leak testing. Regency ® E18E Gas Fireplace Insert... -
Page 9: Pilot Adjustment
Pilot Ignitor ports on the valve. 1. Make sure the switch is in the "OFF" position. Note: If you have an incorrect flame pattern, contact your Regency dealer for ® 2. Loosen the "IN" and/or "OUT" pressure further instructions. tap(s), turning counterclockwise with a 1/8"... -
Page 10: Materials Required
Plug the 3 wire cord into a suitable recepta- bustibles. cle. Do not cut the ground terminal off under any Montigo EP28-2 circumstances. When connected with 120 volts, The Regency ® Insert incorporates its own internal Montigo EP28-4 the appliance must be electrically grounded in ac-... -
Page 11: Minimum Fireplace Clearances To Combustibles
36" 42 3/4" 914mm 1086mm 32" 813mm Diagram 3.1 29" 737mm Sidewall Ceiling 45deg 37 7/8" Mantel Allowable Mantle 961mm area 17 7/8" 453mm 9" 37 1/2" 6" Floor 229mm 952mm 153mm Diagram 3.2 Regency E18E Gas Fireplace Insert ®... -
Page 12: Zero Clearance Framing Dimensions
37 - 7/16" (951mm) Framing Depth 15-1/2" (394mm) Electrical connection: 110v required Fan must be on at all times to operate this unit. Note: All framing may be of wood construction. Finished Floor 12 | Regency ® E18E Gas Fireplace Insert... - Page 13 8. Disconnect venting from existing unit - remove carefully to avoid damage. 9. Remove existing unit from framed opening. 10. Measure framed opening and compare to dimension requirements. Additional adjustments to framed opening may be required. Regency E18E Gas Fireplace Insert ®...
- Page 14 14. Secure surround to the stud on each side with screws. hole Right side shown Use 4 screws on each side to secure surround to studs. Outside firebox shown in position - refer to measurements (Step 18) before securing to surround. 14 | Regency ® E18E Gas Fireplace Insert...
- Page 15 20. Follow instructions in the installation into existing unit section in the SCALE 1 : 4 manual to complete the install of inner firebox. Follow Step 21 before installing faceplate. Collar Plate Setting / Vent position Regency E18E Gas Fireplace Insert ®...
- Page 16 • Black high temp paint • Drill/ ¼” bit – Phillips bit Nibbler • Measuring tape • Level • Sharpie • Shop vacuum Optional: • Plasma cutter • Fibre drop sheet • Fire extinguisher Oscillating tool 16 | Regency ® E18E Gas Fireplace Insert...
-
Page 17: Zero Clearance Framing E18E
Refer to particular approved appliance in which the E18E is being installed into for the following: Existing unit modifications Adaptor setting Before separating Outer Shell and Required flex length Unit—Clear wire harness Outer shell Leg setting / outer shell position both need to be exact as measurements indicated. Regency E18E Gas Fireplace Insert ®... -
Page 18: Modification Of Montigo Ep28-2, Ep28-4 Or Ep28-5
Alternate method is to cut front bar in the center and break off each side spot weld completely. Diagram 5.4 Modified edges must be flush to allow proper seating of the E18E outer shell. Diagram 5.2 Grind corners 18 | Regency ® E18E Gas Fireplace Insert... -
Page 19: E18E Installation Specifications
3 Install with supplied Phillips screws to pre-punched holes and tighten previous screws that were loosened in Step 1. 4 1/8" 4. Keep left side leg loose until outer firebox is in position in ZC box - to allow adjustment of gas line. 105mm Regency E18E Gas Fireplace Insert ®... -
Page 20: Modification Of Montigo Ep28-S2
6. Remove Primary and Secondary Limit Switches (See Diagram 6.4). Diagram 6.1 4. Remove Side Filler Plates and Front Hood (See Diagram 6.2). Diagram 6.4 7. Remove Insert (See Diagram 6.5). Diagram 6.2 Diagram 6.5 20 | Regency ® E18E Gas Fireplace Insert... - Page 21 From this point installation is the same as the EP28-5. Diagram 6.7 10. Remove the leftover ends of the front bar on the Left and Right sides so that they are flush with the sides of the firebox. (See Diagram 6.8) Diagram 6.8 Regency E18E Gas Fireplace Insert ®...
-
Page 22: Modification Of Montigo Econo Plus 28C
8. Remove 2 bolts from underneath, to remove valve, log tray, etc. 9. Lift entire assembly out. Remove 2 screws - remove Top Bracket 5. Remove Bracket and Thermodisc by removing 2 screws. Remove 2 bolts Remove 2 screws - remove Thermodisc Bracket 22 | Regency ® E18E Gas Fireplace Insert... - Page 23 14 Cut out back cross bar to complete modification. Fold back any excess metal after removing the cross piece. Flatten louver brackets 12. Flatten flange (left ,right and rear) in locations shown below. Cut out back cross bar Regency E18E Gas Fireplace Insert ®...
- Page 24 Faceplate is centered, mark and drill 2 holes per side. The pre drilled holes should line up with the outer shell holes. Remove outer faceplate and continue with E18E installation. Install outer faceplate 24 | Regency ® E18E Gas Fireplace Insert...
- Page 25 Step 1. 66mm 4. Keep left side leg loose until outer firebox is in position in ZC box - to allow adjustment of gas line. E18 Insert 28-F / 28F-2 Firebox Flex Adaptor Length Regency E18E Gas Fireplace Insert ®...
-
Page 26: Modification Of Montigo 28F-2 Or 28-F
4. Remove Logs and Sand from Sand Pan. 5. Remove Front Bar. (See Diagram 7.2). Diagram 7.4 8. Unscrew left and right side nuts, under the firebox, holding down the Sand Pan. (see Diagram 7.5) Diagram 7.2 Diagram 7.5 26 | Regency ® E18E Gas Fireplace Insert... - Page 27 Firebox and Cut the Top of the Firebox 1” below the bottom of the Exhaust Collar (See Diagram 7.11 and 7.12). Diagram 7.7 11. Cut the Sides of the Top Face (See Diagram 7.8). Diagram 7.11 Diagram 7.12 Diagram 7.8 Regency E18E Gas Fireplace Insert ®...
- Page 28 15. Final Firebox Should Look Like Diagram 7.14. 14. Bend the Louver Mounts Flat. (See Diagram 7.13) Diagram 7.14 Diagram 7.13 Modified edges must be flush to allow proper seating of the E18E outerbox. 28 | Regency ® E18E Gas Fireplace Insert...
-
Page 29: 28 F / 28 F2 Installation Specifications
Step 1. 66mm 4. Keep left side leg loose until outer firebox is in position in ZC box - to allow adjustment of gas line. E18 Insert 28-F / 28F-2 Firebox Flex Adaptor Length Regency E18E Gas Fireplace Insert ®... -
Page 30: Modification Of Montigo 28F-3
Sand Pan. (see Diagram 4) Diagram 1 4. Remove Logs and Sand from Sand Pan. 5. Disconnect Pilot Gas Line and Pilot Thermopile from the Valve. Disconnect Thermostat wires from valve. Diagram 4 Diagram 2 30 | Regency ® E18E Gas Fireplace Insert... - Page 31 10. Cut out the bottom of the Firebox (See Diagram 7) Cut must be clean - with Max. 1/4" of material left. 12. Unscrew the top bar from location shown below. Diagram 7 Diagram 10 Regency E18E Gas Fireplace Insert ®...
- Page 32 17. Cut the sides of the top face, as shown below. Diagram 12 15. Unscrew the side* and back plates located in the firebox, as shown below. *Not all unit have side plates Diagram 16 Diagram 13 32 | Regency ® E18E Gas Fireplace Insert...
- Page 33 19. Cut the sides of the top of the firebox flush with the sides of the firebox and cut the top of the firebox 1” below the bottom of the exhaust collar (See Diagram 19 below). Diagram 21 Diagram 19 Regency E18E Gas Fireplace Insert ®...
-
Page 34: 28F-3 Installation Specifications
4. Keep left side leg loose until outer firebox is in position in ZC box - to allow adjustment of gas line. E18 Insert 28-F / 28F-2 Firebox Flex Adaptor Length 34 | Regency ® E18E Gas Fireplace Insert Adaptor Plate fastener setting... -
Page 35: Modification Of Montigo 36Sr
3. Remove Glass Doors and Screen Mesh (See Diagram 8.1). 4. Remove Logs and Sand from Sand Pan. 5. Remove Top Rail securing the Bifold Doors (See Diagram 8.2). Diagram 8.4 7. Remove Brick Liner Panels (See Diagram 8.4). Diagram 8.2 Diagram 8.5 Regency E18E Gas Fireplace Insert ®... - Page 36 Top Left and right corner screws back in (See Diagram 8.9 and 8.10). 12. Unscrew Left and Right Nuts Underneath the Firebox Holding Down the Sand Pan. (See Diagram 8.7) 13. Remove Sand Pan and Pilot Assembly. Diagram 8.9 Diagram 8.7 Diagram 8.10 36 | Regency ® E18E Gas Fireplace Insert...
- Page 37 16. Remove Louver Supports in all 4 corners of the Appliance (See 17. Final firebox should look like Diagram 8.12. Diagram 8.11). Diagram 8.12 Diagram 8.11 Modified edges must be flush to allow proper seating of the E18E outerbox. Regency E18E Gas Fireplace Insert ®...
- Page 38 3. Install with supplied Phillips screws to prepunched holes and tighten previous screws that were loosened in Step 1. 4. Keep left side leg loose until outer firebox is in position in ZC box - to allow adjustment of gas line. 38 | Regency ® E18E Gas Fireplace Insert...
- Page 39 6. Bend the Inner Rear Baffle up so it is flush with the back of the Firebox or cut off the Baffle if it will not bend flat with the back of the Firebox. Diagram 9.2 Regency E18E Gas Fireplace Insert ®...
- Page 40 7. Cut The Top Front Flange of the Firebox (See Diagram 9.5). should look like Diagram 9.6. Diagram 9.6 Diagram 9.5 Modified edges must be flush to allow proper seating of the E18E outerbox. 40 | Regency ® E18E Gas Fireplace Insert...
- Page 41 Vents on center screws that were loosened in Step 1. E18 Insert 4. Keep left side leg loose until outer firebox is in position in ZC box - to allow adjustment of gas line. Regency E18E Gas Fireplace Insert ®...
-
Page 42: Modification Of Firesong 120N
4. Remove Top Rail securing Mesh. (See Diagram 10.3). 5. Shut off and disconnect gas line from valve. Diagram 10.6 9. Remove Valve. 10. Make 2 vertical cuts on Top Facing. (See Diagram 10.7). Diagram 10.3 Diagram 10.7 42 | Regency ® E18E Gas Fireplace Insert... - Page 43 Diagram 10.11 Back bar Diagram 1.9 Diagram 10.9 13. Remove 6 screws, one at a time, and replace with pan head (wafer screws) - in locations shown below. Diagram 10.12 Diagram 10.10 Diagram 10.13 Regency E18E Gas Fireplace Insert ®...
- Page 44 16. Repeat Steps 14 & 15 on left side. 17. Remove existing Firesong rating plate from cut out firebox. This rating plate must be retained and affixed to the unit. (See Diagram 10.15 and 10.16). Diagram 10.15 44 | Regency ® E18E Gas Fireplace Insert...
-
Page 45: E18E Installation Specifications
4. Keep left side leg loose until outer firebox is in position in ZC box - to allow adjustment of gas line. Vents on center See Step #2: Outer Shell installation for procedure. E18 Insert Regency E18E Gas Fireplace Insert ®... -
Page 46: Installation Of The E18E Into Existing Units
BURNING APPLIANCE. Slide Plate Retainer Diagram 11.1 STEP #1: VENT CONNECTION (FIRESONG 120N) 1. Attach the Flex Vent Section to the Adaptor Plate using 3 self drilling sheet metal screws. Diagram 11.2 46 | Regency ® E18E Gas Fireplace Insert... -
Page 47: Step #2: Outer Shell Installation
Outer Shell to the existing firebox using self drilling and tapping screws. 6) Locate and install the Surround Mounting Brackets Right and Left. 7) Using 2 screws provided, install the Control Box into a slot provided in the Surround Mounting Bracket Left. Regency E18E Gas Fireplace Insert ®... -
Page 48: Step #4: Surround Installation
See diagrams below. by screwing 4 self tapping screws on fl anges. 2 female wires Power cord (911-245) through supplied grommet Yellow wire Red wire Diagram 13.2 Diagram 13.4 11.28.17 919-216c 48 | Regency ® E18E Gas Fireplace Insert... - Page 49 11. Install control cover, adjust horizontal alignment by sliding control cover to ensure even spacing on both sides. Ensure control cover is seated down all the way. Diagram 13.7 DRAFT RELIEF OPENINGS MUST NOT BE COVERED OR BLOCKED. Regency E18E Gas Fireplace Insert ® 919-216c 11.28.17...
-
Page 50: Zero Clearance Faceplate Installation
8. Disconnect venting from existing unit - remove carefully to avoid damage. 9. Remove existing unit from framed opening. 10. Measure framed opening and compare to dimension requirements. Additional adjustments to framed opening may be required. 50 | Regency ® E18E Gas Fireplace Insert 919-831a 11.29.17... - Page 51 Assemble the ZC surround with 4 screws on each side. 3. Secure surround to the stud on each side with wood screws (not sup- plied). Use 4 screws on each side to secure surround to studs. Regency E18E Gas Fireplace Insert ®...
- Page 52 10. Install lower trim piece with 2 (904-897) screws to the bottom of the ZC surround before installing faceplate. Outside rebox shown in position - refer to measurements (Step 7) before securing to surround. 52 | Regency ® E18E Gas Fireplace Insert 919-831a 11.29.17...
- Page 53 Note the orientation of the on/off switch wires. See diagrams below. 2 female wires Power cord (911-245) through supplied grommet Yellow wire Red wire Diagram 13.2 Diagram 13.4 Regency E18E Gas Fireplace Insert ® 919-831a 11.29.17...
- Page 54 11. Install control cover, adjust horizontal alignment by sliding control cover to ensure even spacing on both sides. Ensure control cover is seated down all the way. Diagram 13.7 DRAFT RELIEF OPENINGS MUST NOT BE COVERED OR BLOCKED. 54 | Regency ® E18E Gas Fireplace Insert 919-831a 11.29.17...
-
Page 55: Optional Wall Thermostat
Optional Optional WALL THERMOSTAT REMOTE CONTROL WALL SWITCH Use the Regency Remote Control Kit approved 1. Run up to 10' of wire through the right or ® A wall thermostat may be installed if desired, for this unit. Use of other systems may void your left side gas inlet opening. -
Page 56: Ac Power Adaptor Installation
Note: This should only be plugged in when unit is fully installed and ready for use. Note: Ensure that wires do not touch the underside of the firebox (keep wires away from the heat as much as possible). FCM - COM 56 | Regency ® E18E Gas Fireplace Insert... -
Page 57: Gtm Remote Installation
8. Plug wiring harness into back of receiver as shown below. White White 5. See AC adaptor install instructions in this manual. 9. Plug the stepper motor into the ‘motor wire as shown below. Motor Wire 06.26.17 919-803 Regency E18E Gas Fireplace Insert ®... - Page 58 13. Switch on left side of faceplate must be in <ON> position. 14. Match the remote control to the receiver - see remote control instructions. 15. Reverse steps 2 and 1. 58 | Regency ® E18E Gas Fireplace Insert 919-803 06.26.17...
-
Page 59: Conversion - Natural Gas To Propane
These instructions must be left with the Unscrew the pilot orifice with the allen key; Burner Orifice appliance. then replace with the LPG pilot orifice and the pilot cap, provided in the kit. Burner Orifice Regency E18E Gas Fireplace Insert ® 06.19.17 919-790... -
Page 60: Glass Burner Installation / Removal
2. Make sure to feed the Air Shutter Bar through the lower hole in the valve tray, just above the ignitor as you place the Glass Burner in. Diagram 14.4 Diagram 14.2 5. To remove--reverse Steps 4-1 60 | Regency ® E18E Gas Fireplace Insert... -
Page 61: Enamel Panel Installation
1. Centre back panel on the back wall of the fi rebox. with one screw (provided). Panel Clip 2. Slide in side panel into place in lower track. 4. Repeat steps 2 & 3 on other side. Final Install 04/04/13 919-203 Regency E18E Gas Fireplace Insert ®... -
Page 62: Glass Crystals And Optional Ceramic Spa Or Volcanic
NOTE: Correct final glass installation of Crystals shown in step 3 and 4. The Burner and Firebox Floor should not be visible when the flame is out. OPTIONAL SPA OR VOLCANIC STONES INSTALLATION (AROUND BURNER) Diagram 15.7 Diagram 15.8 NOTE: Spa or Volcanic Stones are NOT to be placed anywhere on the burner tube or Pilot assembly area. 62 | Regency ® E18E Gas Fireplace Insert... -
Page 63: Brick Panel Installation
3. Position panel so that grout line in the panel lines up with screw in the baffle. 4. If required, lower screw to secure panel in position. Line up screw and grout line. 10/03/12 919-193 Regency E18E Gas Fireplace Insert ®... -
Page 64: Log Tray Installation
3. Install the Log Burner the same way as the Glass Burner (see installation manual for instructions). 4. Fill the Log Burner with 2lbs of black glass crystals. 2. Place Log B at the front left of the Log Tray. 64 | Regency ® E18E Gas Fireplace Insert 10/03/12 919-190... - Page 65 Ember Lava, Embaglow, Platinum Embers Final Install 5. Place Log D on the left pin of Log A and the groove in Log B. Regency E18E Gas Fireplace Insert ® 919-190...
-
Page 66: Optional Log Set Installation
5. Install log brackets by clipping brackets to back of burner tray - measure 4" from outside edge of the burner tray to outside edge of bracket. 4" 4-1/2" Log 2 in position Brackets installed 4" from outside edge of burner tray 02.10.16 919-283 66 | Regency ® E18E Gas Fireplace Insert... - Page 67 11. Installed Log 3 should touch burner position in the location shown below. * Measurement taken from left edge of burner tray - approximately 18". E18 nal install 18" Installed position of Log 3 Regency E18E Gas Fireplace Insert ® 919-283 02.10.16...
-
Page 68: Glass Door / Screen
1. Remove Door as per E18E Installation sec- tion of the manual. 2. Remove the 4 screws to remove Safety Screen from Door. 3. Reverse order to reattach. 4. Install control cover supplied with screen. Safety Screen Diagram 16.3 68 | Regency E18E Gas Fireplace Insert ®... -
Page 69: Drafthood Check
If the heater turns off because of lack of draft during the spillage test, check for the cause and if necessary, seek expert advice. Drafthood Opening E18 Shown with front faceplate removed Proper Draft Improper Draft Diagram 17.1 Regency E18E Gas Fireplace Insert ®... -
Page 70: Safety Switches
1. Open channel and feed cord through. Jun. 19/17: created decal Sept. 22/17: updated decal 2. Peel off backing of cord channel and adhere to hearth. Flame Control Flame control Diagram 18.1 70 | Regency ® E18E Gas Fireplace Insert... -
Page 71: Operating Instructions
If service is to be performed - you must disconnect power to the unit. Appuyer sur la touche ON / OFF de l'interrupteur. Lors de l'entretien de l'appareil, vous devez débrancher l'alimentation électri- que et couper le gaz alimentant l'appareil. DO NOT REMOVE THIS INSTRUCTION PLATE 919-791 Regency E18E Gas Fireplace Insert ®... -
Page 72: Operating Instructions
The glass should be cleaned or the film will bake on and become very difficult to remove. Use a non-abrasive cleaner and NEVER clean the glass while it is hot. 72 | Regency ® E18E Gas Fireplace Insert... -
Page 73: Maintenance
While the pilot flame is on it can make a very slight and should only be refinished with heat resist- GLASS WHILE IT IS HOT. "whisper" sound. ant paint (not with wall paint). Regency uses ® StoveBrite Paint - Metallic Black #6309. -
Page 74: Log Replacement
GLASS REPLACEMENT In the event that you break your glass by impact, purchase your replacement from an authorized Regency dealer only. Replacement glass (Part #616-518/P) is shipped already installed into the door frame. Reinstall as per Glass Door Installation in the "Glass Door Removal" section. -
Page 75: Valve Replacement
7. Unscrew the 8 screws holding down the Valve Tray. Diagram 19.2 8. Slide the Valve Tray out about half way giving easier access to the gas connection at the valve. Diagram 19.3 9. Disconnect the gas line and remove the valve tray. Regency E18E Gas Fireplace Insert ®... -
Page 76: Removing The Fan
8. Loosen 4 screws holding in Air Inlet Baffle and remove it. 9. Loosen 3 screws holding in the Circulation Fan. 10. Disconnect Power Leads on Fan Motor Diagram 20.2 11. Reverse Steps to reinstall. 76 | Regency ® E18E Gas Fireplace Insert... -
Page 77: Wiring Diagrams
(grounding) plug for your protection against shock cause improper and dangerous hazard and should be plugged directly into a prop- operation. erly grounded three-prong receptacle. Do not cut or remove the grounding prong from this plug. Regency E18E Gas Fireplace Insert ®... -
Page 78: Wiring Diagrams
Fan must always operate with this unit. Diagram 21.2 1. Remove wire labelled 911-240 in diagram above for GTM Remote and thermostat installation. 2. Remote and thermostat must be wired in series. 78 | Regency ® E18E Gas Fireplace Insert... - Page 79 Valve Assembly - LP 911-210 External Antenna 911-004 Valve Only - NG 886 SIT IPI High/Low 0.886.002 918-835 Decal Logo Regency / Flame Sit Remote 911-005 Valve Only - LP 886 SIT IPI High/Low 0.886.003 918-875 Decal Remote Quick Reference GTM 911-006 Pilot Assembly IPI NG 2 Flame 0.199.050...
-
Page 80: Parts List
Diagram 22.1 80 | Regency ® E18E Gas Fireplace Insert... -
Page 81: Ep28 Installation Kit
616-068 Surround Panel Rear 904-960 Ring clamp -Installer supplied 616-067 Surround Front 948-338 Flex Vent Section - Installer supplied 9 Magnet and Bracket 616-023 Flue Slider Plate 616-051 Control Cover Upper Trim/ heat shield Regency E18E Gas Fireplace Insert ®... -
Page 82: Montigo Econo Plus 28C Installation Kit
Ring clamp -Installer supplied 904-057 Magnet and Bracket 948-338 Flex Vent Section - Installer supplied 12 616-051 Control Cover 616-023 Flue Slider Plate 616-053 Upper Trim/ heat shield - remove and discard 82 | Regency ® E18E Gas Fireplace Insert... -
Page 83: Montigo 28-F & 28F-2 Installation Kit
616-069 Adaptor plate 616-068 Surround Panel Rear 616-067 Surround Panel Right 904-960 Ring clamp -Installer supplied Magnet and Bracket 948-338 Flex Vent Section - Installer supplied 11 616-051 Control Cover 616-023 Flue Slider Plate Regency E18E Gas Fireplace Insert ®... -
Page 84: Montigo 28-F3 Installation Kit
Montigo 28-F3 Installation Kit Diagram 22.5 Item Part # Description Item Part # Description Faceplate panel Front Ring Clamp Magnet Bracket (not shown) Flex section Control Cover Adaptor Slide Plate E18E Chassis Faceplate panel Rear 84 | Regency ® E18E Gas Fireplace Insert... -
Page 85: Montigo 36Sr Installation Kit
Montigo 36SR Installation Kit (Requires 4" liner) Diagram 21.5 Diagram 22.6 Item Part # Description Item Part # Description Surround panel Front Magnet Bracket (not shown) Control Cover Adaptor Slide Plate E18E Chassis Surround Panel Rear Regency E18E Gas Fireplace Insert ®... -
Page 86: Firesong 220N Installation Kit
Firesong 220N Installation Kit Diagram 22.7 86 | Regency ® E18E Gas Fireplace Insert... -
Page 87: Firesong 120N Installation Kit
Diagram 22.8 Item Part # Description Item Part # Description Faceplate panel Front Ring Clamp Magnet Bracket (not shown) Flex section Control Cover Adaptor Slide Plate Firesong 120N Firebox supports E18E Chassis Faceplate Panel Rear Regency E18E Gas Fireplace Insert ®... - Page 88 88 | Regency ® E18E Gas Fireplace Insert...
- Page 89 FPI is not responsible for results or costs of workmanship of unauthorized FPI dealers or agents in the negligence of their service work. Revision Date: December 2016 Regency Gas Products Warranty Regency E18E Gas Fireplace Insert...
-
Page 90: Warranty
Freight damages for products or parts are not covered under the terms of the warranty. Products made or provided by other manufacturers and used in conjunction with the FPI appliance without prior authorization from FPI may void this warranty. Revision Date: December 2016 Regency Gas Products Warranty 90 | Regency ®... - Page 91 Product Registration and Customer Support: Thank you for choosing a Regency Fireplace. Regency strives to be a world leader in the design, manufacture, and marketing of hearth products. To provide the best support for your product, we request that you complete a product registration form at http://www.regency-fire.com/Customer-Care/Warranty-Registration.aspx...
- Page 92 Product Registration and Customer Support: Thank you for choosing a Regency Fireplace. Regency strives to be a world leader in the design, manufacture, and marketing of hearth products. To provide the best support for your product, we request that you complete a product registration form found on our Web Site under Customer Care within ninety (90) days of purchase.
- Page 93 Regency E18E Gas Fireplace Insert ®...
- Page 94 94 | Regency ® E18E Gas Fireplace Insert...
- Page 95 Regency E18E Gas Fireplace Insert ®...
- Page 96 Dealer Name & Address: ______________________________________________ ___________________________________________________________________ Installer: ___________________________________________________________ Phone #: ___________________________________________________________ Date Installed: ______________________________________________________ Serial No.: __________________________________________________________ Printed in Canada Regency and Energy are trademarks of FPI Fireplace Products International Ltd. © Copyright 2018, FPI Fireplace Products International Ltd. All rights reserved.
Need help?
Do you have a question about the Energy E18E and is the answer not in the manual?
Questions and answers