SICK microScan3 Operating Instructions Manual
Core i/o aida safety laser scanner
Hide thumbs
Also See for microScan3:
- Operating instructions manual (212 pages) ,
- Technical information (64 pages) ,
- Mounting instructions (19 pages)

Related Manuals for SICK microScan3


Summary of Contents for SICK microScan3
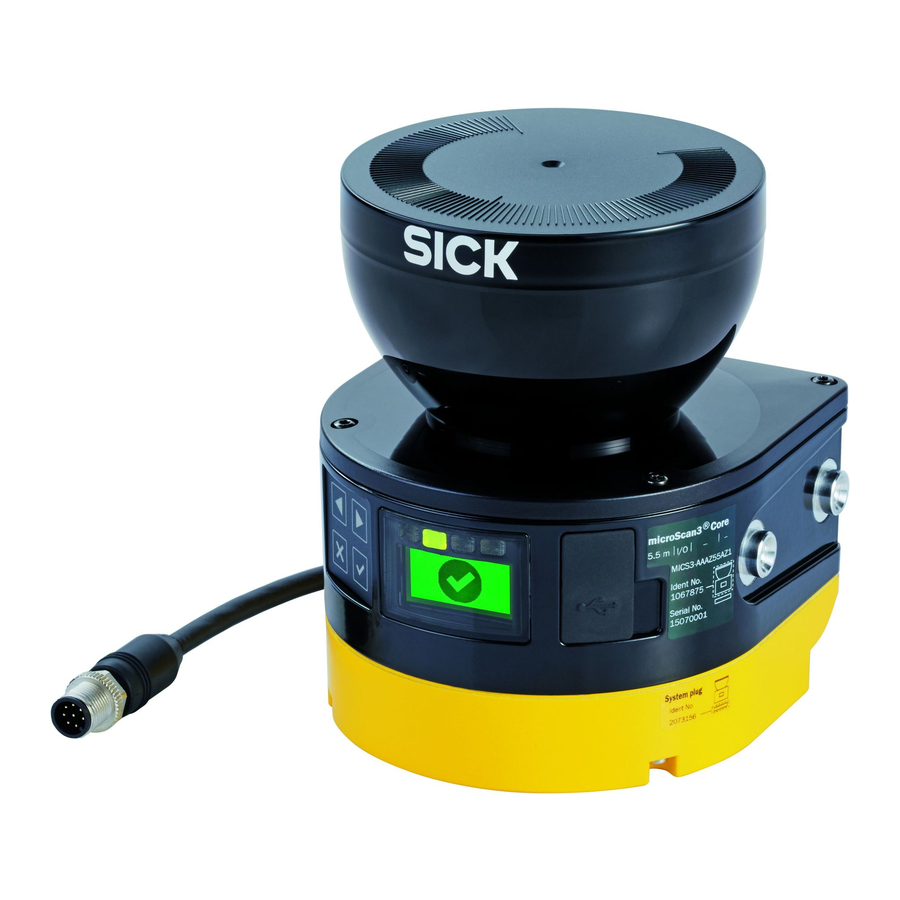
- Page 1 O P E R A T I N G I N S T R U C T I O N S microScan3 Core I/O AIDA Safety laser scanner...
- Page 2 Original document This document is an original document of SICK AG. O P E R A T I N G I N S T R U C T I O N S | microScan3 Core I/O AIDA 8017784/11JR/2018-10-25 | SICK...
-
Page 3: Table Of Contents
4.5.2 Recommendations for further thorough checks....8017784/11JR/2018-10-25 | SICK O P E R A T I N G I N S T R U C T I O N S | microScan3 Core I/O AIDA Subject to change without notice... - Page 4 Drawing in points that cannot be monitored......7.9.8 Enable propose field..............O P E R A T I N G I N S T R U C T I O N S | microScan3 Core I/O AIDA 8017784/11JR/2018-10-25 | SICK Subject to change without notice...
- Page 5 Status display................119 11.3.2 Detailed diagnostics..............121 8017784/11JR/2018-10-25 | SICK O P E R A T I N G I N S T R U C T I O N S | microScan3 Core I/O AIDA Subject to change without notice...
- Page 6 List of figures..................155 List of tables..................157 O P E R A T I N G I N S T R U C T I O N S | microScan3 Core I/O AIDA 8017784/11JR/2018-10-25 | SICK Subject to change without notice...
-
Page 7: About This Document
8017784/11JR/2018-10-25 | SICK O P E R A T I N G I N S T R U C T I O N S | microScan3 Core I/O AIDA Subject to change without notice... -
Page 8: Further Information
Ö The LED is flashing. O The LED is illuminated continuously. O P E R A T I N G I N S T R U C T I O N S | microScan3 Core I/O AIDA 8017784/11JR/2018-10-25 | SICK... -
Page 9: Safety Information
8017784/11JR/2018-10-25 | SICK O P E R A T I N G I N S T R U C T I O N S | microScan3 Core I/O AIDA Subject to change without notice... -
Page 10: Correct Use
O P E R A T I N G I N S T R U C T I O N S | microScan3 Core I/O AIDA 8017784/11JR/2018-10-25 | SICK... - Page 11 111, see "Operation", page 106. 8017784/11JR/2018-10-25 | SICK O P E R A T I N G I N S T R U C T I O N S | microScan3 Core I/O AIDA Subject to change without notice...
-
Page 12: Product Description
A rotating mirror is situated in the safety laser scanner. The mirror deflects the light pulses so that they scan a fan-shaped area. O P E R A T I N G I N S T R U C T I O N S | microScan3 Core I/O AIDA 8017784/11JR/2018-10-25 | SICK... -
Page 13: Light Pulses Scan An Area
8017784/11JR/2018-10-25 | SICK O P E R A T I N G I N S T R U C T I O N S | microScan3 Core I/O AIDA Subject to change without notice... -
Page 14: Product Characteristics
O P E R A T I N G I N S T R U C T I O N S | microScan3 Core I/O AIDA 8017784/11JR/2018-10-25 | SICK... -
Page 15: Variants
Lights up while the con‐ figured time to restart expires. 8017784/11JR/2018-10-25 | SICK O P E R A T I N G I N S T R U C T I O N S | microScan3 Core I/O AIDA Subject to change without notice... -
Page 16: Connections
The USB connection may only be used temporarily and only for configuration and diagnostics. O P E R A T I N G I N S T R U C T I O N S | microScan3 Core I/O AIDA... -
Page 17: Protective Field, Shown In Red In This Document
8017784/11JR/2018-10-25 | SICK O P E R A T I N G I N S T R U C T I O N S | microScan3 Core I/O AIDA Subject to change without notice... -
Page 18: Field Set
When the hazardous area is entered, a stop signal is triggered and starting is prevented. O P E R A T I N G I N S T R U C T I O N S | microScan3 Core I/O AIDA 8017784/11JR/2018-10-25 | SICK... -
Page 19: Hazardous Point Protection: Hand Detection
In access protection, people are detected if their whole body passes through the protec‐ tive field. 8017784/11JR/2018-10-25 | SICK O P E R A T I N G I N S T R U C T I O N S | microScan3 Core I/O AIDA Subject to change without notice... -
Page 20: Access Protection: Detection Of A Person When Accessing A Hazardous Area
Figure 11: Mobile hazardous area protection: detection of a person when a vehicle approaches O P E R A T I N G I N S T R U C T I O N S | microScan3 Core I/O AIDA... -
Page 21: Project Planning
Information about the individual steps for mounting the device: see "Mounting", page 8017784/11JR/2018-10-25 | SICK O P E R A T I N G I N S T R U C T I O N S | microScan3 Core I/O AIDA Subject to change without notice... -
Page 22: Prevent Crawling Beneath
Figure 12: Prevent crawling beneath Figure 13: Prevent stepping over O P E R A T I N G I N S T R U C T I O N S | microScan3 Core I/O AIDA 8017784/11JR/2018-10-25 | SICK Subject to change without notice... -
Page 23: Protection From Influences
You must comply with the standard ISO 13855 when choosing the mounting method. 8017784/11JR/2018-10-25 | SICK O P E R A T I N G I N S T R U C T I O N S | microScan3 Core I/O AIDA Subject to change without notice... -
Page 24: Preventing Unprotected Areas
If required, this area must be secured using an undercut or frame, for example. O P E R A T I N G I N S T R U C T I O N S | microScan3 Core I/O AIDA 8017784/11JR/2018-10-25 | SICK... -
Page 25: Mounting With Deflector Plates (Example)
8017784/11JR/2018-10-25 | SICK O P E R A T I N G I N S T R U C T I O N S | microScan3 Core I/O AIDA Subject to change without notice... -
Page 26: Response Time Of The Safety Laser Scanner
+30°. O P E R A T I N G I N S T R U C T I O N S | microScan3 Core I/O AIDA 8017784/11JR/2018-10-25 | SICK... - Page 27 You can define a number of contours in the reference contour field and so monitor various areas in the environment. 8017784/11JR/2018-10-25 | SICK O P E R A T I N G I N S T R U C T I O N S | microScan3 Core I/O AIDA Subject to change without notice...
-
Page 28: Opening, Edge Of The Protected Opening = Reference Contour)
Distance of the protective field from the contour, to ensure availability o = overrun of the protective field over the opening O P E R A T I N G I N S T R U C T I O N S | microScan3 Core I/O AIDA 8017784/11JR/2018-10-25 | SICK... -
Page 29: Hazardous Area Protection
In many cases, a resolution of 50 mm to 70 mm is suitable for hazardous area protec‐ tion. 8017784/11JR/2018-10-25 | SICK O P E R A T I N G I N S T R U C T I O N S | microScan3 Core I/O AIDA Subject to change without notice... - Page 30 O P E R A T I N G I N S T R U C T I O N S | microScan3 Core I/O AIDA...
- Page 31 The protective field range depends on the set scan cycle time and resolution. 8017784/11JR/2018-10-25 | SICK O P E R A T I N G I N S T R U C T I O N S | microScan3 Core I/O AIDA Subject to change without notice...
-
Page 32: Protection Against Reaching Over When Mounted Low (Dimensions In Mm)
= height of the protective field above the floor in millimeters (mm). ° O P E R A T I N G I N S T R U C T I O N S | microScan3 Core I/O AIDA 8017784/11JR/2018-10-25 | SICK... -
Page 33: Scan Plane At Ankle Height
Figure 23: Scan plane at ankle height 8017784/11JR/2018-10-25 | SICK O P E R A T I N G I N S T R U C T I O N S | microScan3 Core I/O AIDA Subject to change without notice... -
Page 34: Scan Plane At Calf Height
/15 + 50 mm where: O P E R A T I N G I N S T R U C T I O N S | microScan3 Core I/O AIDA 8017784/11JR/2018-10-25 | SICK Subject to change without notice... -
Page 35: Distance Of The Protective Field From The Wall
Attaching deflector plates Attaching fence 8017784/11JR/2018-10-25 | SICK O P E R A T I N G I N S T R U C T I O N S | microScan3 Core I/O AIDA Subject to change without notice... -
Page 36: Hazardous Point Protection
(see "Reference contour monitoring", page 26). O P E R A T I N G I N S T R U C T I O N S | microScan3 Core I/O AIDA 8017784/11JR/2018-10-25 | SICK Subject to change without notice... - Page 37 Provide suitable additional measures if necessary. 8017784/11JR/2018-10-25 | SICK O P E R A T I N G I N S T R U C T I O N S | microScan3 Core I/O AIDA Subject to change without notice...
- Page 38 If the result is S > 500 mm, you may be able to reduce the minimum distance using the following calculation: O P E R A T I N G I N S T R U C T I O N S | microScan3 Core I/O AIDA 8017784/11JR/2018-10-25 | SICK...
-
Page 39: Access Protection
(see "Reference contour monitoring", page 26). 8017784/11JR/2018-10-25 | SICK O P E R A T I N G I N S T R U C T I O N S | microScan3 Core I/O AIDA Subject to change without notice... - Page 40 O P E R A T I N G I N S T R U C T I O N S | microScan3 Core I/O AIDA 8017784/11JR/2018-10-25 | SICK...
-
Page 41: Mobile Hazardous Area Protection
The safety laser scanner detects a person’s legs. The protective field is parallel to the direction of approach. 8017784/11JR/2018-10-25 | SICK O P E R A T I N G I N S T R U C T I O N S | microScan3 Core I/O AIDA Subject to change without notice... -
Page 42: Mobile Application In Horizontal Operation For Hazardous Area Protection
When calculating the protective field length, the impact of turning must be considered separately. O P E R A T I N G I N S T R U C T I O N S | microScan3 Core I/O AIDA 8017784/11JR/2018-10-25 | SICK... -
Page 43: Flat-Rate Supplement Zf For Lack Of Ground Clearance
8017784/11JR/2018-10-25 | SICK O P E R A T I N G I N S T R U C T I O N S | microScan3 Core I/O AIDA Subject to change without notice... -
Page 44: Minimum Supplement For Lack Of Ground Clearance
A vehicle’s braking distance does not increase linearly with increasing speed, but rather in a squared relationship. O P E R A T I N G I N S T R U C T I O N S | microScan3 Core I/O AIDA 8017784/11JR/2018-10-25 | SICK... -
Page 45: Stopping Distance As A Function Of The Vehicle's Speed
≤ 6 m), you must take the supplement Z 350 mm into account. 8017784/11JR/2018-10-25 | SICK O P E R A T I N G I N S T R U C T I O N S | microScan3 Core I/O AIDA Subject to change without notice... - Page 46 In many cases, a mounting height of 150 mm above the floor (height of the scan plane) is suitable. O P E R A T I N G I N S T R U C T I O N S | microScan3 Core I/O AIDA 8017784/11JR/2018-10-25 | SICK...
-
Page 47: Integrating The Equipment Into The Electrical Control
The signal is analyzed with a safety controller. 8017784/11JR/2018-10-25 | SICK O P E R A T I N G I N S T R U C T I O N S | microScan3 Core I/O AIDA Subject to change without notice... -
Page 48: Voltage Supply
Use the same earthing method for all devices that are electrically connected to the safety laser scanner. O P E R A T I N G I N S T R U C T I O N S | microScan3 Core I/O AIDA 8017784/11JR/2018-10-25 | SICK... -
Page 49: Usb Connection
Figure 34: Dual-channel and isolated connection of OSSD1 and OSSD2 8017784/11JR/2018-10-25 | SICK O P E R A T I N G I N S T R U C T I O N S | microScan3 Core I/O AIDA Subject to change without notice... -
Page 50: Connection Diagrams
Figure 36: Connection diagram with FE on the M12 plug connector O P E R A T I N G I N S T R U C T I O N S | microScan3 Core I/O AIDA 8017784/11JR/2018-10-25 | SICK... -
Page 51: Testing Plan
The effective diameter should match the configured resolution. 8017784/11JR/2018-10-25 | SICK O P E R A T I N G I N S T R U C T I O N S | microScan3 Core I/O AIDA Subject to change without notice... -
Page 52: Minimum Requirements For The Regular Thorough Check
Interrupt the protective field using the supplied test object and observe whether the machine stops. O P E R A T I N G I N S T R U C T I O N S | microScan3 Core I/O AIDA 8017784/11JR/2018-10-25 | SICK... - Page 53 How it is indicated depends on the configuration. 8017784/11JR/2018-10-25 | SICK O P E R A T I N G I N S T R U C T I O N S | microScan3 Core I/O AIDA Subject to change without notice...
- Page 54 O P E R A T I N G I N S T R U C T I O N S | microScan3 Core I/O AIDA 8017784/11JR/2018-10-25 | SICK...
-
Page 55: Mounting
The following options for mounting the safety laser scanner are available: 8017784/11JR/2018-10-25 | SICK O P E R A T I N G I N S T R U C T I O N S | microScan3 Core I/O AIDA Subject to change without notice... -
Page 56: Mounting Using Mounting Kit
Make sure that there are not mirrors or other very reflective objects in the protec‐ tive field. O P E R A T I N G I N S T R U C T I O N S | microScan3 Core I/O AIDA 8017784/11JR/2018-10-25 | SICK... -
Page 57: Direct Mounting
Tightening torque: 4.5 Nm to 5.0 Nm. 8017784/11JR/2018-10-25 | SICK O P E R A T I N G I N S T R U C T I O N S | microScan3 Core I/O AIDA Subject to change without notice... -
Page 58: Mounting Using Mounting Kit 1
Tool required: • TX20 Torx wrench O P E R A T I N G I N S T R U C T I O N S | microScan3 Core I/O AIDA 8017784/11JR/2018-10-25 | SICK Subject to change without notice... -
Page 59: Mounting Using Mounting Kit 2
Make sure that the mounting bracket 1a or 1b is oriented correctly. See the sym‐ bol on the mounting bracket. 8017784/11JR/2018-10-25 | SICK O P E R A T I N G I N S T R U C T I O N S | microScan3 Core I/O AIDA Subject to change without notice... - Page 60 10. Tighten the M4 screws. Tightening torque: 2.2 Nm to 2.5 Nm. O P E R A T I N G I N S T R U C T I O N S | microScan3 Core I/O AIDA 8017784/11JR/2018-10-25 | SICK...
-
Page 61: Electrical Installation
Connect the OSSDs such that the machine controller processes both signals sepa‐ rately. 8017784/11JR/2018-10-25 | SICK O P E R A T I N G I N S T R U C T I O N S | microScan3 Core I/O AIDA Subject to change without notice... -
Page 62: Connection Overview
The USB connection may only be used temporarily and only for configuration and diag‐ nostics. The permanent connections are contacted via M12 plug connectors. O P E R A T I N G I N S T R U C T I O N S | microScan3 Core I/O AIDA 8017784/11JR/2018-10-25 | SICK... -
Page 63: Microscan3 Core
8017784/11JR/2018-10-25 | SICK O P E R A T I N G I N S T R U C T I O N S | microScan3 Core I/O AIDA Subject to change without notice... -
Page 64: Alternative Fe Connection
Functional earth and protection earth must be isolated. O P E R A T I N G I N S T R U C T I O N S | microScan3 Core I/O AIDA 8017784/11JR/2018-10-25 | SICK... -
Page 65: Configuration
The USB connection may only be used temporarily and only for configuration and diagnostics. 8017784/11JR/2018-10-25 | SICK O P E R A T I N G I N S T R U C T I O N S | microScan3 Core I/O AIDA Subject to change without notice... -
Page 66: User Interface
For certain actions (e.g., transferring a configuration to the device), you are requested to log onto the device with the respective user group. O P E R A T I N G I N S T R U C T I O N S | microScan3 Core I/O AIDA 8017784/11JR/2018-10-25 | SICK... -
Page 67: Settings
IP address from the configured IP address range with the configured subnet mask 8017784/11JR/2018-10-25 | SICK O P E R A T I N G I N S T R U C T I O N S | microScan3 Core I/O AIDA Subject to change without notice... -
Page 68: Configuration
Device Catalog. The devices are displayed as Device tiles in the working area. O P E R A T I N G I N S T R U C T I O N S | microScan3 Core I/O AIDA 8017784/11JR/2018-10-25 | SICK... -
Page 69: Configuration
When a device is configured offline for the first time, the device selection assistant opens. This is where you select the type of device to be configured. 8017784/11JR/2018-10-25 | SICK O P E R A T I N G I N S T R U C T I O N S | microScan3 Core I/O AIDA Subject to change without notice... -
Page 70: Overview
Serial number of the safety laser scanner • Functionality of the device O P E R A T I N G I N S T R U C T I O N S | microScan3 Core I/O AIDA 8017784/11JR/2018-10-25 | SICK Subject to change without notice... -
Page 71: Functional Scope
Safety Designer, Overview dialog box (only with connected devices) • Safety Designer, report 8017784/11JR/2018-10-25 | SICK O P E R A T I N G I N S T R U C T I O N S | microScan3 Core I/O AIDA Subject to change without notice... -
Page 72: Reading Configuration
O P E R A T I N G I N S T R U C T I O N S | microScan3 Core I/O AIDA 8017784/11JR/2018-10-25 | SICK... -
Page 73: Identification
Enter an application name. 8017784/11JR/2018-10-25 | SICK O P E R A T I N G I N S T R U C T I O N S | microScan3 Core I/O AIDA Subject to change without notice... -
Page 74: Application
Basic settings for the application Settings for the device, which relate to the application O P E R A T I N G I N S T R U C T I O N S | microScan3 Core I/O AIDA 8017784/11JR/2018-10-25 | SICK... -
Page 75: Monitoring Plane
Parameters for the safety laser scanner 8017784/11JR/2018-10-25 | SICK O P E R A T I N G I N S T R U C T I O N S | microScan3 Core I/O AIDA Subject to change without notice... -
Page 76: Parameters For The Monitoring Plane
✓ The name is used to identify the monitoring planes. O P E R A T I N G I N S T R U C T I O N S | microScan3 Core I/O AIDA 8017784/11JR/2018-10-25 | SICK Subject to change without notice... - Page 77 "Parameters for the safety laser scan‐ ner", page 8017784/11JR/2018-10-25 | SICK O P E R A T I N G I N S T R U C T I O N S | microScan3 Core I/O AIDA Subject to change without notice...
-
Page 78: Parameters For The Safety Laser Scanner
✓ The resulting response time is shown. O P E R A T I N G I N S T R U C T I O N S | microScan3 Core I/O AIDA 8017784/11JR/2018-10-25 | SICK Subject to change without notice... - Page 79 A graphic shows how the configuration affects the available ranges. 8017784/11JR/2018-10-25 | SICK O P E R A T I N G I N S T R U C T I O N S | microScan3 Core I/O AIDA Subject to change without notice...
-
Page 80: Reference Contour Field
✓ The reference contour field is displayed. O P E R A T I N G I N S T R U C T I O N S | microScan3 Core I/O AIDA 8017784/11JR/2018-10-25 | SICK Subject to change without notice... -
Page 81: Fields
The edge length or the diameter of each field must be at least as large as the selected object resolution. 8017784/11JR/2018-10-25 | SICK O P E R A T I N G I N S T R U C T I O N S | microScan3 Core I/O AIDA Subject to change without notice... -
Page 82: Using The Field Editor
Draw reference contour field or contour detection field Draw field using points O P E R A T I N G I N S T R U C T I O N S | microScan3 Core I/O AIDA 8017784/11JR/2018-10-25 | SICK... -
Page 83: Colors Of The Field Types
(see "Cut-off paths", page 95). 8017784/11JR/2018-10-25 | SICK O P E R A T I N G I N S T R U C T I O N S | microScan3 Core I/O AIDA Subject to change without notice... -
Page 84: Buttons For Field Sets
Select the field type see "Field types", page O P E R A T I N G I N S T R U C T I O N S | microScan3 Core I/O AIDA 8017784/11JR/2018-10-25 | SICK Subject to change without notice... -
Page 85: Creating Field-Set Templates
✓ The field-set template is saved. 8017784/11JR/2018-10-25 | SICK O P E R A T I N G I N S T R U C T I O N S | microScan3 Core I/O AIDA Subject to change without notice... -
Page 86: Importing And Exporting Field Sets And Fields
The Safety Designer supports the following file formats: BMP, JPG, PNG. O P E R A T I N G I N S T R U C T I O N S | microScan3 Core I/O AIDA 8017784/11JR/2018-10-25 | SICK... -
Page 87: Settings For The Field Editor
If you select the Automatic option, the drawn areas are immediately converted into fields. 8017784/11JR/2018-10-25 | SICK O P E R A T I N G I N S T R U C T I O N S | microScan3 Core I/O AIDA Subject to change without notice... -
Page 88: Editing Fields Using Coordinates
The example shows a dialog box for a rectan‐ gle. O P E R A T I N G I N S T R U C T I O N S | microScan3 Core I/O AIDA 8017784/11JR/2018-10-25 | SICK... -
Page 89: Drawing In Points That Cannot Be Monitored
8017784/11JR/2018-10-25 | SICK O P E R A T I N G I N S T R U C T I O N S | microScan3 Core I/O AIDA Subject to change without notice... -
Page 90: Area That Cannot Be Monitored
✓ The field editor shows the shadowing of the masked area. O P E R A T I N G I N S T R U C T I O N S | microScan3 Core I/O AIDA 8017784/11JR/2018-10-25 | SICK... -
Page 91: Enable Propose Field
8017784/11JR/2018-10-25 | SICK O P E R A T I N G I N S T R U C T I O N S | microScan3 Core I/O AIDA Subject to change without notice... -
Page 92: Inputs And Outputs, Local
Assign the required signals to the safety laser scanner’s connections in the Inputs and outputs, local dialog box. O P E R A T I N G I N S T R U C T I O N S | microScan3 Core I/O AIDA 8017784/11JR/2018-10-25 | SICK... -
Page 93: Further Settings For Some Signals
The OSSDs switch to the ON state if there is no longer an object in the protective field for the specified duration. 8017784/11JR/2018-10-25 | SICK O P E R A T I N G I N S T R U C T I O N S | microScan3 Core I/O AIDA Subject to change without notice... -
Page 94: Monitoring Cases
(for example right cornering, left cornering). O P E R A T I N G I N S T R U C T I O N S | microScan3 Core I/O AIDA 8017784/11JR/2018-10-25 | SICK... -
Page 95: Cut-Off Paths
Designer assigns the Always OFF function to these cells. 8017784/11JR/2018-10-25 | SICK O P E R A T I N G I N S T R U C T I O N S | microScan3 Core I/O AIDA Subject to change without notice... -
Page 96: Simulation
You can move fields to the foreground or to the background using the context menu (right mouse button) O P E R A T I N G I N S T R U C T I O N S | microScan3 Core I/O AIDA 8017784/11JR/2018-10-25 | SICK... -
Page 97: Transfer
The configuration must be verified to ensure that the safety function is implemented correctly. 8017784/11JR/2018-10-25 | SICK O P E R A T I N G I N S T R U C T I O N S | microScan3 Core I/O AIDA Subject to change without notice... -
Page 98: Starting And Stopping Safety Function
Write down the responsible person on the report. Archive the report. O P E R A T I N G I N S T R U C T I O N S | microScan3 Core I/O AIDA 8017784/11JR/2018-10-25 | SICK... -
Page 99: Service
Communication beyond the device is not impaired 8017784/11JR/2018-10-25 | SICK O P E R A T I N G I N S T R U C T I O N S | microScan3 Core I/O AIDA Subject to change without notice... -
Page 100: Factory Settings
It is not possible for maintenance technicians to log in). The configuration is not changed. O P E R A T I N G I N S T R U C T I O N S | microScan3 Core I/O AIDA 8017784/11JR/2018-10-25 | SICK... -
Page 101: Optics Cover Calibration
The end of the calibration is shown. 8017784/11JR/2018-10-25 | SICK O P E R A T I N G I N S T R U C T I O N S | microScan3 Core I/O AIDA Subject to change without notice... -
Page 102: Commissioning
The following options are available to you for precisely aligning the safety laser scanner using mounting kit 2a or 2b: O P E R A T I N G I N S T R U C T I O N S | microScan3 Core I/O AIDA 8017784/11JR/2018-10-25 | SICK... -
Page 103: Switching On
LED illuminates continually. The ON LED is off. 8017784/11JR/2018-10-25 | SICK O P E R A T I N G I N S T R U C T I O N S | microScan3 Core I/O AIDA Subject to change without notice... -
Page 104: Thorough Check
The verified configuration report corresponds to the desired project planning (see "Verifying configuration", page O P E R A T I N G I N S T R U C T I O N S | microScan3 Core I/O AIDA 8017784/11JR/2018-10-25 | SICK Subject to change without notice... - Page 105 8017784/11JR/2018-10-25 | SICK O P E R A T I N G I N S T R U C T I O N S | microScan3 Core I/O AIDA Subject to change without notice...
-
Page 106: Operation
4 status light emitting diodes are located directly above the display. O P E R A T I N G I N S T R U C T I O N S | microScan3 Core I/O AIDA 8017784/11JR/2018-10-25 | SICK... -
Page 107: Buttons And Display
8017784/11JR/2018-10-25 | SICK O P E R A T I N G I N S T R U C T I O N S | microScan3 Core I/O AIDA Subject to change without notice... -
Page 108: Pushbuttons On The Device
O P E R A T I N G I N S T R U C T I O N S | microScan3 Core I/O AIDA 8017784/11JR/2018-10-25 | SICK Subject to change without notice... - Page 109 All safety outputs in the OFF state. 8017784/11JR/2018-10-25 | SICK O P E R A T I N G I N S T R U C T I O N S | microScan3 Core I/O AIDA Subject to change without notice...
-
Page 110: Menu
• Set the display brightness and contrast. O P E R A T I N G I N S T R U C T I O N S | microScan3 Core I/O AIDA 8017784/11JR/2018-10-25 | SICK Subject to change without notice... -
Page 111: Maintenance
Make sure that the safety laser scanner’s outputs do not affect the machine dur‐ ing cleaning. 8017784/11JR/2018-10-25 | SICK O P E R A T I N G I N S T R U C T I O N S | microScan3 Core I/O AIDA Subject to change without notice... -
Page 112: Replacing The Optics Cover
Make sure that the entire system is clear of contamination when the calibration is carried out. O P E R A T I N G I N S T R U C T I O N S | microScan3 Core I/O AIDA 8017784/11JR/2018-10-25 | SICK... -
Page 113: Fixing Screws For The Optics Cover
Unscrew the fixing screws for the optics cover. 8017784/11JR/2018-10-25 | SICK O P E R A T I N G I N S T R U C T I O N S | microScan3 Core I/O AIDA Subject to change without notice... -
Page 114: Replacing The Safety Laser Scanner
Enclosure rating IP65 only applies if the safety laser scanner is closed and the system plug is mounted. O P E R A T I N G I N S T R U C T I O N S | microScan3 Core I/O AIDA 8017784/11JR/2018-10-25 | SICK... -
Page 115: Replacing The Safety Laser Scanner Without System Plug
Reconnect the connecting cables to the system plug. 8017784/11JR/2018-10-25 | SICK O P E R A T I N G I N S T R U C T I O N S | microScan3 Core I/O AIDA Subject to change without notice... -
Page 116: Replacing The System Plug
Figure 72: Installing the system plug on the safety laser scanner O P E R A T I N G I N S T R U C T I O N S | microScan3 Core I/O AIDA 8017784/11JR/2018-10-25 | SICK... -
Page 117: Regular Thorough Check
Carry out the thorough checks according to the instructions from the manufacturer and the machine operator. 8017784/11JR/2018-10-25 | SICK O P E R A T I N G I N S T R U C T I O N S | microScan3 Core I/O AIDA Subject to change without notice... -
Page 118: Troubleshooting
4 status light emitting diodes are located directly above the display. Figure 73: Status LEDs O P E R A T I N G I N S T R U C T I O N S | microScan3 Core I/O AIDA 8017784/11JR/2018-10-25 | SICK... -
Page 119: Diagnostics Using The Display
8017784/11JR/2018-10-25 | SICK O P E R A T I N G I N S T R U C T I O N S | microScan3 Core I/O AIDA Subject to change without notice... - Page 120 All safety outputs in the OFF state. O P E R A T I N G I N S T R U C T I O N S | microScan3 Core I/O AIDA 8017784/11JR/2018-10-25 | SICK Subject to change without notice...
-
Page 121: Detailed Diagnostics
8017784/11JR/2018-10-25 | SICK O P E R A T I N G I N S T R U C T I O N S | microScan3 Core I/O AIDA Subject to change without notice... -
Page 122: Fault Display
The eight-character fault code in the bottom line helps SICK support during the detailed fault analysis. O P E R A T I N G I N S T R U C T I O N S | microScan3 Core I/O AIDA 8017784/11JR/2018-10-25 | SICK... -
Page 123: Fault Types
8017784/11JR/2018-10-25 | SICK O P E R A T I N G I N S T R U C T I O N S | microScan3 Core I/O AIDA Subject to change without notice... -
Page 124: Diagnostics Using Safety Designer
The USB connection may only be used temporarily and only for configuration and diagnostics. O P E R A T I N G I N S T R U C T I O N S | microScan3 Core I/O AIDA... - Page 125 Import configuration from the device. Take an image. 8017784/11JR/2018-10-25 | SICK O P E R A T I N G I N S T R U C T I O N S | microScan3 Core I/O AIDA Subject to change without notice...
-
Page 126: Event History
The internal memory of the safety laser scanner is emptied when it is restarted. O P E R A T I N G I N S T R U C T I O N S | microScan3 Core I/O AIDA... - Page 127 For each duration, the diagram shows the corresponding number of field inter‐ ruptions. 8017784/11JR/2018-10-25 | SICK O P E R A T I N G I N S T R U C T I O N S | microScan3 Core I/O AIDA Subject to change without notice...
-
Page 128: Message History
Print message history Save message history as a PDF O P E R A T I N G I N S T R U C T I O N S | microScan3 Core I/O AIDA 8017784/11JR/2018-10-25 | SICK Subject to change without notice... -
Page 129: Decommissioning
We will be glad to help you dispose of these devices on request. 8017784/11JR/2018-10-25 | SICK O P E R A T I N G I N S T R U C T I O N S | microScan3 Core I/O AIDA Subject to change without notice... -
Page 130: Technical Data
Only compatible with Rev ≥ 1.1.0 O P E R A T I N G I N S T R U C T I O N S | microScan3 Core I/O AIDA 8017784/11JR/2018-10-25 | SICK Subject to change without notice... -
Page 131: Data Sheet
9.0 m 8017784/11JR/2018-10-25 | SICK O P E R A T I N G I N S T R U C T I O N S | microScan3 Core I/O AIDA Subject to change without notice... -
Page 132: Safety-Related Parameters
At least one OSSD is in the OFF state. occurs O P E R A T I N G I N S T R U C T I O N S | microScan3 Core I/O AIDA 8017784/11JR/2018-10-25 | SICK Subject to change without notice... -
Page 133: Interfaces
≤ 2.5 Ω between load and device 8017784/11JR/2018-10-25 | SICK O P E R A T I N G I N S T R U C T I O N S | microScan3 Core I/O AIDA Subject to change without notice... -
Page 134: Mechanical Data
Single shock 15 g, 11 ms O P E R A T I N G I N S T R U C T I O N S | microScan3 Core I/O AIDA 8017784/11JR/2018-10-25 | SICK Subject to change without notice... -
Page 135: Response Times
(for example OFF state of the OSSD pair). 8017784/11JR/2018-10-25 | SICK O P E R A T I N G I N S T R U C T I O N S | microScan3 Core I/O AIDA Subject to change without notice... -
Page 136: Response Time Of An Individual Safety Laser Scanner
OSSD pair 1 n × 50 ms + 10 ms O P E R A T I N G I N S T R U C T I O N S | microScan3 Core I/O AIDA 8017784/11JR/2018-10-25 | SICK Subject to change without notice... -
Page 137: Course Of The Ossd Test Over Time
8017784/11JR/2018-10-25 | SICK O P E R A T I N G I N S T R U C T I O N S | microScan3 Core I/O AIDA Subject to change without notice... -
Page 138: Protective Field Range (Devices With A Max. Protective Field Range Of 4.0 M)
The effective scanning range of the contour detection field is the same as the protective field range. O P E R A T I N G I N S T R U C T I O N S | microScan3 Core I/O AIDA 8017784/11JR/2018-10-25 | SICK... -
Page 139: Dimensional Drawings
Mirror rotational axis Scan plane Required viewing slit 8017784/11JR/2018-10-25 | SICK O P E R A T I N G I N S T R U C T I O N S | microScan3 Core I/O AIDA Subject to change without notice... -
Page 140: Ordering Information
1083079 ≤ 9.0 m MICS3-AAAZ90BZ1P01 1089493 O P E R A T I N G I N S T R U C T I O N S | microScan3 Core I/O AIDA 8017784/11JR/2018-10-25 | SICK Subject to change without notice... -
Page 141: Spare Parts
Optics cover (with seal and screws) 2073673 8017784/11JR/2018-10-25 | SICK O P E R A T I N G I N S T R U C T I O N S | microScan3 Core I/O AIDA Subject to change without notice... -
Page 142: Accessories
Scan plane Countersink for M5 countersunk screw O P E R A T I N G I N S T R U C T I O N S | microScan3 Core I/O AIDA 8017784/11JR/2018-10-25 | SICK Subject to change without notice... -
Page 143: Mounting Kit 1B
Figure 85: Mounting kit 2a All dimensions in mm. 8017784/11JR/2018-10-25 | SICK O P E R A T I N G I N S T R U C T I O N S | microScan3 Core I/O AIDA Subject to change without notice... -
Page 144: Connection Technology
NEC Class 2, SELV, PELV, input 100 V … 120 V/220 V … 240 V AC O P E R A T I N G I N S T R U C T I O N S | microScan3 Core I/O AIDA 8017784/11JR/2018-10-25 | SICK... -
Page 145: Alignment Aid
2095105 Test rod 70 mm 2095139 8017784/11JR/2018-10-25 | SICK O P E R A T I N G I N S T R U C T I O N S | microScan3 Core I/O AIDA Subject to change without notice... -
Page 146: Glossary
(e.g., the voltage at the OSSDs is HIGH so that the machine can run). O P E R A T I N G I N S T R U C T I O N S | microScan3 Core I/O AIDA 8017784/11JR/2018-10-25 | SICK... - Page 147 (for example OFF state of the OSSD pair). 8017784/11JR/2018-10-25 | SICK O P E R A T I N G I N S T R U C T I O N S | microScan3 Core I/O AIDA Subject to change without notice...
- Page 148 The diameter of the test rod is the same as the resolution of the active opto-electronic protective device. O P E R A T I N G I N S T R U C T I O N S | microScan3 Core I/O AIDA 8017784/11JR/2018-10-25 | SICK...
-
Page 149: Annex
(part number: see the type label entry in the “Ident. no.” field). 8017784/11JR/2018-10-25 | SICK O P E R A T I N G I N S T R U C T I O N S | microScan3 Core I/O AIDA Subject to change without notice... -
Page 150: Note On Specified Standards
GB/T 16855.1 ISO 13855 GB/T 19876 O P E R A T I N G I N S T R U C T I O N S | microScan3 Core I/O AIDA 8017784/11JR/2018-10-25 | SICK Subject to change without notice... -
Page 151: Checklist For Initial Commissioning And Commissioning
8017784/11JR/2018-10-25 | SICK O P E R A T I N G I N S T R U C T I O N S | microScan3 Core I/O AIDA Subject to change without notice... -
Page 152: Mounting Methods For Protection From Interference From Systems In Close Proximity
Figure 88: Mounting 2 safety laser scanners with the optics cover facing downward O P E R A T I N G I N S T R U C T I O N S | microScan3 Core I/O AIDA 8017784/11JR/2018-10-25 | SICK... -
Page 153: Mounting The Upper Safety Laser Scanner With The Optics Cover Facing Downward And Mounting The Lower Safety Laser Scanner With The Optics Cover Facing Upward
8017784/11JR/2018-10-25 | SICK O P E R A T I N G I N S T R U C T I O N S | microScan3 Core I/O AIDA Subject to change without notice... -
Page 154: Mounting 2 Safety Laser Scanners Opposite One Another
Figure 92: Mounting 2 safety laser scanners next to one another O P E R A T I N G I N S T R U C T I O N S | microScan3 Core I/O AIDA 8017784/11JR/2018-10-25 | SICK... -
Page 155: List Of Figures
50. Functional scope......................72 51. Identification....................... 73 8017784/11JR/2018-10-25 | SICK O P E R A T I N G I N S T R U C T I O N S | microScan3 Core I/O AIDA Subject to change without notice... - Page 156 91. Mounting 2 safety laser scanners opposite one another........154 92. Mounting 2 safety laser scanners next to one another.........154 O P E R A T I N G I N S T R U C T I O N S | microScan3 Core I/O AIDA 8017784/11JR/2018-10-25 | SICK...
-
Page 157: List Of Tables
41. Ordering information, test rods................145 42. Note on specified standards..................150 8017784/11JR/2018-10-25 | SICK O P E R A T I N G I N S T R U C T I O N S | microScan3 Core I/O AIDA Subject to change without notice... - Page 158 LIST OF TABLES O P E R A T I N G I N S T R U C T I O N S | microScan3 Core I/O AIDA 8017784/11JR/2018-10-25 | SICK Subject to change without notice...
- Page 159 LIST OF TABLES 8017784/11JR/2018-10-25 | SICK O P E R A T I N G I N S T R U C T I O N S | microScan3 Core I/O AIDA Subject to change without notice...
- Page 160 Phone +36 1 371 2680 Phone +386 591 78849 E-Mail ertekesites@sick.hu E-Mail office@sick.si India South Africa Phone +91-22-6119 8900 Phone +27 (0)11 472 3733 Further locations at www.sick.com E-Mail info@sick-india.com E-Mail info@sickautomation.co.za SICK AG | Waldkirch | Germany | www.sick.com...
Need help?
Do you have a question about the microScan3 and is the answer not in the manual?
Questions and answers