
Related Manuals for Kaden KC17


Summary of Contents for Kaden KC17
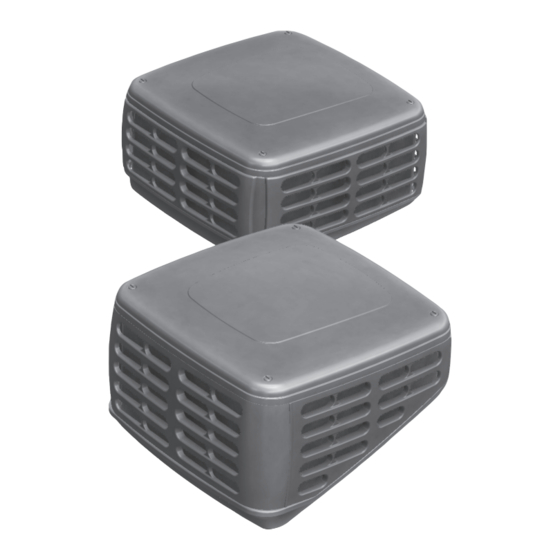
- Page 1 INSTALLER’S MANUAL Evaporative Air Coolers Safety Information Installation Commissioning Models Classic Evaporative Air Coolers: KC17 | KC21 | KC27 | KC32 Low Profile Evaporative Air Coolers: KL16 | KL22 | KL25 | KL28...
-
Page 2: Table Of Contents
5.1 KC Series Dropper Duct Installation Specific .........................11 5.2 Fitting the Winter-Seal ..............................11 5.3 Fitting the KC Series Cooler ............................11 6. Fitting the Winter-Seal 7. Wall Controller Connection 7.1 Wiring the Kaden Networker Wall Control ........................14 7.2 Wiring the Kaden Manual Wall Control .......................... 14... - Page 3 8. Water Connection 8.1 Inlet Connection ................................15 8.2 Tank Water Quality Management........................... 15 8.3 Water Drain Connection ..............................15 9. Timing & Cooler Functions 9.1 Start Up ..................................16 9.2 Pre-wet ..................................16 9.3 Programmable Wall Control Models In AUTO Mode ..................... 16 9.4 Tank Water Quality and Replenishment During Operation ....................
- Page 4 Kaden Installer's Manual Evaporative Air Coolers This page intentionally blank...
- Page 5 DO NOT install or service the Cooler during adverse weather conditions, or drain water onto the roof where it could cause a slippery and hazardous work environment. MODELS COVERED IN THIS MANUAL Kaden Low Profile KL16 KL22 KL25 KL28 Kaden Classic KC17 KC21 KC27 KC32...
-
Page 6: General Guidelines
Carefully remove the outer packaging and any retaining brackets/straps that secure the cooler to the pallet. Kaden coolers MUST BE installed in accordance with these instructions and related regulations, codes, standards, and authorities. These include but may not be limited to: •... -
Page 7: Cooler Service Requirements
DO NOT remove water supply line, (braided hose) from rear of cooler. 2.3 INSTALLING THE WALL CONTROL The Kaden Networker and Manual Wall Controls are part of a sophisticated control system. Controllers with Auto mode constantly monitor the temperature inside the house, switching the Cooler ON and OFF to maintain the target comfort level selected. -
Page 8: Cooler Hardware
Kaden Installer's Manual Evaporative Air Coolers 3. COOLER HARDWARE 3.1 BENDS AND ELBOWS • Where square ducting elbows are to be used, install turning vanes within the elbow to aid airflow. • Use unrestricted ductwork with smooth changes of duct cross section. -
Page 9: Installation - Low Profile (Kl) Series
• A spirit level is needed to set the correct Levelling templates DO NOT come as standard, and angle to the dropper duct. Kaden MUST BE ordered separately, part number 1621272. levelling templates are advisable. NOTE •... -
Page 10: Fitting The Winter-Seal
Kaden Installer's Manual Evaporative Air Coolers 4.2 FITTING THE WINTER-SEAL The Winter Seal fits directly into the base of the cooler and MUST BE installed before the cooler is mounted onto the dropper box (preferably while the unit is on the ground). -
Page 11: Installation - Classic (Kc) Series
5. INSTALLATION - CLASSIC (KC) SERIES 5.1 KC SERIES DROPPER DUCT INSTALLATION SPECIFIC • High side of roof All KC Series Coolers sit on a 550mm x 550mm dropper box with a 15-20mm out turned flange. • KC Series Coolers can also be installed on an existing dropper box. Ensure the dropper box is in a sound condition and the top of the dropper box is level. -
Page 12: Fitting The Winter-Seal
Kaden Installer's Manual Evaporative Air Coolers 6. FITTING THE WINTER-SEAL Gently remove all packaging from the cooler. Remove the front support bracket that is fitted to the base of the cooler and secures the cooler onto the pallet. Then lift the cooler off the pallet onto the ground. - Page 13 Gently push the opposite mounting bracket and lock the axle into the hole on the mounting bracket. Then straighten the mounting bracket to its original position. Ensure that the mounting brackets are all straight and that the stoppers on each mounting bracket are in the correct position, preventing the blades from over pivoting.
-
Page 14: Wall Controller Connection
• These Wall Controls accept the polarised plug connection. The Manual wall control has a small loom to connect the polarised plug to. All models can have either the Kaden Networker wall controller or the Kaden Manual wall controller. NOTE... -
Page 15: Water Connection
8. WATER CONNECTION 8.1 INLET CONNECTION The water inlet connection point is under the cooler base on the left hand side, at the high side of the roof. The connection is via a 1/2” BSP female fitting supplied on a flexible hose. 8.2 TANK WATER QUALITY MANAGEMENT. -
Page 16: Timing & Cooler Functions
9. TIMING & COOLER FUNCTIONS 9.1 START UP Kaden Cooler with Dump Valve fitted will have a 15 second delay on start up. If the Cooler has been OFF for longer than 60 minutes the tank will require refilling. Allow approximately 3-5 minutes depending on the water pressure. -
Page 17: Dismantling
10. DISMANTLING 10.1 REMOVING THE FRONT AND REAR PADS For general servicing, remove the front and back pads to access all components. • Loosen the 4 plastic thumbscrew knobs on the c ooler’s roof until the large front pad can be lifted up enough to clear the bottom edge. -
Page 18: Commissioning Checklist
The isolating switches at the unit and the supply power socket are turned ON. • The unit is turned ON at the Kaden Wall Control. • The fan is not in a delay due to tank filling, or pad Pre-Wet operation. -
Page 19: Exhaust And Ventilation
Number of average size windows & doors (suggestive only) Low Profile Classic Setting Setting Series Series KL16 KC17 Two sliding windows or Five hinged windows 1.5 m 0.9 m KL22 One door and a hinged window 1.9 m 1.1 m KL25 KC21 Three sliding windows or one door &... - Page 20 Kaden Installer's Manual Evaporative Air Coolers 13. TECHNICAL SPECIFICATIONS Kaden Low Profile Kaden Classic Evaporative Air Coolers Evaporative Air Coolers Model KL16 KL22 KL25 KL28 KC17 KC21 KC27 KC32 Weight (kg) Tank Capacity (litres) Watts 1000 1000 Motor Amps (Max)
- Page 21 14. TECHNICAL SUPPORT 1300 4KADEN (1300 452 336) For technical support please call...
- Page 22 Kaden Installer's Manual Evaporative Air Coolers NOTES...
- Page 23 NOTES...
- Page 24 B063652 Rev. A...
Need help?
Do you have a question about the KC17 and is the answer not in the manual?
Questions and answers