
Subscribe to Our Youtube Channel
Related Manuals for Kaden KCS Series


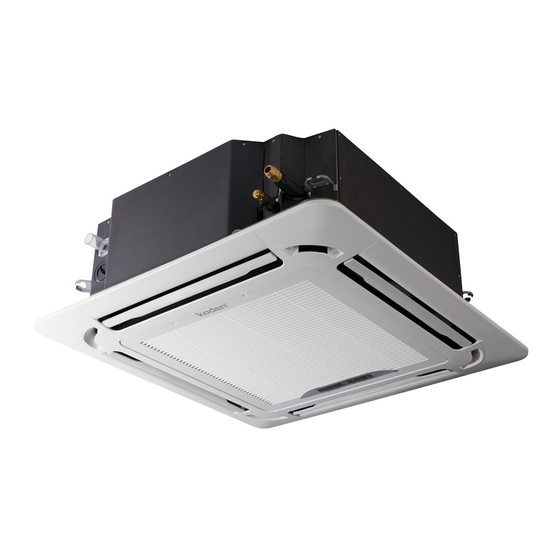
Summary of Contents for Kaden KCS Series
- Page 1 CASSETTE AIR CONDITIONER Installation Manual KCS Series KCS24 | KCS36 | KCS42 | KCS48...
-
Page 3: Table Of Contents
10. Test run Before test run Test run instructions 11. Error codes Important note Read this manual carefully before installing or operating your new air conditioning unit. Make sure to save this manual for future reference. Kaden Installation Manual | 3... -
Page 4: Safety Precautions
Children shall not play with the appliance. Cleaning and user maintenance shall not be made by children without supervision. 4 | Kaden Installation Manual... - Page 5 The air conditioner’s circuit board (PCB) is designed with a fuse to provide overcurrent protection. The specifications of the fuse are printed on the circuit board, such as: Indoor unit: T3.15A/250VAC, T5A/250VAC, etc. Outdoor unit: T20A/250VAC (7.0kW), T30A/250VAC (7.0kW) Kaden Installation Manual | 5...
- Page 6 6. Only ARC (Australian Refrigeration Council) license holders can install and commission this air conditioner. This air conditioner must be installed to meet the requirements of the current version of AS/NZS 5149. It is illegal to vent some types of refrigerant to the atmosphere. 6 | Kaden Installation Manual...
-
Page 7: Accessories
(P & Q & E ) around the magnetic ring twice Magnetic ring – hitch it on the connective cable Varies by Drain outlet pipe between indoor unit model and outdoor unit after installation Ceiling hook Suspension bolt Kaden Installation Manual | 7... -
Page 8: Installation Summary
3. Installation summary Install the indoor unit Install the drainpipe Install the outdoor unit Pressure test and evacuation Connect the wires Connect the refrigerant pipes Install the front panel Perform a test run 8 | Kaden Installation Manual... -
Page 9: Unit Parts
6 Drain pipe 7 Connecting pipe 8 Air inlet 9 Air outlet Note on illustrations Illustrations in this manual are for explanatory purposes. The actual shape of your indoor unit may be slightly different. Kaden Installation Manual | 9... -
Page 10: Indoor Unit Installation
B (Ceiling hole) Ceiling board >2.5m Ground Distance from ceiling relative to height of indoor unit Type Model A (mm) H (mm) B (mm) KCS24 > 235 KCS36 > 275 KCS42 > 235 KCS48 > 275 10 | Kaden Installation Manual... - Page 11 4cm larger than the body size. Be sure to mark the areas where ceiling hook holes will be drilled. KCS24-48 models ceiling hole size Refrigerant piping side Drain hose side 78cm (Suspension bolt) 84cm (Body) 95cm (Ceiling opening) Kaden Installation Manual | 11...
- Page 12 Water level 4. Mount the indoor unit. You will need two people to lift and secure it. Insert suspension bolts into the unit’s hanging holes. Fasten them using the included washers and nuts. 12 | Kaden Installation Manual...
-
Page 13: Note For New Home Installation
In HEAT mode, the outdoor unit will discharge water. Ensure that the drain hose is placed in an appropriate area to avoid water damage and slippage. • Do not pull the drainpipe forcefully. This could disconnect it. Kaden Installation Manual | 13... -
Page 14: Note On Drainpipe Installation
30cm. Incorrect installation could cause water to flow back into the unit and flood. • To prevent air bubbles, keep the drain hose level or slightly sloping up before the riser. 14 | Kaden Installation Manual... -
Page 15: Outdoor Unit Installation
✕ Near animals or plants that will be harmed by hot air discharge. ✕ Near any source of combustible gas. ✕ In a location that is exposed to large amounts of dust. ✕ In a location exposed to a excessive amounts of salty air. Kaden Installation Manual | 15... - Page 16 IN COLD CLIMATES In cold climates, make sure that the drain hose is as vertical as possible to ensure swift water drainage. If water drains too slowly, it can freeze in the hose and flood the unit. 16 | Kaden Installation Manual...
- Page 17 1/2H < L ≤ H 30 cm or more L > H Can not be installed 300 cm or more 25 cm or more 25 cm or more 60 cm or more 150 cm or more Kaden Installation Manual | 17...
-
Page 18: Refrigerant Piping Connection
Gas piping Gas piping Oil trap Oil trap Outdoor unit Indoor unit Liquid Liquid piping piping The outdoor unit is installed higher than the indoor unit The indoor unit is installed higher than the outdoor unit 18 | Kaden Installation Manual... -
Page 19: Connection Instructions - Refrigerant Piping
This will drastically reduce the heating efficiency of the unit. 7. Turn the handle of the flaring tool clockwise until the pipe is fully flared. Flare the pipe in accordance with the dimensions. Kaden Installation Manual | 19... - Page 20 3. Tighten the flare nut as tightly as possible by hand. 4. Using a spanner, grip the nut on the unit tubing. 5. While firmly gripping the nut, use a torque wrench to tighten the flare nut according to the torque values in above table. 20 | Kaden Installation Manual...
-
Page 21: Note On Minimum Bend Radius
Check to make sure there is no refrigerant leak after completing the installation work. If there is a refrigerant leak, ventilate the area immediately and evacuate the system (refer to the Leak Testing and Evacuation section of this manual). Kaden Installation Manual | 21... -
Page 22: Wiring
An electrical isolator must be installed adjacent the outdoor unit so it can be switched off in an emergency. Electrical isolator switch (purchased separately) Outdoor unit power wires Outdoor unit Indoor unit Indoor & outdoor connective wires (purchased separately) 22 | Kaden Installation Manual... -
Page 23: Outdoor Unit Wiring
Strip the insulation from the ends. d. Using a wire crimper, crimp u-lugs on the ends. NOTE: When connecting the wires, strictly follow the wiring diagram found inside the electrical box cover. Kaden Installation Manual | 23... -
Page 24: Indoor Unit Wiring
Control box Wire outlet Control box Wiring diagram Connective wiring diagram Magnetic ring (if supplied and packed with the accessories) Pass the belt through the hole of the magnetic ring to fix it on the cable 24 | Kaden Installation Manual... -
Page 25: Power Specifications
208 – 240V 208 – 240V Circuit breaker/fuse (A) 15/10 15/10 15/10 Power (outdoor) Phase 1 Phase 1 Phase 1 Phase Volt 208 – 240V 208 – 240V 208 – 240V Circuit breaker/fuse (A) 25/20 40/30 50/40 Kaden Installation Manual | 25... -
Page 26: Leak Testing And Evacuation
9. If the vacuum does not settle, repeat from Step 1 of Leak, pressure test and evacuations. If there is no change in system vacuum, unscrew the cap from the packed valve (high pressure valve). Low pressure Vacuum valve pump 26 | Kaden Installation Manual... -
Page 27: Preparations And Precautions
6.35 ( 0.25") 9.52 ( 0.375") Ø Ø Ø Ø Inverter R410A: Inverter R410A: Pipe length - Pipe length - Standard length x Standard length x 15g/m 30g/m CAUTION – DO NOT MIX REFRIGERANT TYPES. Kaden Installation Manual | 27... -
Page 28: Panel Installation
3. Attach the side of the front grille to the panel. 4. Connect the display panel cable to the corresponding wire on the main body. 5. Close the front grille. 6. Fasten the installation covers at all four corners by pushing them inwards. 28 | Kaden Installation Manual... - Page 29 If the unit is not hung correctly and a gap exists, the unit’s height must be adjusted to ensure proper function. The unit’s height can be adjusted by loosening the upper nut, and adjusting the lower nut. Kaden Installation Manual | 29...
-
Page 30: Test Run
Double check to see if the room temperature is being registered correctly. d. Ensure the indicators on the remote control and the display panel on the indoor unit work properly. e. Ensure the manual buttons on the indoor unit works properly. 30 | Kaden Installation Manual... -
Page 31: Error Codes
The design and specifications are subject to change without prior notice for product improvement. Consult with the sales agency or manufacturer for details. Any updates to the manual will be uploaded to the service website, please check for the latest version. Kaden Installation Manual | 31... - Page 32 kadenair.com.au...
Need help?
Do you have a question about the KCS Series and is the answer not in the manual?
Questions and answers