
Related Manuals for Kaden KS09


Summary of Contents for Kaden KS09
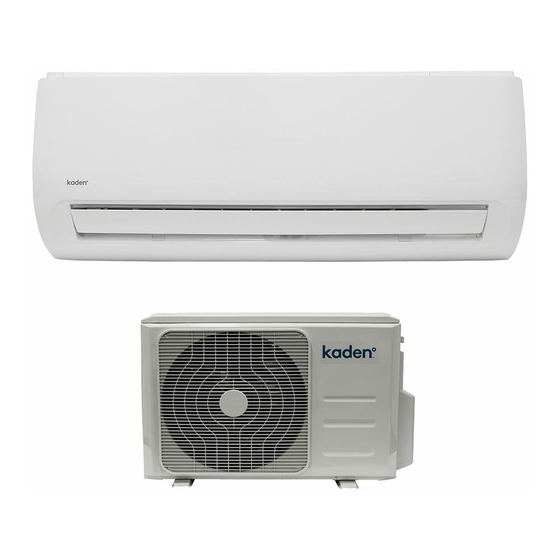
- Page 1 Wall Mounted aIR CondItIoneR Installation Manual KS Series KS09 | KS12 | KS18 KS24 | KS28 J3387_Kaden_Installer_Manual_050917.indd 1 5/09/2017 9:07 AM...
- Page 2 J3387_Kaden_Installer_Manual_050917.indd 2 5/09/2017 9:07 AM...
-
Page 3: Table Of Contents
10. Test Run 11. Error Codes Important note: Read this manual carefully before installing or operating your new air conditioning unit. Make sure to save this manual for future reference. Kaden Installation Manual | 3 J3387_Kaden_Installer_Manual_050917.indd 3 5/09/2017 9:07 AM... -
Page 4: Safety Precautions
7. You must use an independent circuit and single outlet to supply power. Do not connect other appliances to the same outlet. Insufficient electrical capacity or defects in electrical work can cause electrical shock or fire. 4 | Kaden Installation Manual J3387_Kaden_Installer_Manual_050917.indd 4... - Page 5 6. Only ARC (Australian Refrigeration Council) license holders can install and commission this air conditioner. This air conditioner must be installed to meet the requirements of the current version of AS/NZS 5149. It is illegal to vent some types of refrigerant to the atmosphere. Kaden Installation Manual | 5 J3387_Kaden_Installer_Manual_050917.indd 5 5/09/2017 9:07 AM...
-
Page 6: Accessories
ST3.9 X 25 Remote controller Mode ON/OFF Timer Sleep Follow Turbo Self clean Fixing screw for remote controller holder ST2.9 x 10 Remote controller holder Dry battery AAA.LR03 Drain Seal Drain joint 6 | Kaden Installation Manual J3387_Kaden_Installer_Manual_050917.indd 6 5/09/2017 9:07 AM... -
Page 7: Installation Manual
Shape Quantity Owner’s manual Installation manual Wall Mounted aIR CondItIoneR Remote Controller Manual Remote controller KS Series KS09 | KS12 | KS18 manual KS24 | KS28 Mode ON/OFF Timer Sleep Follow Self Turbo clean Kaden Installation Manual | 7 J3387_Kaden_Installer_Manual_050917.indd 7... -
Page 8: Unit Parts
Power Cable Fig. 3.1 Note on illustrations Illustrations in this manual are for explanatory purposes. The actual shape of your indoor unit may be slightly different. The actual shape shall prevail. 8 | Kaden Installation Manual J3387_Kaden_Installer_Manual_050917.indd 8 5/09/2017 9:08 AM... -
Page 9: Installation Summary - Indoor Unit
– Indoor Unit 15cm (5.9in) 12cm 12cm (4.75in) (4.75in) 2.3m (90.55in) Select installation location Determine wall hole position (Page 11) (Page 12) Attach mounting plate Drill wall hole (Page 12) (Page 12) Kaden Installation Manual | 9 J3387_Kaden_Installer_Manual_050917.indd 9 5/09/2017 9:08 AM... - Page 10 Connect piping Connect wiring Prepare drain hose (Page 25) (Page 17) (Page 16) Wrap piping and cable (Page 19) STEP Mount indoor unit (Page 19) 10 | Kaden Installation Manual J3387_Kaden_Installer_Manual_050917.indd 10 5/09/2017 9:08 AM...
-
Page 11: Indoor Unit Installation
Firm and solid—the location will not vibrate Strong enough to support the weight of the unit A location at least one meter from all other electrical devices (e.g., TV, radio, computer) Kaden Installation Manual | 11 J3387_Kaden_Installer_Manual_050917.indd 11 5/09/2017 9:08 AM... -
Page 12: Attach Mounting Plate To Wall
Then secure the mounting plate to the wall by tightening the screws When drilling the wall hole, make sure to avoid wires, directly into the clip anchors. plumbing, and other sensitive components. 12 | Kaden Installation Manual J3387_Kaden_Installer_Manual_050917.indd 12 5/09/2017 9:08 AM... - Page 13 • Recommended position of wall hole (both to the left and right of mounting plate) • Relative distances between screw holes Correct orientation of mounting plate KS24 & KS28 ✔ ✘ ✘ Kaden Installation Manual | 13 J3387_Kaden_Installer_Manual_050917.indd 13 5/09/2017 9:08 AM...
-
Page 14: Prepare Refrigerant Piping
Be extremely careful not to dent or damage the piping (see Fig.3.6). while bending them away from the unit. Any dents in the piping will affect the unit’s performance. 14 | Kaden Installation Manual J3387_Kaden_Installer_Manual_050917.indd 14 5/09/2017 9:08 AM... - Page 15 Connect drain hose and refrigerant piping (refer to Refrigerant Piping Connection section of this manual for instructions). • To facilitate Gas Leak Checks and enable you to check for dents Kaden Installation Manual | 15 J3387_Kaden_Installer_Manual_050917.indd 15 5/09/2017 9:08 AM...
-
Page 16: Connect Drain Hose
Do not place the end of the drain hose in water or in containers that collect water. This will prevent proper drainage. ✘ Fig. 3.12 16 | Kaden Installation Manual J3387_Kaden_Installer_Manual_050917.indd 16 5/09/2017 9:08 AM... -
Page 17: Connect Signal Cable
The maximum current is indicated on the nameplate located on the side panel of the unit. Refer to this nameplate to choose the right cable, fuse, or switch. Kaden Installation Manual | 17 J3387_Kaden_Installer_Manual_050917.indd 17 5/09/2017 9:08 AM... - Page 18 The wiring connection process may differ slightly between units. Terminal block Wire cover Cable clamp Fig. 3.13 The Wiring Diagram is located on the inside of the indoor unit’s wire cover. 18 | Kaden Installation Manual J3387_Kaden_Installer_Manual_050917.indd 18 5/09/2017 9:08 AM...
-
Page 19: Wrap Piping And Cables
3. Using insulation tape, wrap the signal wire, refrigerant pipes, and drain hose tightly together. Double-check that all items are bundled in accordance with Fig. 3.14. Kaden Installation Manual | 19 J3387_Kaden_Installer_Manual_050917.indd 19 5/09/2017 9:08 AM... -
Page 20: Outdoor Unit Installation
Near any source of combustible gas Level mounting position In a location that is exposed to large amounts of dust In a location exposed to a excessive amounts of salty air 20 | Kaden Installation Manual J3387_Kaden_Installer_Manual_050917.indd 20 5/09/2017 9:08 AM... -
Page 21: Install Drain Joint
Note that there are two different types of drain joints depending on the type of outdoor unit. Kaden Installation Manual | 21 J3387_Kaden_Installer_Manual_050917.indd 21 5/09/2017 9:08 AM... -
Page 22: Anchor Outdoor Unit
4. Place a nut on the end of each expansion bolt. When drilling into concrete, eye protection 5. Hammer expansion bolts into the pre-drilled holes. is recommended at all times. 22 | Kaden Installation Manual J3387_Kaden_Installer_Manual_050917.indd 22 5/09/2017 9:08 AM... -
Page 23: Connect Signal And Power Cables
The outside unit’s terminal block is protected by an electrical wiring cover on the side of the unit. A comprehensive wiring diagram is printed on the inside of the terminal cover. Kaden Installation Manual | 23 J3387_Kaden_Installer_Manual_050917.indd 23 5/09/2017 9:08 AM... - Page 24 Using a wire crimper, crimp u-lugs on the ends of the wires. Cover Outdoor Unit Wiring Diagram is located on the inside of the wire cover on the outdoor unit. Fig. 4.6 24 | Kaden Installation Manual J3387_Kaden_Installer_Manual_050917.indd 24 5/09/2017 9:08 AM...
-
Page 25: Refrigerant Piping Connection
This will ensure efficient operation and Oblique Rough Warped minimize the need for future maintenance. Remember to always use a tuber cutter. 1. Measure the distance between the indoor and outdoor units. Fig. 5.1 Kaden Installation Manual | 25 J3387_Kaden_Installer_Manual_050917.indd 25 5/09/2017 9:08 AM... -
Page 26: Remove Burrs
3. Place flare nuts on both ends of pipe. Make sure they are facing in the right direction, because you can’t put them on or change their direction after flaring. See Fig. 5.3 Pipe Fig. 5.5 26 | Kaden Installation Manual J3387_Kaden_Installer_Manual_050917.indd 26 5/09/2017 9:08 AM... -
Page 27: Connect Pipes
Ø 15.88 (Ø 0.63”) Do not use excessive torque Excessive force can break the nut or damage the refrigerant piping. You must not exceed torque requirements shown in the table above. Kaden Installation Manual | 27 J3387_Kaden_Installer_Manual_050917.indd 27 5/09/2017 9:08 AM... - Page 28 6. Loosen the flaring nut slightly, then tighten again. 7. Repeat Steps 3 to 6 for the remaining pipe. 28 | Kaden Installation Manual J3387_Kaden_Installer_Manual_050917.indd 28 5/09/2017 9:08 AM...
-
Page 29: Leak Testing And Evacuation
2. Connect another charge hose from the manifold gauge to the vacuum pump. 3. Monitor test pressure and check with a leak detector and bubble solution. Safely release the test pressure. Kaden Installation Manual | 29 J3387_Kaden_Installer_Manual_050917.indd 29 5/09/2017 9:08 AM... -
Page 30: Opening Outdoor Unit Valves
Standard pipe length is 20m Vacuum Pump Inverter R410A: Inverter R410A: (Pipe length – standard (Pipe length – standard length) x 15g/m length) x 30g/m CAUTION DO NOT mix refrigerant types. 30 | Kaden Installation Manual J3387_Kaden_Installer_Manual_050917.indd 30 5/09/2017 9:08 AM... -
Page 31: Electrical Checks
If electrical leakage is detected, turn off the unit immediately and call a licensed electrician to find and resolve the cause of the leakage. Kaden Installation Manual | 31 J3387_Kaden_Installer_Manual_050917.indd 31 5/09/2017 9:08 AM... -
Page 32: Test Run
All piping is properly insulated Unit performs COOL function properly Unit performs HEAT Fig. 8.1 function properly Indoor unit louvers rotate properly Indoor unit responds to remote controller 32 | Kaden Installation Manual J3387_Kaden_Installer_Manual_050917.indd 32 5/09/2017 9:08 AM... -
Page 33: Error Codes
Use the remote controller. If the unit does not respond to the remote, the indoor PCB needs to be replaced; if the unit does respond, then the display board needs to be replaced. Kaden Installation Manual | 33 J3387_Kaden_Installer_Manual_050917.indd 33... - Page 34 Notes 34 | Kaden Installation Manual J3387_Kaden_Installer_Manual_050917.indd 34 5/09/2017 9:08 AM...
- Page 35 Notes Kaden Installation Manual | 35 J3387_Kaden_Installer_Manual_050917.indd 35 5/09/2017 9:08 AM...
- Page 36 J3387_Kaden_Installer_Manual_050917.indd 36 5/09/2017 9:08 AM...
Need help?
Do you have a question about the KS09 and is the answer not in the manual?
Questions and answers