Kaden KD Series Installation Manual
Ducted air conditioner
Hide thumbs
Also See for KD Series:
- Owner's manual (16 pages) ,
- Manual (20 pages) ,
- Installation manual (36 pages)
Table of Contents
Advertisement
Quick Links
Advertisement
Table of Contents

Subscribe to Our Youtube Channel
Related Manuals for Kaden KD Series


Summary of Contents for Kaden KD Series
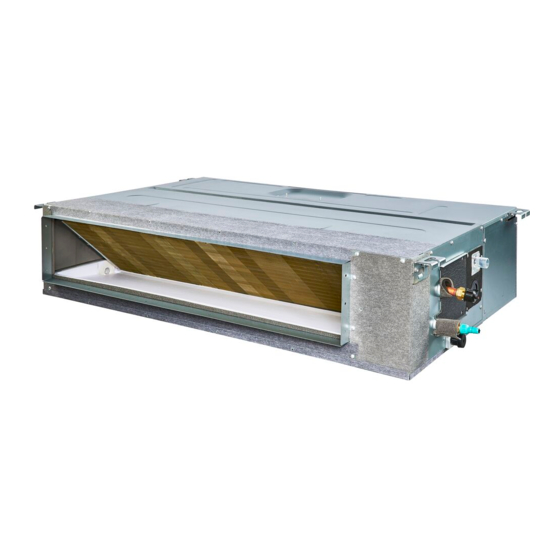
- Page 1 DUCTED AIR CONDITIONER Installation Manual KD Series KD24...
- Page 2 2 | Kaden Installation Manual...
-
Page 3: Table Of Contents
Before test run Test run instructions 12. Manual operations Manual operations Error codes Important note Read this manual carefully before installing or operating your new air conditioning unit. Make sure to save this manual for future reference. Kaden Installation Manual | 3... -
Page 4: Safety Precautions
Children must not weight, or the installation is not done properly, the unit play with the appliance. Cleaning and user maintenance may drop and cause serious injury and damage. must not be made by children without supervision. 4 | Kaden Installation Manual... -
Page 5: Note About Fluorinated Gases
6. Only ARC (Australian Refrigeration Council) licence holders can install and commission this air conditioner. This air conditioner must be installed to meet the requirements of the current version of AS/NZS 5149. 7. It is illegal to vent some types of refrigerant to the atmosphere. Kaden Installation Manual | 5... -
Page 6: Accessories
Owner’s manual Installation manual Others Display panel (for testing purposes only) Wired controller Magnetic ring – wrap the electric wires EMC magnetic ring S1 & S2 (P & Q & E) around the magnetic ring twice 6 | Kaden Installation Manual... -
Page 7: Installation Summary
Install the indoor unit (page 8) Install the outdoor unit (page 15) Install the drainpipe (page 18) Connect the wires (page 26) Leak test and evacuation Connect the refrigerant pipes (page 24) (page 20) Perform a test run (page 31) Kaden Installation Manual | 7... -
Page 8: Indoor Unit Installation
CAUTION Install the indoor and outdoor units, cables and wires at least 1m from televisions or radios to prevent static or image distortion. Depending on the appliances, a 1m distance may not be sufficient. 8 | Kaden Installation Manual... -
Page 9: Indoor Unit Installation Instructions
Rooms with high humidity, such as bathrooms or laundry rooms. Installation place > 30cm Strong and durable ceiling > 2cm Indoor unit Left Right side side > 2cm Service access Ceiling > 10cm > 30cm Floor Fig. 4.2 Kaden Installation Manual | 9... -
Page 10: Maintenance Space
1. Please refer to the following diagrams to locate the four positioning screw bolt holes on the ceiling. Be sure to mark the places where you will drill ceiling hook holes. Air outlet dimensions Air inlet dimensions filter Descending ventilation opening and mounted hook filter Electric control Fig. 4.4 10 | Kaden Installation Manual... - Page 11 Fig. 4.7 6. Mount the indoor unit with at least two people to lift and secure it. Insert suspension bolts into the unit’s hanging holes. Fasten them using the washers and nuts provided. (See Fig. 4.9) Kaden Installation Manual | 11...
- Page 12 2. When connecting the duct, use a non-flammable canvas tie-in to prevent vibrating. 3. Insulation foam must be wrapped outside the duct to avoid condensate. An internal duct under-layer can be added to reduce noise, if the end-user requires. 12 | Kaden Installation Manual...
- Page 13 Fig. 4.14 Note All the figures in this manual are for demonstration purposes only. The air conditioner you have purchased may be slightly different in design, though similar in shape. Kaden Installation Manual | 13...
- Page 14 1. Remove four screws from the drain pump. 2. Unplug the pump power supply and water level switch cable. 3. Detach the pump. 4. Replace all components to re-assemble and complete maintenance. Pump Fig. 4.17 14 | Kaden Installation Manual...
-
Page 15: Outdoor Unit Installation
✓ Install the indoor and outdoor units, cables and wires at least 1 meter from televisions or radios to prevent static or image distortion. Depending on the radio waves, a 1 metre distance may not be enough to eliminate all interference. Kaden Installation Manual | 15... -
Page 16: Outdoor Unit Specifications
Fig. 5.4 at least two of the three directions (M, N, P). (See Fig. 5.7) 30cm from 60cm back wall above 30cm on left 60cm on right Fig. 5.5 200cm in front Fig. 5.7 Fig. 5.6 16 | Kaden Installation Manual... -
Page 17: Drain Joint Installation
Base pan hole of outdoor unit NOTE: When drilling the wall hole, make sure to avoid Seal wires, plumbing, and other sensitive components. Seal Drain joint Fig. 5.9 Kaden Installation Manual | 17... -
Page 18: Drainpipe Installation
This can lead to water leakage. Possible actions to avoid water leakage: 1. Disconnect power to drain pump. 2. Plumb drain pump spigot into gravity fed drain. Lean over 1/50 Fig. 6.2 18 | Kaden Installation Manual... - Page 19 3. Turn off the air conditioner and put the cap back on. NOTE: When connecting multiple drainpipes, install the pipes as shown in Fig. 6.5. With drain pump 0 – 53cm Without drain pump ≥10cm Fig. 6.5 Kaden Installation Manual | 19...
-
Page 20: Refrigerant Piping Connection
Table 7.1 The maximum length and drop height based on models. (Unit: metres) The indoor unit is installed higher than the outdoor unit Type of model Length of piping Maximum drop height Fig. 7.1 KD24 20 | Kaden Installation Manual... -
Page 21: Refrigerant Piping Connection Instructions
Size of joint pipes for indoor unit ✓ ✕ ✕ ✕ Table 7.2 Size of joint pipes for 410A indoor unit 90° Oblique Rough Warped Type of model Size of main pipe (mm) Fig. 7.3 Gas side Liquid side KD24 15.9 Kaden Installation Manual | 21... - Page 22 8. Remove the flaring tool and flare form, then inspect the end Fig. 7.5 of the pipe for cracks and even flaring. 4. Remove PVC tape from ends of pipe when ready to perform flaring work. 22 | Kaden Installation Manual...
-
Page 23: Note On Minimum Bend Radius
Ensure that you wrap insulation around the piping. Direct contact with the bare piping may result in burns or frostbite. • Make sure the pipe is properly connected. Over-tightening may damage the bell mouth and under-tightening may lead to leakage. Kaden Installation Manual | 23... -
Page 24: Leak Testing And Evacuation
Pressure hose/ Leak, pressure test and evacuations. If there is no charge hose change in system vacuum, unscrew the cap from the Charge hose packed valve (high pressure valve). Low pressure Vacuum valve pump Fig. 8.1 24 | Kaden Installation Manual... -
Page 25: Preparations And Precautions
4. Using hexagonal wrench, fully open both the high pressure and low pressure valves. 5. Tighten valve caps on all three valves (service port, high pressure, low pressure) by hand. You may tighten it further using a torque wrench if needed. Kaden Installation Manual | 25... -
Page 26: Wiring
No other equipment should be connected to the same power circuit. • To prevent distortion when the compressor starts (you can find the unit’s power information on the rating sticker), no other equipment should be connected to the same power circuit. 26 | Kaden Installation Manual... -
Page 27: Signal Wiring Between Outdoor And Indoor Units
Strip the insulation from the ends of the wires. 5. Reattach the electric box cover. c. Using a wire crimper, crimp the u-lugs to the ends of the wires. 2. Remove the cover of the electric control box on your indoor unit. Kaden Installation Manual | 27... - Page 28 Do not adjust the dampers when automatic airflow adjustment is active. After 3 to 6 minutes, the air conditioning unit stops operating – Press the CONFIRM button. once automatic airflow adjustment has finished. The external static pressure settings are now complete. 28 | Kaden Installation Manual...
-
Page 29: Power Specifications
90 100 110 120 130 140 150 160 STATIC PRESSURE (pa) AIR FLOW (L/S) (WITHOUT FILTER) SP2-L SP2-M SP2-H SP4-L SP4-M SP4-H SP3-L SP3-M SP3-H SP1-L SP1-M SP1-H 90 100 110 120 130 140 150 160 STATIC PRESSURE (pa) Kaden Installation Manual | 29... -
Page 30: Electrical Checks
Measure grounding resistance by visual detection and with Risk of electric shock grounding resistance tester. Grounding resistance must be less than 4Ω. All wiring must comply with local and national electrical codes, and must be installed by a licensed electrician. 30 | Kaden Installation Manual... -
Page 31: Test Run
Ensure the manual buttons on the indoor unit works properly. e. Check to see that the drainage system is unimpeded and draining smoothly. Ensure there is no vibration or abnormal noise during operation. Kaden Installation Manual | 31... -
Page 32: Manual Operations
• OFF mode: When the panel is turned OFF, the unit turns off and the remote control is re-enabled. Manual Timer Infrared button indicator receiver display Operation Alarm indicator indicator PRE-DEF (pre-heating/defrost) indicator Fig. 12.1 32 | Kaden Installation Manual... -
Page 33: Error Codes
High/Low voltage protection Flash Compressor top overheating protection Flash Outdoor low temperature protection Flash Compressor drive error Flash Mode conflict Flash Compressor low pressure protection Flash Outdoor IGBT sensor error Flash Indoor unit communication malfunction Kaden Installation Manual | 33... - Page 34 34 | Kaden Installation Manual...
- Page 35 Kaden Installation Manual | 35...
- Page 36 kadenair.com.au...
Need help?
Do you have a question about the KD Series and is the answer not in the manual?
Questions and answers