Table of Contents
Advertisement
Quick Links
Advertisement
Table of Contents

Subscribe to Our Youtube Channel
Related Manuals for Kaden KSI R32


Summary of Contents for Kaden KSI R32
- Page 1 MULTI-AIR CONDITIONER Owner’s and Controller Manual...
-
Page 2: Table Of Contents
Table of contents Safety precautions 2. Installation and service KSI Split System Air Conditioner KSI unit specifications and features 2. KSI manual operation(without remote) 3. KSI care and maintenance KMD Ducted Air Conditioner KMD unit specifications and features 2. KMD care and maintenance KMC Cassette Air Conditioner KMC unit specifications and features 2. - Page 3 Instructions. Important note REFRIGERANT Read this manual carefully before installing or operating your new air conditioning unit. Make sure to save this manual for future reference. Kaden Owner’s and Controller Manual | 3...
-
Page 4: Safety Precautions
Do not expose your body directly to cool air for a prolonged period of time. REFRIGERANT This appliance uses R32 (difluoromethane) refrigerant, which is a flammable gas class 2.2 according to AS 1677 and must be handled by a refrigeration technician with an appropriate Australian refrigerant licence. 4 | Kaden Owner’s and Controller Manual... - Page 5 Do not climb onto or place objects on top of the outdoor unit. • Do not allow the air conditioner to operate for long periods of time with doors or windows open, or if the humidity is very high. Kaden Owner’s and Controller Manual | 5...
-
Page 6: Installation And Service
Also note that all refrigerated air conditioning systems have air filters that require regular inspection and cleaning. Please refer to Cleaning your air filter on pages 17 (KSI), 22 (KMD), 28 (KMC). 6 | Kaden Owner’s and Controller Manual... - Page 7 Batteries (if applicable) *Installation and other field-supplied components are not covered by Kaden product warranty. These include, but are not limited to, control wiring, refrigerant gas and electrical connections to the appliance. These should be inspected as they can affect the performance, reliability and safety of the system.
- Page 8 Batteries (if applicable) *Installation and other field-supplied components are not covered by Kaden product warranty. These include, but are not limited to, control wiring, refrigerant gas and electrical connections to the appliance. These should be inspected as they can affect the performance, reliability and safety of the system.
- Page 9 Batteries (if applicable) *Installation and other field-supplied components are not covered by Kaden product warranty. These include, but are not limited to, control wiring, refrigerant gas and electrical connections to the appliance. These should be inspected as they can affect the performance, reliability and safety of the system.
- Page 10 10 | Kaden Owner’s and Controller Manual...
-
Page 11: Ksi Split System Air Conditioner
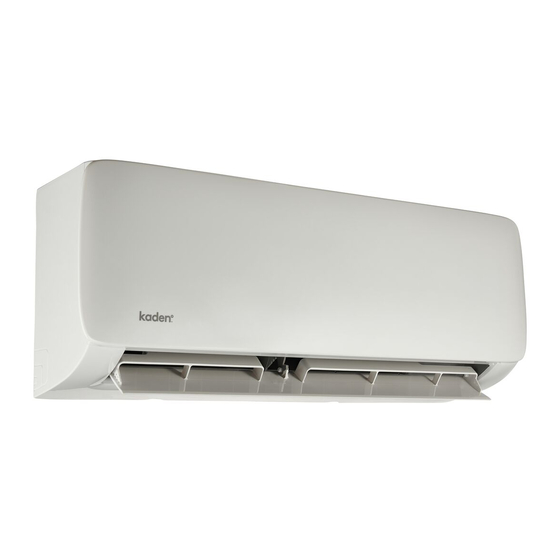
KSI Split System Air Conditioner KSI06 | KSI09 |KSI12 | KSI18 | KSI24 | KSI28 Kaden Owner’s and Controller Manual | 11... -
Page 12: Ksi Unit Specifications And Features
• FRESH, SWING, TURBO, ECO or SILENCE feature is turned off when defrosting when 8ºC heating feature is turned on (some units) when Active Clean feature is turned on (for inverter split type) when unit is self-cleaning (for fixed-speed type) 12 | Kaden Owner’s and Controller Manual... - Page 13 (such as TURBO mode and its self-cleaning using your mobile phone and a Wireless connection. functions), refer to the Remote Control Manual. For the USB device access, replacement, maintenance operations must be carried out by a professional. Kaden Owner’s and Controller Manual | 13...
- Page 14 Do not move louvre by hand. This will cause the louvre to become out of sync. If this occurs, turn off the unit and unplug it for a few seconds, then restart the unit. This will reset the louvre. Deflector rod Fig. B 14 | Kaden Owner’s and Controller Manual...
- Page 15 It will hold the new temperature for 5 hours, then the unit will turn off automatically. NOTE: The SLEEP function is not available in FAN or DRY mode. SLEEP operation +/- 1ºC +/- 1ºC 7 hours temperature timer off Saving energy during sleep Kaden Owner’s and Controller Manual | 15...
-
Page 16: Ksi Manual Operation(Without Remote)
How to operate your unit Wi-Fi operation setup without the remote control For instructions on setting up Wi-Fi connectivity for your Kaden air conditioner, please scan the QR code below, In the event that your remote control fails to work, your unit or visit kadenair.com.au... -
Page 17: Ksi Care And Maintenance
Do not touch air freshening (Plasma) filter for at least 10 minutes after turning off the unit. 9. Close the front panel of the indoor unit. Kaden Owner’s and Controller Manual | 17... - Page 18 Clean all filters Turn on FAN function Make sure nothing is blocking all air inlets and outlets until unit dries out completely Turn off the unit and Remove batteries from disconnect the power remote control 18 | Kaden Owner’s and Controller Manual...
-
Page 19: Kmd Ducted Air Conditioner
KMD Ducted Air Conditioner KMD09 | KMD12 | KMD18 | KMD24 Kaden Owner’s and Controller Manual | 19... -
Page 20: Kmd Unit Specifications And Features
NOTE: Room relative humidity less than 80%. If the air conditioner operates in excess of this figure, the surface of the air conditioner may attract condensation. Please sets the vertical air flow louvre to its maximum angle (vertically to the floor), and set HIGH fan mode. 20 | Kaden Owner’s and Controller Manual... - Page 21 When power returns, the wired control display will return. To restart the unit, press the ON/OFF button on the wired control. If the system has an auto restart function, the unit will restart using the same settings. Kaden Owner’s and Controller Manual | 21...
-
Page 22: Kmd Care And Maintenance
1. If the unit you purchased is a rear ventilated one, take off the filter in the directions indicated by the arrows in the following diagram. 2. Remove the air filter. 22 | Kaden Owner’s and Controller Manual... - Page 23 Any unit repairs should be performed by an authorised dealer or a licensed service provider. Check for Clean all filters damaged wires Check for leaks Make sure nothing is blocking all air inlets and outlets Kaden Owner’s and Controller Manual | 23...
- Page 24 24 | Kaden Owner’s and Controller Manual...
-
Page 25: Kmc Cassette Air Conditioner
KMC Cassette Air Conditioner KMC09 | KMC12 | KMC18 Kaden Owner’s and Controller Manual | 25... -
Page 26: Kmc Unit Specifications And Features
30 minutes. The remote control will be disabled during this operation. OFF MODE: When the panel is turned OFF, the unit turns off and the remote control is re-enabled. 26 | Kaden Owner’s and Controller Manual... - Page 27 “EC” and the LED indicator light will flash. Three-minute protection feature A protection feature prevents the air conditioner from being activated for approximately 3 minutes when it restarts immediately after operation. Kaden Owner’s and Controller Manual | 27...
-
Page 28: Kmc Care And Maintenance
3. Detach the grille from the main unit by holding the grille at a 45° angle, lifting it up slightly and then pulling the grille forward. 4. Remove the air filter. 28 | Kaden Owner’s and Controller Manual... - Page 29 Make sure nothing is blocking all air inlets and outlets Arrange for all Turn on FAN function filters to be cleaned until unit dries out completely Turn off the unit and Remove batteries from disconnect the power remote control Kaden Owner’s and Controller Manual | 29...
- Page 30 30 | Kaden Owner’s and Controller Manual...
-
Page 31: Km Multi Outdoor Unit
KM Multi Outdoor Unit KM24 | KM28 |KM46 Kaden Owner’s and Controller Manual | 31... -
Page 32: Km Units Parts And Major Functions
Your air conditioner may be slightly different, if similar in shape. The following pages introduce several kinds of indoor units that can be matched with the outdoor units. 32 | Kaden Owner’s and Controller Manual... - Page 33 Your air conditioner may be slightly different, if similar in shape. The following pages introduce several kinds of indoor units that can be matched with the outdoor units. Kaden Owner’s and Controller Manual | 33...
- Page 34 Your air conditioner may be slightly different, if similar in shape. The following pages introduce several kinds of indoor units that can be matched with the outdoor units. 34 | Kaden Owner’s and Controller Manual...
- Page 35 Under these conditions, the air conditioner will stop heating operations and start defrosting automatically. The time to defrost may vary from 4 to 10 minutes, depending on the outdoor temperature and the amount of frost build-up on the outdoor unit. Kaden Owner’s and Controller Manual | 35...
- Page 36 This will reduce the efficiency of the unit. • Adjust louvres properly and avoid direct airflow. Closing curtains during heating also Doors and windows should be kept closed helps keep the heat in 36 | Kaden Owner’s and Controller Manual...
-
Page 37: Km Manual Operations And Maintenance
3. Disconnect the power supply and remove the battery from the remote control. 4. Check components of the outdoor unit periodically. Contact a local dealer or a customer service centre if the unit requires servicing. Kaden Owner’s and Controller Manual | 37... -
Page 38: Disposal Guidelines
Dispose of the appliance at a designated municipal electronic waste collection facility. • Sell the appliance to certified scrap metal dealers. NOTE: Disposing of this appliance in the forest or other natural surroundings endangers your health and is bad for the environment. 38 | Kaden Owner’s and Controller Manual... -
Page 39: Troubleshooting
Squeaking sound: Normal expansion and contraction of plastic and metal parts caused by temperature changes during operation can cause squeaking noises. Kaden Owner’s and Controller Manual | 39... - Page 40 The fuse is burned out. Contact a qualified service technician. Remote control batteries are dead. Replace batteries. The unit’s 3-minute protection has been activated. Wait three minutes after restarting the unit. Timer is activated. Turn timer off. 40 | Kaden Owner’s and Controller Manual...
- Page 41 • E(x), P(x), F(x) • EH(xx), EL(xx), EC(xx) • PH(xx), PL(xx), PC(xx) NOTE: If your problem persists after performing the checks and diagnostics above, turn off your unit immediately and contact your qualified service technician. Kaden Owner’s and Controller Manual | 41...
- Page 42 Flash Compressor top overheating protection Flash Outdoor temperature too low protection Flash Compressor drive error Flash Mode conflict Flash Compressor low pressure protection Flash Outdoor IGBT sensor error* Flash Indoor unit communication malfunction 42 | Kaden Owner’s and Controller Manual...
-
Page 43: Wireless Controller Guide
Wireless Controller Guide For use with the KSI and KMC Series KSI06 | KSI09 | KSI12 | KSI18 | KSI24 | KSI28 KMC09 | KMC12 | KMC18 Kaden Owner’s and Controller Manual | 43... -
Page 44: Remote Controller Specifications
1% increments. environment. SWING Starts and stops the horizontal TURBO louvre movement. Hold down for Enables unit to reach preset 2 seconds to initiate vertical louvre temperature in shortest auto swing feature. possible time. 44 | Kaden Owner’s and Controller Manual... -
Page 45: Handling The Remote Controller
Do not leave batteries in the remote control if you don’t plan on using the device for more than 2 months. Battery disposal Do not dispose of batteries as unsorted municipal waste. Refer to local laws for proper disposal of batteries. Kaden Owner’s and Controller Manual | 45... -
Page 46: Remote Lcd Screen Indicators
This display is blank when operating in FAN mode. Note: All indicators shown in the figure are for the purpose of clear presentation. But during actual operation, only the relative function signs are shown on the display window. 46 | Kaden Owner’s and Controller Manual... -
Page 47: How To Use The Basic Functions
3. Press the FAN button to select the fan speed. 4. Press the ON/OFF button to start the unit. Setting temperature The operating temperature range for units is 17ºC – 30ºC. You can increase or decrease the set temperature in 1ºC increments. Kaden Owner’s and Controller Manual | 47... - Page 48 2. Press the FAN button to select the fan speed. 3. Press the ON/OFF button to start the unit. NOTE: You can’t set temperature in FAN mode. As a result, your remote control’s LCD screen will not display temperature. 48 | Kaden Owner’s and Controller Manual...
- Page 49 The “ “ indicator remains on and this function is activated. 3 sec Timer Timer Example: Setting unit to turn on after 5 hours 3 sec Example: Setting unit to turn on after 2.5 hours Kaden Owner’s and Controller Manual | 49...
- Page 50 1:00 PM, and you want the unit to turn on automatically at 7:00 PM. You want it to operate for 2 hours, then automatically turn off at 9:00 PM. Do the following: 3 sec Timer 3 sec Timer 50 | Kaden Owner’s and Controller Manual...
- Page 51 Timer is set to turn ON Timer is set to turn OFF 6 hours from current time 8 hours from current time Timer starts Unit turns Unit turns Current time 1PM 6 hours later 8 hours later Kaden Owner’s and Controller Manual | 51...
-
Page 52: How To Use The Advanced Functions
This function can only be activated ACTIVE CLEAN function. via remote control. For detail, see “sleep operation” in OWNER’S MANUAL. NOTE: You can only activate this function in COOL or DRY mode. 52 | Kaden Owner’s and Controller Manual... -
Page 53: Breeze Away Function
FRESH function When the FRESH function is initiated, the ion generator is energized and will help to purify the air in the room. Breeze away / fresh / sleep / follow me function Kaden Owner’s and Controller Manual | 53... -
Page 54: Lock Function
COOL, or HEAT modes, measuring ambient temperature from the remote control (instead of from the indoor unit itself) will enable the air conditioner to optimise the temperature around you and ensure maximum comfort. 54 | Kaden Owner’s and Controller Manual... -
Page 55: Swing Function
SWING button. Press again to make it stop. louvre SWING function is activated (model dependent). Wi-Fi operation setup For instructions on setting up Wi-Fi connectivity for your Kaden air conditioner, please scan the QR code below, or visit kadenair.com.au... - Page 56 56 | Kaden Owner’s and Controller Manual...
- Page 57 Wired Controller Guide For use with KMD Series KD24 | KD36 | KD42 | KD48 | KD60 | KMD09 KMD12 | KMD18 | KMD24 Kaden Owner’s and Controller Manual | 57...
- Page 58 Fan speed: Auto/Low/Med/High DELAY/DAY OFF CONFIRM BACK COPY • Timer ON/OFF • Temp setting • Weekly timer Follow me • Child lock • LCD display • Clock • Infrared remote receiver (on some models) 58 | Kaden Owner’s and Controller Manual...
- Page 59 2. Fan speed 8. Lock 3. Faceplate function 9. Room display 4. Follow me function 10. Clock display 5. Turbo mode 11. On / Off timer 6. ºC / ºF 12. Timer display Kaden Owner’s and Controller Manual | 59...
- Page 60 BACK COPY 1. POWER 7. DELAY/DAY OFF 2. MODE 8. CONFIRM 3. Adjust 9. BACK 4. FAN SPEED 10. COPY 5. FOLLOW ME/TURBO MODE 11. Infrared remote receiver (on some models) 6. TIMER 60 | Kaden Owner’s and Controller Manual...
- Page 61 The wired controller can be a remote signal receiving device, you can use the wireless remote controller to control the air-conditioner through the wired remote controller when the system has been powered on. Kaden Owner’s and Controller Manual | 61...
- Page 62 Press the buttons again for 3 seconds to deactivate the child lock function. When the child lock function is activated, the icon SWING SWING mark appears. 62 | Kaden Owner’s and Controller Manual...
- Page 63 3. Press the button “+” or “–” to set the time. After the time is set, the timer will start or stop automatically. ex. Off timer set at 6.00PM 4. Press the CONFIRM button again to finish. CONFIRM Kaden Owner’s and Controller Manual | 63...
- Page 64 Tuesday time scale 1 Up to 4 timer settings can be saved for each day of the week. It is convenient if the WEEKLY TIMER is set according to the user’s life style. 64 | Kaden Owner’s and Controller Manual...
- Page 65 2. When you press the POWER button for 2 seconds, the air • The DAY OFF setting is cancelled automatically after conditioner will turn off completely. the set day has passed Kaden Owner’s and Controller Manual | 65...
- Page 66 6. Other days can be copied by repeating steps 4 and 5. 7. Press the Confirm button to confirm the settings. CONFIRM 8. Press the Back button to go back to the weekly timer. BACK 66 | Kaden Owner’s and Controller Manual...
- Page 67 Error of communication between wired controller and indoor unit The faceplate is abnormal Please check the error display of the indoor unit and read the unit owners manual if other error codes appear. Kaden Owner’s and Controller Manual | 67...
- Page 68 kadenair.com.au...
Need help?
Do you have a question about the KSI R32 and is the answer not in the manual?
Questions and answers