wtw inoLab pH/Oxi Level 1 Operating Manual
Measuring instrument for ph and dissolved oxygen
Hide thumbs
Also See for inoLab pH/Oxi Level 1:
- Operating manual (52 pages) ,
- Operating manual (73 pages)

Related Manuals for wtw inoLab pH/Oxi Level 1


Summary of Contents for wtw inoLab pH/Oxi Level 1
- Page 1 Operating Manual inoLab pH/Oxi Level 1 Measuring Instrument for pH and Dissolved Oxygen ba12231e03 10/2002...
- Page 2 Copyright Weilheim 2002, WTW GmbH & Co. KG © Reprinting - even as excerpts - is only allowed with the ex- plicit written authorization of WTW GmbH & Co. KG, Weilheim. Printed in Germany.
-
Page 3: Table Of Contents
List of contents Overview ......69 1.1 Keypad .......70 1.2 Display . - Page 4 List of contents 5.3 Disposal ......108 What to do if......109 6.1 pH system messages .
-
Page 5: Overview
Overview Overview The compact inoLab pH/Oxi Level 1 precision measuring in- strument lets you perform pH, Redox, and D. O. measure- ments rapidly and reliably. The inoLab pH/Oxi Level 1 provides the highest degree of operating comfort, reliability and measuring safety for all applications. -
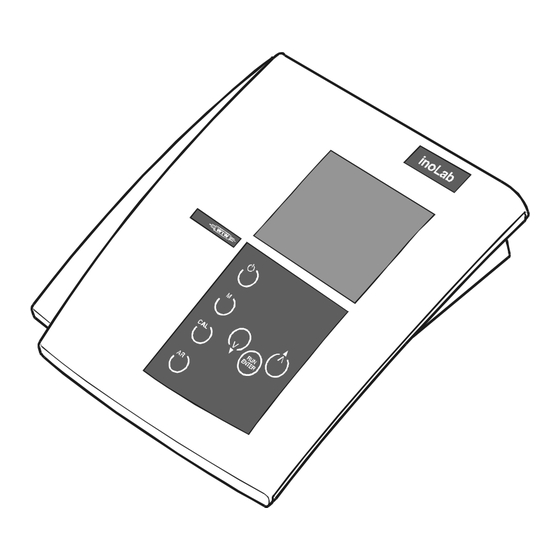
Page 6: Keypad
Overview Keypad Measuring instrument ON/OFF Select measuring mode Call up calibration procedure Activate/deactivate AutoRead Confirm inputs, start AutoRead Select measuring mode, increase values, scroll Select measuring mode, reduce values, scroll... -
Page 7: Display
Mains power supply (option) Caution Only connect probes to the instrument that cannot feed ex- cessive voltages or currents (> SELV and > circuit with cur- rent limiter). Almost all commercial probes - especially WTW probes - meet these requirements. -
Page 8: Operating Structure
Overview Caution On socket 4, use the WTW probe StirrOx G only. Operating structure The following overview diagram shows which keys you have to press to select between the different measuring modes: Note The oxygen concentration, oxygen saturation, and oxygen partial pressure measuring modes only appear if a D. -
Page 9: Safety
Safety Safety This operating manual contains basic instructions that you must follow during the commissioning, operation and main- tenance of the instrument. Consequently, all responsible personnel must read this operating manual before working with the instrument. The operating manual must always be available within the vicinity of the instrument. -
Page 10: Authorized Use
In this event, wait until the temperature of the instrument reaches room tem- perature before putting the instrument back into operation. Caution The instrument is only allowed to be opened by personnel authorized by WTW. - Page 11 Safety Safe operation If safe operation is no longer possible, the instrument must be taken out of service and secured against inadvertent op- eration. Safe operation is no longer possible if: the instrument has been damaged in transport the instrument has been stored under adverse conditions for a lengthy period of time the instrument is visibly damaged the instrument no longer operates as described in this...
- Page 12 Safety...
-
Page 13: Commissioning
(see chapter 7 T ECHNICAL 1 Insert the plug (1) into the socket (2) of the meter. 2 Connect the original WTW plug-in power supply (3) to an easily accessible mains socket. Note If a stirrer is operated via the measuring instrument, it is... - Page 14 Commissioning Scope of delivery Laboratory measuring instrument, inoLab pH/Oxi Level 1 Operating manual and short manual 4 x type AA Mignon 1.5 V batteries...
-
Page 15: Operation
Operation Operation Switch on the instrument 1 Place the instrument on a flat surface and protect it against intense light and heat. 2 Press the key. The display test appears briefly on the display. The instrument then switches automatically to the previously selected measuring mode. -
Page 16: Measuring The Ph Value/Redox Voltage
Operation Measuring the pH value/Redox voltage Preparatory Perform the following preparatory activities when you want activities to measure: 1 Press the key repeatedly until the pH/Redox measurement appears on the display. 2 Connect the electrode to the instrument. 3 Adjust the temperature of the buffer or test solutions or measure the current temperature if the measurement is made without a temperature probe. - Page 17 Operation The temperature measurement is absolutely essential for a reproducible pH measurement. If the measurement is made without a temperature probe, proceed as follows: 1 Determine the current temperature using a thermometer. 2 Press and hold down the key and set up the temperature using Note When calibrating without a temperature probe, set up the...
-
Page 18: Measuring The Ph Value
Operation 4.2.1 Measuring the pH value 1 Perform the preparatory activities according to section 4.2. 2 Immerse the pH electrode into the test sample. 3 Press the key until pH appears in the status display. The pH value appears on the display. 4.2.2 AutoRead AR (drift control) The AutoRead function (drift control) checks the stability of the measurement signal. -
Page 19: Measuring The Redox Voltage
Operation Note The current AutoRead measurement (with acceptance of the current value) can be terminated at any time by pressing . It is only possible to change to another measuring mode after AutoRead has been terminated. 4.2.3 Measuring the Redox voltage The instrument can measure the Redox voltage (mV) of a solution when connected with a Redox electrode, e.g. -
Page 20: Calibrating For Ph Measurements
Always calibrate after connecting another pH electrode. You can choose between 3 calibration procedures: AutoCal TEC is specially adapted to the WTW technical buffer solutions as a fully automatic two-point calibration. The buffer solutions are automatically recognized by the instrument. - Page 21 Operation Display Asymmetry Slope [mV] [mV/pH] -15 ... +15 -60.5 ... -58 -20 ... +20 -58 ... -57 -25 ... +25 -61 ... -60.5 -57 ... -56 -30 ... +30 -62 ... -61 -56 ... -50 Clean the electrode accord- ing to the electrode manual <...
-
Page 22: Autocal Tec
Operation 4.3.1 AutoCal TEC Use any two of the WTW technical buffer solutions for this procedure (pH 2.00, 4.01, 7.00, or 10.00). Note Steps 2 and 6 are not required if you use a temperature probe. 1 Press the key repeatedly until the AutoCal TEC function display appears. - Page 23 Operation 6 If necessary, set the temperature of the second buffer solution by pressing 7 Submerse the electrode in the second buffer solution. 8 Press the key. AR flashes on the display. The electrode voltage (mV) appears on the display. As soon as a stable value is recognized, AR disappears.
-
Page 24: Autocal Din
Operation 4.3.2 AutoCal DIN Use two different DIN buffer solutions (type A, C, D or F with the pH values 1.679, 4.006, 6.865, 9.180) for this procedure. Note Steps 2 and 6 are not required if you use a temperature probe. - Page 25 Operation 6 If necessary, set the temperature of the second buffer solution by pressing 7 Submerse the electrode in the second buffer solution. 8 Press the key. AR flashes on the display. The electrode voltage (mV) appears on the display. As soon as a stable value is recognized, AR disappears.
-
Page 26: Concal
Operation 4.3.3 ConCal Two-point Use two buffer solutions for this procedure: calibration pH 7.0 ± 0.5 any other buffer solution Note Steps 2 and 9 are not required if you use a temperature probe. 1 Press the key repeatedly until the ConCal function display appears. - Page 27 Operation 8 Thoroughly rinse the electrode with distilled water. 9 If necessary, set the temperature of the second buffer solution by pressing 10 Submerse the electrode in the second buffer solution. 11 Press the key. The second measured pH value appears on the display.
- Page 28 Operation Single-point Use a buffer solution in the range pH = 7.0 ± 0.5 for this calibration procedure. Note Only the electrode asymmetry is determined in single-point calibration. The slope of the last two-point calibration is retained. Note Step 2 is not required if you use a temperature probe. The TP display indicates an active temperature measurement.
-
Page 29: Measuring The Dissolved Oxygen
Operation Measuring the dissolved oxygen The following parameters can be measured: Oxygen concentration Oxygen saturation Oxygen partial pressure The measuring instrument has the following functions: AutoRange (automatic selection of the measuring range), AutoRead (drift control) to check the stability of the mea- suring signal. -
Page 30: Oxygen Concentration
Operation 4.4.1 Oxygen concentration When measuring the concentration in test samples with a salt content of more than 1 g/l, a salinity correction is required. Note How to enter the current salt content is described in section 4.5.2 on page 102. How to switch the salinity correction on/ off see below. -
Page 31: Oxygen Saturation
Operation 2 Press and hold down the key and with switch off the salinity correction function. Sal disappears from the display. 4.4.2 Oxygen saturation To measure the oxygen saturation proceed as follows: 1 Perform the preparatory activities according to section 4.4. 2 Immerse the D. -
Page 32: Oxygen Partial Pressure
Operation 4.4.3 Oxygen partial pressure To measure the oxygen partial pressure proceed as follows: 1 Perform the preparatory activities according to section 4.4. 2 Immerse the D. O. probe into the test sample. 3 Press the key until the oxygen partial pressure in mbar appears on the display. - Page 33 Operation 5 If necessary, start the next AutoRead measurement by pressing 6 To terminate the AutoRead function: Press Note The current AutoRead measurement (with acceptance of the current value) can be terminated at any time by pressing . It is only possible to change to another measuring mode after AutoRead has been terminated.
-
Page 34: Calibrating For D. O. Measurements
Operation Calibrating for D. O. measurements Why calibrate? D. O. probes age. This changes the slope of the probes. As a result, an inexact measured value is displayed. Calibration determines the current slope of the probe and stores it in the instrument. - Page 35 Operation Probe evaluation After the calibration, the instrument automatically evaluates the current status of the probe using the relative slope. The relative slope does not affect the measuring accuracy. Low values indicate that the electrolytic filling will soon be depleted and the probe will have to be regenerated. Display Relative slope S = 0.8 ...
-
Page 36: Starting The Calibration
Operation 4.5.1 Starting the calibration To calibrate the instrument proceed as follows: 1 Connect the D. O. probe to the instrument. ® 2 Keep the OxiCal -SL air calibration vessel ready. Note The sponge in the air calibration vessel must be moist (not ®... - Page 37 Operation 6 As soon as a stable value is reached, AR stops flashing. Thus the calibration is finished and the probe symbol indicates the relative slope determined and the probe evaluation (see page 99). 7 With change to the measuring mode. Note Refer to ...
-
Page 38: Entering The Salt Content (Salinity)
Operation 4.5.2 Entering the salt content (salinity) When measuring the concentration of test samples with a salt content of more than 1 g/l, a salinity correction is required. For this, you have to determine and input the salinity of the test sample first. Before measuring, switch on the salinity correction. -
Page 39: Configuration
Operation Configuration You can adapt the measuring instrument to your individual requirements. To do this, the following parameters can be changed (the status on delivery is marked in bold): Temperature probe that is used pH temperature probe, for the pH measurement temperature probe Air pressure display Current value in mbar... - Page 40 Operation 4 Set up pH TP or O2 TP by pressing 5 Confirm with . P appears on the display and, if a D. O. probe is connected, the current air pressure in mbar. Air pressure 6 Confirm with . USE appears on the display. Temperature unit 7 With select between °C and °F .
-
Page 41: Reset
Operation Reset Basic settings You can reset (initialize) the settings for the pH and oxygen measurement separately. pH measurement The following functions for the pH measurement (pH InI) are reset to the values they had on delivery: Measuring mode Asymmetry 0 mV Slope -59.16 mV/pH... - Page 42 Operation Proceed as follows to reset the settings: 1 Press and hold down the key. 2 Press the key. Resetting the pH settings 3 Toggle between no and yes by pressing yes: reset the settings for pH. no: retain settings. 4 Confirm with .
-
Page 43: Maintenance, Cleaning, Disposal
Maintenance, cleaning, disposal Maintenance, cleaning, disposal Maintenance The measuring instrument is almost maintenance-free. The only maintenance task is replacing the batteries: 1 Open the battery compartment (1) on the underside of the instrument. 2 Remove the four batteries from the battery compart- ment. -
Page 44: Cleaning
Maintenance, cleaning, disposal Cleaning Occasionally wipe the outside of the measuring instrument with a damp, lint-free cloth. Disinfect the housing with iso- propanol as required. Caution The housing is made of synthetic material (ABS). Thus, avoid contact with acetone or similar detergents that contain solvents. - Page 45 What to do if... What to do if... pH system messages Cause Remedy Error message, pH electrode: – Not connected – Connect electrode – Air bubbles in front of the – Remove air bubbles diaphragm – Air in the diaphragm –...
- Page 46 What to do if... Buffer solutions: – Incorrect buffer solutions – Change calibration procedure – Buffer solutions too old – Only use once. Note the shelf life – Buffer solutions depleted – Change solutions No stable Cause Remedy measured value pH electrode: –...
- Page 47 What to do if... Cause Remedy – pH electrode unsuitable – Use suitable electrode – Temperature difference – Adjust temperature of between buffer and buffers or samples sample too large – Measuring procedure not – Follow special procedure suitable Oxygen system messages Cause Remedy Error message,...
- Page 48 What to do if... Cause Remedy Error message, Damaged membrane – Membrane damaged – Regenerate D. O. probe – Membrane head not tight – Screw membrane head enough tight AR flashes for a Cause Remedy longer time No stable measured value –...
- Page 49 You would like to Cause Remedy know which soft- – e.g. question of the WTW – Press the key and ware version is in service department switch on instrument. the instrument The software version...
- Page 50 What to do if...
- Page 51 Technical Data Technical Data General data Storage temperature - 25 °C ... + 65 °C Ambient temperature Operating temperature 0 °C ... + 55 °C Allowable relative hu- Annual mean: < 75 % midity 30 days/year: 95 % Other days: 85 % Length [mm] Dimensions and...
- Page 52 Technical Data Batteries 4 x 1.5 V AA type alkaline manga- Energy supply nese batteries Runtime Approx. 3000 operating hours Mains power supply Connection max. overvoltage cate- (option) gory II (valid for all plug-in power supplies): Plug-in power supply (Euro plug): FRIWO FW1199, 11.7864 Friwo Part.
- Page 53 Technical Data pH/Redox measurement - 2.00 ... + 16.00 Measuring ranges and resolution U [mV] - 199.9 ... + 199.9 - 1999 ... + 1999 T [°C] - 5.0 ... + 105.0 T [°F] + 23.0 ... + 221.0 ± 0.01 Accuracy (after calibration) (±...
- Page 54 Technical Data Oxygen measurement Measuring ranges mg/l mbar and resolution Range I 0 ... 19.99 0 ... 199.9 0 ... 199.9 Resolution 0.01 Range II 0 ... 90.0 0 ... 600 0 ... 1250 Resolution T [°C] 0,0 ... +50,0 T [°F] +32,0 ...
- Page 55 Lists Lists This chapter provides additional information and orientation aids. Abbreviations The list of abbreviations explains abbreviations that appear on the display or when dealing with the instrument. Specialist terms The glossary briefly explains the meaning of the specialist terms. However, terms that should already be familiar to the target group are not described here.
- Page 56 Measuring instrument measures with highest resolution Asymmetry AutoCal DIN Automatic calibration with DIN buffer solutions AutoCal TEC Automatic calibration with WTW technical buffer solutions °C Temperature unit, Celsius Calibration Cd... Calibration with DIN buffer solutions (acc. to DIN 19 266)
- Page 57 Lists Overflow Display range exceeded Oxical Automatic calibration pH value Slope Salinity SELV Safety Extra Low Voltage Slope Slope setting on calibration Temperature probe Temperature measurement active Asymmetry potential...
- Page 58 Contact point between the reference electrolytic solution and the sample. Drift control See A ® MultiCal Group term for the various WTW calibration procedures used for automatic calibration in buffer solutions. ® OxiCal Automatic calibration Oxygen saturation Relation of the pO...
- Page 59 Lists Redox voltage Potentiometric quantity. Relative slope Dimensionless factor, referring to the average slope value of newly regenerated probes of the same type. Resolution Number of decimal places that appear for a measured value. Salinity The salinity is a sum parameter especially for seawater; it gives the salt content of a solution (without dimension) in ‰...
- Page 60 Lists...
- Page 61 Index asymmetry measuring ranges authorized use AutoCal DIN 84, 88 operating structure AutoCal TEC 84, 86 operational safety AutoRead 82, 96 oxygen concentration criteria oxygen partial pressure oxygen saturation basic settings battery compartment place of the instrument plug-in power supply calibrating 84, 98 calibration...
- Page 62 Index AutoCal TEC ConCal...
- Page 63 Appendix Appendix...
- Page 64 Appendix Note If you need further informationen or application notes you can ask for: Application reports Primers Safety data sheets. You can find information on available literature in the WTW or via the catalog, L ABORATORY AND IELD NSTRUMENTATION Internet.
Need help?
Do you have a question about the inoLab pH/Oxi Level 1 and is the answer not in the manual?
Questions and answers