Table of Contents
Advertisement
Available languages
Available languages
INSTRUCCIONES DE INSTALACIÓN Y USO
INSTALLATION INSTRUCTIONS AND USER GUIDE
Por favor, lea estas instrucciones atentamente antes de instalar o utilizar el aparato por primera vez. Estas instrucciones deben ser seguidas para una instalación
segura del emisor. Cualquier problema, fallo o daño ocasionado por la no observancia de estas instrucciones no será cubierto por la garantía del fabricante. Este
Please read these instructions before installing or using this appliance for the first time. These instructions must be followed for the safe installation of the radiator. Any
problem, fault or damage caused by the non-observance of these instructions will not be covered under the manufacturer's warranty. This manual should be retained with the
EMISORES TERMOELÉCTRICOS CON WIFI
manual debe ser guardado con el aparato por el usuario para futuras consultas.
appliance by the user for future reference.
DILIGENS
WIFI THERMAL RADIATORS
DIL4GC DIL10GC
DIL6GC DIL12GC
DIL8GC DIL14GC
Advertisement
Table of Contents

Subscribe to Our Youtube Channel
Related Manuals for Gabarron DILIGENS DIL4GC


Summary of Contents for Gabarron DILIGENS DIL4GC
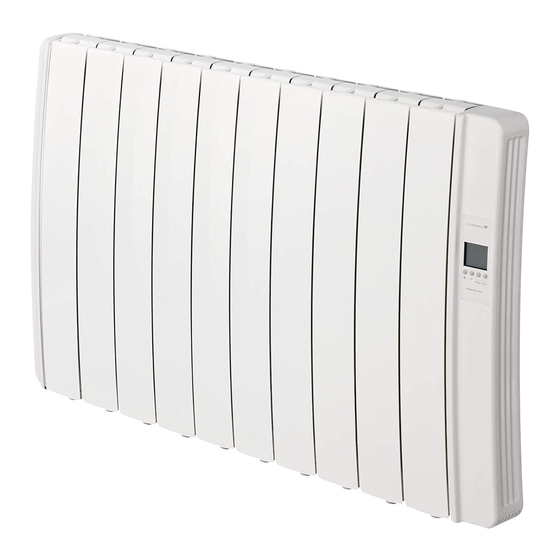
- Page 1 INSTRUCCIONES DE INSTALACIÓN Y USO INSTALLATION INSTRUCTIONS AND USER GUIDE DILIGENS EMISORES TERMOELÉCTRICOS CON WIFI WIFI THERMAL RADIATORS DIL4GC DIL10GC DIL6GC DIL12GC DIL8GC DIL14GC Por favor, lea estas instrucciones atentamente antes de instalar o utilizar el aparato por primera vez. Estas instrucciones deben ser seguidas para una instalación segura del emisor.
- Page 2 1.- IMPORTANTE Lean estas instrucciones antes de conectar este aparato por primera vez La garantía del radiador no cubrirá cualquier daño causado por la no observancia de alguna de estas instrucciones. Las instrucciones deben conservarse para futuras referencias. Este manual debe ser conservado y dado a cualquier nuevo usuario.
-
Page 3: Instrucciones De Instalación
2.- INSTRUCCIONES DE INSTALACIÓN - Abrir la caja de cartón y comprobar que se trata del modelo correcto y que se encuentra en perfectas condiciones. - Para obtener resultados óptimos es necesario mantener una Eventual repisa distancia mínima de 15 cm entre el radiador y cualquier material combustible como muebles, cortinas etc. -
Page 4: Modo De Empleo
3.- MODO DE EMPLEO Interruptor general. Todos los modelos disponen de un interruptor en la parte posterior que permite la desconexión o apagado total del emisor. Programación horaria: Temperatura asignada a cada tramo horario en modo AUTO. Estado conexión con Centralita G Control Hub. - Page 5 3.2. PUESTA EN HORA Comenzamos estableciendo el día y hora actual. 3.2.1 Pulse y mantenga pulsado el botón 3.2.2 Pulse la tecla Config/Prog de nuevo, el día de la semana Config/Prog hasta que se muestre la siguiente comienza a parpadear. Utilizando las teclas “+” y “-”, seleccione el día pantalla.
-
Page 6: Modo Manual
3.4. TEMPERATURAS DE CONSIGNA. En el modo AUTO, es posible modificar temporalmente la temperatura de consigna para el periodo de tiempo actual. Se puede aumentar o disminuir la consigna simplemente pulsando las teclas “+” o “-”. El cambio se elimina tras el cambio de día o nivel de temperatura. - Page 7 3.7. DETECCIÓN DE VENTANA ABIERTA Con la detección de ventana abierta activada, se desconectará automáticamente el elemento emisor cuando se detecte en la sala la apertura de una ventana mediante la bajada drástica de temperatura evitando el desperdicio de energía. Después de este periodo, el emisor vuelve al modo anterior de operación.
-
Page 8: Valores Por Defecto
Mediante una centralita G-Control Hub conectada a la red del hogar, es posible controlar el funcionamiento completo e integral del emisor remotamente desde cualquier lugar a través de la app Elnur Gabarron o la app-web. El emisor debe estar asociado a una centralita G-Control Hub conectada a internet para utilizar esta característica. -
Page 9: Mantenimiento
7.- MANTENIMIENTO Estos emisores térmicos no precisan de ningún tipo de mantenimiento especial, proporcionando confort térmico durante largas temporadas. Limpie el polvo con un trapo suave y seco, sólo cuando la unidad esté desconectada y fría. No utilice disolventes ni productos abrasivos. Al finalizar la temporada de calefacción desconecte el emisor mediante el interruptor situado en la parte posterior. -
Page 10: Componentes Principales
10.- COMPONENTES PRINCIPALES Carcasa plástico derecha ref. 46102205 Interruptor general ref. 46100530 Carcasa plástico izquierda ref. 46100480 500 W Elemento Calefactor ref. 30201825 Placa Potencia TRIAC (Excepto DIL14GC) ref. 46102185 750 W Elemento Calefactor ref. 30201830 Placa Potencia RELÉ (Sólo DIL14GC) ref. - Page 11 1. WARNING Please read these instructions before installing or using this appliance for the first time. 1. The warranty of the heater will not cover any damage caused by non-observance of any of these instructions. 2. The instructions should be retained for future reference. This guide must be kept and given to any new owner.
-
Page 12: Installation Instructions
2. - INSTALLATION INSTRUCTIONS - Open the package and check that it is the correct model and it is in good condition. - To obtain optimum performances it is necessary to maintain a Shelf minimum clearance of 15 cm between the radiator and any inflammable material as furniture, Minimum 15cm curtains etc. -
Page 13: Operating Modes
3. - USING THE THERMAL RADIATOR Main switch. All models are equipped with one switch on the back surface allowing the heater disconnection. Daily Programming: Temperature level for each time interval (1h) of the day. G-Control Hub connection indicator. Temperature setpoint. Heating on indicator. -
Page 14: Setting The Time
3.2. SETTING THE TIME We start by first setting the Day and Time. 3.2.1 You can do this by Press & Holding the 3.2.2 Press & Release the Config/Prog. button again and the day of Config/Prog. button until the following is shown. the week starts to flash. -
Page 15: Temperature Levels
3.4. TEMPERATURE LEVELS In the AUTO mode, you can temporary change the set temperature for the time period. You can increase or decrease this temperature simply by pressing the "+" or "-" buttons. Once the time period finishes, the temperature will revert back to the programmed set temperature. -
Page 16: Open Window Detection
3.7. OPEN WINDOW DETECTION With open window detection activated, the heating element will be disconnected automatically when a sharp decrease in temperature in the room is detected avoiding energy wastage. After this period of time, the radiator returns to the prior operation mode. -
Page 17: Unit Reset
4.- REMOTE OPERATION USING THE WIFI G-CONTROL HUB It is possible to control the full operation of the unit remotely with Gabarron-Elnur app or app-web. The unit must be connected to a Wifi G-Control Hub connected to the internet to use this feature. -
Page 18: Cleaning And Maintenance
7.- CLEANING AND MAINTENANCE The radiators do not precise any special maintenance providing thermal comfort during large periods. Clean dust with a dry, soft cloth only when the unit is disconnected and cold. Do not use solvents or abrasive products for cleaning. After the heating season disconnect the radiator with the switch located on the back surface of the radiator. -
Page 19: Main Components List
10.- MAIN COMPONENTS LIST Right side plastic case ref. 46102205 Main Switch ref. 46100530 Left side plastic case ref. 46100480 500 W Heating Element ref. 30201825 Power PCB TRIAC (Except DIL14GC model) ref. 46102185 750 W Heating Element ref. 30201830 Power PCB RELAY (Only DIL14GC model) ref. - Page 20 ADVERTENCIA: Para evitar sobrecalentamientos, no cubrir el aparato de calefacción WARNING: In order to avoid overheating do not cover the heater El símbolo en el producto o en su embalaje indica que este producto no se puede tratar como desperdicios normales del hogar.
Need help?
Do you have a question about the DILIGENS DIL4GC and is the answer not in the manual?
Questions and answers