Advertisement
Available languages
Available languages
INSTALLATION INSTRUCTIONS AND USER GUIDE
Lea estas instrucciones atentamente antes de instalar o utilizar el aparato por primera vez.
Please read these instructions before installing or using this appliance for the first time.
ACUMULADORES DINÁMICOS
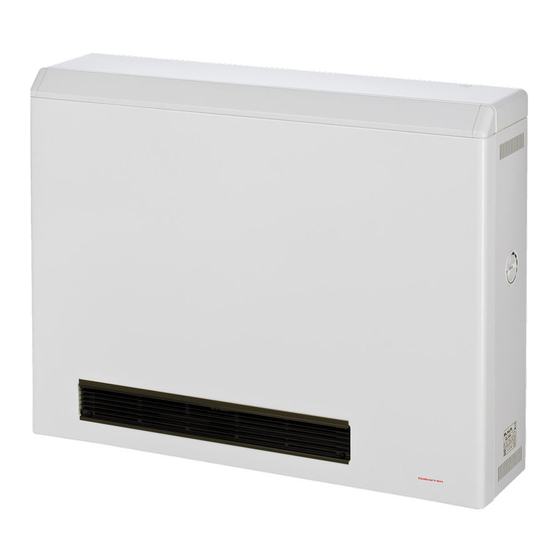
FAN STORAGE HEATERS
ADL 5030/14
ADL 4024/14
ADL 3018/14
ADL 2012/14
INSTRUCCIONES DE INSTALACIÓN Y USO
ADL 5030
ADL 4024
ADL 3018
ADL 2012
Advertisement
Table of Contents

Related Manuals for Gabarron ADL 5030/14


Summary of Contents for Gabarron ADL 5030/14
- Page 1 ACUMULADORES DINÁMICOS FAN STORAGE HEATERS ADL 5030/14 ADL 5030 ADL 4024/14 ADL 4024 ADL 3018/14 ADL 3018 ADL 2012/14 ADL 2012 INSTRUCCIONES DE INSTALACIÓN Y USO INSTALLATION INSTRUCTIONS AND USER GUIDE Lea estas instrucciones atentamente antes de instalar o utilizar el aparato por primera vez.
- Page 2 INSTRUCCIONES DE INSTALACION Y USO 1.- IMPORTANTE Lean estas instrucciones antes de conectar este aparato por primera vez La garantía del acumulador no cubrirá cualquier daño causado por la no observancia de alguna de estas instrucciones. Este manual debe ser conservado y dado a cualquier nuevo usuario. Este aparato no está...
-
Page 3: Instrucciones De Instalación
desconexión del ventilador debe estar gobernada por un termostato de ambiente externo que no está incluido en el suministro del acumulador dinámico. Para conseguir el máximo ahorro energético con el mejor rendimiento en una instalación de acumuladores, es necesario realizar una correcta elección tanto del número como de la potencia de los mismos. - Page 4 4.- Retire la rejilla quitando los cuatro tornillos. Retire también el panel frontal quitando los dos tornillos de la parte inferior. 5.- Fije al aparato los dos separadores laterales incluidos en la caja de accesorios utilizando para ello los tornillos suministrados así como los ya fijados en la parte superior de los laterales del acumulador.
- Page 5 8.- Compruebe que la resistencia descansa por completo sobre los ladrillos sin impedir que se coloque una nueva fila de ladrillos, figura 4. fig. 4 9.- Coloque dos nuevas filas de ladrillos, siempre con la cara lisa hacia abajo e inserte otra resistencia. Repita la operación para la tercera resistencia.
-
Page 6: Modo De Empleo
3.- MODO DE EMPLEO El mando giratorio regulado del 1 al 5 y situado en el lateral derecho del aparato, regula la carga del mismo. En media estación es suficiente con situar el mando en posiciones intermedias. En estación fría puede seleccionarse la posición 5. - Page 7 INSTALLATION INSTRUCTIONS AND USER GUIDE 1.- WARNING Please read these instructions before installing or using this appliance for the first time. The warranty of the storage heater will not cover any damage caused by non observance of any of these instructions. This Guide must be kept and given to any new owner.
-
Page 8: Installation Instructions
The input control operates a highly sensitive thermostat which regulates the amount of heat stored. The discharge takes place when the built-in blower operates. The blower drives fresh air through the core and is heated. A bimetallic device mixes the hot air with fresh air to provide homogeneous temperature. It is important that the correct rating of heater is installed to provide the selected level of heat. - Page 9 4.- Remove the front outlet grill by removing the four screws. Remove also the front panel by removing the two screws at the bottom of the heater. 5.- Attach the LH & RH spacers to the storage heater using the screws supplied, in the same way as the screws are fixed in the upper rear section of the heater side.
- Page 10 8.- Check that the heating element rests completely on the bricks without restricting a new row (Fig. 4). fig. 4 9.- Arrange two new rows of bricks, ensuring the flat side of each bricks is facing towards the bottom of the heater, and insert a new heating element.
-
Page 11: Using The Heater
3.- USING THE HEATER The input control allows to lead the heat you want to store during the night. On mild weather it is enough to set the input control at intermediate positions, you can set the input control at maximum position if necessary. - Page 12 ADVERTENCIA: Para evitar sobrecalentamientos, no cubrir el aparato de calefacción. WARNING: To avoid overheating do not cover the heater. El símbolo en el producto o en su embalaje indica que este producto no se puede tratar como desperdicio normales del hogar. Este producto se debe entregar al punto de recolección de equipos eléctricos y electrónicos para reciclaje. Al asegurarse de que este producto se deseche correctamente usted ayudará...
Need help?
Do you have a question about the ADL 5030/14 and is the answer not in the manual?
Questions and answers