Table of Contents
Advertisement
Available languages
Available languages
INSTRUCCIONES DE INSTALACIÓN Y USO
INSTALLATION INSTRUCTIONS AND USER GUIDE
NSTRUÇÕES DE INSTALAÇÃO E USO
Lea estas instrucciones atentamente antes de instalar o utilizar el aparato por primera vez.
Please read these instructions carefully before installing or using this appliance for the first time.
Leia estas instruções atentamente antes de ligar o aparelho a primeira vez.
EMISORES TERMOELÉCTRICOS
THERMAL RADIATORS
EMISSORES ELÉTRICOS
RF3P
RF3F
RF4P
RF4F
RF6P
RF6F
RF8P
RF8F
RF10P
RF10F
RF12P
RF12F
RF14P
RF14F
RF
RF3E
RF4E
RF6E
RF8E
RF10E
RF12E
RF14E
Advertisement
Table of Contents

Related Manuals for Gabarron RF Series


Summary of Contents for Gabarron RF Series
- Page 1 INSTRUCCIONES DE INSTALACIÓN Y USO INSTALLATION INSTRUCTIONS AND USER GUIDE NSTRUÇÕES DE INSTALAÇÃO E USO EMISORES TERMOELÉCTRICOS THERMAL RADIATORS EMISSORES ELÉTRICOS RF3P RF3F RF3E RF4P RF4F RF4E RF6P RF6F RF6E RF8P RF8F RF8E RF10P RF10F RF10E RF12P RF12F RF12E RF14P RF14F RF14E Lea estas instrucciones atentamente antes de instalar o utilizar el aparato por primera vez.
- Page 2 1. INFORMACIÓN IMPORTANTE • La garantía del radiador no cubrirá cualquier daño causado por la no observancia de alguna de estas instrucciones. • Las instrucciones deben conservarse para futuras referencias. Este manual debe ser conservado y dado a cualquier nuevo usuario. •...
-
Page 3: Instrucciones De Instalación
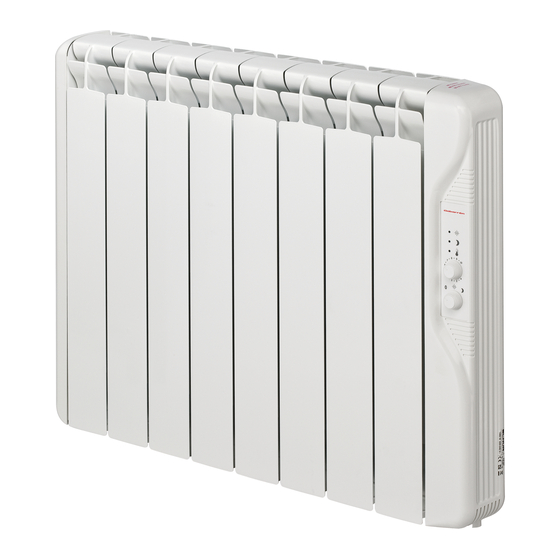
RF3P RF4P RF5P RF6P RF8P RF10P RF12P RF14P MODELOS RF3F RF4F RF5F RF6F RF8F RF10F RF12F RF14F RF3E RF4E RF5E RF6E RF8E RF10E RF12E RF14E ELEMENTOS LARGO (cm) 33.5 41.5 49.5 57.5 73.5 89.5 105.5 121.5 FONDO (cm) 10 más 2 cm de separación de la pared ALTO (cm) PESO (kg) 11,5... -
Page 4: Modo De Empleo
3. MODO DE EMPLEO MODELOS RF-P CONTROL ELECTRONICO Indicador modo SOL Indicador modo LUNA Indicador De consumo Selector de temperatura Selector de modo Dos mandos rotativos controlan el funcionamiento de los modelos electrónicos: El selector de temperatura permite fijar la temperatura de confort con gran sensibilidad. El indicador de consumo se ilumina cuando el emisor está... -
Page 5: Control Digital
MODELOS RF-F CONTROL DIGITAL Display digital: Aquí podrá ver indicada, Tecla +: la temperatura y otros Pulse esta tecla para mensajes. elevar la temperatura. Indicador de consumo: Este punto ilumina Tecla -: cuando el emisor está Pulse esta tecla para calentando. -
Page 6: Modo Antihielo
MODO ANTIHIELO: El emisor tiene un modo de funcionamiento antihielo que le ayudará a proteger la estancia de heladas. Para activarlo pulsar la tecla – repetidamente hasta que aparezca en el display la indicación H H H . El equipo se conectará... - Page 7 MODELOS RF-E CONTROL DIGITAL CON PROGRAMACIÓN DIARIA Y SEMANAL Display digital: Aquí podrá ver indicada la hora, la temperatura y otros mensajes. Indicador de consumo: Tecla +: Este puntito ilumina Aumenta los valores cuando emisor está a modificar. calentando. Tecla antihielo: Indicador de modo SOL Si el display muestra la hora el emisor está...
- Page 8 SELECTOR “O” , “P”, “I”. Posición “0” : El radiador está desconectado y el display digital estará apagado. Posición “P” : Modo programa, el radiador mantiene la temperatura SOL, la temperatura LUNA o ANTIHIELO según las maniobras programadas. Si en esta posición el display muestra la hora el radiador estará...
- Page 9 LUNA ANTIHIEL O 00:00 01:00 02:00 03:00 04: 00 05:00 06: 00 07:00 08:00 09:00 10: 0 0 11: 00 12: 0 0 13:00 14: 0 0 15:00 16: 0 0 17:00 18: 0 0 19:00 20: 0 0 21:00 22:00 23:00...
-
Page 10: Programación Semanal
PROGRAMACIÓN SEMANAL Es posible asignar un programa diferente a cada uno de los días de la semana. Para pasar del modo diario (que es el modo original de fábrica) a modo semanal, proceda de la siguiente manera: Seleccionar la posición 0 con el mando rotativo apagando así toda visualización en el display. Pulsar tecla sin soltarla girar de nuevo el mando rotativo a la posición P. -
Page 11: Problemas Y Soluciones
5. PROBLEMAS Y SOLUCIONES - El emisor no calienta. Modelos electrónicos y digitales: Comprobar que el emisor no esté cubierto o las entradas de aire inferiores obstruidas. Modelos digitales: Si el display digital muestra la hora pulsar la tecla (tecla antihielo) para encender el aparato. - Page 12 ESQUEMAS ELÉCTRICOS PLACA ELECTRONICA MODELOS RF-P R resistencia Ts termóstato de seguridad noche C selector tres posiciones sonda Tª salida entrada MODELOS RF-F PLACA ELECTRONICA R resistencia Ts termóstato de seguridad sonda Tª MODELOS RF-E salida entrada R resistencia Ts termóstato de seguridad C selector tres posiciones PLACA ELECTRONICA...
- Page 13 1. IMPORTANT INFORMATION • The warranty of the heater will not cover any damage caused by non-observance of any of these instructions. • The instructions should be retained for future reference. This guide must be kept and given to any new owner.
-
Page 14: Installation Instructions
RF3P RF4P RF5P RF6P RF8P RF10P RF12P RF14P MODELS RF3F RF4F RF5F RF6F RF8F RF10F RF12F RF14F RF3E RF4E RF5E RF6E RF8E RF10E RF12E RF14E MODULES W (cm) 33.5 41.5 49.5 57.5 73.5 89.5 105.5 121.5 D (cm) 10 plus 2 cm separated from the wall H (cm) WEIGHT (kg) 11,5... -
Page 15: Electronic Control
3. USING THE THERMAL RADIATOR MODELS RF-P ELECTRONIC CONTROL SUN mode indicator MOON mode indicator Heating indicator Temperature selector Mode selector Operation in electronic models is controlled by means of two rotary knobs. It is possible to regulate the temperature level with accuracy by means of the temperature selector. The heating indicator will be lit when the heater is consuming energy. -
Page 16: Digital Control
MODELS RF-F DIGITAL CONTROL Key +: It increases the Digital display: temperature set It shows the temperature point. and other messages. Heating indicator: This small dot will be lit Key -: when the heater is It decreases the consuming energy. temperature set point Start / Stop key:... -
Page 17: Frost Protection Mode
Note: It is possible to modify the set back value from 3ºC to a different one. Press the key four seconds and the display will show 3. 0 as the factory default value. Increase or decrease the value using the + and – keys. The new set back value for ECO mode will be stored automatically in a few seconds. - Page 18 DIGITALS MODELS RF-E DIGITAL CONTROL WITH DAILY AND WEEKLY PROGRAMMING Digital DISPLAY: shows time, temperature other messages. Heating indicator: Key + : This small dot will be lit It increases the values. when heater consuming energy. SUN indicator Frost protection key: If the display shows the time the heater is in frost SUN key :...
-
Page 19: Daily Programmes
SELECTOR “O” , “P”, “I”. Position “0” : The heater is switched off permanently. The display is switched off. Position “P” : The heater is following a program. It will maintain the SUN, MOON or temperatures as per the introduced program. At this position if the display shows the time the heater is frost protection mode. - Page 20 MOON 00:00 01:00 02:00 03:00 04:00 05:00 06:00 07:00 08:00 09:00 10:00 11:00 12:00 13:00 14:00 15:00 16:00 17:00 18:00 19:00 20:00 21:00 22:00 23:00 24:00 EXAMPLE 1 - Press PRG 00:00 Let’s see an example of how to 2 - Press ...
-
Page 21: Weekly Programmes
WEEKLY PROGRAMMES It is possible to allocate different programs to different days of the week. To do this, the controller has to be upgrade from 24h mode (factory default) to 24h/7days mode as follows: Move the selector to 0 position, the display will be Off. Press the key and at the same time turn the selector to P position maintaining the key at least five seconds. -
Page 22: Troubleshooting
5. TROUBLESHOOTING - The thermal radiator does not heat. Check the heater or the air inlets are not covered. Digital models: the display shows the time, press the key to switch on the heater. Check that the DAY or NIGHT temperatures are right. - The room does not reach the right temperature. - Page 23 6. WIRING PLACA ELECTRONICA MODELS RF-P R heating element noche Ts safety cut out C three way selector sonda Tª probe Tª salida entrada PLACA MODELS RF-F ELECTRONICA R heating element Ts safety cut out sonda Tª probe Tª MODELS RF-E salida entrada R heating element...
-
Page 24: Informação Importante
1. INFORMAÇÃO IMPORTANTE • A garantia do radiador não cobrirá qualquer dano causado pelo não cumprimento de algumas destas instruções. • As instruções devem ser retidas para a referência futura. Este manual deve ser conservado e dado a qualquer novo usuário. •... - Page 25 RF3P RF4P RF5P RF6P RF8P RF10P RF12P RF14P MODELOS RF3F RF4F RF5F RF6F RF8F RF10F RF12F RF14F RF3E RF4E RF5E RF6E RF8E RF10E RF12E RF14E ELEMENTOS LARGURA (cm) 33.5 41.5 49.5 57.5 73.5 89.5 105.5 121.5 PROF. (cm) 10 mais 2 cm de separação à parede ALTURA (cm) PESO (kg) 11,5...
-
Page 26: Instruçoes De Uso
3. INSTRUÇOES DE USO MODELOS RF-P CONTROLE ELETRÓNICO Piloto modo SOL Piloto modo LUA Radiador está a funcionar Selector de temperatura Selector rotativo O modelo eletrónico incorpora dois comandos rotativos que servem para controlar o funcionamento do aparelho O seletor de temperatura permite fixar a temperatura desejada. Girar o comando do termóstato no máximo para aquecer o compartimento, acender-se-á... -
Page 27: Temperatura Ambiente
MODELOS RF-F CONTROLE DIGITAL Tecla +: Display digital: Pulsar para aumentar a Aqui poderá ver indicada a temperatura e outras temperatura. Indicador de consumo: Este ponto fica iluminado Tecla -: quando o radiador está a Diminui a temperatura. aquecer. Tecla ativar / desativar: Pulsar para ativar / desativar o Tecla ECO: radiador. -
Page 28: Modo Anti Gelo
MODO ANTI GELO : Com esta modalidade ativada, se a temperatura ambiente deixa cair abaixo de 5ºC o calefator conectar-se-á automaticamente. Pressione a tecla – para diminuir o ponto ajustado da temperatura ambiente até que o display mostre H H H BLOQUEIO DE TECLADO É... - Page 29 MODELOS RF-E CONTROLE DIGITAL COM PROGRAMAÇÃO DIÁRIA E SEMANAL Display digital: Aqui poderá ver indicada a hora, a temperatura e outras mensagens. Tecla +: Indicador de consumo: Aumenta os valores a Este ponto fica iluminado quando o radiador está a modificar.
- Page 30 SELECTOR “O” , “P”, “I”. Posição “0” : O radiador está desligado e o display digital estará apagado. Posição “P” : Modo programa, o radiador mantém a temperatura SOL, a temperatura LUA o ANTI GELO segundo as manobras programadas. Se nesta posição o display mostra a hora, o radiador estará em modo anti-gelo.
- Page 31 LUNA ANTIHIEL O 00:00 01:00 02:00 03:00 04: 00 05:00 06: 00 07:00 08:00 09:00 10: 0 0 11: 00 12: 0 0 13:00 14: 0 0 15:00 16: 0 0 17:00 18: 0 0 19:00 20: 0 0 21:00 22:00 23:00...
- Page 32 PROGRAMAÇÃO SEMANAL : É possível fazer um programa diferente em cada um dos dias da semana. Para passar do modo diário (que é um modo original de fábrica) a modo semanal proceda da seguinte maneira: Selecionar a posição 0 com o comando rotativo apagando assim toda visualização no display. Pulsar tecla sem soltar girar de novo o comando rotativo para a posição P.
-
Page 33: Problemas E Soluções
5. PROBLEMAS E SOLUÇÕES : - O radiador não aquece . Modelos eletrónicos e digitais: Comprovar que o radiador não está coberto ou as entradas de ar inferiores obstruídas. Modelos digitais: Se o display digital mostra a hora pulsar a tecla (tecla anti gelo) para ligar o aparelho. -
Page 34: Esquemas Eléctricos
6. ESQUEMAS ELÉCTRICOS PLACA ELECTRONICA MODELOS RF-P R resistencia noche Ts termóstato de segurança C selectores três posições sonda Tª salida entrada PLACA ELECTRONICA MODELOS RF-F R resistencia Ts termóstato de segurança sonda Tª MODELOS RF-E salida entrada R resistencia Ts termóstato de segurança C selectores três posições PLACA... - Page 35 ADVERTENCIA: Para evitar sobrecalentamientos, no cubrir el aparato de calefacción. WARNING: In order to avoid overheating do not cover the heater. ADVERTENCIA: Para evitar sobreaquecimentos, não cobrir o aparelho de aquecimento. El símbolo en el producto o en su embalaje indica que este producto no se puede tratar como desperdicio normal del hogar.
- Page 36 Fabricado por: ELNUR S.A. Travesía de Villa Esther, 11 28110 Algete - Madrid Atención al Cliente: +34 91 628 1440 Customer Service: +44 01942 670119 www.elnur.es www.elnur-global.com www.elnur.co.uk Como parte de la política de mejora continua Elnur s.a. se reserva el derecho a realizar modificaciones técnicas sin previo aviso. As a part of the policy of continuous product improvement Elnur s.a.
Need help?
Do you have a question about the RF Series and is the answer not in the manual?
Questions and answers