Advertisement
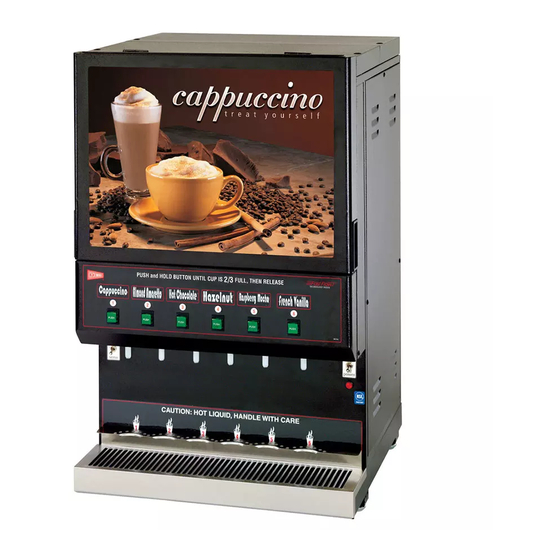
Powdered Cappuccino Dispenser
GB3M10-LD-U
Model GB6M10-LD-U
Safety Information..................2
Specifications...........................3
Operation ................................7
Cleaning...................................8
Thank you for purchasing this quality powdered cappuccino dispenser. For your safety and the safety of
others, read all warnings and the operator's manual before installing or using the product. Properly
instruct all operators. Keep training records. For future reference, record serial number here:
Grindmaster-Cecilware
4003 Collins Lane, Louisville, KY 40245 USA
Phone: 502.425.4776 Toll Free: 800.695.4500
Fax: 502.425.4664
Web: gmcw.com Email: info@gmcw.com
©2017 Grindmaster-Cecilware
Printed in USA
Vertical Lift Door
GB6M10-LD-U
Model GB8M10-LD-U
Table of Contents
Maintenance ...........................9
Troubleshooting Guide.........11
Parts Diagram and List..........12
Wiring Diagrams ...................19
Operator Manual
GB8M10-LD-U
Grindmaster-Cecilware provides the industry's
BEST warranty. Visit gmcw.com for warranty
terms and conditions.
1017 Form # CW-315-02
Part # 390-00043
Advertisement

Related Manuals for Cecilware GB3M10-LD-U


Summary of Contents for Cecilware GB3M10-LD-U
-
Page 1: Table Of Contents
Thank you for purchasing this quality powdered cappuccino dispenser. For your safety and the safety of others, read all warnings and the operator’s manual before installing or using the product. Properly instruct all operators. Keep training records. For future reference, record serial number here: Grindmaster-Cecilware provides the industry’s Grindmaster-Cecilware BEST warranty. Visit gmcw.com for warranty 4003 Collins Lane, Louisville, KY 40245 USA terms and conditions. -
Page 2: Safety Information
Some aftermarket or generic replacement parts do not have the characteristics that will allow them to operate safely in Grindmaster-Cecilware equipment. It is essential to use Grindmaster-Cecilware Replacement Parts when repairing Grindmaster-Cecilware equipment. Failure to use Grindmaster-Cecilware Replacement Parts may subject operators of the equipment to hazardous electrical voltage, resulting in electrical shock or burn. -
Page 3: Specifications
Only Grindmaster-Cecilware brings you this type of versatility. With its top hinged and bottom hinged door design, its 27 inch footprint (left to right) allows maximum utilization of counter space. - Page 4 Installation (continued) Description and Location of Components Cecilware Cappuccino Dispenser - Vertical Door ®...
- Page 5 Federal, State, and Local inspected before leaving the factory. In case of damage, codes. contact the shipper, not Grindmaster-Cecilware. After the machine has been unpacked and placed on a HIGHLY RECOMMENDED: counter, pull out the stainless steel drip tray. It should...
- Page 6 6. WATER LEVEL CONTROLS: Under normal If you need help, call Grindmaster-Cecilware Technical conditions and operation, the water level in the Service Department for help, (502) 425-4776 or (800) tank should not drop more than ½" from the 695-4500 (USA &...
-
Page 7: Operation
Decrease DISPENSE CAP Adjust Water Flow Rate so that the water level reaches half way up in the Mixing Chamber, as shown. TRIANGULAR RIB CORRECT WATER LEVEL FOR MAX FLOW RATE. MIXING CHAMBER Cappuccino Dispenser - Vertical Door Cecilware ®... -
Page 8: Cleaning
18.940 “Tolerance exemptions for active and inert ingredients for use in antimicrobial formulations (Food-contact surface sanitizing solutions)”. Follow the instructions provided with the sanitizing agent. Let all sanitized parts drain and dry naturally. DO NOT WIPE THEM DRY. Cecilware Cappuccino Dispenser - Vertical Door ®... -
Page 9: Maintenance
3. Untie the clip, clear the hole in the bracket, and lift up. 4. To install the new socket, put one side of the lip into the hole and push the socket to one side until the second clip snaps into the second hole. Cappuccino Dispenser - Vertical Door Cecilware ®... - Page 10 Tank Control Board. 4. If water starts flowing into the tank, the Probe may be grounded, due to excessive liming. Check with Ohm meter. Clean probe. BLUE DUAL PROBE OUT OF PRODUCT SENSOR Cecilware Cappuccino Dispenser - Vertical Door ®...
-
Page 11: Troubleshooting Guide
Heater Switch is OFF. Turn Heater Switch ON. water tank. Loose connection on Thermistor. Make sure all wires and terminals on Thermistor are tight. Heater is burned out or defective. Replace the Heater. Cappuccino Dispenser - Vertical Door Cecilware ®... -
Page 12: Parts Diagram And List
Troubleshooting Guide (continued) If you still need help, call Grindmaster-Cecilware Technical Service Department, (502) 425-4776 or (800) 695-4500 (USA & Canada only) (Monday through Friday 8 AM - 6 PM EST). Please have the model and serial number ready so that accurate information can be given. - Page 13 Parts Diagram and List (continued) Whipper Illustrations SLANTED Cappuccino Dispenser - Vertical Door Cecilware ®...
- Page 14 Parts Diagram and List (continued) Body Frame Sub-Assembly - GB3M10-LD-U and GB6M10-LD-U PARTS LIST ITEM DESCRIPTION GB3 P/N GB6 P/N Body Frame Sub-Assembly - GB8M10-LD-U PARTS LIST ITEM DESCRIPTION Cecilware Cappuccino Dispenser - Vertical Door ®...
- Page 15 PARTS LIST ITEM DESCRIPTION PARTS LIST ITEM DESCRIPTION Cappuccino Dispenser - Vertical Door Cecilware ®...
- Page 16 Parts Diagram and List (continued) Electrical Chassis and Control PARTS LIST ITEM DESCRIPTION Cecilware Cappuccino Dispenser - Vertical Door ®...
- Page 17 HOT WATER TANK SJ61C USED ON: GB6M-10-LD-U RL72C AND SM90C TANK DIMENSIONS: 12" WIDE, 4.8" DEEP, 16.5" HIGH. APPROX. 3.7 GAL. SJ61C TANK DIMENSIONS: 15" WIDE, 6" DEEP, 18" HIGH. APPROX. 6 GAL. PARTS LIST ITEM DESCRIPTION Cappuccino Dispenser - Vertical Door Cecilware ®...
- Page 18 Parts Diagram and List (continued) Recommended Spare Parts Cecilware Cappuccino Dispenser - Vertical Door ®...
-
Page 19: Wiring Diagrams
Wiring Diagrams GB3M10-LD-U (120V, 1700W, 1 PH, 2 wires + Ground) w/ Relays TRANSFORMER WATER INLET VALVE FILL WATER LEVEL RELAY PROBE WATER TANK Cappuccino Dispenser - Vertical Door Cecilware ®... - Page 20 Wiring Diagrams (continued) GB6M10-LD-U TRANSFORMER WATER INLET VALVE FILL RELAY WATER LEVEL WATER PROBE TANK Cecilware Cappuccino Dispenser - Vertical Door ®...
- Page 21 Wiring Diagrams (continued) GB8M10-LD-U (with and without water option) - LEFT SIDE TRANSFORMER WATER INLET VALVE FILL RELAY WATER LEVEL WATER PROBE TANK Cappuccino Dispenser - Vertical Door Cecilware ®...
- Page 22 Wiring Diagrams (continued) GB8M10-LD-U (with and without water option) - RIGHT SIDE TRANSFORMER WATER INLET VALVE FILL RELAY WATER LEVEL WATER PROBE TANK Cecilware Cappuccino Dispenser - Vertical Door ®...
- Page 23 Wiring Diagrams (continued) GB8M10WLD-U (with optional “OUT OF PRODUCT” Light) - LEFT SIDE TRANSFORMER WATER INLET VALVE FILL RELAY WATER LEVEL WATER PROBE TANK Cappuccino Dispenser - Vertical Door Cecilware ®...
- Page 24 WATER INLET VALVE FILL RELAY WATER LEVEL WATER PROBE TANK Grindmaster-Cecilware 4003 Collins Lane, Louisville, KY 40245 USA Phone: 502.425.4776 Toll Free: 800.695.4500 Fax: 502.425.4664 Web: gmcw.com Email: info@gmcw.com 1017 Form # CW-315-02 ©2017 Grindmaster-Cecilware Part # 390-00043 Printed in USA...
Need help?
Do you have a question about the GB3M10-LD-U and is the answer not in the manual?
Questions and answers