Dell Dimension 9200 Service Manual
Hide thumbs
Also See for Dimension 9200:
- Owner's manual (174 pages) ,
- Getting started manual (65 pages) ,
- Service manual (56 pages)
Table of Contents
Advertisement
Quick Links
Documentation
Contact Us
Shop
Services & Warranties
Technical Support
Customer Service
You are here:
Dell USA
>
Support Home Page
Back to Contents Page
Before You Begin
Dell™ Dimension™ 9200 Service Manual
Getting Started
Recommended Tools
Turning Off Your Computer
Before Working Inside Your Computer
Getting Started
This manual provides procedures for removing and replacing the components in your computer. Unless otherwise
noted, each procedure assumes that the following conditions exist:
You have performed the steps in
You have read the safety information in your Dell™ Product Information Guide.
A component can be replaced by performing the removal procedure in reverse order.
Recommended Tools
The procedures in this document may require the following tools:
Small flat-blade screwdriver
Phillips screwdriver
Long Phillips screwdriver
Flash BIOS update program (download from support.dell.com)
Turning Off Your Computer
NOTICE:
To avoid losing data, save and close any open files and exit any open programs before you turn off
your computer.
1. Shut down the operating system:
a. Save and close any open files, exit any open programs, click the Start button, and then click Shutdown.
b. In the Shut Down Windows window, select Shut down.
The computer turns off after the operating system shutdown process finishes.
2. Ensure that the computer and any attached devices are turned off. If your computer and attached devices did
not automatically turn off when you shut down your operating system, press and hold the power button for 4
seconds.
http://support.dell.com/support/edocs/systems/dim9200/en/SM_EN/before.htm
Support
Resource Center
Warranty Information
Dell Forums
Contact Us
and
Turning Off Your Computer
Before Working Inside Your Computer
Keyword Search
Account
in this section.
Page 1 of 2
Cart
Sign In
My Account
My Order Status
12/9/2007
Advertisement
Table of Contents

Subscribe to Our Youtube Channel
Related Manuals for Dell Dimension 9200


Summary of Contents for Dell Dimension 9200
-
Page 1: Before You Begin
Turning Off Your Computer Before Working Inside Your Computer You have read the safety information in your Dell™ Product Information Guide. A component can be replaced by performing the removal procedure in reverse order. Recommended Tools The procedures in this document may require the following tools:... -
Page 2: Before Working Inside Your Computer
United States. Taxes, fees, shipping, handling and any applicable restocking charges extra, vary, and are not subject to discount. The Small Business site and offers contained herein valid only for end users and not for resellers and/or online auctions. Dell cannot be responsible for pricing or other errors, omissions, or consequences of misuse of site and its functions and reserves the right to cancel orders arising from such errors. -
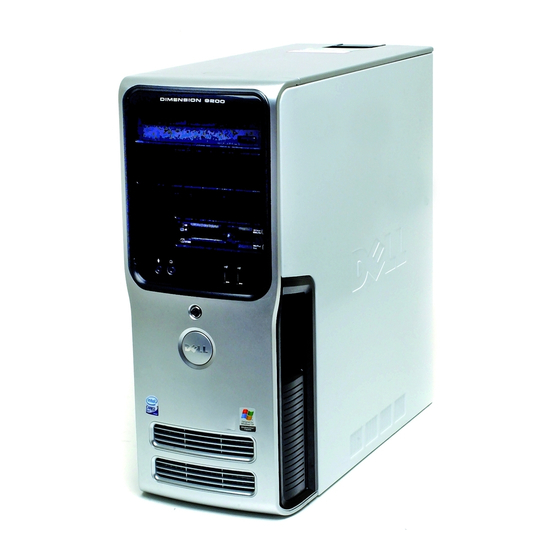
Page 3: About Your Computer
Support Home Page Back to Contents Page About Your Computer Dell™ Dimension™ 9200 Service Manual Front View of the Computer Back View of the Computer Back Panel Connectors Front View of the Computer http://support.dell.com/support/edocs/systems/dim9200/en/SM_EN/about.htm (1 of 7) [12/9/2007 11:13:43 PM]... - Page 4 CD or DVD eject button Press the CD or DVD eject button to eject a disc from the CD or DVD drive. FlexBay drives (2) Can contain an optional floppy drive or an optional Media Card Reader. http://support.dell.com/support/edocs/systems/dim9200/en/SM_EN/about.htm (2 of 7) [12/9/2007 11:13:43 PM]...
-
Page 5: Back View Of The Computer
Service Tag Use the Service Tag to identify your computer when you access the Dell Support website or contact support. Back View of the Computer http://support.dell.com/support/edocs/systems/dim9200/en/SM_EN/about.htm (3 of 7) [12/9/2007 11:13:43 PM]... -
Page 6: Back Panel Connectors
I/O connectors Plug USB, network, S/PDIF, and audio devices into the appropriate connectors (see Back Panel Connectors). card slots (6) Access connectors for any installed PCI or PCI Express cards. Back Panel Connectors http://support.dell.com/support/edocs/systems/dim9200/en/SM_EN/about.htm (4 of 7) [12/9/2007 11:13:43 PM]... - Page 7 Flashes a yellow light when the computer is transmitting or receiving network data. A high volume of network traffic may make this light appear to be in a steady "on" state. http://support.dell.com/support/edocs/systems/dim9200/en/SM_EN/about.htm (5 of 7) [12/9/2007 11:13:43 PM]...
- Page 8 80 Hz and below. The LFE channel drives a subwoofer to provide extremely low bass extension. Systems not using subwoofers can shunt the LFE information to the main speakers in the surround sound setup. http://support.dell.com/support/edocs/systems/dim9200/en/SM_EN/about.htm (6 of 7) [12/9/2007 11:13:43 PM]...
- Page 9 Small Business for delivery in the 50 United States. Taxes, fees, shipping, handling and any applicable restocking charges extra, vary, and are not subject to discount. The Small Business site and offers contained herein valid only for end users and not for resellers and/or online auctions. Dell cannot be responsible for pricing or other errors, omissions, or consequences of misuse of site and its functions and reserves the right to cancel orders arising from such errors.
-
Page 10: Technical Overview
System Board Components Power Supply DC Connector Pin Assignments Inside View of Your Computer CAUTION: Before you use this information in any of the procedures, follow the safety instructions in the Product Information Guide. http://support.dell.com/support/edocs/systems/dim9200/en/SM_EN/techov.htm (1 of 9) [12/9/2007 11:16:43 PM]... -
Page 11: System Board Components
Documentation floppy drive (optional) CD or DVD drive power supply system board hard drive media card reader (optional) System Board Components http://support.dell.com/support/edocs/systems/dim9200/en/SM_EN/techov.htm (2 of 9) [12/9/2007 11:16:43 PM]... - Page 12 SATA connectors (4) (SATA2, SATA3, SATA4, SATA5 FlexBay USB connector clear CMOS jumper password jumper (CLRCMOS) (CLRPSWD) PCI Express x1 card PCI Express x16 card PCI Express x4 card connector connector connector http://support.dell.com/support/edocs/systems/dim9200/en/SM_EN/techov.htm (3 of 9) [12/9/2007 11:16:43 PM]...
-
Page 13: Power Supply Dc Connector Pin Assignments
PCI card connectors floppy drive connector PS/2 and Serial connector (FLOPPY) rear fan connector thermal sensor connector CPU fan connector processor and heat sink processor power connector connector Power Supply DC Connector Pin Assignments http://support.dell.com/support/edocs/systems/dim9200/en/SM_EN/techov.htm (4 of 9) [12/9/2007 11:16:43 PM]... -
Page 14: Dc Power Connector P1
+12 VB DC White 18-AWG +12VB DC White 18-AWG +3.3 VDC Orange 18-AWG +3.3 VDC Orange 18-AWG -12 VDC Blue 18-AWG Black 18-AWG PS-ON Green 18-AWG Black 18-AWG Black 18-AWG Black 18-AWG 18-AWG http://support.dell.com/support/edocs/systems/dim9200/en/SM_EN/techov.htm (5 of 9) [12/9/2007 11:16:43 PM]... -
Page 15: Dc Power Connector P2
Black 18-AWG DC Power Connector P2 Pin Number Signal Name 18-AWG Wire Black Black +12 VA DC Yellow +12 VA DC Yellow DC Power Connect P4 Pin Number Signal Name 18-AWG Wire Black http://support.dell.com/support/edocs/systems/dim9200/en/SM_EN/techov.htm (6 of 9) [12/9/2007 11:16:43 PM]... -
Page 16: Dc Power Connector P7
Signal Name 18-AWG Wire +3.3 VDC Orange Black +5 VDC Black +12 VB DC White DC Power Connector P7 Pin Number Signal Name 18-AWG Wire +5 VDC Black Black +12 A VDC Yellow http://support.dell.com/support/edocs/systems/dim9200/en/SM_EN/techov.htm (7 of 9) [12/9/2007 11:16:43 PM]... - Page 17 The P10 connector is intended for use with PCI Express graphics cards that have power requirements exceeding 75 watts. DC Power Connector P12 Pin Number Signal Name 18-AWG Wire +12 B VDC White +12 B VDC White +12 B VDC White Black Black Black http://support.dell.com/support/edocs/systems/dim9200/en/SM_EN/techov.htm (8 of 9) [12/9/2007 11:16:43 PM]...
- Page 18 Small Business for delivery in the 50 United States. Taxes, fees, shipping, handling and any applicable restocking charges extra, vary, and are not subject to discount. The Small Business site and offers contained herein valid only for end users and not for resellers and/or online auctions. Dell cannot be responsible for pricing or other errors, omissions, or consequences of misuse of site and its functions and reserves the right to cancel orders arising from such errors.
-
Page 19: Specifications
4, and Core processors Memory Type dual-channel 533-, 667-, and 800-MHz DDR2 Memory connectors four Memory capacities 512 MB or 1 GB Maximum memory 4 GB BIOS address F0000h Computer Information Chipset Intel P965 Express Chipset http://support.dell.com/support/edocs/systems/dim9200/en/SM_EN/specs.htm (1 of 7) [12/9/2007 11:17:51 PM]... - Page 20 PCI: 33 MHz PCI Express:100 MHz Bus throughput PCI Express: x1 slot bidirectional speed - 500 MB/ x4 slot bidirectional speed - 2 GB/s x16 slot bidirectional speed - 8 GB/s connectors three http://support.dell.com/support/edocs/systems/dim9200/en/SM_EN/specs.htm (2 of 7) [12/9/2007 11:17:51 PM]...
- Page 21 3.5-inch drive bays (FlexBay) two 5.25-inch drive bays Available devices serial ATA drives, floppy drive, Media Card Reader, DVD drive, and DVD/CD-RW combo drive Internally accessible: two 3.5-inch hard-drive bays Connectors External connectors: http://support.dell.com/support/edocs/systems/dim9200/en/SM_EN/specs.htm (3 of 7) [12/9/2007 11:17:51 PM]...
- Page 22 If the system cannot boot and there is a solid amber light, this indicates a problem with the system board (see Power Lights). Hard-drive access light green http://support.dell.com/support/edocs/systems/dim9200/en/SM_EN/specs.htm (4 of 7) [12/9/2007 11:17:51 PM]...
- Page 23 Product Information Guide for important voltage setting information) Backup battery 3-V CR2032 lithium coin cell Physical Height 46.05 cm (18.13 in) Width 18.75 cm (7.38 in) Depth 45.42 cm (17.88 in) Weight 12.7 kg (28 lb) http://support.dell.com/support/edocs/systems/dim9200/en/SM_EN/specs.htm (5 of 7) [12/9/2007 11:17:51 PM]...
- Page 24 Small Business for delivery in the 50 United States. Taxes, fees, shipping, handling and any applicable restocking charges extra, vary, and are not subject to discount. The Small Business site and offers contained herein valid only for end users and not for resellers and/or online auctions. Dell cannot be responsible for pricing or other errors, omissions, or consequences of misuse of site and its functions and reserves the right to cancel orders arising from such errors.
- Page 25 Documentation sn WEB3 http://support.dell.com/support/edocs/systems/dim9200/en/SM_EN/specs.htm (7 of 7) [12/9/2007 11:17:51 PM]...
-
Page 26: Advanced Troubleshooting
The power button light located on the front of the computer illuminates and blinks or remains solid to indicate different states: If the power light is green and the computer is not responding. ● http://support.dell.com/support/edocs/systems/dim9200/en/SM_EN/adtshoot.htm (1 of 11) [12/9/2007 11:19:07 PM]... -
Page 27: Diagnostic Lights
To help you troubleshoot a problem, your computer has four lights labeled 1, 2, 3, and 4 on the front panel (see Front View Computer). When the computer starts normally, the lights flash before turning off. If the computer malfunctions, of the the sequence of the lights help to identify the problem. http://support.dell.com/support/edocs/systems/dim9200/en/SM_EN/adtshoot.htm (2 of 11) [12/9/2007 11:19:07 PM]... - Page 28 (one at a time) until you have identified a faulty module or reinstalled all modules without error. If available, install properly working memory of the same ● type into your computer (see Installing Memory). http://support.dell.com/support/edocs/systems/dim9200/en/SM_EN/adtshoot.htm (3 of 11) [12/9/2007 11:19:07 PM]...
-
Page 29: Beep Codes
Reseating the memory modules (see Memory) may fix the beep code errors in the following table. If the Installing problem persists, see "Contacting Dell" in your Owner's Manual for instructions on obtaining technical assistance. http://support.dell.com/support/edocs/systems/dim9200/en/SM_EN/adtshoot.htm (4 of 11) [12/9/2007 11:19:07 PM]... - Page 30 Screen initialization failure 3-4-2 Screen retrace failure 3-4-3 Search for video ROM failure 4-2-1 No time tick 4-2-2 Shutdown failure 4-2-3 Gate A20 failure 4-2-4 Unexpected interrupt in protected mode 4-3-3 Timer-chip counter 2 failure http://support.dell.com/support/edocs/systems/dim9200/en/SM_EN/adtshoot.htm (5 of 11) [12/9/2007 11:19:07 PM]...
- Page 31 CMOS Checksum Failure battery charge may be low. then restart the computer. CMOS System Options Not CMOS Display Type Mismatch CMOS Memory Size Mismatch CMOS Time and Date Not http://support.dell.com/support/edocs/systems/dim9200/en/SM_EN/adtshoot.htm (6 of 11) [12/9/2007 11:19:07 PM]...
-
Page 32: Dell Diagnostics
The operating system cannot be Enter the system setup program No ROM Basic located on drive A or drive C. (see Setup) and Entering System confirm that drive A or drive C is properly identified. Dell Diagnostics http://support.dell.com/support/edocs/systems/dim9200/en/SM_EN/adtshoot.htm (7 of 11) [12/9/2007 11:19:07 PM]... -
Page 33: Dell Diagnostics Main Menu
4. When the Dell Diagnostics Main Menu appears, select the test you want to run. Dell Diagnostics Main Menu 1. After the Dell Diagnostics loads and the Main Menu screen appears, click the button for the option you want. Option... -
Page 34: Identifying Drivers
Parameters Allows you to customize the test by changing the test settings. 4. Close the test screen to return to the Main Menu screen. To exit the Dell Diagnostics and restart the computer, close the Main Menu screen. Drivers... -
Page 35: Manually Reinstalling Drivers
If a device is not detected during the operating system setup or is detected but incorrectly configured, you can use the Hardware Troubleshooter to resolve the incompatibility. To resolve incompatibilities using the Hardware Troubleshooter: http://support.dell.com/support/edocs/systems/dim9200/en/SM_EN/adtshoot.htm (10 of 11) [12/9/2007 11:19:07 PM]... - Page 36 Small Business for delivery in the 50 United States. Taxes, fees, shipping, handling and any applicable restocking charges extra, vary, and are not subject to discount. The Small Business site and offers contained herein valid only for end users and not for resellers and/or online auctions. Dell cannot be responsible for pricing or other errors, omissions, or consequences of misuse of site and its functions and reserves the right to cancel orders arising from such errors.
-
Page 37: System Setup Program
Clearing Forgotten Passwords Clearing CMOS Settings Flashing the BIOS Overview Use system setup as follows: To change the system configuration information after you add, change, or remove any hardware in your computer ● http://support.dell.com/support/edocs/systems/dim9200/en/SM_EN/syssetup.htm (1 of 11) [12/9/2007 11:19:53 PM]... -
Page 38: Entering System Setup
Entering System Setup 1. Turn on (or restart) your computer. 2. When the blue DELL™ logo is displayed, watch for the F2 prompt to appear. 3. Once the F2 prompt appears, press <F2> immediately. The F2 prompt indicates that the keyboard has initialized. If you press <F2> before you are prompted, the NOTE: keystroke will be lost. -
Page 39: System Setup Options
Identifies the drives attached to the SATA connectors on the system board, and lists the capacity for SATA 0 through 5 hard drives. Identifies and defines the SATA controller settings for RAID. You can set the SATA controller to RAID SATA Operation Autodetect/ATA or RAID On. Onboard Devices http://support.dell.com/support/edocs/systems/dim9200/en/SM_EN/syssetup.htm (3 of 11) [12/9/2007 11:19:53 PM]... - Page 40 If your computer processor supports Intel® SpeedStep® technology, then this option is listed and it SpeedStep allows you to enable or disable support for this feature. If your computer processor supports Hyper-Threading, this option appears in the Options List. HyperThreading http://support.dell.com/support/edocs/systems/dim9200/en/SM_EN/syssetup.htm (4 of 11) [12/9/2007 11:19:53 PM]...
- Page 41 Auto Power Time fields. This feature does not work if you turn off your computer using a power strip or surge protector. http://support.dell.com/support/edocs/systems/dim9200/en/SM_EN/syssetup.htm (5 of 11) [12/9/2007 11:19:53 PM]...
-
Page 42: Boot Sequence
This feature allows you to set the order in which the BIOS will search devices when trying to find an operating system. NOTICE: If you modify any boot sequence settings, save the new settings to avoid losing the changes. Option Settings http://support.dell.com/support/edocs/systems/dim9200/en/SM_EN/syssetup.htm (6 of 11) [12/9/2007 11:19:53 PM]... -
Page 43: Changing Boot Sequence For The Current Boot
The Boot Device Menu appears, listing all available boot devices. Each device has a number next to it. 4. At the bottom of the menu, enter the number of the device that is to be used for the current boot only. http://support.dell.com/support/edocs/systems/dim9200/en/SM_EN/syssetup.htm (7 of 11) [12/9/2007 11:19:53 PM]... -
Page 44: Changing Boot Sequence For Future Boots
Clearing Forgotten Passwords CAUTION: Before you perform any of the procedures in this section, follow the safety instructions in the Product Information Guide. 1. Follow the procedures in Before Working Inside Your Computer. http://support.dell.com/support/edocs/systems/dim9200/en/SM_EN/syssetup.htm (8 of 11) [12/9/2007 11:19:53 PM]... - Page 45 To connect a network cable, first plug the cable into the network device and then plug it into the computer. 11. Connect your computer and devices to electrical outlets, and then turn them on. http://support.dell.com/support/edocs/systems/dim9200/en/SM_EN/syssetup.htm (9 of 11) [12/9/2007 11:19:53 PM]...
-
Page 46: Clearing Cmos Settings
The BIOS may require a new flash when an update is available or when replacing the system board. 1. Turn on the computer. 2. Locate the BIOS update file for your computer at support.dell.com. 3. Click Download Now to download the file. - Page 47 Small Business for delivery in the 50 United States. Taxes, fees, shipping, handling and any applicable restocking charges extra, vary, and are not subject to discount. The Small Business site and offers contained herein valid only for end users and not for resellers and/or online auctions. Dell cannot be responsible for pricing or other errors, omissions, or consequences of misuse of site and its functions and reserves the right to cancel orders arising from such errors.
-
Page 48: Removing And Installing Parts
This chapter provides procedures for removing and installing the components in your computer. Unless otherwise noted, each procedure assumes that the following conditions exist: You have performed the steps in Turning Off Your Computer Before Working Inside Your Computer. ● http://support.dell.com/support/edocs/systems/dim9200/en/SM_EN/parts.htm (1 of 68) [12/9/2007 11:22:24 PM]... -
Page 49: Removing The Computer Cover
Documentation You have read the safety information in your Dell™ Product Information Guide. ● A component can be replaced by performing the removal procedure in reverse order. ● You have the tools listed in Recommended Tools. ● You are familiar with Turning Off Your Computer. - Page 50 7. Lift the cover away and set it aside in a secure location. Inside View of Your Computer CAUTION: Before you perform any of the procedures in this section, follow the safety instructions in the Product Information Guide. http://support.dell.com/support/edocs/systems/dim9200/en/SM_EN/parts.htm (3 of 68) [12/9/2007 11:22:24 PM]...
- Page 51 Documentation power supply system board hard drive card fan media card reader (optional) floppy drive (optional) CD or DVD drive processor fan processor shroud and processor System Board Components http://support.dell.com/support/edocs/systems/dim9200/en/SM_EN/parts.htm (4 of 68) [12/9/2007 11:22:24 PM]...
- Page 52 SATA Connectors SATA0, connectors (1, 2, 3, 4) SATA1 front panel I/O connector main power connector SATA connectors (4) (SATA2, SATA3, SATA4, SATA5 FlexBay USB connector clear CMOS jumper password jumper (CLRCMOS) (CLRPSWD) http://support.dell.com/support/edocs/systems/dim9200/en/SM_EN/parts.htm (5 of 68) [12/9/2007 11:22:24 PM]...
-
Page 53: Memory Overview
NOTE: Always install memory modules in the order indicated on the system board. The recommended memory configurations are: A pair of matched memory modules installed in connectors DIMM_1 and DIMM_2 http://support.dell.com/support/edocs/systems/dim9200/en/SM_EN/parts.htm (6 of 68) [12/9/2007 11:22:24 PM]... -
Page 54: Addressing Memory With 4-Gb Configurations
If you remove your original memory modules from the computer during a memory upgrade, keep them separate from any new modules that you may have, even if you purchased the new modules from Dell. If possible, do not pair an original memory module with a new memory module. Otherwise, your computer may not start properly. -
Page 55: Installing Memory
4. Press out the securing clip at each end of the memory module connector. memory module connectors (4) securing clip (2) 5. Align the notch on the bottom of the module with the crossbar in the connector. http://support.dell.com/support/edocs/systems/dim9200/en/SM_EN/parts.htm (8 of 68) [12/9/2007 11:22:24 PM]... - Page 56 6. Insert the module into the connector until the module snaps into position. If you insert the module correctly, the securing clips snap into the cutouts at each end of the module. http://support.dell.com/support/edocs/systems/dim9200/en/SM_EN/parts.htm (9 of 68) [12/9/2007 11:22:24 PM]...
-
Page 57: Removing Memory
3. Press outward the securing clip at each end of the memory module connector. 4. Grasp the module and pull up. If the module is difficult to remove, gently ease the module back and forth to remove it from the connector. http://support.dell.com/support/edocs/systems/dim9200/en/SM_EN/parts.htm (10 of 68) [12/9/2007 11:22:24 PM]... -
Page 58: Installing A Pci Card
If you are installing or replacing a PCI Express card, see Installing a PCI Express Card. ● Installing a PCI Card NOTE: Dell offers an optional customer kit for Audigy II and IEEE 1394 PCI add-in-cards that includes a front-mounted IEEE 1394 connector. http://support.dell.com/support/edocs/systems/dim9200/en/SM_EN/parts.htm (11 of 68) [12/9/2007 11:22:24 PM]... - Page 59 4. Push the two release tabs on the card retention door from the inside to pivot the door open; the hinged door will remain in the open position. http://support.dell.com/support/edocs/systems/dim9200/en/SM_EN/parts.htm (12 of 68) [12/9/2007 11:22:24 PM]...
- Page 60 To guard against electrical shock, be sure to unplug your computer from its electrical outlet before installing any cards. 8. Place the card in the connector and press down firmly. Ensure that the card is seated fully in the slot. http://support.dell.com/support/edocs/systems/dim9200/en/SM_EN/parts.htm (13 of 68) [12/9/2007 11:22:24 PM]...
- Page 61 9. Before you close the card retention door, ensure that: The tops of all cards and filler brackets are flush with the alignment bar. ● The notch in the top of the card or filler bracket fits around the alignment guide. ● http://support.dell.com/support/edocs/systems/dim9200/en/SM_EN/parts.htm (14 of 68) [12/9/2007 11:22:24 PM]...
-
Page 62: Removing A Pci Card
1. Follow the procedures in Before You Begin. 2. Remove the computer cover (see Removing the Computer Cover). 3. If you are removing the card permanently, install a filler bracket in the empty card-slot opening. http://support.dell.com/support/edocs/systems/dim9200/en/SM_EN/parts.htm (15 of 68) [12/9/2007 11:22:24 PM]... -
Page 63: Installing A Pci Express Card
If you are replacing a card, remove the current driver for the card from the operating system. If you are installing or replacing a PCI card, see Installing a PCI Card. Installing a PCI Express Card 1. Follow the procedures in Before You Begin. http://support.dell.com/support/edocs/systems/dim9200/en/SM_EN/parts.htm (16 of 68) [12/9/2007 11:22:24 PM]... - Page 64 2. If present on your computer, rotate the lever on the chassis wall upward. 3. Push the two release tabs on the card retention door from the inside to pivot the door open; the hinged door will remain in the open position. http://support.dell.com/support/edocs/systems/dim9200/en/SM_EN/parts.htm (17 of 68) [12/9/2007 11:22:24 PM]...
- Page 65 6. Pull the securing tab, grasp the card by its top corners, and then ease it out of its connector. http://support.dell.com/support/edocs/systems/dim9200/en/SM_EN/parts.htm (18 of 68) [12/9/2007 11:22:24 PM]...
- Page 66 Ensure that you release the securing tab to seat the card. If the card is not installed correctly, you may damage the system board. 9. Place the card in the connector and press down firmly. Ensure that the card is fully seated in the slot. http://support.dell.com/support/edocs/systems/dim9200/en/SM_EN/parts.htm (19 of 68) [12/9/2007 11:22:24 PM]...
- Page 67 14. If you installed an add-in network adapter and want to disable the integrated network adapter: a. Enter system setup, select Integrated NIC Controller, and then change the setting to Off. http://support.dell.com/support/edocs/systems/dim9200/en/SM_EN/parts.htm (20 of 68) [12/9/2007 11:22:24 PM]...
-
Page 68: Removing A Pci Express Card
3. If present on your computer, rotate the lever on the chassis wall upward. 4. Push the two release tabs on the card retention door from the inside to pivot the door open; the hinged door will remain http://support.dell.com/support/edocs/systems/dim9200/en/SM_EN/parts.htm (21 of 68) [12/9/2007 11:22:24 PM]... - Page 69 5. If your computer includes a card retention mechanism to secure the x16 card, press the release tab downward gently and then pivot the mechanism upward to access the card slots. PCI Express x16 card slot PCI Express x16 card securing tab PCI Express x1 card PCI Express x1 card slot http://support.dell.com/support/edocs/systems/dim9200/en/SM_EN/parts.htm (22 of 68) [12/9/2007 11:22:24 PM]...
-
Page 70: Drive Panels
Before you perform any of the procedures in this section, follow the safety instructions in the Product Information Guide. CAUTION: To guard against electrical shock, always unplug your computer from the electrical outlet before removing the cover. http://support.dell.com/support/edocs/systems/dim9200/en/SM_EN/parts.htm (23 of 68) [12/9/2007 11:22:24 PM]... -
Page 71: Removing The Drive Panel
3. Pull the sliding plate lever to the right and hold in place while pushing the panel from the inside. Pivot the panel to the left to release it from its side hinges. 4. Set the drive panel aside in a secure location. http://support.dell.com/support/edocs/systems/dim9200/en/SM_EN/parts.htm (24 of 68) [12/9/2007 11:22:24 PM]... -
Page 72: Removing The Drive-Panel Insert
2. Pull the inner tip of the drive-panel insert tab away from the drive panel. 3. Pivot the drive-panel insert out and away from the drive panel. 4. Set the drive-panel insert aside in a secure location. Installing the Drive-Panel Insert http://support.dell.com/support/edocs/systems/dim9200/en/SM_EN/parts.htm (25 of 68) [12/9/2007 11:22:24 PM]... -
Page 73: Installing The Drive Panel
2. Rotate the drive-panel insert into place and snap the drive-panel insert tab over the corresponding tab on the drive panel. 3. Ensure that the drive-panel insert is correctly seated in the drive panel. Installing the Drive Panel 1. Follow the procedures in Before You Begin. http://support.dell.com/support/edocs/systems/dim9200/en/SM_EN/parts.htm (26 of 68) [12/9/2007 11:22:24 PM]... - Page 74 3. Rotate the drive panel toward the computer until the sliding plate lever clicks into place and the drive panel snaps into place on the front panel. Drives Your computer supports: Two hard drives (Serial ATA) ● http://support.dell.com/support/edocs/systems/dim9200/en/SM_EN/parts.htm (27 of 68) [12/9/2007 11:22:24 PM]...
-
Page 75: General Installation Guidelines
"SATA4" and "SATA5", starting with SATA4. Serial ATA hard drives and CD/DVD drives are connected to connectors labeled "SATA0" to "SATA5" on the system board. SATA0 SATA1 SATA2 SATA3 SATA4 SATA5 http://support.dell.com/support/edocs/systems/dim9200/en/SM_EN/parts.htm (28 of 68) [12/9/2007 11:22:24 PM]... -
Page 76: Removing A Hard Drive
Removing a Hard Drive 1. Follow the procedures in Before You Begin. 2. Remove the computer cover (see Removing the Computer Cover). 3. Disconnect the power and hard drive cables from the drive. http://support.dell.com/support/edocs/systems/dim9200/en/SM_EN/parts.htm (29 of 68) [12/9/2007 11:22:24 PM]... -
Page 77: Installing A Hard Drive
4. Press in on the tabs on each side of the drive and slide the drive up and out. tabs (2) hard drive Installing a Hard Drive 1. Follow the procedures in Before You Begin. http://support.dell.com/support/edocs/systems/dim9200/en/SM_EN/parts.htm (30 of 68) [12/9/2007 11:22:24 PM]... - Page 78 7. Install the hard drive into the computer by sliding the drive into place until you feel it click into place. hard drive hard drive bracket 8. Connect the power and hard drive cables to the hard drive. http://support.dell.com/support/edocs/systems/dim9200/en/SM_EN/parts.htm (31 of 68) [12/9/2007 11:22:24 PM]...
-
Page 79: Adding A Second Hard Drive
To avoid damage to the drive, do not set it on a hard surface. Instead, set the drive on a surface, such as a foam pad, that will sufficiently cushion it. 1. Check the documentation for the drive to verify that it is configured for your computer. http://support.dell.com/support/edocs/systems/dim9200/en/SM_EN/parts.htm (32 of 68) [12/9/2007 11:22:24 PM]... - Page 80 6. Slide the new hard drive into empty bay until you feel a click. hard drive hard drive bracket 7. Connect the power and hard drive cables to the drive. Refer to to identify the hard drive General Installation Guidelines cable connectors on the system board. http://support.dell.com/support/edocs/systems/dim9200/en/SM_EN/parts.htm (33 of 68) [12/9/2007 11:22:24 PM]...
-
Page 81: Floppy Drive
Product Information Guide. CAUTION: To guard against electrical shock, always unplug your computer from the electrical outlet before opening the cover. NOTE: If you are adding a floppy drive, see Installing a Floppy Drive. http://support.dell.com/support/edocs/systems/dim9200/en/SM_EN/parts.htm (34 of 68) [12/9/2007 11:22:24 PM]... -
Page 82: Removing A Floppy Drive
5. Pull the sliding plate to the right and hold in place. 6. Slide the floppy drive out of the floppy drive bay. http://support.dell.com/support/edocs/systems/dim9200/en/SM_EN/parts.htm (35 of 68) [12/9/2007 11:22:24 PM]... -
Page 83: Installing A Floppy Drive
3. If you are installing a new floppy drive, remove the shoulder screws from the inside of the drive-panel insert and attach the screws to the new drive. floppy drive shoulder screws (4) http://support.dell.com/support/edocs/systems/dim9200/en/SM_EN/parts.htm (36 of 68) [12/9/2007 11:22:24 PM]... -
Page 84: Removing A Media Card Reader
9. Enter system setup (see Setup) and select the appropriate Diskette Drive option. Entering System 10. Verify that your computer works correctly by running the Dell Diagnostics (see Dell Diagnostics). Media Card Reader Removing a Media Card Reader... - Page 85 6. Disconnect the USB cable from the back of the Media Card Reader. Disconnect the other end of the cable from the USB connector from the system board (see Components). Remove the cable from any clips and lift out of the System Board computer. http://support.dell.com/support/edocs/systems/dim9200/en/SM_EN/parts.htm (38 of 68) [12/9/2007 11:22:24 PM]...
-
Page 86: Installing A Media Card Reader
To prevent static damage to components inside your computer, discharge static electricity from your body before you touch any of your computer's electronic components. You can do so by touching an unpainted metal surface on the computer chassis. http://support.dell.com/support/edocs/systems/dim9200/en/SM_EN/parts.htm (39 of 68) [12/9/2007 11:22:24 PM]... - Page 87 Ensure that the Media Card Reader is installed before the USB cable is connected. 8. Connect the USB cable to the back of the Media Card Reader and to the USB connector on the system board (see System Board Components). http://support.dell.com/support/edocs/systems/dim9200/en/SM_EN/parts.htm (40 of 68) [12/9/2007 11:22:24 PM]...
-
Page 88: Cd/Dvd Drive
If removing or installing the drive changes the drive configuration, you must reflect the changes in the BIOS. Go NOTE: to the "Drives" section of the BIOS and under SATA 0 through 5, set the SATA ports to the correct configuration. http://support.dell.com/support/edocs/systems/dim9200/en/SM_EN/parts.htm (41 of 68) [12/9/2007 11:22:24 PM]... -
Page 89: Removing A Cd/Dvd Drive
CD/DVD drive cable power cable system board 4. Slide the drive release mechanism to the right to release the shoulder screw and slide the drive out to remove it from the drive bay. http://support.dell.com/support/edocs/systems/dim9200/en/SM_EN/parts.htm (42 of 68) [12/9/2007 11:22:24 PM]... -
Page 90: Installing A Cd/Dvd Drive
4. If you are installing a new drive, remove the drive panel insert (see Insert). Then, remove three Removing the Drive-Panel shoulder screws from the inside of the drive-panel insert and attach the screws to the new drive. http://support.dell.com/support/edocs/systems/dim9200/en/SM_EN/parts.htm (43 of 68) [12/9/2007 11:22:24 PM]... - Page 91 5. Slide the drive into the drive bay until the drive clicks into position. 6. Connect the power cable to the drive and the CD/DVD cable to the drive and system board. CD/DVD cable power cable system board http://support.dell.com/support/edocs/systems/dim9200/en/SM_EN/parts.htm (44 of 68) [12/9/2007 11:22:24 PM]...
-
Page 92: Replacing The Battery
See the documentation that came with the drive for instructions on installing any software required for drive operation. 11. Enter system setup (see Setup) and select the appropriate Drive option. Entering System 12. Verify that your computer works correctly by running the Dell Diagnostics (see Dell Diagnostics). Battery... - Page 93 8. Connect your computer and devices to electrical outlets, and then turn them on. 9. Enter system setup and restore the settings you recorded in (see step 1 Entering System Setup). 10. Properly dispose of the old battery. http://support.dell.com/support/edocs/systems/dim9200/en/SM_EN/parts.htm (46 of 68) [12/9/2007 11:22:24 PM]...
-
Page 94: Removing The Power Supply
6. Press the release button located on the floor of the computer frame. 7. Slide the power supply approximately 1 inch towards the front of the computer. 8. Lift the power supply out of the computer. http://support.dell.com/support/edocs/systems/dim9200/en/SM_EN/parts.htm (47 of 68) [12/9/2007 11:22:24 PM]... -
Page 95: Installing The Power Supply
2. Replace the four screws that secure the power supply to the back of the computer frame. 3. Reconnect the DC power cables. 4. Connect the AC power cable to the connector. 5. Run the cables underneath the clips, and press the clips to close them over the cables. http://support.dell.com/support/edocs/systems/dim9200/en/SM_EN/parts.htm (48 of 68) [12/9/2007 11:22:24 PM]... -
Page 96: Removing The Processor
3. If your computer includes a card retention mechanism to secure the x16 card, press the release tab downward gently and then pivot the mechanism upward. 4. Unhook the floppy drive cable from clips on processor shroud and move it out of the way. http://support.dell.com/support/edocs/systems/dim9200/en/SM_EN/parts.htm (49 of 68) [12/9/2007 11:22:24 PM]... - Page 97 The heat-sink assembly may be very hot during normal operation. Be sure that it has had sufficient time to cool before you touch it. 6. Rotate the heat-sink assembly toward the rear of the computer, and remove it from the computer. http://support.dell.com/support/edocs/systems/dim9200/en/SM_EN/parts.htm (50 of 68) [12/9/2007 11:22:24 PM]...
- Page 98 (2) NOTICE: If you are installing a processor upgrade kit from Dell, discard the original heat sink. If you are not installing a processor upgrade kit from Dell, reuse the original heat sink when you install your new processor.
-
Page 99: Installing The Processor
Ground yourself by touching an unpainted metal surface on the back of the computer. NOTICE: When replacing the processor, do not touch any of the pins inside the socket or allow any objects to fall on the pins in the socket. http://support.dell.com/support/edocs/systems/dim9200/en/SM_EN/parts.htm (52 of 68) [12/9/2007 11:22:24 PM]... - Page 100 NOTICE: To avoid damage, ensure that the processor aligns properly with the socket, and do not use excessive force when you install the processor. http://support.dell.com/support/edocs/systems/dim9200/en/SM_EN/parts.htm (53 of 68) [12/9/2007 11:22:24 PM]...
- Page 101 If you are not installing a processor upgrade kit from Dell, reuse the original heat-sink assembly when you replace the processor. If you installed a processor replacement kit from Dell, return the original heat-sink assembly and processor to Dell in the same package in which your replacement kit was sent.
-
Page 102: I/O-Panel Components
Before you begin any of the procedures in this section, follow the safety instructions in the Product Information Guide. CAUTION: To guard against electrical shock, always unplug your computer from the electrical outlet before opening the cover. I/O-Panel Components http://support.dell.com/support/edocs/systems/dim9200/en/SM_EN/parts.htm (55 of 68) [12/9/2007 11:22:24 PM]... -
Page 103: Removing The I/O Panel
3. If your computer includes a card retention mechanism to secure the x16 card, press the release tab downward gently and then pivot the mechanism upward. 4. Unhook the floppy drive cable from clips on processor shroud and move it out of the way. http://support.dell.com/support/edocs/systems/dim9200/en/SM_EN/parts.htm (56 of 68) [12/9/2007 11:22:24 PM]... - Page 104 The heat-sink assembly may be very hot during normal operation. Be sure that it has had sufficient time to cool before you touch it. 6. Rotate the heat-sink assembly towards the rear of the computer, and remove it from the computer. http://support.dell.com/support/edocs/systems/dim9200/en/SM_EN/parts.htm (57 of 68) [12/9/2007 11:22:24 PM]...
- Page 105 7. Place the heat-sink assembly on its side in a safe place. 8. Disconnect the system fan cable from the system board. 9. Ensure that all cables have been removed from the routing clips on the top of the system fan assembly. http://support.dell.com/support/edocs/systems/dim9200/en/SM_EN/parts.htm (58 of 68) [12/9/2007 11:22:24 PM]...
- Page 106 16. If an optional IEEE 1394 cable is installed in the front port, remove the cable from the front of the computer by following the instructions that came with the connector. 17. Remove the mounting screw from the front of the I/O panel. 18. Remove the I/O panel from the computer. http://support.dell.com/support/edocs/systems/dim9200/en/SM_EN/parts.htm (59 of 68) [12/9/2007 11:22:24 PM]...
-
Page 107: Installing The I/O Panel
Panel) in reverse order, ensuring that the tabs on the top panel, bottom panel, and front panel are secure. Processor Fan CAUTION: Before you begin any of the procedures in this section, follow the safety instructions in the Product Information Guide. http://support.dell.com/support/edocs/systems/dim9200/en/SM_EN/parts.htm (60 of 68) [12/9/2007 11:22:24 PM]... -
Page 108: Removing The Processor Fan
(2) 5. Use a long Phillips screwdriver to loosen the two captive screws, one on each side of the heat-sink assembly. http://support.dell.com/support/edocs/systems/dim9200/en/SM_EN/parts.htm (61 of 68) [12/9/2007 11:22:24 PM]... - Page 109 7. Place the heat-sink assembly on its side in a safe place. 8. Disconnect the system fan cable from the system board. 9. Ensure that all cables have been removed from the routing clips on the top of the system fan assembly. http://support.dell.com/support/edocs/systems/dim9200/en/SM_EN/parts.htm (62 of 68) [12/9/2007 11:22:24 PM]...
-
Page 110: Installing The Processor Fan
Ensure that the fan release lever tab is seated into its slot in the bottom cover. Follow the removal procedure (Removing the Processor Fan) in reverse order. Card Fan http://support.dell.com/support/edocs/systems/dim9200/en/SM_EN/parts.htm (63 of 68) [12/9/2007 11:22:24 PM]... -
Page 111: Removing The Card Fan
5. Lift the fan release lever, then slide the fan toward the back of the computer to release the four fan tabs from the four keyhole slots in the bottom cover. 6. Remove the fan from the computer being careful of the front hard drive's power and hard drive cables. http://support.dell.com/support/edocs/systems/dim9200/en/SM_EN/parts.htm (64 of 68) [12/9/2007 11:22:24 PM]... -
Page 112: Installing The Card Fan
7. Remove the heat-sink assembly and processor. 8. Disconnect all cables from the system board. 9. Remove any memory modules that you are transferring to the new system board (see Removing Memory). http://support.dell.com/support/edocs/systems/dim9200/en/SM_EN/parts.htm (65 of 68) [12/9/2007 11:22:24 PM]... -
Page 113: Installing The System Board
To connect a network cable, first plug the cable into the network port or device and then plug the cable into the computer. Connect your computer and devices to electrical outlets, and turn them on. If the new system board requires flashing the BIOS refer to Flashing the BIOS. http://support.dell.com/support/edocs/systems/dim9200/en/SM_EN/parts.htm (66 of 68) [12/9/2007 11:22:24 PM]... -
Page 114: Replacing The Computer Cover
Small Business for delivery in the 50 United States. Taxes, fees, shipping, handling and any applicable restocking charges extra, vary, and are not subject to discount. The Small Business site and offers contained herein valid only for end users and not for resellers and/or online auctions. Dell cannot be responsible for pricing or other errors, omissions, or consequences of misuse of site and its functions and reserves the right to cancel orders arising from such errors. - Page 115 Documentation © 2007 Dell About Dell Terms of Sale Unresolved Issues Privacy Contact Site Map Visit ID Feedback Large Text sn WEB3 http://support.dell.com/support/edocs/systems/dim9200/en/SM_EN/parts.htm (68 of 68) [12/9/2007 11:22:24 PM]...
Need help?
Do you have a question about the Dimension 9200 and is the answer not in the manual?
Questions and answers