
Related Manuals for Flowserve Logix 3200MD


Summary of Contents for Flowserve Logix 3200MD
- Page 1 USER INSTRUCTIONS FCD LGAIM0058-00 Installation Digital Positioner 3200MD 3200MD Digital Positioner Operation Maintenance Installation, Operation and Maintenance Instructions...
-
Page 2: Table Of Contents
Optional Valtek Rotary Mounting Procedure 4-20 mA Analog Output Board Tubing Positioner to Actuator 10 Parts List Wiring and Grounding Guidelines 11 Logix 3200MD Spare Parts Kits 4-20 mA Command Input Wiring 12 Logix 3200MD Mounting Kits Grounding Screw 12.1 Valtek Mounting Kits Compliance Voltage 12.2 Logix O.E.M. -
Page 3: Terms Concerning Safety
Unpacking DANGER: Indicates that death, severe personal injury and/ or substantial property damage will occur if proper precau- 1. While unpacking the Logix 3200MD positioner, check the tions are not taken. packing list against the materials received. Lists describing the... -
Page 4: Logix 3200Md Positioner Overview
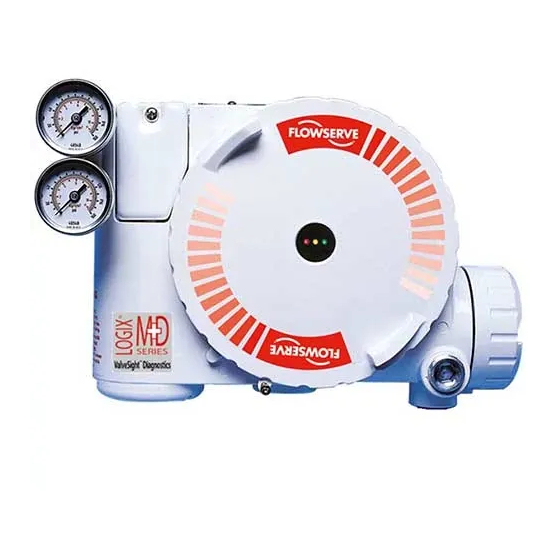
Positioner Overview Standard (-20° to 80°C) Operating Temperature Range The Logix 3200MD digital positioner is a two-wire 4-20 mA input digital -40° to 176°F valve positioner. The positioner is configurable through the local user (-40° to 80°C) interface. The Logix 3200MD utilizes the HART protocol to allow two- Transport and Storage -40°... - Page 5 User instructions - Digital Positioner 3200MD LGENIM0059-01 10/08 ® Table VII: Hazardous Area Certifications Certification Enclosure Notified Body Approval Entity Parameters Temperature Code Option Rating Explosionproof: Class I, Div 1, Groups B,C,D NEMA Not Applicable T6 T ≤ = 60ºC Dust Ignition Proof: Class II, III, Div 1, Groups EFG (See Warning No.
-
Page 6: Positioner Operation
The Logix 3200MD positioner is an electric feedback instrument. adjustment. The positioner has three basic modes: Linear, Equal Figure 1 shows a Logix 3200MD positioner installed on a double- Percent (=%) and Custom characterization. In Linear mode, the input acting linear actuator for air-to-open action. -
Page 7: Detailed Sequence Of Positioner Operations
User instructions - Digital Positioner 3200MD LGENIM0059-01 10/08 ® Figure 2: System Positioning Algorithm the deviation. The inner-loop then quickly adjusts the spool position. Given these conditions, 12 mA represents a Command source of The actuator pressures change and the stem begins to move. The 50 percent. -
Page 8: Mounting And Installation
Mark One Valves shaft and tighten down the nut. To mount a Logix 3200MD positioner to a Valtek linear Mark One 3. Align the bracket with the three outer mounting holes on the valve, refer to Figure 3 and proceed as outlined below. The following positioner. -
Page 9: Mounting To Standard Valtek Rotary Valves
1/2" self-tapping screws. Figure 4: Standard Rotary Mounting Positioner Bolts ¼-20 (4)* Bracket Bolts -18 (2, not shown) Take-off Arm, Rotary Lock Washer (2) Logix 3200MD 10-32 Bolt 10-32 Nut Digital Positioner Self-tapping Screws (2) Spline Lever Adapter 10-32 Nut... -
Page 10: User Instructions - Digital Positioner 3200Md Lgenim0059-01
Orienting the Take-off Arm for Final Lock Down washer and 10-32 nut. 1. Tube the Logix 3200MD positioner to the actuator according to the instructions given in Section 5.4, “Tubing Positioner to NOTE: The arm will point up when feedback shaft is in the free Actuator.”... -
Page 11: Optional Valtek Rotary Mounting Procedure
30 to 150 psig. A supply regulator is recommended if the customer will be using Optional Valtek Rotary the diagnostic features of the Logix 3200MD but is not required. In Mounting Procedure applications where the supply pressure is higher than the maximum... -
Page 12: Wiring And Grounding Guidelines
M20 above the conduit opening. Forcing dissimilar threads together will damage equipment, cause personal injury and void hazardous location certifi- cations. Conduit fittings must match equipment housing threads before installation. If threads do not match, obtain suitable adapters or contact a Flowserve representative. -
Page 13: Ma Command Input Wiring
Logix 3200MD terminals. The current must always be limited for board damage. 4-20 mA operation. Minimum operating current is 3.6 mA. Determine if the loop will support the Logix 3200MD digital posi- The input loop current signal to the Logix 3200MD digital positioner tioner by performing the following calculation. -
Page 14: Intrinsically Safe Barriers
In addition to the cable capacitance, the network resistance also affects the allowable cable length. The Logix 3200MD local user interface allows the user to configure the basic operation of the positioner, tune the response, and calibrate In order to calculate the maximum network capacitance, use the the positioner without additional tools or configurators. -
Page 15: Operation Of Configuration Dip Switch Settings
User instructions - Digital Positioner 3200MD LGENIM0059-01 10/08 ® Operation of Configuration Pos. Characterization Linear Select if the actuator position should be directly DIP Switch Settings proportional to the input signal. (Due to their inherent =% char- The first 7 Dip Switches are for basic configuration acteristics, this setting give an =% Cv characteristic for most rotary valves.) Air Action... -
Page 16: Setup Of The Cal Dip-Switch For The Quick Calibration Operating Mode
If the selectable GAIN switch is set to “A” the tuning will not be “Jog” buttons. modified with a QUICK-CAL. Use this setting if custom tuning will be done using a handheld or other Flowserve software. WARNING: During the QUICK-CAL operation the valve may stroke unexpectedly. Notify proper personnel that... -
Page 17: Local Control Of Valve Position
WARNING: When operating using local control of the valve, the valve will not respond to external commands. Notify The blink codes used to convey the status of the Logix 3200MD proper personnel that the valve will not respond to remote digital positioner are described in the following table. - Page 18 There are accumulators for total valve travel, total valve cycles, After maintenance, reset the cycle accumulator. See DTM screen: Health total spool valve travel, and total spool valve cycles. Flowserve Status/Positioner Health. This indicator can be disabled. For spool valve supplies software can identify the specific limit that has been accumulators inspect for high air consumption and signs of wear.
- Page 19 User instructions - Digital Positioner 3200MD LGENIM0059-01 10/08 ® Blink Description Recommendations Code YYGR SUPPLY PRESSURE HIGH WARNING indicates the positioner Regulate the supply pressure at the positioner below the maximum limit has determined that the supply pressure is above the user set recommended for your actuator.
- Page 20 User instructions - Digital Positioner 3200MD LGENIM0059-01 10/08 ® Blink Description Recommendations Code RGGR INNER LOOP OFFSET TIME OUT ALARM during calibration the Repeat the stroke calibration to get a more accurate ILO value. To Inner Loop Offset value did not settle. This could result in less proceed using the less accurate ILO value, this error may be cleared by accurate positioning.
-
Page 21: Maintenance And Repair
5. Being careful not to lose the nylon washer, remove the Phillips- The Logix 3200MD digital positioner supports and is supported by head screw that attaches the driver module to the main housing the HART 375 Handheld Communicator. The Device Description (Figure 13). - Page 22 Older models contain orifices that will not work in screws and carefully sliding the block off the spool (Figure 13). the Logix 3200MD model. Orifices are brass-colored, barbed 7. Carefully remove the spool by sliding the end of the spool out of fittings are silver-colored.
-
Page 23: Regulator
User instructions - Digital Positioner 3200MD LGENIM0059-01 10/08 ® Figure 15: Main PCB Assembly Regulator block toward the driver module until the two retaining holes line The regulator reduces the pressure of the incoming supply air to a up with the threaded holes in the base. level that the driver module can use. -
Page 24: Checking Or Setting Internal Regulator Pressure
1. Make sure the valve is bypassed or in a safe condition. sitioners. Older models contain regulators with different settings that will not work in the Logix 3200MD model. The regulator 2. Remove the main cover. pressure setting is printed on the top of the regulator. The Logix 3200MD regulator is set to 17.4 psig. -
Page 25: Spool Valve Cover
User instructions - Digital Positioner 3200MD LGENIM0059-01 10/08 ® Spool Valve Spool Valve Cover The spool valve routes the supply air to one side of the actuator The spool valve cover incorporates a coalescing filter element in a while venting the opposite side (see Figure 1). The position of the two-piece cover. -
Page 26: Stem Position Sensor
User instructions - Digital Positioner 3200MD LGENIM0059-01 10/08 ® Figure 18: Stem Position Sensor Orientation Stem Position Sensor 1. Make sure the valve is bypassed or in a safe condition. 2. Disconnect the power and air supply to the unit. The position feedback assembly transmits valve positions informa- tion to the processor. -
Page 27: Main Pcb Assembly
Logix positioners. Older models contain sensors with different 8. If the old main PCB is equipped with a 4-20 mA analog output ranges that will not work in the Logix 3200MD model. The wires board, gently lift the board off the main PCB. Align the two con- on the Logix 3200MD position sensor are red, white and black. -
Page 28: Customer Interface Board
User instructions - Digital Positioner 3200MD LGENIM0059-01 10/08 ® 6. Remove the two screws holding the pressure sensor board to Replacing the Customer Interface Board the housing. Lift the metal stiffener plate off the pressure sensor To replace the customer interface board, refer to Figures 6, 11, board and set aside for future use. -
Page 29: Optional Hardware
Vented Design (See Figures 19 and 20) A standard Logix 3200MD positioner is vented directly to the atmo- sphere. When supply air is substituted with sweet natural gas, piping must be used to route the exhausted natural gas to a safe environ- ment. -
Page 30: Ma Analog Output Board
Figure 23: Analog Output Board Power 4-20 mA Analog Output Board The Logix 3200MD digital positioner can be supplied to provide an analog feedback signal of the stem position. This option can also be retrofitted in the field. The 4-20 mA analog output board is wired in series with a 12.5 to 40 VDC power supply (see Figure 23). - Page 31 User instructions - Digital Positioner 3200MD LGENIM0059-01 10/08 ® 7. Align the two connectors on the new 4-20 mA analog output Figure 24: 4-20 mA Analog Output Board board with the mating sockets on the main PCB board and gently press the connectors together. 8.
-
Page 32: Parts List
User instructions - Digital Positioner 3200MD LGENIM0059-01 10/08 ® 10 Parts List Item Item Part Part Main Vent Cover Housing Logix 3000MD Positioner Main Housing Cover Screw, Main Vent Cover O-ring, Main Housing Cover Driver Module Cover O-ring, Driver Module Cover Screw, Anti-rotation Driver Module Assembly Plastic Main PCB Cover... - Page 33 User instructions - Digital Positioner 3200MD LGENIM0059-01 10/08 ® Figure 25: Exploded Drawing...
-
Page 34: Logix 3200Md Spare Parts Kits
User instructions - Digital Positioner 3200MD LGENIM0059-01 10/08 ® 11 Logix 3200MD Spare Parts Kits See Figure 25 for item numbers. Item Item Description Quantity Description Quantity Kit 2: Driver Module Assembly -40° to 80°C Kit, P/N 199786.999.000 Kit 7: Soft Goods Kit, P/N 199789.999.000... -
Page 35: Logix 3200Md Mounting Kits
User instructions - Digital Positioner 3200MD LGENIM0059-01 10/08 ® 12 Logix 3200MD Mounting Kits 12.1 Valtek Mounting Kits Table IX: Valtek Linear Mounting Kits 25 in 50 in 100-200 in Spud Standard Handwheel Standard Handwheel Standard Handwheel 2.00 164432 164433... -
Page 36: Logix O.e.m. Mounting Kits
User instructions - Digital Positioner 3200MD LGENIM0059-01 10/08 ® 12.2 Logix O.E.M. Mounting Kits Table XI: Logix O.E.M. Mounting Kits (continued) Table XI: Logix O.E.M. Mounting Kits Brand Model Size Mounting Kit Brand Model Size Mounting Kit 173298 213905 0.5" – 1.5" stroke 141410 173298... -
Page 37: Frequently Asked Questions
A: The Logix 3200MD does not have a simple resistive input. When measur- A: No. ing the voltage across the Logix 3200MD, it only varies slightly when the cur- rent is changed from 4 mA to 20 mA (9.8 to 10.0 VDC nominal without HART Q: What is the difference between models with Standard (3200MD), communications. -
Page 38: How To Order
User instructions - Digital Positioner 3200MD LGENIM0059-01 10/08 ® 14 How to Order Selection Code Example Protocol HART Standard Diagnostics Advanced (with pressure sensing) Pro (with sensing and full ValveSight dianostics) Aluminum, White Paint (Valtek) Stainless Steel, No Paint (Valtek) Aluminum, Black Paint (Automax) Material Aluminum, Food-Grade White Paint (Automax) -
Page 39: Troubleshooting
Interference with I.S. barrier Must use HART-compatible I.S. barrier Current Source stripping (filtering) HART signal. Use the HART filter (VHF) available from Flowserve Switch to analog command mode by doing a Command Source Reset from the local interface or with a handheld Unit is in digital command mode communicator or ValveSight (please refer to Section 7.9,...
Need help?
Do you have a question about the Logix 3200MD and is the answer not in the manual?
Questions and answers
Logix 3200 MD Positioner,Brand: Flowserve, Model: 3200 MD-28-N6-E-04-40-0G-0F, P/N: 269518.999.000