Flowserve Logix 3200MD User Instructions
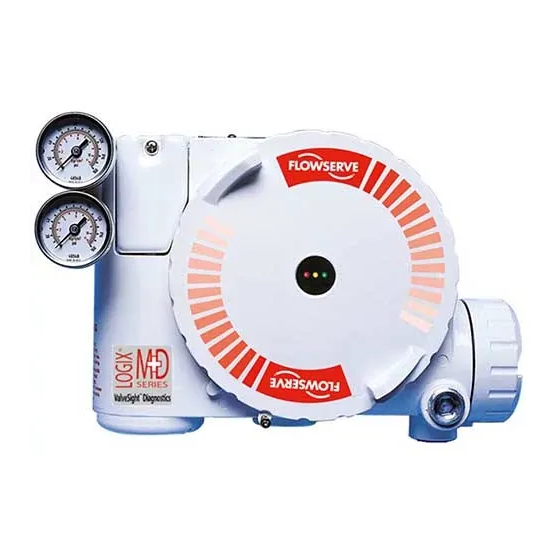
Digital positioner
Hide thumbs
Also See for Logix 3200MD:
- Installation, operation and maintenance manual (39 pages) ,
- Technical bulletin (17 pages)

Related Manuals for Flowserve Logix 3200MD


Summary of Contents for Flowserve Logix 3200MD
- Page 1 US SER IN N STRU UCTIO Installa ation Digital P Position ner 3200 0MD Opera ation Maintena ance...
- Page 2 er instructions – – Digital Positio oner 3200MD LGENIM0059- -04 09/11 Conten 1 Terms Con cerning Safety 2 General Inf ormation 8 Main ntenance and R Repair 3. Unpacking and Storage Driver Module e Assembly 3.1 Unpac cking Regulator 3.2 Storag Checking or S Setting Internal Regulator Pres...
- Page 3 G: Standard ind dustry safety pr ractices must b WARNING adhered to o when working g on this or any y process contr product. S Specifically, pe rsonal protectiv ve and lifting devices m ust be used as s warranted. flowserve.com...
-
Page 4: Spec Cifications
er instructions – – Digital Positio oner 3200MD LGENIM0059- -04 09/11 Logi x 3200MD Table II II: Environmen tal Conditions Posi tioner Ov verview -40 to o 176 °F Operatin ng Temperature Range Stan dard (-40 t to 80 °C) The Logix 320 00MD digital po sitioner is a two... - Page 5 Substitut tion of componen nts may impair In ntrinsic Safety. flowserve.com...
- Page 6 er instructions – – Digital Positio oner 3200MD LGENIM0059- -04 09/11 4.2 Posit tioner Oper ation In Linea ar mode, the in nput signal is pa assed straight through to the c control algorithm m in a 1:1 trans sfer. In Equal Percent The Logix 320 00MD positione...
- Page 7 This is commo only called the null or balance ed spool positio flowserve.com...
- Page 8 er instructions – – Digital Positio oner 3200MD LGENIM0059- -04 09/11 Figure 3: Line ar Mark One C Control Valve M Mounting nting and d Installatio 3. Alig gn the bracket w with the three o outer mounting g holes on positioner.
- Page 9 The pin sh hould extend proximately in. past the tak ke-off arm. Wh in. nutd driver prop perly adjusted, securely tighte en the bracketi ing bolts. Figure 4: Stan ndard Rotary M Mounting flowserve.com...
- Page 10 Orienting the e Take-off Arm m for Final Loc ck Down 1. Tube the L Logix 3200MD positioner to th he actuator a RG GGY blink code e, the A/D feed back values we...
- Page 11 FAIL POS ITION and rotate position er CCW 105° and bolt in plac Insert positione er shaft into feedback slot w with valve in Clock kwise ON and rotate FAIL POSITIO positioner CCW W 15° and bolt in place. flowserve.com...
- Page 12 (if present ), and the Logi x 3200MD positioner imp pedance. The L Logix 3200MD digital position requires that t the current loop p system allow s for a 10.0 VD drop across th he positioner at t maximum loo p current.
-
Page 13: Cable Requirements
0.0 VDC; across the e positioner term minals. This co ould cause therefor re, this system w will support the Logix 3200MD digital permanen t circuit board d damage. position ner. The Logix 3 3200MD positio oner has a wors... -
Page 14: Intrin Sically Safe
er instructions – – Digital Positio oner 3200MD LGENIM0059- -04 09/11 In order to cal culate the max ximum network k capacitance, Figure 8 8: Local User I Interface use the follow wing formula: 0.00 (µF) ≤ Equation 2 network + 390) barrier wire... - Page 15 GAIN switch is s set to “A” the tu uning will be modified wi ith a QUICK-CA AL. Use this s setting if cust tom tuning will be done using g a handheld or r other Flow wserve softwar flowserve.com...
- Page 16 er instructions – – Digital Positio oner 3200MD LGENIM0059- -04 09/11 Off Off fo orces the posi itioner to use o one of the ARNING: During g the QUICK-C CAL operation t the valve factory pre eset tuning se ets determined d by the rotary y stroke unexpe ectedly.
- Page 17 This so oftware is avai lable other user con nfigured limits, alarm settings , and valve from a Flowserve repr resentative. information wi ill also be lost a and need to be e restored. The Log gix 3200MD di...
- Page 18 Flo owserve supplied d software. SIGN NATURE IN PRO OGRESS MODE YGGY been initiated by y Flowserve supp plied software. See DT TM screen: Diagn nostics E. Diisplays a bl ink sequence 3 t times INIT...
- Page 19 This e error may be clea red by briefly p pushing the QUIC CK-CAL button, w which will force th position ner to use the par rameters from the e last good calibr ration. flowserve.com...
- Page 20 er instructions – – Digital Positio oner 3200MD LGENIM0059- -04 09/11 Blink Desc cription Recom mmendations Code Repeat t the stroke calib bration to get a m more accurate ILO O value. To procee d using the less accurate ILO va alue, this error ma ay be ALARM.
- Page 21 ( (figure 13). 7. Carefully r remove the spo ool by sliding th he end of the spool out o of the connecti on clip. Exces ssive force may bend spoo 8. Remove th he main cover. flowserve.com...
- Page 22 er instructions – – Digital Positio oner 3200MD LGENIM0059- -04 09/11 9. Remove th he plastic board d cover by rem moving the three 23. Fee ed the driver m odule wires int to the main cha amber of retaining s screws.
- Page 23 0 to 30 psi g gauge. 14. Reinstall a all covers. e internal press sure should be set to 17.4 ± 0 0.2 psi g. flowserve.com...
- Page 24 er instructions – – Digital Positio oner 3200MD LGENIM0059- -04 09/11 If adjustme ent is needed, loosen the set screw retainin 8. Car refully slide the e block over the e spool, using t nut on the top of the regu ulator using the in.
- Page 25 00MD model. T The wires on th he Logix 3200M ition sensor ar re red, white an nd black. G: Observe pre ecautions for ha andling WARNING electrostat tically sensitive e devices. Figure 18: Ste em Position Se nsor Orientatio flowserve.com...
- Page 26 er instructions – – Digital Positio oner 3200MD LGENIM0059- -04 09/11 9. Carefully c center the posit tion sensor on the shaft bore, 9. Rein nstall the five w wire connection ns (six wire con nnections insert and tighten the scr rews.
- Page 27 The following tools s are required: Phillips sc crewdriver G: Observe pre ecautions for ha andling WARNING electrostat tically sensitive e devices. 1. Make sure e the valve is by ypassed or in a a safe condition flowserve.com...
- Page 28 er instructions – – Digital Positio oner 3200MD LGENIM0059- -04 09/11 Optio onal Hard dware Figure 2 20: Spool Cove er Vent Vente ed Design (See figures 1 9 and 20.) A standard Lo ogix 3200MD po ositioner is ven nted directly to the atmosphe re.
- Page 29 Refer to produ uct label and F Flowserve d tighten evenly y, using a Philli ps screwdriver r. Do not drawing 1 198736. r tighten. Replacing the...
- Page 30 er instructions – – Digital Positio oner 3200MD LGENIM0059- -04 09/11 10.3 Fail Safe S State Respo onse Time 10 Req uirements s for Safet ty Integrity A typica al response tim me for the spoo ol to move to a fail safe This section p provides inform...
-
Page 31: Installation
3200MD LGENIM0059 9-04 09/11 10.5 Maxim mum Achie evable SIL 10.8 Firmware u update The Flowserve e 3200MD Valv ve Positioner c covered by this Ensure the firmware v version is 2.05 or greater. Th safety manual l is suitable for... - Page 32 , a HART comm municator such as a 375 Hand dheld or softwa are such as Va lveSight DTM f Logix 3200MD D are required. Steps for P Proof Test Step Action 1. Bypass the e safety PLC o...
- Page 33 Use e r instructions – Digital Positi i oner 3200MD LGENIM0059 9 -04 09/11 Figure 24: Exp ploded Drawing g flowserve.com...
- Page 34 er instructions – – Digital Positio oner 3200MD LGENIM0059- -04 09/11 11 Parts s list Item Item Part Part Housi ng Logix 3000MD D Positioner Main Vent Cov Main H Housing Cover Screw, Main Ve ent Cover O-ring g, Main Housing C Cover Driver Module Cover...
- Page 35 5430 135431 1372 1.75 135429 5430 135431 1372 * Standard: all r rotary valves with h standard acces ssories (end of sh haft mount). Optional: all rota ary valves with h handwheels or vo olume tanks (link kage design). flowserve.com...
- Page 36 er instructions – – Digital Positio oner 3200MD LGENIM0059- -04 09/11 13.2 Logix x O.E.M. Mo ounting Kits Table XI: Logi ix O.E.M. Moun nting Kits Table X XI: Logix O.E.M M. Mounting Kit ts (continued) Brand odel Size ounting kit Brand Model Size...
- Page 37 Handheld 4-20 mA calibrators w which do not requ uire a filter: certifying g agencies rules s please contact t the Flowserve S pringville Quality D Department Altek Mode el 334 Rochester...
- Page 38 er instructions – – Digital Positio oner 3200MD LGENIM0059- -04 09/11 15 How w to Order Selection Code Example HART Protocol Standard ( (No Sensors) Advanced (with Sensors) Diagnostics Pro (with s sensors and full ValveSight diagn nostics) Aluminum , White Paint (Va altek) Stainless S Steel, No Paint (V...
- Page 39 I.S. barrier urrent Source str ripping (filtering) HART signal Use the HA ART filter (VHF) available from F Flowserve Switch to a analog command d mode by doing Command d Source Reset fr rom the local inte erface or...
- Page 40 Flowserve produ ucts. The purchaser r/user should read an nd understand the Installation Ope eration Maintenance (IOM) instructions in...
Need help?
Do you have a question about the Logix 3200MD and is the answer not in the manual?
Questions and answers