Table of Contents
Advertisement
Quick Links
Advertisement
Table of Contents

Subscribe to Our Youtube Channel
Related Manuals for hager TJA560


Summary of Contents for hager TJA560
- Page 1 TJA560 IoT Controller Installer Manual 01/2018 – 6LE005108C...
-
Page 2: Table Of Contents
1. INTRODUCTION ........................... 4 2. GENERAL INFORMATION ........................4 INTRODUCTION TO THE SYSTEM ........................... 4 SYSTEM OVERVIEW ..............................4 THE IOT CONTROLLER ............................5 SOFTWARE VERSION UPDATE FOR THE CONFIGUARATION SERVER .............. 6 AUTO/ROUTER FUNCTIONALITY ..........................7 TECHNICAL SPECIFICATIONS ..........................8 3. - Page 3 LIMITATIONS ................................41 5.10 LIST OF DATAPOINTS .............................. 41 5.11 LIST OF ALEXA VOCAL COMMANDS ........................42...
-
Page 4: Introduction
IoT Controller TJA560 Installer Manual INTRODUCTION The descriptions provided in this manual are intended to familiarise the installer with the IoT Controller provided by Hager. The procedures described in this manual are intended to help the installer with IoT Controller configuration during installation. -
Page 5: The Iot Controller
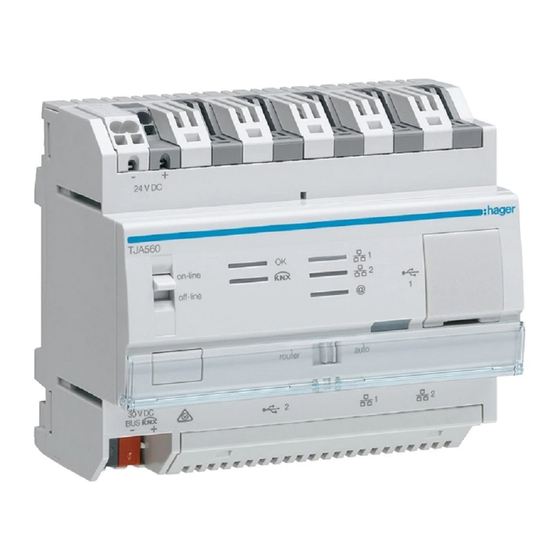
PC, touch screens, or Smartphones for the configuration. THE IOT CONTROLLER The TJA560 is a gateway between the KNX products and connected products from third-parties. The product connects both: • to the KNX bus via connector •... -
Page 6: Software Version Update For The Configuaration Server
No Hager portal connection Blinks green Hager portal connection attempt Lights up green Hager portal connection established Lights up red Hager portal connection inaccessible or connection refused Bus voltage Lights up red Check the bus voltage with a short press of button . -
Page 7: Auto/Router Functionality
IoT Controller TJA560 Installer Manual AUTO/ROUTER FUNCTIONALITY switch lets you select the operating mode for the Ethernet network. Switches Ethernet port behaviour Ethernet Port 1 Ethernet Port 2 Hager Portal KNX Bus Auto On-line This is the normal operating mode when the IoT... -
Page 8: Technical Specifications
TECHNICAL SPECIFICATIONS KNX power supply KNX bus SELV 30 V = Safety extra-low voltage 24 V = via power supply SELV Hager TGA200 or TXA114 or via PoE Consumption on the bus line 10 mA max - 30 V =... -
Page 9: Installation
INSTALLATION PHYSICAL INSTALLATION The IoT Controller TJA560 must be installed in the distribution board or in the VDI box (Voice, Data, Images). The IoT Controller can also be connected to a PoE (Power over Ethernet) network If there is no VDI distribution board, the server can be installed in the electric distribution board. In this case, the ELV (Extra Low Voltage) and SELV (Safety Extra Low Voltage) connections must be properly secured. -
Page 10: Network Installation
IoT Controller TJA560 Installer Manual NETWORK INSTALLATION 3.2.1 INSTALLATION BEHING A DHCP SERVER The IoT Controller is connected to a DHCP server (router or any other device having a DHCP functionality). In this case, the IoT Controller automatically obtains an IP address coming from the DHCP server. -
Page 11: Software Installation
IoT Controller TJA560 Installer Manual SOFTWARE INSTALLATION 3.3.1 IOS AND ANDROID: INSTALL THE LAUNCHER The launcher is an application that can find the IoT Controller IP address. It is available for iOS and Android and can be downloaded from the Apple Store and the Play Store. -
Page 12: Example For Configuring A Project
IoT Controller TJA560 Installer Manual EXAMPLE FOR CONFIGURING A PROJECT To make understanding easier, this chapter will outline a concrete example representative of most cases. Example of a home with various applications: Phillips Hue command: ON/OFF + Variation in light brightness + Changing colour. -
Page 13: Skills Configuration
IoT Controller TJA560 Installer Manual SKILLS CONFIGURATION 4.1.1 LINKING THE IOT CONTROLLER TO MYHAGER To use the various services, your myHager account needs to be linked to the IoT Controller - Click the Cloud tab - Fill in the user name and password for your... -
Page 14: Philips Hue Skill
IoT Controller TJA560 Installer Manual 4.1.4 PHILIPS HUE SKILL - Click the Skills tab then Overview - Click the Philips HUE tab - Activate the Philips HUE module - Click Save skill to confirm 4.1.5 SONOS SKILL - Click the Skills tab then Overview... -
Page 15: Skills Configuration
IoT Controller TJA560 Installer Manual SKILLS CONFIGURATION 4.2.1 KNX SKILL - Click the Skills tab then KNX - Click the Add manually tab - Enter the group address: 1/1/1 - Enter the object name: ON/OFF - Select the type of object: DPT 1.001 switch... -
Page 16: Sonos Skill
IoT Controller TJA560 Installer Manual Click Quick Config to create links with the group addresses Click Select on the Turn On/Off command Select the 1/1/1 ON/OFF address by clicking Add Click Save to confirm Continue in the same way for addresses in groups 1/1/2 (brightness (4 bit) and 1/1/3 (colour loop) Click Close to confirm. - Page 17 IoT Controller TJA560 Installer Manual Click Add module for the Indoor detector for the indoor temperature Click Add module for the Outdoor detector for the outdoor temperature Click Quick Config for the Indoor detector to create links with the group addresses...
-
Page 18: Create A Scene
IoT Controller TJA560 Installer Manual CREATE A SCENE To create a scene, you must define the various actions to carry out. Below is the list of actions for the Music scene: Turn off the lighting in the living room Turn on the Philips Hue lamp with the predefined brightness and colour. -
Page 19: Create A Digigram To Play The Scene
IoT Controller TJA560 Installer Manual CREATE A DIGIGRAM TO PLAY THE SCENE Once the scene has been created, define a command that will play this scene. In our example, it will be the music push button (4/1/2) that will trigger the scene. -
Page 20: Create An Event Signalling Notification
IoT Controller TJA560 Installer Manual CREATE AN EVENT SIGNALLING NOTIFICATION Once the notification has been created, define from which command the notification will be sent. In our example, triggering the alarm will be notified by the address from group 5/1/1. -
Page 21: Create The Scenario In Ifttt
IoT Controller TJA560 Installer Manual o Select the Hager IoT tab o Click Connect to link the IoT Controller to IFTTT On the website o Connect to your myHagar account o Click Authorize App to confirm the IFTTT service o Enter your myHagar login and password 4.7.2... - Page 22 Click You enter an area to define the condition o Enter the domicile area and the action radius o Click +that to configure the scene to play o Enter Hager IoT to find the IoT Controller application o Click Hager IoT.
- Page 23 IoT Controller TJA560 Installer Manual o Click Run scene to define the action to carry o Select the I’m back scene o Click Create action to confirm The IFTTT service confirms that the application has been created o Click Finish to confirm...
-
Page 24: Play A Scene Using Amazon Echo
Click on Link to Alexa Skill to open the web page for your Amazon Alexa account o Once the alexa webpage is opened, fill in your amazon credentials o Go to Alexa skills store and search for the Hager IoT skill o Click on Connect... - Page 25 IoT Controller TJA560 Installer Manual o Fill in your myhager credentials o Click on authorize app o From the smart home menu, click on discover devices, Alexa will then discover all your scenes and components. o You can then control the scenes and components...
-
Page 26: Iot Controller Functionalities
IoT Controller TJA560 Installer Manual IOT CONTROLLER FUNCTIONALITIES This chapter describes the various available menus and their functionalities. DASHBOARD This part lets you view the presence and status of the various connected peripherals. SCENES: List of available scenes SUNRISE/SUNSET: Sunrise and sunset time depending on the position SONOS: List of quick commands: ... -
Page 27: Cloud
IoT Controller TJA560 Installer Manual CLOUD This part lets you set up and configure services requiring an Internet connection (Cloud). Cloud services: lists the active services Amazon Alexa: click Alexa Skill to open the web page for your Amazon Alexa account... -
Page 28: Skills
IoT Controller TJA560 Installer Manual SKILLS 5.3.1 OVERVIEW This section lets you view the list of modules that can be connected to the IoT Controller and configure them. The available skills are: Amazon Alexa o Click the Amazon Alexa tab... - Page 29 IoT Controller TJA560 Installer Manual Netatmo o Click the Netatmo tab o Activate the Netatmo skill o Click Add skill to confirm Philips HUE o Click the Philips HUE tab o Activate the Philips HUE skill o Click Add skill to confirm ...
-
Page 30: Knx Link
IoT Controller TJA560 Installer Manual 5.3.2 KNX LINK In this section, you can configure the project group addresses. This configuration can be carried out in 2 ways: By importing a KNX project: From a KNX project saved file, you can import group addresses with their names. -
Page 31: Philips Hue
IoT Controller TJA560 Installer Manual The table below indicates the various possible formats: DPT1.x 1 bit DPT5.004 Percentage DPT12.001 4 byte (0...255) DPT1.001 Switch DPT6.x 1 byte DPT13.x 4 byte DPT1.007 Step DPT7.x 2 byte DPT14.x 4 byte float DTT1.008 Up/down DPT9.x... -
Page 32: Sonos
IoT Controller TJA560 Installer Manual Click Add lamp to add the lamps of your choice in the configuration group Click Quick Config to create links with the group addresses Click Select for the desired command Select the group address by clicking Add... -
Page 33: Scenes
IoT Controller TJA560 Installer Manual Click Add Module to add the items of your choice in the configuration group Click Quick Config to create links with the group addresses Click Select for the desired command Select the group address by clicking Add... -
Page 34: Schedules
IoT Controller TJA560 Installer Manual SCHEDULES This section lets you programme scene triggering depending on a schedule. Click Create new Schedule Enter the name of the schedule to create Select the days of the week when the programme must be run... -
Page 35: Digigrams
IoT Controller TJA560 Installer Manual DIGIGRAMS This part lets you set up and configure how digigrams run depending on the conditions. 5.7.1 CREATE A DIGIGRAM Click Create digigram Enter the name of the event to create Click Triggers and select the triggering event from the list of peripherals. -
Page 36: Settings
IoT Controller TJA560 Installer Manual SETTINGS 5.8.1 MY ACCOUNT This section lets you fill out the information concerning the administrator account. - Complete the administrator account profile. - Click Update Account after entering the information. 5.8.2 NETWORK This section configures the network settings. -
Page 37: General
IoT Controller TJA560 Installer Manual Modification is only possible when the DHCP functionality is inactive (excluding MAC address). Click the DHCP field to enable or disable the functionality. Click the IPv4 Address field and the new IP address. Click the Gateway field and enter the new IP address Click the Subnet Mask field and enter the new mask Click Save and reboot to record the modifications. -
Page 38: Configuration
IoT Controller TJA560 Installer Manual 5.8.4 CONFIGURATION This section lets you reinitialise, backup and restore the system configuration. System information: This section lets you view the system name and serial number Click the System name field and enter the new name. -
Page 39: Account Management
IoT Controller TJA560 Installer Manual Devices: Click the Refresh field to reinitialise the page. Click Delete to delete the peripheral from the list. Click Filter to search for a specific peripheral or a group of peripherals. Fill out the fields provided for the search. -
Page 40: Update
IoT Controller TJA560 Installer Manual For the user profile: Click Add User Enter the fields provided for this. Click Activate to make the account active Click Save to confirm Click to delete a user. If the installer or user loses his or her password, it can be reset using the following procedure:... - Page 41 Connected devices: 50 devices including: Hue: 50 lights Sonos: 32 loudspeakers Netatmo: 1 account Alexa: 1 account IFTTT: 1 account Hager Smart Thermostat - Tado (when available): 1 account Automatisms (digigrams, schedules and scenes) Digigrams: 100 Scenes: 50 Schedules: 50 Triggers per digigram: 15...
- Page 42 IoT Controller TJA560 Installer Manual 5.11 LIST OF ALEXA VOCAL COMMANDS Scene Activate a scene: "Alexa, turn on Movie Time" or "Alexa, turn on Bedtime." Component/light Turn lights on or off: "Alexa, turn on the lights" or "Alexa, turn off the living room lights."...
- Page 43 Hager Controls S.A.S., 33 Rue Saint-Nicolas, B.P. 10140, 67703 SAVERNE CEDEX, France – www.hager.fr 01/2018 – 6LE005108C...
Need help?
Do you have a question about the TJA560 and is the answer not in the manual?
Questions and answers