Table of Contents
Advertisement
Available languages
Available languages
FOR YOUR SAFETY - This product must be installed and serviced by a contractor
who is licensed and qualified in pool equipment by the jurisdiction in which the
product will be installed where such state or local requirements exist. The maintainer
must be a professional with sufficient experience in pool equipment installation and
maintenance so that all of the instructions in this manual can be followed exactly.
Before installing this product, read and follow all warning notices and instructions
that accompany this product. Failure to follow warning notices and instructions may
result in property damage, personal injury, or death. Improper installation and/or
operation will void the warranty.
Improper installation and/or operation can create unwanted
electrical hazard which can cause serious injury, property
damage, or death.
ATTENTION INSTALLER - This manual contains important
information about the installation, operation and safe use of this
product. This information should be given to the owner/operator
of this equipment.
OWNER'S MANUAL
ENGLISH
TruFit
Eyeball and Snorkel
WARNING
|
|
FRANÇAIS
ESPAÑOL
Bubbler
TM
Advertisement
Chapters
Table of Contents

Related Manuals for Jandy TruFit Bubbler


Summary of Contents for Jandy TruFit Bubbler
- Page 1 OWNER’S MANUAL ENGLISH FRANÇAIS ESPAÑOL TruFit Bubbler Eyeball and Snorkel WARNING FOR YOUR SAFETY - This product must be installed and serviced by a contractor who is licensed and qualified in pool equipment by the jurisdiction in which the product will be installed where such state or local requirements exist. The maintainer must be a professional with sufficient experience in pool equipment installation and maintenance so that all of the instructions in this manual can be followed exactly.
-
Page 2: Table Of Contents
Page 2 ENGLISH Jandy TruFit Bubbler Eyeball and Snorkel ® Table of Contents Section 1. Prepare the Bubbler....... 4 Product Contents ..............4 Remove Bubbler Lens ............4 Section 2. Assembly ........5 Section 3. Installation ........7... - Page 3 Failure to follow safety warnings and instructions can result in severe injury, death, or property damage. Visit www.jandy.com for additional free copies of these instructions or call Zodiac Technical Support at 800.822.7933 (U.S.) or 888.647.4004 (Canada)
-
Page 4: Section 1. Prepare The Bubbler
Section 1. Prepare the Bubbler Product Contents ITEM DESCRIPTION Snorkel Lens Removal Tool (included with purchase of Jandy lights) Eyeball Metal Sleeve Lens Remove Bubbler Lens Turn off the power to the pump. If the pump is located below the water level, close the isolation valves on the suction and discharge sides of the pump to prevent backflow of water. -
Page 5: Section 2. Assembly
ENGLISH Page 5 Installation Instructions Figure 2. Remove Existing Lens Rotate counter-clockwise to extract the lens. Remove the existing lens from the bubbler body. Section 2. Assembly Insert the eyeball into the center of the lens opening. Figure 2. Insert Eyeball Rotate the eyeball 90 degrees and push the eyeball into the center of the lens. - Page 6 Page 6 ENGLISH Jandy TruFit Bubbler Eyeball and Snorkel ® Insert and pull the snorkel through the bottom of the eyeball until it locks in place. NOTE: Snorkel only compatible with the 3/4” eyeball. Figure 4. Insert the Snorkel Make sure the lip of the snorkel snaps over the edge of the eyeball.
-
Page 7: Section 3. Installation
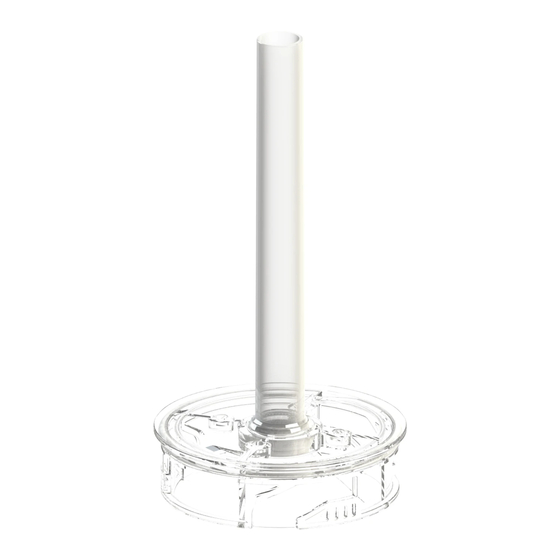
ENGLISH Page 7 Installation Instructions Section 3. Installation Insert the snorkel into the bubbler body. 2. Turn the lens clockwise. Make sure it fits properly inside the body. Figure 6. Insert the Snorkel Figure 7. Snorkel Installed The snorkel is adjustable so that proper water flow can reach the surface. The length of the snorkel can be trimmed so that the plume height of the bubbler can be set to your preference. - Page 8 Zodiac Pool Systems LLC 2882 Whiptail Loop # 100, Carlsbad, CA 92010 Jandy.com | 1.800.822.7933 Zodiac Pool Systems Canada, Inc. 3365 Mainway, Unit 2 Burlington, ON L7M 1A6 Jandy.ca | 1.888.647.4004 2020 Zodiac Pool Systems LLC. All rights reserved. ZODIAC is a registered trademark of Zodiac ©...
- Page 9 MANUEL DU PROPRIÉTAIRE FRANÇAIS Rotule de refoulement et tube hissable pour barboteur d’éclairage immergé TruFit MISE EN GARDE POUR VOTRE SÉCURITÉ, ce produit doit être installé et entretenu par un entrepreneur qualifié en équipements de piscine disposant d’un permis délivré par la juridiction dans laquelle le produit est installé...
- Page 10 Rotule de refoulement et tube hissable pour Page 10 FRANÇAIS barboteur d’éclairage immergé Jandy TruFit ® Table des matières Consignes de sécurité importantes....11 Section 1. Préparation du barboteur d’éclairage ........12 Contenu du produit ...............12 Retirer la lentille du barboteur d’éclairage ......12 Section 2.
-
Page 11: Consignes De Sécurité Importantes
Omettre de suivre les mises en garde et les instructions pourrait entraîner des blessures corporelles graves, la mort ou des dommages à la propriété. Visiter www.jandy.com pour obtenir des copies gratuites supplémentaires de ces instructions ou appeler le soutien technique Zodiac au 800.822.7933 (É.-U.) ou au 888.647.4004 (Canada) -
Page 12: Section 1. Préparation Du Barboteur D'éclairage
Rotule de refoulement et tube hissable pour Page 12 FRANÇAIS barboteur d’éclairage immergé Jandy TruFit ® Section 1. Préparation du barboteur d’éclairage Contenu du produit ARTICLE DESCRIPTION Tube hissable (Schnorkel) Outil d’extraction de lentilles (inclus avec l’achat d’éclairages Jandy) Rotule de refoulement Manchon en métal... -
Page 13: Section 2. Assemblage
Page 13 FRANÇAIS Directives d’installation Figure 2. Retirer la lentille existante 3. Faire pivoter dans le sens antihoraire afin d’extraire la lentille. Retirer la lentille existante du corps du barboteur. Section 2. Assemblage Insérer la rotule de refoulement dans le centre de l’ouverture de la lentille. Figure 2. Insertion de la rotule de refoulement Faire pivoter la rotule de refoulement de 90 degrés et enfoncer la rotule de refoulement dans le centre de la lentille. - Page 14 Rotule de refoulement et tube hissable pour Page 14 FRANÇAIS barboteur d’éclairage immergé Jandy TruFit ® Insérer et tirer le tube hissable (Schnorkel) à travers le fond de la rotule de refoulement jusqu’à ce que celui-ci se verrouille en place.
-
Page 15: Section 3. Installation
Page 15 FRANÇAIS Directives d’installation Section 3. Installation Insérer le tube hissable dans le corps du barboteur. Faire pivoter la lentille dans le sens horaire. Bien s’assurer que celle-ci s’enclenche correctement à l’intérieur du corps. Figure 7. Insertion du tube hissable (Schnorkel) Figure 8. - Page 16 Zodiac Pool Systems LLC 2882 Whiptail Loop # 100, Carlsbad, CA 92010 Jandy.com | 1.800.822.7933 Zodiac Pool Systems Canada, Inc. 3365 Mainway, Bureau 2 Burlington, ON L7M 1A6 Jandy.ca | 1.888.647.4004 2020 Zodiac Pool Systems LLC. Tous droits réservés. ZODIAC est une marque de commerce ©...
- Page 17 MANUAL DEL PROPIETARIO ESPAÑOL Globo con tubo burbujeador TruFit ADVERTENCIA PARA SU SEGURIDAD: la instalación y el servicio técnico de este producto deben estar a cargo de un contratista cualificado y matriculado para trabajar con equipamientos para piscinas en la jurisdicción en la que se instalará el producto, donde existan tales requisitos estatales o locales.
- Page 18 Página 18 ESPAÑOL Jandy Globo con tubo burbujeador TruFit ® Contenido Instrucciones importantes de seguridad ..19 Sección 1. Prepare el burbujeador....20 Contenido del producto ............20 Extraiga la lente del burbujeador ..........20 Sección 2. Ensamblaje ........21 Sección 3. Instalación ........23...
-
Page 19: Instrucciones Importantes De Seguridad
Visite www.jandy.com para obtener copias adicionales gratuitas de estas instrucciones, o llame al soporte técnico de Zodiac al 800.822.7933 (EE. -
Page 20: Sección 1. Prepare El Burbujeador
Contenido del producto ELEMENTO DESCRIPCIÓN Tubo Herramienta para extraer la lente (se incluye con la compra de luces Jandy) Globo Manguito metálico Lente Extraiga la lente del burbujeador Corte la energía de la bomba. Si la bomba está ubicada por debajo del nivel del agua, cierre las válvulas de aislamiento de... -
Page 21: Sección 2. Ensamblaje
Página 21 ESPAÑOL Instrucciones de instalación Figura 2. Extraiga la lente Gire en sentido antihorario para extraer la lente. Extraiga la lente existente del cuerpo del burbujeador. Sección 2. Ensamblaje Inserte el globo en el centro de la abertura de la lente. Figura 2. - Page 22 Página 22 ESPAÑOL Jandy Globo con tubo burbujeador TruFit ® Inserte y tire del tubo a través de la parte inferior del globo hasta que se trabe en su lugar. NOTA: El tubo solo es compatible con el globo de 3/4”.
-
Page 23: Sección 3. Instalación
Página 23 ESPAÑOL Instrucciones de instalación Sección 3. Instalación Inserte el tubo en el cuerpo del burbujeador. Gire la lente en sentido horario. Asegúrese de que encaje correctamente en el cuerpo. Figura 7. Inserte el tubo Figura 8. Tubo instalado El tubo es ajustable para que el flujo de agua correcto pueda llegar a la superficie. - Page 24 Zodiac Pool Systems LLC 2882 Whiptail Loop # 100, Carlsbad, CA 92010 Jandy.com | 1.800.822.7933 Zodiac Pool Systems Canada, Inc. 3365 Mainway, Unit 2 Burlington, ON L7M 1A6 Jandy.ca | 1.888.647.4004 2020 Zodiac Pool Systems LLC. Todos los derechos reservados. ZODIAC es una marca ©...
Need help?
Do you have a question about the TruFit Bubbler and is the answer not in the manual?
Questions and answers