VeriFone VX675 Operating Manual
Merchant
Hide thumbs
Also See for VX675:
- User manual (24 pages) ,
- Manual (14 pages) ,
- Implementation manual (34 pages)
Table of Contents
Advertisement
Advertisement
Table of Contents

Related Manuals for VeriFone VX675


Summary of Contents for VeriFone VX675
- Page 1 Merchant Operating Guide VX675...
- Page 2 The Merchant Helpdesk is available 24 hours, 7 days a week, Australian Eastern Standard Time (AEST). Please ensure you have your Merchant ID (MID) and / or your EFTPOS Terminal ID (TID), for the following enquiries: Merchant Helpdesk 1800 700 226 Stationery Orders New order Select Option 1...
-
Page 3: Table Of Contents
Table of Contents INTRODUCTION ....................5 TRANSACTION TYPES ................... 5 SUPPORTED CARD TYPES ................... 5 GETTING STARTED ..................6 VX675 EFTPOS TERMINAL ..................6 TERMINAL FEATURES ................... 6 KEYPAD FEATURES ....................6 TERMINAL DISPLAY ....................7 POWER SUPPLY ....................7 PAPER ROLL INSTALLATION ................ - Page 4 7.1.3 HELPDESK ORDER ....................60 LOAD PARAMETERS .................... 60 MERCHANT PASSWORD ..................62 REPRINT RECEIPT (DUPLICATE) ............... 64 7.4.1 DUPLICATE TRANSACTION RECEIPT ..............65 POWER SAVE ....................... 66 RESTART TERMINAL ................... 67 MULTI-MERCHANT FACILITY ............... 68 MULTI-MERCHANT PURCHASE ................68 MULTI-MERCHANT SETTLEMENT ..............
-
Page 5: Introduction
Merchant Operating Guide Introduction The purpose of the Merchant Operating Guide is to assist you in the operation of the VX675 EFTPOS Terminal. The VX675 terminal allows transactions to be processed for Australian Domestic Debit Cards (Cheque and Savings accounts), Credit Cards (Visa and MasterCard) and Charge Cards (American Express, Diners Club and JCB). -
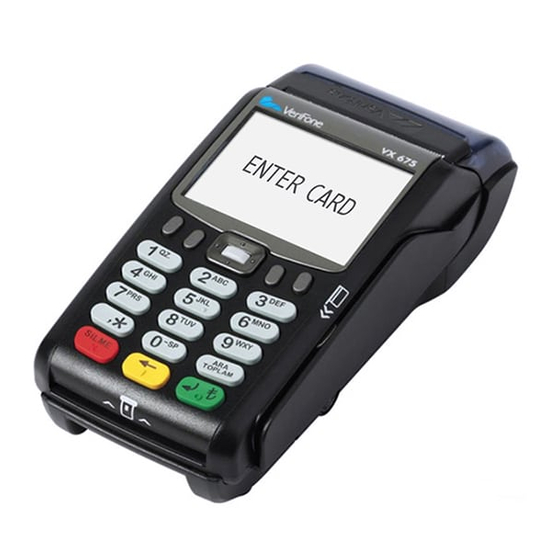
Page 6: Getting Started
Getting Started VX675 EFTPOS T E R M I N A L The VX675 EFTPOS Mobile terminal is a complete unit. E R M I N A L E A T U R E S E Y P A D... -
Page 7: Terminal Display
E R M I N A L I S P L A Y Key Title Symbol Key Purpose GPRS Number of bars indicates strength of the GPRS signal. Internal battery power level displayed when terminal is not connected to Battery mains power. -
Page 8: Paper Roll Installation
Before you can process transactions that require a receipt or records, you must install paper in the printer section of your terminal. The VX675 uses a roll of single-ply, thermal-sensitive paper for either the 38 mm or the 49 mm diameter version. -
Page 9: Power Up
8. Tear the paper off against the serrated metal strip in the printer. Power Up O W E R Step Terminal Display Action Ensure the power cord is attached or battery is charged and hold down the ENTER key for 4 seconds until you hear a beep. The screen will light up and a welcome screen will appear. -
Page 10: Power Off
Once the parameter download has completed successfully you will be notified on screen. The terminal will then automatically load up the main screen. The terminal is now ready to begin processing transactions. To check the connectivity strength of your device, see the signal strength indicator on the right upper corner of the terminal screen. -
Page 11: Card Presentation Procedures
N S E R T I N G A H I P A R D The VX675 terminal supports credit or debit card transactions. The chip card reader is located at the bottom of the terminal below the keypad. Instructions: 1. -
Page 12: Contactless Card Transactions
O N T A C T L E S S A R D R A N S A C T I O N S Contactless card transactions can be processed on the VX675 terminal. The contactless card reader is located behind the display screen. - Page 13 Enter the purchase amount, i.e. 4500 = $45.00 If a correction is required press the CLEAR key to remove the number(s) entered or the key to return to the main screen. CANCEL Press the ENTER to accept amount and continue. Leave the cashback amount blank and press ENTER Note: The Tipping screen will only display if...
- Page 14 In some instances you may get the option of PIN or ENTER – refer to Screen 2. NOTE: PIN can be bypassed for certain card types (i.e. International) by leaving the PIN blank and pressing the ENTER . The card type will determine if a signature is allowed and if so the screen will be presented.
- Page 15 Press ENTER for YES to print a customer copy. Press CANCEL for NO to avoid printing a customer copy. If a signature is required, remove the card from the terminal and have the customer sign the receipt. Check signature on receipt against customer’s card, and select either option below: Press ENTER for YES to confirm customer’s...
-
Page 16: Purchase Transaction Receipt
5 . 1 . 1 P U R C H A S E T R A N S A C T I O N R E C E I P T The receipt for a standard Purchase transaction is as follows: Approved Purchase Receipt Approved Purchase Receipt Merchant Copy... -
Page 17: Processing A Purchase With Cashback
Step Terminal Display Action There are two methods for initiating a purchase on the VX675 EFTPOS terminal, either: Amount Entry Method - Press a number key • on the terminal key pad to begin amount entry. The amount is entered without the decimal point. - Page 18 Navigate to the account required by using the scroll key then push the select button or ENTER Enter the number shown on the display screen by using the keypad. NOTE: The accounts offered on this screen are dynamic and will display all card types enabled on the card.
- Page 19 Press ENTER for YES to print a customer copy. Press CANCEL for NO to avoid printing a customer copy. If a signature is required, remove the card from the terminal and have the customer sign the receipt. Check signature on receipt against customer’s card, and select either option below: Press ENTER for YES to confirm customer’s...
-
Page 20: Purchase With Cashback Transaction Receipt
Press ENTER for YES to print a customer copy. Press CANCEL for NO to avoid printing a customer copy. 5 . 2 . 1 P U R C H A S E W I T H C A S H B A C K T R A N S A C T I O N R E C E I P T The receipt for a standard Purchase with Cashback transaction is as follows: Approved Purchase with Approved Purchase with... -
Page 21: Processing A Purchase With Tip
Step Terminal Display Action There are two methods for initiating a purchase on the VX675 EFTPOS terminal, either: Amount Entry Method - Press a number key • on the terminal key pad to begin amount entry. The amount is entered without the decimal point. - Page 22 Navigate to the account required by using the scroll key then push the select button or ENTER Enter the number shown on the display screen by using the keypad. NOTE: The accounts offered on this screen are dynamic and will display all card types enabled on the card.
- Page 23 Press ENTER for YES to print a customer copy. Press CANCEL for NO to avoid printing a customer copy. If a signature is required, remove the card from the terminal and have the customer sign the receipt. Check signature on receipt against customer’s card, and select either option below: Press ENTER for YES to confirm customer’s...
- Page 24 Press ENTER for YES to print a customer copy. Press CANCEL for NO to avoid printing a customer copy. V X 6 7 5 M E R C H A N T O P E R A T I N G G U I D E...
-
Page 25: Purchase With Tip Transaction Receipt
5 . 3 . 1 P U R C H A S E W I T H T I P T R A N S A C T I O N R E C E I P T The receipt for a standard Purchase with Tip transaction is as follows: Approved Purchase with Tip Approved Purchase with Tip Field Explanation... - Page 26 then push the select button or ENTER Enter the number shown on the display screen by using the keypad. Key in the Cash Out amount, i.e. 500 = $5.00 If a correction is required press the CLEAR key to remove the last number entered or the key to return to the main screen.
-
Page 27: Processing A Cash Out
The terminal will connect to the bank and begin processing the Cash Out. If a chip card was inserted, and is yet to be removed, this prompt will appear. Remove the card at this prompt. The terminal will beep as a reminder if the card is not removed. -
Page 28: Cash Out Transaction Receipt
5 . 4 . 1 C A S H O U T T R A N S A C T I O N R E C E I P T The receipt for a standard Cash Out transaction is as follows: Approved Cash Out Receipt Approved Cash Out Receipt Field Explanation... -
Page 29: Processing A Refund
R O C E S S I N G A E F U N D Step Terminal Display Action From the main screen, select Menu key located on right-hand side of terminal. Navigate to the menu item using the scroll key then push the select button or ENTER Enter the number shown on the display screen by... - Page 30 Navigate to the account required by using the scroll key then push the select button or ENTER Enter the number shown on the display screen by using the keypad. NOTE: The accounts offered on this screen are dynamic and will display all card types enabled on the card.
- Page 31 Press ENTER for YES to print a customer copy. Press CANCEL for NO to avoid printing a customer copy. If a signature is required, remove the card from the terminal and have the customer sign the receipt. The card type will determine if a signature is allowed and if so the screen will be presented.
-
Page 32: Refund Transaction Receipt
Approved Refund Receipt Approved Refund Receipt Field Explanation Merchant Copy Customer Copy Press ENTER for YES to print a customer copy. Press CANCEL for NO to avoid printing a customer copy. 5 . 5 . 1 R E F U N D T R A N S A C T I O N R E C E I P T V X 6 7 5 M E R C H A N T O P E R A T I N G G U I D E... - Page 33 Acquirer Name Merchant Name ABC Pty Ltd ABC Pty Ltd Merchant Address 55 Queen Street 55 Queen Street Suburb and Postcode BRISBANE 4000 BRISBANE 4000 Merchant Phone 0732129999 0732129999 Advertising text Country AUSTRALIA AUSTRALIA Merchant ID MID 000000XXXXXXXXX 000000XXXXXXXXX TSP-ID 1001XXXXXXXX 1001XXXXXXXX Local terminal Date &...
- Page 34 From the main screen, select Menu key located on the right-hand side. Navigate to the menu item using the scroll key then push the select button or ENTER Enter the number shown on the display screen by using the keypad. Navigate to the menu item using the scroll key then push the select button or ENTER...
- Page 35 Key in the cardholder’s card expiry date in MMYY format. If a correction is required press the CLEAR key, once the value is correct press the ENTER key. Telephone Order Only - The terminal will now display the control number entry screen (CVV). Enter the 3 digit CCV number located on the back of the card near the signature strip.
- Page 36 Press ENTER for YES to print a customer copy. Press CANCEL for NO to avoid printing a customer copy. V X 6 7 5 M E R C H A N T O P E R A T I N G G U I D E...
-
Page 37: Mail Order/Telephone Order Transaction Receipt
5 . 6 . 1 M A I L O R D E R / T E L E P H O N E O R D E R T R A N S A C T I O N R E C E I P T The receipt for a standard MOTO transaction is as follows: MOTO Receipt MOTO Receipt... -
Page 38: Processing A Pre-Authorisation
R O C E S S I N G A U T H O R I S A T I O N The Pre-Authorisation transaction is only available to merchants who have satisfied the Bank’s specific Terms and Conditions. Please contact the Merchant Helpdesk to discuss your requirements. Pre-Authorisation is used to preserve a value amount on a cardholder’s account. - Page 39 Insert, swipe or tap the customer’s card (See Section 4 Card Presentation Procedures). NOTE: Contactless operation is not permitted for this type of transaction. The screen will show PIN or ENTER. Enter Personal Identification Number (PIN), or Press ENTER for signature. NOTE: PIN can be bypassed for certain card types (i.e.
- Page 40 Press ENTER for YES to print a customer copy. Press CANCEL for NO to avoid printing a customer copy. If a signature is required, remove the card from the terminal and have the customer sign the receipt. The card type will determine if a signature is allowed and if so the screen will be presented.
-
Page 41: Pre-Authorisation Transaction Receipt
5 . 7 . 1 P R E - A U T H O R I S A T I O N T R A N S A C T I O N R E C E I P T The receipt for a standard Pre-Authorisation transaction is as follows: Pre-Authorisation Receipt Pre-Authorisation Receipt... - Page 42 R O C E S S I N G A U T H O R I S A T I O N O M P L E T I O N The Pre-Authorisation Completion process looks up the original pre-authorisation record, confirms the transaction value and puts the preauthorisation payment through as a transaction.
- Page 43 The terminal will begin locating the stored transaction. To confirm the transaction is to be completed, press ENTER Enter the completion amount and press ENTER Note: Completion amount entry will be restricted by variance limits applied to the original Pre-Auth amount.
- Page 44 Press ENTER for YES to print a customer copy. Press CANCEL for NO to avoid printing a customer copy. V X 6 7 5 M E R C H A N T O P E R A T I N G G U I D E...
-
Page 45: Pre-Authorisation Completion Transaction Receipt
5 . 8 . 1 P R E - A U T H O R I S A T I O N C O M P L E T I O N T R A N S A C T I O N R E C E I P T The receipt for a standard Pre-Authorisation Completion transaction is as follows: Pre-Authorisation Pre-Authorisation Completion... - Page 46 R O C E S S I N G A U T H O R I S A T I O N A N C E L L A T I O N Step Terminal Display Action From the main screen, select the menu key located on the right-hand side.
- Page 47 To confirm the transaction is to be cancelled press ENTER The screen will show Cancelling Pre-Auth, Please Wait. Press ENTER for YES to print a customer copy. Press CANCEL for NO to avoid printing a customer copy. V X 6 7 5 M E R C H A N T O P E R A T I N G G U I D E...
-
Page 48: Pre-Authorisation Cancellation Transaction Receipt
5 . 9 . 1 P R E - A U T H O R I S A T I O N C A N C E L L A T I O N T R A N S A C T I O N R E C E I P T The receipt for a standard Pre-Authorisation Cancellation transaction is as follows: Pre-Authorisation Pre-Authorisation... -
Page 49: Electronic Fallback Procedure
5.11 L E C T R O N I C A L L B A C K R O C E D U R E The Electronic Fallback (EFB) function is available on your EFTPOS Terminal. EFB is the ability to continue processing transactions through your terminal, when communication to the BOQ host system has been lost or the cardholder’s card issuer is unavailable. -
Page 50: Settlement And Reporting
PPROVED Enter the authorisation number verbally given over the phone and follow the prompts on your terminal. ECLINED Follow the prompts on your terminal. You must not ‘split’ a transaction to avoid obtaining an authorisation. Please refer to your Merchant Facility Terms and Conditions “Specific Obligations to Us”. -
Page 51: Close Batch (Settlement) Overview
6 . 3 . 1 C L O S E B A T C H ( S E T T L E M E N T ) – M A N U A L P R O C E D U R E Step Terminal Display Action... - Page 52 The terminal will now print the Close Batch Report. Important Points to Remember: If a Close Batch (Settlement) is not performed during the day, all online transactions will automatically be processed when the acquirer completes the daily cut-off. A Batch cannot be closed twice on the same physical day, and even if this is run you will receive a message saying ‘Already Settled Today, Press Enter Key’.
-
Page 53: Close Batch Report
CLOSE BATCH REPORT The report for a standard Close Batch Settlement is as follows: Acquirer Name à à Merchant Name à ABC Company LTD Merchant Address 123 Abc Street Suburb and Postcode Brisbane QLD 4000 Country Australia Merchant Phone number 07 3254 9000 *-----------------------------------------------------* Report Name... - Page 54 T O T A L S The following Sub Total Report can be run from the terminal at multiple times per day for reporting purposes. Step Terminal Display Action From the main screen, select Menu key located on right-hand side. Page down and navigate to the menu item using the scroll key then push the select button ENTER...
- Page 55 Press ENTER for YES to print Sub Totals. Press CANCEL for NO to avoid printing a Sub Totals. The terminal will now print the Sub Total Report. V X 6 7 5 M E R C H A N T O P E R A T I N G G U I D E...
-
Page 56: Subtotals
6 . 5 . 1 S U B T O T A L R E P O R T The standard Sub Total Report is as follows: Acquirer Name (BOQ) à à Merchant Name à ABC Company LTD Merchant Address 123 Abc Street Suburb and Postcode Brisbane QLD 4000... -
Page 57: Terminal Functions
TERMINAL FUNCTIONS T A T I O N E R Y O R D E R I N G 7 . 1 . 1 T E R M I N A L O R D E R You can only submit 1 order per day via your terminal. The options for EFTPOS rolls are: •... - Page 58 Navigate to the menu item using the scroll key then push the select button or ENTER Enter the number shown on the display screen by using the keypad. e.g., 1 pack = 10 rolls The order selected will then be displayed on the confirmation screen.
-
Page 59: Stationery Order Receipt
The terminal will display Order Complete. ORDER COMPLETE 7 . 1 . 2 S T A T I O N E R Y O R D E R R E C E I P T The standard Stationery Order receipt is as follows: Stationery Order Receipt MERCHANT NAME MERCHANT ADDRESS... - Page 60 If your terminal is unable to connect to perform the download at its scheduled time it will re-try at a later stage. The steps to trigger a parameter download manually are as follows: Step Terminal Display Action From the main screen, select Menu key on right- hand side.
-
Page 61: Merchant Password
Upon the unsuccessful completion of the download the terminal will display this screen. Please retry Load Parameters again, and if still failing, contact the Merchant Helpdesk. E R C H A N T A S S W O R D The terminal is programmed with a merchant password which is required for refunds and other terminal functions. - Page 62 Navigate to the menu item using the scroll key then push the select button or ENTER Enter the number shown on the display screen by using the keypad. Key in the current 6-digit Merchant Password and press ENTER Key in the new 6-digit merchant password and press ENTER Re-key to confirm the new 6-digit merchant password and press ENTER...
-
Page 63: Reprint Receipt (Duplicate)
REPRINT RECEIPT (DUPLICATE) This function allows you to print a duplicate receipt for the last transaction within the same settlement period. Step Terminal Display Action From the main screen, select Menu key on right- hand side. Page down Navigate to the menu item using the scroll key then push the select button ENTER Enter the number shown on the display screen by... -
Page 64: Duplicate Transaction Receipt
7 . 4 . 1 D U P L I C A T E T R A N S A C T I O N R E C E I P T The receipt for a standard duplicate Purchase transaction is as follows: Approved Purchase Receipt Field Explanation Duplicate Copy... -
Page 65: Power Save
O W E R A V E The Power Save feature allows you to control the time before the screen dims due to inactivity on the terminal. This feature is typically used to conserve battery for portable devices. Step Terminal Display Action From the main screen, select Menu key on right-hand side. -
Page 66: Restart Terminal
For option 2. Inactive enter the Inactivity time in seconds and press ENTER This is the time before the screen automatically dims in idle state. E S T A R T E R M I N A L The steps to restart the terminal are as follows: Step Terminal Display Action... -
Page 67: Multi-Merchant Facility
Press ENTER for YES to print Restart Terminal. Press CANCEL for NO and this will stop the Restart Terminal. Multi-Merchant Facility The Multi-Merchant function will allow up to 8 merchants to accept payments using the same terminal. If the terminal is configured to support multiple merchants, this means you can switch between multiple merchants on the same terminal. - Page 68 Key in the Purchase amount, i.e. 500 = $5.00 If a correction is required press the CLEAR key to remove the last number entered or the key to return to the main screen. CANCEL Press the ENTER to accept amount and continue.
-
Page 69: Troubleshooting
Navigate to the menu item using the scroll key then push the select button or ENTER Enter the number shown on the display screen by using the keypad. Refer to section 6.1 Close Batch (Settlement) Overview. Troubleshooting R A N S A C T I O N E S P O N S E O D E S If you require any assistance with the below response code please contact the Merchant Helpdesk. -
Page 70: Hardware Faults
INVALID TRANSACTION Transaction requested is not allowed Request other means of for this terminal or this card. payment e.g. Cash ISSUER UNAVAILABLE The cardholder’s bank is unable to be The terminal should attempt contacted to authorise the EFB, or request other means transaction. -
Page 71: General Questions & Answers
10 General Questions & Answers POWERING ON YOUR TERMINAL Q : H O W D O P O W E R O N M Y T E R M I N A L A: By holding down the green enter key will power on the terminal. Refer to Section Power On for further details. - Page 72 this feature is only enabled for chip cards that also have Visa payWave or MasterCard PayPass. This tap and go function can be used on debit or credit cards. Your customer can simply place their chip card on the terminal screen instead of inserting or swiping.
- Page 73 ELECTRONIC FALLBACK Q : W ( E F B ) H A T D O E S L E C T R O N I C A L L B A C K M E A N A: Please refer to both your BOQ Merchant Terms and Conditions and section 5.11 Electronic Fallback Procedure.
- Page 74 Q : W H A T H A P P E N S I F T U R N T H E T E R M I N A L O F F O V E R N I G H T W I T H O U T P E R F O R M I N G A L O S E A T C H...
- Page 75 GENERAL Q : I B O Q N E E D T O C H A N G E M Y A D D R E S S O W D O N O T I F Y O F T H I S C H A N G E A: The ‘Change of Address Request’...
- Page 76 Merchant Helpdesk Contact number 1800 700 226 available 7 days per week, 24 hours per day. BOQS001675 V1 05/17...
Need help?
Do you have a question about the VX675 and is the answer not in the manual?
Questions and answers