MSA Ultima X Instruction Manual
Sampling module,
dc aspirated model
Hide thumbs
Also See for Ultima X:
- Instruction manual addendum (30 pages) ,
- Operating manual (42 pages)
Table of Contents
Advertisement
Quick Links
Ultima
Sampling Module,
DC Aspirated Model
Instruction Manual
THIS MANUAL MUST BE CAREFULLY READ BY ALL INDIVIDUALS WHO HAVE OR WILL
HAVE THE RESPONSIBILITY FOR USING OR SERVICING THE PRODUCT. Like any piece
of complex equipment, this device will perform as designed only if it is used and serviced
in accordance with the manufacturer's instructions. OTHERWISE, IT COULD FAIL TO
PERFORM AS DESIGNED AND PERSONS WHO RELY ON THIS PRODUCT FOR THEIR
SAFETY COULD SUSTAIN SEVERE PERSONAL INJURY OR DEATH.
The warranties made by Mine Safety Appliances Company with respect to the product are
voided if the product is not used and serviced in accordance with the instructions in this
manual. Please protect yourself and others by following them. We encourage our cus-
tomers to write or call regarding this equipment prior to use or for any additional infor-
mation relative to use or service.
In the U.S., to contact your nearest stocking location, dial toll-free 1-800-MSA-INST
To contact MSA International, dial 1-412-967-3228.
© MINE SAFETY APPLIANCES COMPANY 2009 - All Rights Reserved
This manual is available on the internet at www.msanet.com
Manufactured by
MSA NORTH AMERICA
P.O. Box 427, Pittsburgh, Pennsylvania 15230
(L) Rev 0
X
®
"! WARNING
10103803
Advertisement
Table of Contents
Troubleshooting

Subscribe to Our Youtube Channel
Related Manuals for MSA Ultima X


Summary of Contents for MSA Ultima X
- Page 1 In the U.S., to contact your nearest stocking location, dial toll-free 1-800-MSA-INST To contact MSA International, dial 1-412-967-3228.
- Page 2 MSA Permanent Instrument Warranty 1. Warranty- Seller warrants that this product will be free from mechanical defect or faulty workmanship for a period of eighteen (18) months from date of shipment or one (1) year from installation, whichever occurs first, provided it is maintained and used in accordance with Seller's instructions and/ or recommendations.
- Page 3 General Warnings and Cautions " WARNING 1. The Ultima X Sampling Module - Aspirated Model described in this manual must be installed, operated, and maintained in strict accordance with the labels, cautions, warnings, instructions, and within the limitations stated. 2. The Ultima X Sampling Module - Aspirated Model is designed to sample gases or vapors in air.
- Page 4 7. Extremely high concentrations of combustible gas or vapor between the lower explosive limit (LEL) and the upper explosive limit (UEL) will cause the indication on the Ultima X Gas Monitor to indicate full scale or above full scale. If the concentration level is further increased and exceeds the UEL, the display will continue to show an above scale indication.
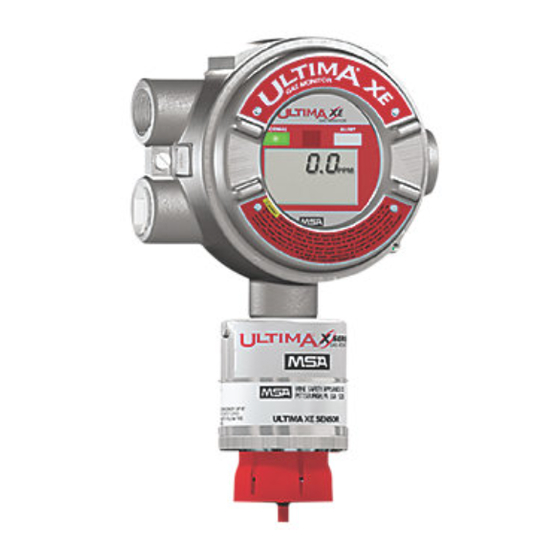
- Page 5 Ultima X Sampling Module, Aspirated Model (P/N 10058101)
-
Page 6: Table Of Contents
Sample Line Placement between Aspirated Sampling Module and Ultima X Gas Monitor ....2-3 " WARNING ......2-3 Table 2-1. - Page 7 Zeroing the System with the Ultima X Sampling Module .....3-2 " WARNING ......3-2 Spanning with the Ultima X Sampling Module .
-
Page 8: General Information
Ultima X Gas Monitor • a special flow cap for use on the Ultima X Gas Monitor to ensure proper sensor sampling. A properly-installed unit for a single Ultima X Gas Monitor is shown in FIGURE 1-1. -
Page 9: Figure 1-1. Sampling Module Installation
Figure 1-1. Sampling Module Installation... -
Page 10: Unit Identification
Each Aspirated Sampling Module package contains: • Aspirated Sampling Module • Flow cap for one Ultima X Gas Monitor • Tubing and in-line Filter • End-of-line Filter • Instruction Manual Unit Identification There is one possible Aspirated Sampling Module configuration: •... -
Page 11: Ultima X Sampling Module - Aspirated Model
Table 1-1. Performance Specifications for Ultima X Sampling Module - Aspirated Model ASPIRATOR AIR Instrument grade air REQUIREMENTS MAXIMUM 30 PSIG (206 kPa) ASPIRATOR PRESSURE MINIMUM .6 CFM at 20 PSIG (137 kPa) ASPIRATOR AIR CONSUMPTION MAXIMUM .9 CFM at 30 PSIG (206 kPa) -
Page 12: Terminology
Terminology ELECTRO-CHEMICAL SENSOR - Sensor employing the reactions of chemicals generating electric currents to detect certain gases. EXHAUST GAS - Gas after it has passed through the sensor. FLOW RATE - The volume-per-minute of gas in the sample line. SPAN - Full scale or up-scale reading on the meter display. SPAN GAS VALUE - Gas concentration which gives the instrument an up scale or full scale value. -
Page 13: Chapter 2, Installation
Double check the area classification of the sampling module. Refer to FIGURE 1-2 to find the area classification label on your unit. Ensure that the Ultima X Gas Monitor is rated properly by referring to Ultima X Gas Monitor instruction manual (P/N 10036101) for more details. -
Page 14: Mounting The Aspirated Sampling Module Unit
Mounting the Aspirated Sampling Module Unit (All Models) 1. Locate the Aspirated Sampling Module and the Ultima X Gas Monitor(s) in a clean, accessible location. • Since the unit enclosure is non-corrosive, it can be mounted to the outside of a building or in other wet environments. -
Page 15: Sample Line Placement Between Aspirated Sampling Module And Ultima X Gas Monitor
Sampling Module gas INLET and EXHAUST ports. 2. On new installations, skip to Step 4. On existing installations of the Ultima X Gas Monitor: Remove the Ultima X Gas Monitor(s) red plastic sensor cap and any gaskets remaining on the sensor. Do not remove the sensor element. -
Page 16: Sample Line Placement
Ensure that the arrow on the in line filter is pointing towards the Aspirated Sampling Module. • If installing additional Ultima X Gas Monitors, install tubing between units as shown in FIGURE 2-1. Use tubing compatible with the gas being sampled. -
Page 17: A Sampling Module
Figure 2-1. Three Ultima X Monitors & a Sampling Module... -
Page 18: Caution
2. Attach a 1/4-inch (6.35 mm) OD sample tubing to the flow block sample inlet fitting on the Ultima X Gas monitor (FIGURE 1-1). Ensure tubing is compatible with the sampled gas. 3. Route the sample tubing to the area to be monitored. -
Page 19: Exhaust Line Placement
5. Install the provided end-of-line filter at the end of the sampling tubing, if applicable. 6. Check for leaks along the entire length of the sample tubing line. Any leak will dilute the gas sample from the area of interest and give a lower than actual gas reading. -
Page 20: Electrical Connection
A flow detector within the Aspirated Sampling Module activates a relay when sufficient flow exists for proper gas detection. Generally, the Ultima X Gas Monitor output signal is routed through this relay. When the flow is insufficient, the relay opens and the gas signal is interrupted. -
Page 21: Warning
• If unit is an explosion-proof model: • Remove and discard the cable grip threaded into the enclosure. • Follow National Electrical and local procedural Codes. 3. If not using the attached wiring harness: a. Remove the top cover of the Sampling Module by rotating the cover counter-clockwise. -
Page 22: Initial Start-Up
Consult equip- ment instruction manual for further details. All instruments must be returned to normal operation when Aspirated Sampling Module and Ultima X Gas Monitor adjustments are completed. 4. Before applying compressed air to the Aspirated Sampling Module compressed air inlet: a. - Page 23 5. Apply the compressed air to the compressed air inlet of the Aspirated Sampling Module at 20 to 25 psig (137 to 172 kPa). 6. Pull out the red locking ring and adjust the knob on the air regulator to obtain a reading of 10 psig (90 kPa). 7.
-
Page 24: Calibration And Operation
If this calibration procedure cannot be performed at any step, consult Section 4, "Troubleshooting Guidelines," localize the problem and replace the inoperative component. MSA offers periodic service that is available on a contract basis; for more information, please call MSA at 1-800-MSA-INST. -
Page 25: Calibration Procedures
4. When the Ultima X Gas Monitor displays "APPLY ZERO GAS", press and hold the button by the calibration inlet. Turn the knob on the regulator to permit the ZERO gas to flow. The Ultima X Gas Monitor will make all corrections to the zero signal; there are no adjustments necessary. -
Page 26: Spanning With The Ultima X Sampling Module
8. When the Ultima X Gas Monitor displays "APPLY SPAN GAS", press and hold the button by the calibration inlet. Turn the regulator knob to permit the SPAN gas to flow. The Ultima X Gas Monitor will make all the correction to the span signal; there are no adjustments necessary. -
Page 27: Chapter 4, Maintenance And Troubleshooting Guidelines
Chapter 4, Maintenance and Troubleshooting Guidelines Maintenance The Aspirated Sampling Module requires minimal maintenance. However, the filters need routine inspection and possible replacement. It is good practice to have on hand replacement filters to minimize any down time of your unit (see TABLE 4-2). Filter Maintenance Filter maintenance consists of visual inspection of the two filters, end-of-line filter and the in-line filter which blocks water from entering... -
Page 28: Troubleshooting Guidelines
The ambient is too cold or Place the Ultima X Sampling Module in too hot for the sensor warmer or cooler ambient environment A leak in the sample line Check and repair any leaks in the... -
Page 29: Replacement Parts
Replacement Parts Table 4-2. Parts List DESCRIPTION PART NO. PC Board Assembly (requires new label) 10052349 Label 10051804 Filter, In-line 10051406 Filter, End-of-Line, Includes Cartridge (High Humidity) 637920 Filter, End-of Line, (Reactive Gases) 637921 Filter Cartridge for End-of-Line Filter (General Purpose) 95302 Flashback Arrestor for Explosion-proof Models Only 813159...
Need help?
Do you have a question about the Ultima X and is the answer not in the manual?
Questions and answers