
Subscribe to Our Youtube Channel
Related Manuals for Trane TR1 6002


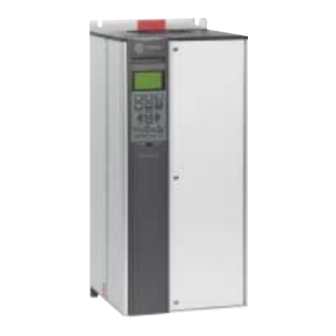
Summary of Contents for Trane TR1 6002
- Page 1 Series VFD ™ Variable Frequency Drive Installation and Operation Manual August, 2004 TR1-SVX10A-EN 175R5559...
- Page 2 Safety Guidelines WARNING The drive must be disconnected from the AC line before any service work is done. Equipment Hazard! The STOP/OFF key on the local control panel of the drive does Rotating shafts and electrical equipment can not disconnect the equipment from the AC line and is not to be be hazardous.
- Page 3 Never ignore warnings, cautions and notes in this manual. They are provided to alert anyone installing, operating, or maintaining this equipment to potential hazards or ineffective practices. Notes are used to call special attention to information which, if ignored or not clearly understood, in most cases will result in degraded or less then optimum equipment operation.
-
Page 5: Table Of Contents
Table of Contents General ........................................... 7 Clearances ..........................................7 Backplate Requirements ......................................7 Plenum Mounting ........................................8 Grounding Plate ........................................8 Shielded Wires ........................................8 Standard Service Conditions ....................................8 UL, C-UL, and CE Conformity ....................................8 Drive Output Ratings ....................................... 9 Input Fuses ........................................... - Page 6 Setting Up Drive for Motor Start ..................................... 31 HAND Operational Tests......................................31 AUTO Operational Tests ......................................31 Final Adjustments ........................................31 Programming......................................... 32 Description of Parameters ...................................... 32 Operation and Display Parameters 000 through 017 ..................................32 Setup Configuration and Copying Parameters ................................ 32 Setup of User-defined Readout ....................................
-
Page 7: General
(see tables below). A backplate assembly is available from Trane. enclosure. The drive must always be installed vertically. To ensure that no injury or damage occurs, the drive must always be firmly attached to the wall or the floor before further installation work is carried out. -
Page 8: Plenum Mounting
Plenum Mounting Standard Service Conditions The drive is UL rated for plenum mounting as well as auxiliary panels The mechanical and electrical components of the TR1 Series VFDs can that may be supplied with the drive. If the equipment is to be mounted in be adversely affected by the environment. -
Page 9: Drive Output Ratings
230 V Input Drive Output Ratings TR1 Type Max. Nominal Max. Drive Output HP Output Current 6002 1 / 1½ 6003 6004 208 V Input 6006 17.5 6008 7½ 6011 TR1 Type Max. Nominal Max. Drive 6016 48.3 Output HP Output Current 6022 62.1... -
Page 10: Input Fuses
TR1 Type Rating (Amps) Bussmann Type 6002 Trane recommends input fuses on all drives. If specified as a drive 6003 option, input fuses will be installed by The Trane Company in an 6004 enclosure external to the drive, which may include other optional 6006 features. -
Page 11: Internal Drive Fuses
Internal Drive Fuses Terminal Identification The table below specifies fuses used internally in the TR1 series The connectors for input and output power, auxiliary relay connections, drives. Use the specified fuse or an exact replacement only. and external DC bus are identified in the tables below. AC Line Internal Fuses Provided with TR1 Series VFDs 200 –... -
Page 12: Power Connections
Power Connections WARNING 1. Make all power connections with 75 C rated copper wiring. Induced Voltage! 2. Conduit entry must be from the bottom on all drives. Conduit entries Run output motor cables from multiple drives are provided on smaller drives. For drives with auxiliary separately. -
Page 13: Input Power Connection
WARNING NOTE Run input power, motor wiring and control Grounding Hazard! wiring in three separate metallic conduits or For operator safety, it is important to ground raceways for high frequency noise isolation. drive properly. Follow the grounding guidelines Failure to isolate power, motor and control provided. -
Page 14: Terminal Tightening Torque
Terminal Tightening Torque Tighten terminals connecting the drive input power, output to the Max. Drive Torque Max. Drive Torque motor(s) and ground to the values shown in the tables below. Drives Output Current in-lbs (Nm) Output Current in-lbs (Nm) with 200 to 240 volts of 88 amps and less, and drives with 380 to 600 to 10 5 (0.6) 100 (11.3) - Page 15 Terminal Tightening Torque for Optional Auxiliary Control Panels (continued) 230-240 V Hp Ove rload In/Out Pow er Main Disco Drive Disco MN/BYP Fuse Drive Fuse Ground CTK Bre aker Ra ting Relay Term ina l Sw itch S witch Term inal 17 (1.9) 15 (1.7) 22 (2.5)
- Page 16 Terminal Tightening Torque for Optional Auxiliary Control Panels (continued) 550-600 V Hp Overload In/Out Pow er Main Disco Drive Disco MN/BYP Fuse Drive Fuse Ground CTK Breake r Rating Rela y Term ina l Sw itch Sw itch Te rm inal 17 (1.9) 15 (1.7) 50 (5.6)
-
Page 17: External Dc Bus Connection
Do not connect anything to terminals 88 and 89 without first consulting with Trane. Failure consult with Trane could result in motor or equipment damage. High Voltage Form C Relay The connections for the high-voltage relay are terminals 01, 02, 03. -
Page 18: Control Connections
Control Connections Drive Inputs and Outputs All terminals for the low voltage control wires are located under the The drive operates by receiving control signals. Control input gets to protective cover below the keypad. Remove the cover with a the drive in three possible ways. One way is from input signals through screwdriver or other pointed object as shown bellow. -
Page 19: Output Signals
Output Signals Control Terminal Functions The drive also produces output signals that are carried through either The following is a description of the functions of the control terminals. the RS-485 serial bus or terminals 42 and 45. Output terminals 42 and Many of these terminals have multiple functions determined by 45 operate in the same manner as the inputs. - Page 20 Control Terminal Functions (continued) Terminal No. Function 0 to 20 mA or 4 to 20 mA, analog current input, R = 188 Ω. See parameters 314 through 316. Shield for serial communication. 68, 69 RS-485 interface and serial communication. When the drive is connected to an RS-485 serial communication bus, DIP switch settings on the control card may have to be reset.
-
Page 21: Typical Control Connections
Typical Control Connections Shown below are typical interfaces between the TR1 and other components in an HVAC system. The terminal numbers and the functions of the terminals are identical on all TR1s. An optional relay card, not shown, can provide four additional Form C output relays. The RS-485 connections allow direct communication through the drive’s built-in serial communication protocols. -
Page 22: Electrical Installation, Control Wiring
DIP Switches 1 through 4 NOTE DIP switches are located on the control card. Run input power, motor wiring and control wiring in three separate metallic conduits or They are used for serial communication and the common of digital raceways for high frequency noise isolation. inputs 16 through 33. -
Page 23: Galvanic Isolation
Galvanic Isolation Electrical Noise Galvanic isolation offers protection from electric shock. All control In general, electrical noise can be divided into two forms: wire-borne terminals of all TR1 drives, and terminals 1 through 3 of the relay electromagnetic interference (EMI), and radiating radio frequency output, offer galvanic isolation. -
Page 24: Application Control Connection Examples
Application Control Connection Examples Run Permissive After receiving a run command, Two-wire Start/Stop In Auto mode, closing the contact to terminal 18 will make the drive run. the drive will apply power to the In any mode, opening the safety interlock contact to terminal 27 will stop damper motor and wait until it the drive. -
Page 25: Control Panel
Control Panel The Local Control Panel (LCP), normally mounted on the front of the drive, is a complete interface for programming and operating the drive. The control panel can be removed from the drive and installed up to 10 feet (3 meters) from the drive by using a remote mounting kit. The control panel has five functions: Display Keys for changing the display... -
Page 26: Indicator Lamps
The + and - keys are used to scroll through parameters AUTO START is used if the drive is to be started via the and to change the value of a chosen parameter. These control terminals and/or serial communication. When a keys are also used to change the local reference. - Page 27 The table below gives the operating data options for the first and Status line (Line 4): Additional automatic displays for the drive status second lines of the display. line are shown below. See Status Messages section in this manual for additional information.
-
Page 28: Changing Data
Display Mode III: Changing Numeric Values Press and hold the [DISPLAY MODE] key while in Mode II. Mode III is If the chosen parameter represents a number value, the flashing digit visible as long as the key is depressed. The top line changes to identify can be changed by means of the [+] and [-] keys. -
Page 29: Quick Menu
Quick Menu parameters are described in the table below. A detailed description of The Quick Menu gives access to the 12 most important setup the functions are given in the Programming section of this manual. The parameters of the drive. After programming the Quick Menu items, the Quick Menu is activated by pressing the QUICK MENU key on the drive will, in many cases, be ready for operation. -
Page 30: Extended Menu
Extended Menu Uploading Parameters In some applications, the Quick Menu will not access all additional At any time the present parameters may be copied to the local control parameters necessary to set up the drive. To access all parameters, panel (LCP). This may be useful when setting up multiple drives. It is including Quick Menu items, use the Extended Menu. -
Page 31: Tr1 Series Vfd Start-Up
• Protect signal wires from noise. TR1 Series VFD Start-Up • Ground each drive individually. Pre-installation Checks • Double check input and output power wiring for correct location. 1. Compare drive model number to what was ordered. 2. Ensure each of following are rated for same voltage: Setting Up Drive for Motor Start •... -
Page 32: Programming
The ✭ symbol indicates read- omit downloading motor and current dependent data. only default factory settings. Special default parameter settings for various Trane TR1 Series VFD applications are noted under Factory Active Setup (ACTIVE SETUP) Settngs in this manual. -
Page 33: Setup Of User-Defined Readout
Setup Change Connection Example LCP Copy (LCP COPY) Value: ✭ No copying (NO COPY) Upload all parameters (UPLOAD ALL PARAMET.) Download all parameters (DOWNLOAD ALL PARAM.) Download power-independent parameters (DOWNLOAD SIZE INDEP.) Function: Parameter 004, LCP Copy, is used to copy all parameter setups to or from the Local Control Panel (LCP). - Page 34 Maximum Value of Custom Readout (CUSTOM READOUT ) Value: 0.01 to 999,999.99 ✭100.000 Function: This parameter determines the value that the user defined meter will display when the drive’s output frequency is the value set in parameter 202, Output Frequency High. Description of choice: Set the required value for maximum output frequency.
- Page 35 Motor voltage [V] is the voltage supplied to the motor. Function: This parameter allows a choice of the data value to be shown in the DC link voltage [V] is the drive DC bus voltage. large display when power is applied to the drive. In Display Mode, the + and - keys change this display when the drive is in operation.
- Page 36 Small Readout 1 Unit of Local Reference (UNIT OF LOC REF) Value: (SMALL READOUT 1) Hz (HZ) Value: ★ % of output frequency range (%) (% OF FMAX) ✭ Reference, % Function: Function: This parameter sets the unit that will be displayed in Display Mode IV This parameter selects the meter shown on the left display on line 1.
- Page 37 Auto Start on LCP (AUTO START BTTN) Operating State at Power Up Value (POWER UP ACTION) Disable (DISABLE) Value: ★ Enable (ENABLE) ★ Auto restart (AUTO RESTART) OFF/STOP (OFF/STOP) Function: This parameter allows disabling the Auto/Start key on the keypad. Function: Selects auto or manual restart when power is reapplied after an outage Description of choice:...
-
Page 38: Load And Motor Parameters 100 Through 118
Load and Motor Torque Characteristics ( VT CHARACT) Value: Parameters 100 through 118 ★ Automatic Energy Optimization This parameter group controls output power and other output (AEO FUNCTION) characteristics of the drive. Parallel motors (MULTIPLE MOTORS) For correct operation, motor nameplate data must be entered into parameters 102 through 106 either through the Quick Menu or the Function: This parameter configures the drive for single or multiple motor... - Page 39 NOTE Motor Voltage (MOTOR VOLTAGE) It is very important that values set in parameters Value: 200 V [200] 102, Motor Power, through 106, Rated Motor 208 V [208] Speed, correspond accurately to nameplate data 220 V [220] of motor. Failure to enter motor nameplate data 230 V [230] accurately could result in erratic or less than...
-
Page 40: Procedure For Automatic Motor Adaptation
NOTE NOTE Failure to enter motor nameplate data Some motors (such as motors with 6 or more accurately could result in erratic or less than poles) may be unable to run Automatic optimum equipment operation. Changing Adaptation. Limited AMA is a procedure which values in parameter 104, Motor Frequency, after can be effective in such cases since results measure motor’s stator and effects of cable... - Page 41 Start Voltage of Parallel Motors Start Delay (START DELAY) Value: (MULTIM.START VOLT) 0.0 to 120.0 sec. ★ 0.0 sec. Value: 0.0 through parameter 103 Motor Voltage ✭ depends on par. 103 Motor Voltage Function: This parameter allows a delayed start of the drive after the conditions for start have been fulfilled.
-
Page 42: Dc Braking
DC Braking NOTE Applying DC current to the motor will brake the motor. Parameter 114, Most HVAC applications do not required braking DC Braking Current, sets the DC braking current as a percentage of or holding. It is suggested that parameter 114 remain set at 0 unless braking or holding torque the rated motor current. -
Page 43: Motor Thermal Protection
Motor Thermal Protection Motor Thermal Protection The motor temperature is calculated on the basis of motor current, (MOT. THERM PROTEC) output frequency and time. The graph shows the amount of time that the Value: No protection (NO PROTECTION) drive can provide a current level to the motor at the rated motor Thermistor warning (THERMISTOR WARNING) frequency, 20% of rated motor frequency and 200% of rated motor Thermistor trip (THERMISTOR FAULT) -
Page 44: References And Limits Parameters 200 Through 228
NOTE Function: HVAC applications seldom require output Choose one of two maximum output frequency ranges. frequency greater than 60 Hz. Check with Trane, motor manufacturer, or manufacturer of driven Description of choice: equipment before selecting a maximum Select the output frequency range that includes the highest output frequency greater than 60 Hz. -
Page 45: Reference Handling
It is possible to have both internal preset references and external Reference Handling Reference handling is shown in the block diagram at the bottom of this references at the same time. In parameter 210, Reference Type, a page. The block diagram shows how a change in a parameter can choice is made of how the preset references are to be combined with effect the resulting reference. - Page 46 The unit for the reference can be seen from the following table: Function: This parameter chooses the active resulting reference. If Hand/Auto Unit linked reference is selected, the resulting reference will depend on Parameter 100 Configuration = Open loop whether the drive is in Hand or Auto mode. Parameter 100 Configuration = Closed loop Par.
- Page 47 Description of choice: Ramp Up Time (RAMP UP TIME) Program the desired decel time. Too long of a ramp down time can Value: 1 to 3600 seconds ★ Depends on the unit cause sluggish operation. Too short of a ramp down time can cause the drive to trip off due to high DC bus voltage or cause unacceptable Function: torque pulses in the controlled system.
-
Page 48: Reference Type
Reference Type The example below shows how the resulting reference is calculated when Preset references are used together with Sum and Relative references set in parameter 210, Reference Type. A formula for calculating the resulting reference is given under Calculation of Resulting Reference. - Page 49 Description of choice: Preset Reference 1 (PRESET REF. 1) Set the required maximum output current. Preset Reference 2 (PRESET REF. 2) Preset Reference 3 (PRESET REF. 3) NOTE Preset Reference 4 (PRESET REF. 4) When drive is in current limit and a stop Value: command is issued by pressing the STOP key -100.00 % to +100.00 %...
-
Page 50: Warning Functions
Warning Functions Warning: High Current (WARN. HIGH CURR) The warning functions in parameters 221 through 228 are not active Value: Parameter 221 to 1.1 x rated current ★ 1.1 x rated current during ramp-up after a Start command, ramp down after a Stop command, or while stopped. - Page 51 Warning: Low Reference Warning: Low Feedback (WARN. LOW REF) (WARN .LOW FDBK) Value: Value: -999,999.999 - High Reference (par. 226) ★ -999,999.999 Hz -999,999.999 to High Feedback (parameter 228) ★ -999,999.999 Function: When the total remote reference is less than the limit programmed in this Function: parameter, the display shows a flashing REF. < REF.
-
Page 52: Inputs And Outputs Parameters 300 Through 328
Inputs and Outputs Parameters 300 through 328 In this parameter group, the functions of the drive input and output terminals are defined. The digital inputs are through terminals 16, 17, 18, 19, 27, 32 and 33. Inputs are programmed by parameters 300 through 307. - Page 53 Freeze Reference freezes the present reference. The frozen Function: In parameters 300 through 307, Digital Inputs, the functions of reference can only be changed by means of Speed Up or Speed terminals 16 through 33 are selected. Down. The frozen reference is saved after a stop command and when power is removed.
- Page 54 As long as there is a logic ‘1’ on the terminal selected for Speed Up, the Pulse reference is selected if the frequency of a pulse train is to be reference or the output frequency will increase by the Ramp-up Time used as a reference signal.
-
Page 55: Analog Inputs
Feedback. If a feedback signal is connected, a voltage input may be Analog Inputs Two analog inputs for voltage signals, terminals 53 and 54, and an connected to either terminal 53 or 54, or a current input conected to analog input for current, terminal 60, are provided for reference and terminal 60. - Page 56 Terminal 53, Minimum Scaling Terminal 54, Minimum Scaling (AI 53 SCALE LOW) (AI 54 SCALE LOW) Value: Value: 0.0 to 10.0 V ★ 0.0 V 0.0 to 10.0 V ★ 0.0 V Function: Function: This parameter is used for setting the signal value that corresponds to This parameter is used to set the signal value that corresponds to the the minimum reference or the minimum feedback, parameter 204, minimum reference value or the minimum feedback, parameter 204,...
- Page 57 Terminal 60, Minimum Scaling Time Out (AI 60 SCALE LOW) (LIVE ZERO TIME) Value: Value: 0.0 to 20.0 mA ★ 4.0 mA 1 to 99 sec. ★ 10 sec. Function: Function: This parameter determines the signal value that corresponds to the If the signal value of the reference or feedback signal connected to one minimum reference or the minimum feedback, parameter 204 Minimum of the input terminals 53, 54 or 60 drops to below 50% of the minimum...
-
Page 58: Analog/Digital Outputs
For the analog output, there is a choice of three types of output signal: Analog/Digital Outputs The two analog/digital outputs available through terminals 42 and 45 0 to 20 mA, 4 to 20 mA or 0 to 32000 pulses. The pulse rate is set by can be programmed to show a status or an analog value such as parameter 322, Terminal 45, Output, Pulse Scaling. - Page 59 Output frequency lower than low frequency warning level. The Function: These outputs can act both as digital and analog outputs. If used as a output frequency is lower than the value set in parameter 223, digital output, a 0 or 24 VDC signal is transmitted. If used as an analog Warning: Low Frequency.
- Page 60 Output frequency: 0 to 20 mA, 4 to 20 mA, and pulses. An output Terminal 42, Output Pulse Scaling signal proportional to the output frequency in the range from 0 to (AO 42 PULS SCALE) Output Frequency, High Limit, set by parameter 202. Maximum pulse Value: 1 to 32000 Hz ★...
-
Page 61: Relay Outputs
Relay Outputs Relay 1: Relay 2: 1 - 3 normally closed, 1 - 2 normally open 4 - 5 normally open Maximum: 240 VAC/DC, 2 A Maximum: 30 VAC, 1 A, Relay 02 Minimum: 24 VAC, 100 mA; 42.5 VDC, 1 A 24 VDC, 10 mA The high voltage relay connections are located The low voltage relay terminals are... - Page 62 Relay 1, Output Function Pulse Reference, Maximum Frequency (RELAY1 FUNCTION) (PULSE REF. MAX) Function: Value: ★ NO ALARM 100 to 65,000 Hz at terminal 29 ★ 5,000 Hz 100 to 5,000 Hz at terminal 17 Relay 1 is a form C relay that can be used for status indications and warnings.
-
Page 63: Application Functions Parameters 400 Through 427
Application Functions Automatic Restart Time Parameters 400 through 427 (AUTORESTART TIME) Special functions of the drive are set up in this parameter group. This Value: 0 to 600 seconds ★ 10 sec. includes the proportional, integral, derivative controller (PID) and Function: setting the sleep mode function. -
Page 64: Sleep Mode
When the sleep mode timer expires and the drive is stopped in sleep Sleep Mode mode, a theoretical output frequency is calculated based upon the Sleep mode makes it possible to stop the drive when the system reference signal. When the theoretical output frequency rises above the demand drops below a preset level. - Page 65 Wake-up Frequency (WAKEUP FREQUENCY) WARNING Value: Parameter 404 to parameter 202, Maximum Frequency Unintended Start! ★ 60 Hz In Sleep Mode, a start signal via digital inputs may cause drive to start at any time. The drive, Function: motor, and any driven equipment must be in When the theoretical output frequency exceeds the preset value, the operational readiness.
- Page 66 Switching Frequency (SWITCHING FREQ.) Interference Reduction Method Value: (NOISE REDUCTION) Depends on the current rating of the unit. Value: ★ ASFM (ASFM) Fixed switching freq. (FIXED SWITCHING FREQ.) [1] Function: The value of this parameter determines the maximum switching LC filter fitted (LC-FILTER CONNECTED) frequency of the inverter.
- Page 67 At phase loss, the cooling fan of NEMA 12 drives cannot be powered. To avoid overheating, an external power supply can be connected. Contact Trane for further information. Failure to provide fan cooling may result in equipment damage. ✭ I...
-
Page 68: Feedback Signals In Open Loop
Feedback Signals in Open Loop Units Relating to Closed Loop In some drives, feedback signals and feedback parameters are only (REF. / FDBK. UNIT) used in closed loop operation. In the TR1, the feedback signals are Value: No unit °C [21] also active in open loop operation. -
Page 69: Pid For Process Regulation
PID for Process Regulation Reference (Setpoint) The built-in proportional, integral, derivative (PID) controller in the In parameter 205, Maximum Reference, the maximum value of the sum drive maintains a constant condition (pressure, temperature, flow, etc.) of all reference signals is set. in the system. -
Page 70: Differentiator Gain Limit
Differentiator Gain Limit PID Overview The differentiation control reacts to the rate of change of the error The block diagram below shows reference and setpoint in relation to between the setpoint and the feedback signal. This is seldom needed the feedback signal. for HVAC applications. - Page 71 1 Setpoint and 2 Feedbacks Feedback Handling (continued) During closed loop operation, there are three ways to use the PID Depending on the feedback function selected in parameter 417, controller and setpoint and feedback signals: Feedback Function, the two feedback signals will be compared to the 1 setpoint and 1 feedback setpoint.
- Page 72 Function: Feedback Conversion This parameter determines the calculation method for two feedback (FEEDBACK CONV.) signals. Terminals 53 and 54 are both read in selections [0] through Value: ★ Linear (LINEAR) [6]. In each case, if only one feedback signal is received, a zero value Square root (SQUARE ROOT) will be calculated for the inactive terminal.
- Page 73 Setpoint 1 PID Anti-windup (SETPOINT 1) (PID ANTI WINDUP) Value: Value: Feedback Minimum to Feedback Maximum ★ 0.000 Off (DISABLE) ★ On (ENABLE) Function: Function: It is possible to choose whether the PID controller integrator is to Setpoint 1 is used to provide the setpoint reference for PID control with continue to sum the error signal when it is not possible to increase or one feedback signal.
- Page 74 PID Proportional Gain PID Differentiator Gain Limit (PID PROP. GAIN) (PID DIFF. GAIN) Value: Value: 0.00 to 10.00 ★ 0.30 5.0 to 50.0 ★ 5.0 Function: Function: The proportional gain determines how fast the system responds to a When the differentiator is used, fast changes in the error can sometimes change in feedback.
-
Page 75: Serial Communication Parameters 500 Through 571
Serial Communication Description of choice: The transmission speed of the drive must be set at a value that Parameters 500 through 571 corresponds to the transmission speed of the master. Parameter 502, This parameter group sets up the drive for serial communication. Baud Rate, cannot be selected through serial communication;... - Page 76 DC Brake Start (DC BRAKE) (START) Value: Value: Digital input (DIGITAL INPUT) Digital input (DIGITAL INPUT) Serial communication (SERIAL PORT) Serial communication (SERIAL PORT) Logic and (LOGIC AND) Logic and (LOGIC AND) ★ Logic or (LOGIC OR) ★ Logic or (LOGIC OR) Function: Function: See the functional description under parameter 503, Coasting Stop.
- Page 77 Digital Input Reversing Setup/Preset Setup/Preset Setup No. (REVERSING) Preset Ref. No. Value: ★ Digital input (DIGITAL INPUT) Serial communication (SERIAL PORT) Logic and (LOGIC AND) Logic or (LOGIC OR) Function: See the functional description under parameter, 503 Coasting Stop. Description of choice: The table below shows when the motor is running forward and reverse when Digital input, Serial communication, Logic and or Logic or has been selected.
- Page 78 Logic or Setup/Preset Setup/Preset Setup No. Preset Ref. No. 509 through 532, 537 Data Read-out Value: Updating Parameter Description Display Text Unit Interval Reference % (REFERENCE %) 80 msec. Reference [unit] (REFERENCE [UNIT]) Hz, rpm 80 msec. Feedback [unit] (FEEDBACK) Par.
- Page 79 Terminal 60, Analog Input [mA], parameter 524, gives the current Function: These parameters are read-only through the serial communication value of the signal on terminal 60. port. To display drive functions on the drive display, see parameters Pulse Reference [Hz], parameter 525, gives a pulse frequency in Hz 007 through 010, Display Readout.
-
Page 80: Programming Custom Display Text
Programming Custom Display Text Relay Status Enter custom text in lines 1 (top line) or 2 (large display) of the LCP (RELAY STATUS) keypad display in accordance with the following procedure. Value: binary (0 = open, 1 = closed) ★ 0 1. - Page 81 N2 override release time Modbus parity and message framing (N2 OVER.REL.TIME) (M.BUS PAR./FRAME) Value: Value: 1 - 65533 sec. ★ OFF Even parity (EVEN / 1 STOPBIT) Odd parity (ODD / 1 STOPBIT) Function ★ No parity (NO PARITY / 1 STOPBIT) The maximum time is set between the receipt of two N2 messages.
-
Page 82: Warning Words, Extended Status Word And Alarm Word
Warning Words, Extended Status Word and Warning Word (Parameter 531) Reference high Alarm Word Control card fault Warning Word, Extended Status Word and Alarm Word are shown in Power card fault hex format on the display. If there is more than one warning or alarm, HPFB bus timeout RS-485 timeout the sum of the warnings or alarms will be shown. -
Page 83: Serial Communication For Fc Protocol
Modbus RTU communication, request the related operator’s manual When a master sends a packet to all slaves connected to the bus at the from Trane. same time, it is called a broadcast. In broadcast communication, if the packet has been correctly received, the slaves do not send reply... - Page 84 Conversion The different attributes for each parameter can be seen in the section Index Factor on factory settings. Since a parameter value can only be transferred as a whole number, a conversion factor must be used to transfer decimals. Example: 0.01 Parameter 201: Minimum Frequency, conversion factor 0.1.
- Page 85 Bit 03, Coasting Stop: Bit 10, Data Not Valid/Data Valid: Bit 03 = 0 means that the drive will coast to a stop. Used for telling the drive whether the control is to be used or ignored. Bit 03 = 1 means that the drive is able to start the motor, provided the Bit 10 = 0 means that the control word is ignored.
- Page 86 Bit 06, Not in use: Status Word per FC Protocol The status word is used to inform the master (e.g., a PC) of the Bit 06 is not used in the status word. condition of the slave (drive). Bit 07, No warning/warning: Slave➝Master Bit 07 = 0 means there is no warning.
- Page 87 Serial Communication Reference Present Output Frequency Master➝Slave Slave➝Master Control Serial com. Status Output word ref. word frequency 15 14 13 12 11 10 9 8 7 6 5 4 3 2 1 0 Bit no. 15 14 13 12 11 10 9 8 7 6 5 4 3 2 1 0 Bit no. The value of the output frequency of the drive at any given time is transmitted as a 16-bit word.
-
Page 88: Service Functions Parameters 600 Through 631
Parameter 602, kWh Counter Service Functions Parameters 600 through 631 Shows the output power of the drive. The calculation is based on the mean value in kWh over one hour. This value can be reset using This parameter group contains functions useful for troubleshooting the parameter 618, Reset of kWh Counter. - Page 89 606 - 614 Data Log Value: Parameter Description Display Unit Range Data log: Text Digital Input (LOG: DIGITAL INP) Decimal 0 through 255 Control Word (LOG: BUS COMMAND) Decimal 0 through 65535 Status Word (LOG: BUS STAT WD) Decimal 0 through 65535 Reference (LOG: REFERENCE) 0 through 100...
- Page 90 Fault Log: Error Code Reset of kWh Counter (F. LOG: ERROR CODE) (RESET KWH COUNT) Value: Value: [Index 1-10] Error Code: 0 - 99 ★ No reset (DO NOT RESET) Reset (RESET COUNTER) Function: This parameter makes it possible to see the reason why a fault trip Function: Reset to zero of parameter 602, kWh Counter.
- Page 91 A test connector with the connections shown below is required for this Initialization is selected to reset the drive to its factory default settings test. without resetting parameters 501 Address, 502 Baud Rate; 600-605, Operating Data; and 615-617, Fault Log. Set test connector set up as follows: NOTE Choosing Initialization resets drive to standard...
- Page 92 Parameter 630, Nameplate: Communication Option Type: on the Trane nameplate when contacting the factory about the drive. This gives the type of communication option card installed in the drive, if Parameter 624, Nameplate: Software Version Number: any.
-
Page 93: Relay Card Functions Parameters 700 Through 711
Electrical Installation of the Relay Card Relay Card Functions The relays are connected as shown below. Parameters 700 through 711 Parameters 700 through 711 are only activated if a relay option card is installed in the drive. A relay card can be field installed in the drive if Relay 6-9 desired. -
Page 94: Status Messages
Status Messages Status messages are generated automatically and appear in the fourth 80.0% 5.08A 2.1HP 40.0 Hz (bottom) line of the display as shown. SETUP A. The first part of the status line indicates the CONTROL POINT of the drive. B. - Page 95 D IS PL AY D E SR IPT IO N W O R D R U N R E Q . WARNING U n in ten d ed S tart! W hen in Run Request m ode, m otor m ay restart at any tim e w ithout warning. The drive, m otor, and any driven equipm ent m ust be in operational readiness.
-
Page 96: Warnings And Alarms
A trip can be reset in any one of the following ways: Warnings and Alarms The table below lists the drive fault messages and indicates whether a Manual reset by pressing the RESET key on the keypad warning, alarm, or trip-lock occurs. Wherever an “X” is placed under A digital input through a digital input terminal both warning and alarm, this means that a warning precedes the alarm. -
Page 97: Warnings
Warnings Alarms A warning will flash in line 2, while an explanation is given in line 1. If an alarm is given, the present alarm number will be shown in line 2. Lines 3 and 4 of the display will offer an explanation. MAINS PHASE LOSS WARN.4 TRIP (RESET) - Page 98 There is a fault on the power card EEPROM. The drive will continue to EARTH FAULT function, but is likely to fail at the next power-up. Contact the Trane There is current leakage from the output phases to ground, either in the service department.
- Page 99 AMA has been interrupted by the user. The serial communication on the communication option card is not working. INTERNAL FAULT An internal fault has occurred in the drive. Contact Trane service WARNING 35 department. OUT FREQ RNG/ROT LIM This warning will occur if the output frequency has reached its Output...
- Page 100 ALARM 37 WARNING 62 GATE DRIVE FAULT FOUT > FHIGH An output IGBT or the power card is defective. Contact the Trane The output frequency is higher than parameter 224, Warning: High service department. Frequency. Auto Optimization Warnings 39 through 42 WARNING/ALARM 63 I MOTOR <...
- Page 101 Calculation of Resulting Reference The calculation made below gives the resulting reference when para- External reference is the sum of references from terminals 53, 54, meter 210, Reference Type, is programmed for Sum and Relative, 60 and serial communication. The sum of these can never exceed respectively.
-
Page 102: Factory Settings
Factory Settings NOTE Choosing Initialization in parameter 620, Special Default Parameter Settings Operating Mode, resets drive to standard default Some applications of the TR1 Series VFDs have differences in factory parameters. special application programming performed at the factory, during set default parameters. The table below lists default settings that differ by start-up or thereafter, will be lost. - Page 103 Factory Settings (continued) Changes During Operation: Conversion Index Conversion Factor “Yes” means that the parameter can be changed while the drive is in operation. “No” means that the drive must be stopped before a change 100.0 can be made. 10.0 4-Setup: “Yes”...
- Page 104 Load and Motor Parameter Factory Setting Range Changes 4-Setup Conversion Data Description During Operation Index Type OPEN LOOP Configuration AEO FUNCTION Torque Characteristics Depends on the unit 0.25 - 500 kW Motor Power Depends on the unit 200 - 575 V Motor Voltage 60 Hz 24 - 1000 Hz...
- Page 105 Inputs and Outputs Parameter Factory Setting Range Changes 4-Setup Conversion Data Description During Operation Index Type Terminal 16 Digital Input RESET Terminal 17 Digital Input NO OPERATION Terminal 18 Digital Input START Terminal 19 Digital Input REVERSING Terminal 27 Digital Input SAFETY INTERLOCK Terminal 29 Digital Input Terminal 32 Digital Input...
- Page 106 Application Functions Parameter Factory Setting Range Changes 4-Setup Conversion Data Description During Operation Index Type INFINITE AUTOMATIC Reset Function 10 sec. 0 - 600 sec. Automatic Restart Time Fans=ENABLE, Pumps=DISABLE Flying Start 0 - 300 sec. Sleep Mode Timer 0 Hz Min freq - Par.
- Page 107 Serial Communication Parameter Factory Setting Range Changes 4-Setup Conversion Data Description during operation Index Type Protocol Depends on par. 500 Address 9600 BAUD Baudrate LOGIC OR Coasting LOGIC OR DC-brake LOGIC OR Start DIGITAL INPUT Reversing LOGIC OR Selection of Setup LOGIC OR Selection of Preset Reference Data Read-out: Reference %...
- Page 108 Service Functions Parameter Factory Setting Range Changes 4-Setup Conversion Data Description During Operation Index Type Operating Data: Operating Hours Operating Data: Hours Run Operating Data: kWh Counter Operating Data: No. of Power Ups Operating Data: No. of Overtemps Operating Data: No. of Overvoltages Data Log: Digital Input Data Log: Bus Command Data Log: Bus Status Word...
- Page 109 Index BUS TIME INTERVAL ..............80 BUS TIME INTERVAL FUNCTION ........... 80, 81 activation ..................93 bypass bandwidth ................49 AEO FUNCTION ................38 BYPASS FREQ. 1 ................49 AI [ma] 60 FUNCT................56 BYPASS FREQ. 2 ................49 AI [v] 53 FUNCT.
- Page 110 CUST. READ. UNIT ............... 34 CUSTOM READOUT ............... 34, 78 F. LOG: ERROR CODE ..............90 F. LOG: TIME................... 90 F. LOG: VALUE ................90 DATA CHANGE LOCK ..............37 factory settings ................102 data change lock ................54 factory setup ..................32 data, log ...................
- Page 111 HEATSINK TEMP ..............34, 78 LOG: REFERENCE ................. 89 high breakaway torque..............41 loss of load ..................63 HIGH START TORQ................ 41 LOW P 105 ..................99 high-voltage relay ................17 lowpass filter ................70, 74 HOURS RUN ................... 34 manual initialization ..............
- Page 112 NO AMA ................... 40 107 Automatic Motor Adaptation, AMA ........... 40 NO COPY ..................33 108 Start Voltage of Parallel Motors ..........41 noise, electrical ................. 23 109 Resonance Dampening ............41 noise, radio frequency ................ 8 110 High Breakaway Torque ............41 NOISE REDUCTION ...............
- Page 113 324 Relay 01, ON Delay.............. 62 527 Status word ................78 325 Relay 01, OFF Delay ............62 528 Heat sink temperature [°C] ............ 78 326 Relay 2, Output Function ............62 529 Alarm word ................78 327 Pulse Reference, Maximum Frequency ......... 62 530 Control word .................
- Page 114 Parameters, other references ramp down time ................29 Parameter 004 ................33 ramp times ..................44 Parameter 005 ................33 RAMP UP TIME ................47 Parameter 006 ................33 ramp up time ..................29 Parameter 105 ................13 rating, full load current ..............39 Parameter 117 ................
- Page 115 RESONANCE DAMP............... 41 STATUS WORD HEX ............... 78 resonance dampening ..............41 strain relief ..................12 resulting reference ................45 switch, Klixon thermal ............... 55 REVERSING ..................77 switches, DIP..................22 reversing ..................53 SWITCHING FREQ................. 66 reversing and start ................53 switching frequency ................
- Page 116 Warnings and Alarms ................ 96 WARNING: 40 ................100 ALARM: 14 .................. 98 WARNING: 41 ................100 ALARM: 15 .................. 98 WARNING: 42 ................100 ALARM: 16 .................. 98 WARNING: 61 ................100 ALARM: 22 ................40, 99 WARNING: 62 ................100 ALARM: 29 ..................
- Page 118 Stocking Location Commercial Communications, Inc. For more information contact your local Trane Trane has a policy of continuous product and product data improvement and office or e-mail us at comfort@trane.com reserves the right to change design and specifications without notice.
Need help?
Do you have a question about the TR1 6002 and is the answer not in the manual?
Questions and answers