Table of Contents

Subscribe to Our Youtube Channel
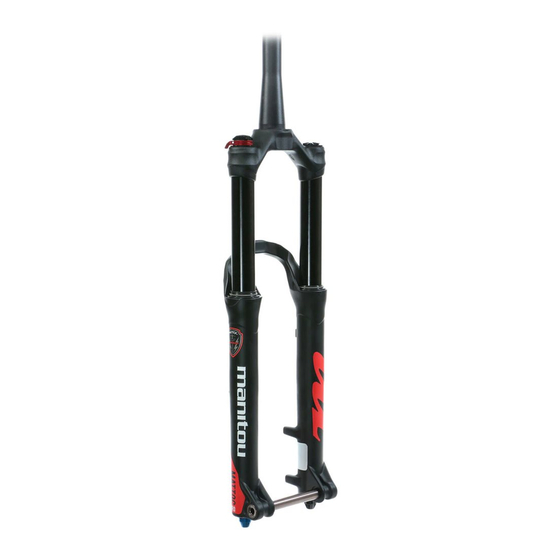
Related Manuals for Manitou Mattoc Pro


Summary of Contents for Manitou Mattoc Pro
- Page 1 2017...
- Page 2 Hayes Performance Systems 5800 W. Donges Bay Rd. Mequon, WI 53092 Tel: 888.686.3472 Email: techsupport@hayesbicycle.com Web: www.hayescomponents.com Hayes Components Europe Dirnismaning 20 a 85748 Garching (b. Munich) Germany ph: +49 (0)89 203237450 Email: techsupportEU@hayesbicycle.com Web: www.hayescomponents.com MATTOC PRO SERVICE MANUAL...
- Page 3 INTRODUCTION This manual is intended to guide the user through the steps necessary to fully service and maintain the 2017 Mattoc Pro suspension fork. We highly recommend that service to this fork be performed by a certified bicycle mechanic. Failure to follow instructions presented in this manual could lead to serious injury or death.
-
Page 4: Table Of Contents
TABLE OF CONTENTS SECTION PAGE NUMBER REQUIRED TOOLS EXPLODED DIAGRAM 6–10 CASTING REMOVAL & SERVICE 12–14 AIR SPRING SERVICE 15–19 DAMPER SERVICE 20–23 CASTING INSTALLATION 24–26 COMPRESSION DAMPER INSTALL 27–30 TRAVEL CHANGE (OPTIONAL) 31-33 MATTOC PRO SERVICE MANUAL... -
Page 5: Required Tools
REQUIRED TOOLS Below is a list of tools necessary for servicing the 2017 Mattoc Pro fork. • Safety Glasses • Nitrile Gloves • Lint-Free Rags • Torque Wrench • Slickoleum Grease ™ • Semi-bath Oil, 5/40w Synthetic - Manitou part number 85-0022 •... - Page 6 MAttoc Pro 110 27.5 Exploded view MATTOC PRO SERVICE MANUAL...
- Page 7 Magnum Pro 110 27.5+/29 Exploded view MATTOC PRO SERVICE MANUAL...
- Page 8 MAttoc Pro 110 29+ Exploded view MATTOC PRO SERVICE MANUAL...
- Page 9 MAttoc Pro 100 26 Exploded view MATTOC PRO SERVICE MANUAL...
- Page 10 MAttoc Pro 100 27.5 Exploded view MATTOC PRO SERVICE MANUAL...
- Page 11 Bushings Dust Seals Stripped or Worn Bolts Rear Shock Fork/Shock Air Seals and/or O-rings Remote Lockout Cable Mount Hardware Bearings Gloves Handlebar grips Upper Stanchion Tubes Lower Stanchion Tubes(Dorado) Tubeless Valves MATTOC PRO SERVICE MANUAL...
-
Page 12: Casting Removal & Service
Insert a 8mm Hex wrench into the end of the rebound rod and loosen clockwise until rebound rod disengages from the casting threads. Unscrew air cap and depress Schrader Valve a few times to ensure all air is released. MATTOC PRO SERVICE MANUAL... - Page 13 CASTING REMOVAL & SERVICE Using the Manitou 8mm Thin Wall Socket, turn the compression rod clockwise until compression rod is disengaged from the casting threads. Remove casting from fork. It is recommended this be done over a drain pan as the lower casting contains semi- bath oil.
- Page 14 Remove springs from lip of dust seals. Clean seal area with Isopropyl alcohol. Using the Manitou 34mm Seal Press or large socket press in the dust seals. Reinstall springs onto seals. MATTOC PRO SERVICE MANUAL...
-
Page 15: Air Spring Service
Make sure the air is released from the fork. Depress IRT and Compression Rod Schrader valves a few times to ensure all air is released. Remove IRT using a 24mm socket. Pull IRT assembly straight out. MATTOC PRO SERVICE MANUAL... - Page 16 AIR SPRING SERVICE Invert the fork and use Manitou cassette tool with adjustable wrench to unthread the air spring assembly from the stanchion. Remove Air Spring Assembly, clean with isopropyl, and re-grease. Once the air spring assembly is removed clean the inside of the stanchion with...
- Page 17 Spread grease across entire thread surface. Install air spring assembly into stanchion. Using a 26mm crow’s foot and Manitou cassette tool, torque to 60-80 in lb [6.8-9.0 N m]. MATTOC PRO SERVICE MANUAL...
- Page 18 Insert IRT piston into stanchion. Apply even pressure to piston surface as you work the piston seal past the stanchion threads. Install IRT into stanchion. Torque to 60-80 in lb [6.8-9.0 N m]. MATTOC PRO SERVICE MANUAL...
- Page 19 Attach a shock pump and inflate IRT to 100PSI. NOTE: ALWAYS SET IRT PRESSURE BEFORE COMPRESSION ROD ASSEMBLY. Attach a shock pump and inflate air leg to 60PSI. This will aid in installing the casting later. MATTOC PRO SERVICE MANUAL...
-
Page 20: Damper Service
Note: Be sure to hold the HBO knob still while removing the screw/nut. These tend to move and can damage the damper if the knob is over turned. Remove the black high speed compression knob while keeping the silver HBO knob in place. MATTOC PRO SERVICE MANUAL... - Page 21 Note: Be sure to hold the knob still while removing the screw/nut. These tend to move and can damage the damper if the knob is over turned. Remove the sliver spacer that was under the red low speed adjustment knob. MATTOC PRO SERVICE MANUAL...
- Page 22 DAMPER SERVICE Use the Manitou cassette tool and 1/2 socket or adjustable wrench to unthread the compression damper assembly from the stanchion. Remove compression damper assembly from the stanchion. Pour fork oil into a catch pan. MATTOC PRO SERVICE MANUAL...
- Page 23 DAMPER SERVICE Using a Manitou cassette tool and adjustable wrench, unthread the rebound damper assembly from the fork stanchion. Remove rebound damper assembly from the fork. Once the damper assembly is removed, clean the inside of the stanchion with isopropyl alcohol and a lint free towel.
-
Page 24: Casting Installation
Make sure the air chamber is filled with air (60PSI). This will extend the air spring assembly and make casting installation easier. Fully extend the rebound damper rod. MATTOC PRO SERVICE MANUAL... - Page 25 Using an 8mm Hex wrench tighten the rebound damper rod to 35–40 in lb [3.95–4.5 N m] by turning them counter- clockwise. Do not overtighten, doing so can damage the end of the rods. MATTOC PRO SERVICE MANUAL...
- Page 26 Hex wrench. Add a small drop of blue Loctite to the screw before installation to prevent the screw from backing out during riding. Using the Manitou 8mm Thin Wall Socket, turn the compression rod counter-clockwise. Do not overtighten, doing so can damage the end of the rods.
-
Page 27: Compression Damper Install
See following page for the correct oil height depending on compression damper type and fork travel. An oil height setting tool used for motorcycle forks similar to the one pictured makes this job easier. MATTOC PRO SERVICE MANUAL... - Page 28 2. oil height is set with fork fully extended and casting installed. All forks listed us 5w synthetic oil for the damer, Manitou part number 85-0023. All forks listed us 5w40 synthetic oil for the lowers, Manitou part number 85-0024.
- Page 29 Insert compression damper into the damper leg. Ensure the damper is set in the unlocked position when installing. Using the Manitou cassette tool and torque wrench, tighten down the MC2 at a torque of 60–80 in lb [6.8–9.0 N m].
- Page 30 Clean fork and use a shock pump to set to desired pressure. Lightly pull the casing away from the CSA as you add air. Pressure chart below for reference. MATTOC PRO SERVICE MANUAL...
- Page 31 Pro & COMP MATTOC PRO SERVICE MANUAL...
- Page 32 Mattoc travel change In order to change the travel of your Mattoc Pro/Comp (26-27.5-29+), first remove the compression rod assembly. For instructions on how to do this refer to page 16. Once the rod is removed arrange the travel spacers into the desired amount of travel using the following charts.
- Page 33 Mattoc travel change 2017 Mattoc 100mm Hub Spacing TRAVEL SPACERS 27.5” TRAVEL SPACERS 26” 2017 Mattoc Comp IVA TRAVEL SPACERS TRAVEL SPACERS MATTOC PRO SERVICE MANUAL...
- Page 34 WWW. MANITOUMTB.COM WWW.HAYESCOMPONENTS.COM 5800 W DONGES BAY ROAD MEQUON WI 53092...
Need help?
Do you have a question about the Mattoc Pro and is the answer not in the manual?
Questions and answers