Planmeca intra Installation Manual
X-ray unit
Hide thumbs
Also See for intra:
- User manual (64 pages) ,
- Technical manual (58 pages) ,
- Quick reference manual (20 pages)
Table of Contents
Advertisement
Advertisement
Table of Contents

Related Manuals for Planmeca intra


Summary of Contents for Planmeca intra
- Page 1 installation manual...
-
Page 3: Table Of Contents
CONTROL PANEL INSTALLATION” on page 48) ..............5 Ceiling mounting in treatment room (see section 5.1 “Ceiling installation” on page 25) ....6 Dental unit mounting in treatment room (only Planmeca Compact dental unit) (see Planmeca Compact installation manual) ................7 X-ray room with generator box/control panel outside the room (see sections 7 “REMOTE CONTROL PANEL INSTALLATION”... - Page 4 Delight operating light installation ....................35 Adjustable ceiling adapter ......................37 Single stud installation ....................... 38 Installation to the Planmeca Compact dental unit ..............43 ATTACHING THE GENERATOR BOX WITHOUT THE ADAPTER PLATE ..........44 REMOTE CONTROL PANEL INSTALLATION ..................48 FIXED CONTROL PANEL INSTALLATION .....................
-
Page 5: Introduction
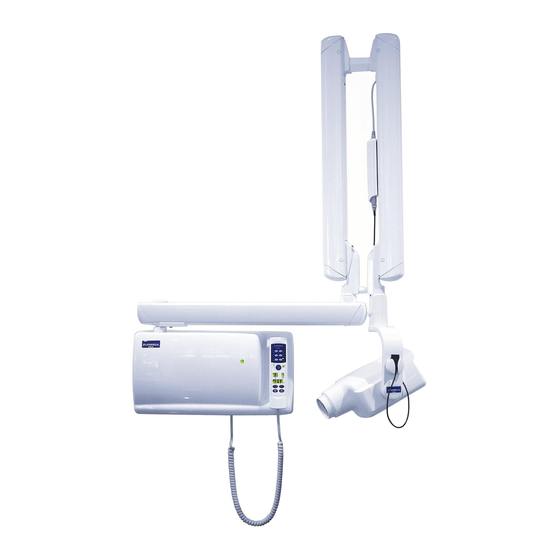
INTRODUCTION 1 INTRODUCTION This manual contains all the information required to install and set up the Planmeca Intra X-ray unit. Please read this manual carefully before installing the X-ray unit. WARNING Failure to install the Planmeca Intra X-ray unit in an approved location may be dangerous to both patient and operator. -
Page 6: Pre-Installation Requirements
2.2 Electrical requirements Mains voltage The Planmeca Intra X-ray unit has been preset at the factory to one of the 3 different mains voltage settings. Please check that the rating indicated on the type shield and the mains voltage selector on the generator PCB (connector P4) corresponds to the local mains voltage. -
Page 7: Internal Mains Fuse Ratings
No other equipment should be connected to the same fused mains line as the X-ray unit. In some countries an additional external fault current guard is also required. Grounding The Planmeca Intra X-ray unit must always be connected to a grounded outlet to fulfill the safety directives stated. Power consumption The idle power consumption is less than 30VA. -
Page 8: Installation Possibilities
3 INSTALLATION POSSIBILITIES 3.1 Mounting alternatives NOTE The Planmeca Intra X-ray unit can be installed in several ways. Read these installation instructions carefully, because some installation accessories are optional, and are not included in the standard delivery. Make sure that required accessories are available before starting the installation. -
Page 9: Wall Mounting With Remote Control In Treatment Room (See Section 7 "Remote Control Panel Installation
CONTROL PANEL INSTALLATION” on page 48) Control panel Telephone cable, max. 12 m extension arm 835mm Dental unit r=1975 extension arm 760mm r=1900 extension arm 535mm r=1675 (std) extension arm 385mm r=1525 Generator box Planmeca Intra X-ray unit 5 Installation manual... -
Page 10: Ceiling Mounting In Treatment Room (See Section 5.1 "Ceiling Installation
NOTE Both the Delight S and Delight operating light for unit mounting can be installed to the ceiling arm using an additional arm. Generator Extension cable, max. 12 m Control panel Dental unit 6 Planmeca Intra X-ray unit Installation manual... -
Page 11: (See Planmeca Compact Installation Manual)
INSTALLATION POSSIBILITIES Dental unit mounting in treatment room (only Planmeca Compact dental unit) (see Planmeca Compact installation manual) NOTE Only short extension arm can be used in dental unit mounting. Generator Extension cable, max. 12 m Control panel Dental unit... -
Page 12: X-Ray Room With Generator Box/Control Panel Outside The Room (See Sections 7 "Remote Control Panel Installation" On Page 48 And 5.3 "Single Stud Installation
535mm r=1675 (std) extension arm 385mm r=1525 Generator box Generator box extension arm 835mm r=1975 extension arm 760mm r=1900 Extension cable, extension arm 535mm max. 12 m r=1675 (std) extension arm 385mm r=1525 8 Planmeca Intra X-ray unit Installation manual... -
Page 13: Control Panel Assembling Alternatives
Remote assembly with generator box (see section 6 “ATTACHING THE GENERATOR BOX WITHOUT THE ADAPTER PLATE” on page 44) Ceiling mounting Dental unit mounting Control panel Single stud plate Generator box READY PRET MODE SELECT Extension cable Planmeca Intra X-ray unit 9 Installation manual... -
Page 14: Single Stud Assembly Plate With Control Panel (See Section 5.3 "Single Stud Installation
Fixed control panel (contains a possibility to make “double exposure button” assembly) (see section 8 “FIXED CONTROL PANEL INSTALLATION” on page 51) Double exposure button READY PRET MODE SELECT Fixed control panel Generator box Telephone cable 10 Planmeca Intra X-ray unit Installation manual... -
Page 15: Standard Installation To A Wall
4.1 Attaching the standard adapter plate to wall The Planmeca Intra X-ray unit must be positioned in accordance with the information given in the installation pattern supplied with the unit. The X-ray unit should be positioned within the reach of the power supply cable (3m) (118 in.). -
Page 16: Attaching Alternative 1 (Recommended For Concrete Or Brick Wall)
Insert the drilling tool to one of the holes and drill the second hole using the drilling tool as a guide. Unscrew the drilling tool and insert the second expansion anchor as described above, replace the adjustment nut and attach the screw. Spirit level Drilling tool, part number 6525091 12 Planmeca Intra X-ray unit Installation manual... - Page 17 Adjust the wall adapter bearing to vertical position by opening slightly the mounting screws and turning the adjustment nuts to required position. The wall adapter moves towards the wall when turning the nut counterclockwise. Adjust Check Finally, tighten all the mounting screws. Planmeca Intra X-ray unit 13 Installation manual...
-
Page 18: Attaching Alternative 2 (For Wooden Wall, Not Recommended For Concrete Wall)
The wall adapter moves towards the wall when turning the nut counterclock- wise. Adjust Check Finally, tighten all the mounting screws. 14 Planmeca Intra X-ray unit Installation manual... -
Page 19: Assembling The Arm
Secure the bracket arm with the locking plate. Route the cables through the extension arm and arm shaft. Place the cover plug back to the end of the extension arm. Bracket arm Extension arm Arm shaft housing Extension arm shaft Dixi interconnection cable Arm cable Locking plate Planmeca Intra X-ray unit 15 Installation manual... -
Page 20: Changing The Bracket Arm Movement Area
Modified movement area Arm movement obstructed Empty opening NOTE When the modified area is used the tube head can hit the extension arm. Be careful not to knock the tube head against the arm. 16 Planmeca Intra X-ray unit Installation manual... - Page 21 Attach the pin to the other opening on the housing so that the pin is level with the inner surface of the housing (see figure below). Limiting pin Housing surface MODIFIED PRESET Openings for limiting pin Planmeca Intra X-ray unit 17 Installation manual...
-
Page 22: Mounting The Arm
2mm allen key. Position the arm cable (and mains cable) as shown on the figure below. Slip the generator assembly under the heads of the screws. Wall adapter bearing Mains cable Generator assembly Arm cable 18 Planmeca Intra X-ray unit Installation manual... - Page 23 STANDARD INSTALLATION TO A WALL Secure the generator assembly into position by tightening the four screws through the openings on the generator PCB. Planmeca Intra X-ray unit 19 Installation manual...
-
Page 24: Connecting The Cables
ON/OFF switch to the connector P7 must be moved to the connecto P10. Also the fuse F3 must be removed. Neutral Line Blue Brown Blue Brown Remove Fuse F3 20 Planmeca Intra X-ray unit Installation manual... - Page 25 If needed, attach the cable to the wall adapter bearing with a cable tie. Snap-on ferrite NOTE The Dixi digital intra X-ray system is installed according to the instructions given in the Dixi digital X-ray systems installation manual. Planmeca Intra X-ray unit 21 Installation manual...
-
Page 26: Attaching The Control Panel Holder To The Generator Housing
Generator housing Attach the control panel holder to the generator housing with the two PT 3x22 rst WN1451 screws. Generator housing Control panel holder 22 Planmeca Intra X-ray unit Installation manual... -
Page 27: Mounting The Generator Housing
Planmeca OY only with same type and 00880 HELSINKI rating of fuse. FINLAND LBL-Z-006D 0537 Attach the generator housing cover plate to its position. Generator housing cover plate Planmeca Intra X-ray unit 23 Installation manual... -
Page 28: Connecting The Control Panel Cable
Total filtration: 2,0 mm EquAl WARNING: 1000VA 50/60Hz For continued protection Manufactured by: against risk of fire replace Planmeca OY only with same type and 00880 HELSINKI rating of fuse. FINLAND LBL-Z-006D Control panel cable 24 Planmeca Intra X-ray unit Installation manual... -
Page 29: Other Installation Alternatives
Attach the plate to the ceiling with four M8x35 DIN 912 screws and ø8.4/17 DIN 125 washers. Use the adjustment nuts and the adjustment plates with the screws at each corner of the adapter plate. Adapter plate Planmeca Intra X-ray unit 25 Installation manual... -
Page 30: Wooden Ceiling
NOTE If the concealed wiring is not used, the extension cable must be lead so that there is at least 1.2 m cable after adapter plate. min. 1.2 m 26 Planmeca Intra X-ray unit Installation manual... - Page 31 Ceiling arm NOTE If the optional adapter cover is used, attach it to its position before attach- ing the ceiling arm. Adapter cover Ceiling arm Planmeca Intra X-ray unit 27 Installation manual...
- Page 32 The dent must not be in line with the machining on the adapter collar. Arm adapter Adapter collar Machining Mounting rings Ceiling arm 28 Planmeca Intra X-ray unit Installation manual...
- Page 33 30-32 mm 65 - 80 mm Move the lower mounting ring to the position shown on the figure below. Tighten all the mounting rings’ screws firmly. 30-32 mm 100-105 mm Planmeca Intra X-ray unit 29 Installation manual...
- Page 34 Remove the extension arm shaft. Remove the shaft nut by hitting it as shown on the figure below. Remove the support plate and the shaft. The shaft is not needed in this installation. Arm shaft 30 Planmeca Intra X-ray unit Installation manual...
- Page 35 15. Assemble the bearing housing to the extension arm as described in figure below. Support plate Shaft nut Attach the shaft nut Install the X-ray unit to the ceiling arm and lock it immediately to its position with the fastening screw. Planmeca Intra X-ray unit 31 Installation manual...
- Page 36 OTHER INSTALLATION ALTERNATIVES NOTE The ceiling arm shaft can be locked temporarily to ease the installation of the unit. Tighten this locking screw Fastening screw Tighten firmly 32 Planmeca Intra X-ray unit Installation manual...
- Page 37 Route the arm and Dixi interconnection cables from the extension arm to the ceiling arm. In case the Dixi digital intra X-ray system is not installed leave the Dixi interconnection cable into the ceiling arm as shown on the figure below.
- Page 38 Fasten the cover to the opening of the ceiling arm. Loosen the locking screw and either leave it loose, so that the arm can be rotated (700°), or tighten it to the position desired by the customer. Attach the cover plugs. 34 Planmeca Intra X-ray unit Installation manual...
-
Page 39: Delight Operating Light Installation
OTHER INSTALLATION ALTERNATIVES Delight operating light installation The operating light can be installed to the ceiling arm of the Planmeca Intra X-ray unit. Delight operating light without power contol Make sure that the operating light cable is installed. Attach the arm and the Delight operating light according to the figure below. Make sure that the light cable is in the groove of the light arm pivot when attaching the light to the horizontal arm. - Page 40 M6x17 DIN 7991 Spring bushings NOTE Do not tighten the ligth cable but leave it a bit loose. Connect the Delight wires according to the instructions given in Delight Installation manual, publica- tion number 588200. 36 Planmeca Intra X-ray unit Installation manual...
-
Page 41: Adjustable Ceiling Adapter
Continue the installation according to the instructions given in section 5.1 “Ceiling installation” on page 25. Upper part of the adjustable adapter Lower plate of the adjustable adapter Adapter plate Planmeca Intra X-ray unit 37 Installation manual... -
Page 42: Single Stud Installation
Use the single stud assembling plate when you are installing the Planmeca Intra to a cabinet, to an end of a wall, or to a single stud (plaster) wall. Use the installation pattern or the single stud adapter plate as a template and mark the positions where the holes for the attaching screws will be drilled. - Page 43 Using a spirit level adjust the arm position with the four screws of the wall adapter bearing. Adjust the arm position with these screws. Planmeca Intra X-ray unit 39 Installation manual...
- Page 44 When the assembly is completed, the weight of the unit bends the arm to horizontal position. 2 mm 2 mm Connect the grounding leads to the grounding point in the bottom of the adapter plate. cover part earthing cable 40 Planmeca Intra X-ray unit Installation manual...
- Page 45 Dixi interconnection cable NOTE The Dixi digital intra X-ray system is installed according to the instructions given in the Dixi digital X-ray systems installation manual. Planmeca Intra X-ray unit 41 Installation manual...
- Page 46 Drill two attachment holes to the cover as shown on the figure below and attach the holder to the cover with the two PT 3x22 rst WN1451 screws. 19mm 19mm 65mm Ø 3,5mm Screw 3x22 PT Code 00326195 42 Planmeca Intra X-ray unit Installation manual...
-
Page 47: Installation To The Planmeca Compact Dental Unit
Earthing cable 5.4 Installation to the Planmeca Compact dental unit Install the Planmeca Intra X-ray unit to the Planmeca Compact dental unit according to the instruc- tions given in dental unit installation manual, publication number 10006961. Planmeca Intra X-ray unit 43... -
Page 48: Attaching The Generator Box Without The Adapter Plate
Do not use the expansion anchors with wooden or plaster wall. Concrete (brick) wall Wooden (plaster) wall Expansion anchor ø4x30 DIN 7981 ø4x30 DIN 7981 Power cable Extension cable 44 Planmeca Intra X-ray unit Installation manual... - Page 49 PCB. Connect the power leads (3-pole connector) of the cable to the terminal P1 on the generator PCB. Snap the ferrite to the extension cable as shown on the figure below. Extension cable Power cable Planmeca Intra X-ray unit 45 Installation manual...
- Page 50 Brown Blue Brown Remove Fuse F3 Attach the extension cable to the generator box assembly as shown on the figure below. Place the generator housing over the generator assembly. Generator housing Extension cable 46 Planmeca Intra X-ray unit Installation manual...
- Page 51 ATTACHING THE GENERATOR BOX WITHOUT THE ADAPTER PLATE Secure the cover into position with the three M4x6 ULS screws. M4x6 ULS Connect the control panel cable to its terminal at the underside of the generator box. Planmeca Intra X-ray unit 47 Installation manual...
-
Page 52: Remote Control Panel Installation
2 3 4 5 6 Possible through holes for the cable Route the telephone cable through the hole on the side or bottom of the frame. Assemble the data wall socket according to the figure above. 48 Planmeca Intra X-ray unit Installation manual... - Page 53 If the wall is made of wood, attach the screws to the wall without drilled holes. Concrete wall Wooden wall Expansion anchor ø4x30 DIN 7981 screw Holder attachment plate Planmeca Intra X-ray unit 49 Installation manual...
- Page 54 NOTE The control panel holder can be attached with a sticker to a surface which can not be drilled (e.g. glass). 50 Planmeca Intra X-ray unit Installation manual...
-
Page 55: Fixed Control Panel Installation
Do not use the expansion anchors with wooden or plaster wall. Use 4 attaching screws Expansion anchor Note: Do not use expansion anchors with wooden/plaster wall. ø4x30 DIN 7981 Telephone cable Planmeca Intra X-ray unit 51 Installation manual... -
Page 56: Attaching The Bottom Plate To The Wall Socket
Alternative 3 NOTE You can connect the telephone cable to the Extension cable PCB before attaching the bottom plate to the wall socket. Refer to section 8.3 “Con- necting the cables” on page 53. 52 Planmeca Intra X-ray unit Installation manual... -
Page 57: Connecting The Cables
Connect the telephone cable between the Generator PCB and Extension cable PCB according to the figure below. Telephone cable, concealed wiring Telephone cable, Surface mounting (option) Double exposure button (option) +12V Generator PCB +12V +12V AUX1 AUX2 ELMP P6-P9 Telephone cable Extension cable PCB Planmeca Intra X-ray unit 53 Installation manual... - Page 58 AUX1 AUX2 AUX2 ELMP Telephone cable P6-P9 Connect the cross connection (part number 10007597) cable between the Extension cable PCB and fixed control panel. Extension cable PCB Fixed control panel Cross connection cable 54 Planmeca Intra X-ray unit Installation manual...
-
Page 59: Attaching The Fixed Control Panel To The Bottom Plate
Press the fixed control panel to its position so that the mounting pins located on the bottom plate hit the mounting springs on the control panel. Secure the control panel to its position with one attach- ment screw. Planmeca Intra X-ray unit 55 Installation manual... -
Page 60: External Exposure Button
Press the Select key until the number starts to blink, and the value can now be changed with the parameter adjustment keys. Select the number 1. Accept the number 1 setting by pressing the Select key. Press the Mode key briefly to exit the service mode. 56 Planmeca Intra X-ray unit Installation manual... -
Page 61: Attaching The Long Cone And Rectangular Collimator (Optional)
The rectangular collimator can be attached to the long cone either before the film holder or after it. Refer to the Planmeca Intra X-ray unit’s user’s manual for detailed instructions on how to use the rectangular collimator and the film holder. -
Page 62: Final Adjustments
Openings for adjustments Arm in adjustment position NOTE Adjust the arm from the lower part of the adjustment nut. CORRECT WRONG 58 Planmeca Intra X-ray unit Installation manual... -
Page 63: Adjusting The Bracket Arm Angles
Remove the cover plug from the end of the bracket arm. Attach the limiting plate to the arm with the two M3 Allen screws. Adjust the angle with the limiting plate adjustment screws. Limiting plate Limiting plate adjustment screw Planmeca Intra X-ray unit 59 Installation manual... -
Page 64: Adjusting The Stiffness Of The Tube Head's Horizontal Axle
Remove the plug from the tube head’s axle and adjust the tightness of the two adjusting screws evenly (arrows on the figure below). WARNING! Do not touch the painted screws or the earth spring attachment screw. ø 2.5 Allen screw 60 Planmeca Intra X-ray unit Installation manual... -
Page 65: Running In The X-Ray Unit
Take three exposures with exposure values 60 kV and 0.05 seconds. • Take three exposures with exposure values 70 kV and 0.1 seconds. • Take three exposures with exposure values 70 kV and 1.0 seconds. Planmeca Intra X-ray unit 61 Installation manual... - Page 68 PLANMECA OY Asentajankatu 6, 00880 Helsinki, Finland, tel. +358 20 7795 500 fax +358 20 7795 555, e-mail: sales@planmeca.com, www.planmeca.com...
Need help?
Do you have a question about the intra and is the answer not in the manual?
Questions and answers