Table of Contents
Advertisement
Advertisement
Table of Contents

Related Manuals for Planmeca PlanScan


Summary of Contents for Planmeca PlanScan
- Page 1 Planmeca PlanScan User Manual...
-
Page 3: Table Of Contents
Planmeca Table of Contents Introduction ....................6 Associated Documentation ..........................6 Indications for Use ..............................6 Contraindications ..............................6 Turn ON Laptop ......................... 7 Opening Romexis ........................7 Scanner ............................7 Removable Components ..........................7 Connecting the Thunderbolt™ Adapter .....................7 Disconnecting the Thunderbolt™ Adapter ..................7 Scanner Indication Lights ..........................8... - Page 4 For intraoral scanning systems only..................14 Additional Assistance ......................15 Scanning Safety ..................16 Patients ....................17 Managing Patients in Planmeca Romexis ................17 Creating new patients ............................ 17 Searching Patients ............................17 Sorting patients ..............................17 Selecting and opening patients ......................... 18 Managing Cases ........................
- Page 5 Approvals (All Systems) ......................48 Guidance and Manufacturer’s Declaration - Electromagnetic Emissions ......49 Guidance and Manufacturer’s Declaration - Electromagnetic Immunity ......49 Recommended Separation Distances ...................... 51 PlanScan Optical Specifications ........................52 Labels ............................53 Symbols ................................53 Firewire Warning Label ........................... 54 Product Identification Labels ........................
-
Page 6: Introduction
Planmeca Romexis Cloud to Planmeca or a certified laboratory for design and milling or exported to a third party. Note: Caution: US Federal law restricts the Planmeca PlanScan to sale by or on the order of a dentist. The Planmeca Fit System requires Planmeca Romexis software revision 3.4.0.R or later. -
Page 7: Turn On Laptop
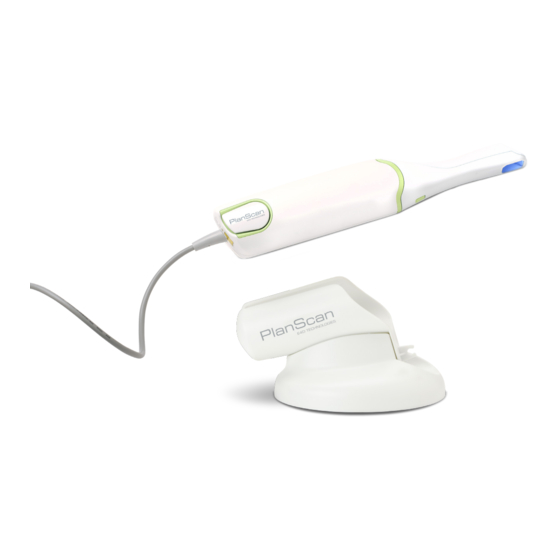
Click the Romexis icon on your desktop to open the software. Scanner Removable Components The PlanScan system has a set of removable components. Connecting the Thunderbolt™ Adapter Properly connecting and disconnecting the scanner prevents damage to your devices. Insert the Thunderbolt adapter into the adapter slot on the side of the laptop. -
Page 8: Scanner Indication Lights
Position the pointer on your model. size of the model on Rotate the mouse wheel downward, toward your wrist. the screen Rotate the mouse wheel upward, away from your wrist. Introduction Planmeca PlanScan User Manual... -
Page 9: Moving The Model
The model becomes larger. Moving the Model The model can be moved without being rotated. Position the pointer on the model. Move Model up/down, left/right: Press and hold down the mouse wheel. press and hold the wheel button, then Drag the model to the desired position and release the drag. -
Page 10: Sprue Angle Method
This screen should be used only under the supervision of a customer service representative. These settings are pre-configured and should not be changed. Workbook Exercises (For Classic systems) Mill Notification Settings (For Classic systems) Milling Settings (For mill systems) Auto or Occlusal POI (For mill systems) Introduction Planmeca PlanScan User Manual... -
Page 11: Administration
System software and hardware upgrades are initiated through Planmeca only. No software or hardware should be added or deleted to/from the Planmeca systems without prior approval of Planmeca. Doing so may result in damage to the system and will void the product warranty. Connecting the Scanning Tip (After disinfection if scanning intraorally. -
Page 12: Cleaning The Scanner Tip
High Level Disinfection Tips have no symbol. See “Instructions for symbol. See “Instructions for High Level Autoclaveable Tips” on page 13. Disinfection Tips” on page 14. Note: Autoclavable tips compatible with PlanScan version 5.5 or later. Administration Planmeca PlanScan User Manual... -
Page 13: Instructions For Autoclaveable Tips
Instructions for Autoclaveable Tips DO NOT use a chemical sterilant on tips with the autoclave symbol. DO NOT Autoclave tips without the autoclave symbol. DO NOT place in Ultrasonic Cleaner. Excessive cycle times may prematurely reduce the life and function of the tip. Note: These instructions were validated using a Class B autoclave and the sterilization pouch HSD # 112-4854 with a minimum cycle of 132°... -
Page 14: Instructions For High Level Disinfection Tips
Ensure each surface is dry before connecting it to the scanner. Cleaning the System For intraoral scanning systems only. Protect the keyboard with a disposable barrier. Cleaning Cycle: Before and after each use, clean all areas of the Planmeca PlanScan System. Administration Planmeca PlanScan User Manual... -
Page 15: Additional Assistance
Warning: Before and after each use, follow these instructions to disinfect the Planmeca PlanScan System. Do not substitute any other cleaning solution or procedure. Under no circumstances should you use any paint thinner, solvents, or harsh chemicals. Use only a non-woven sponge or pre-moistened germicidal cloths when cleaning the Planmeca PlanScan System. -
Page 16: Scanning Safety
Changes or modifications not expressly approved by Planmecacould void the user’s authority to operate the equipment and/or void the warranty. Do not install or operate the Planmeca products in an environment where an explosion hazard exists, e.g., high oxygen area. -
Page 17: Patients
Planmeca Patients Managing Patients in Planmeca Romexis Creating new patients In Patient Management, click the Add Patient button. The Add Patient screen opens. Enter the necessary information and add a face photo if desired. Note: The obligatory fields are in bold text. See the Romexis User Manual for more information. -
Page 18: Selecting And Opening Patients
• Start a new restoration - See below for more information • Open an existing restoration - See below for more information • Import 3D models - See Planmeca Romexis User’s manual for more information • Export 3D models - See Planmeca Romexis User’s manual for more information... -
Page 19: Deleting Files
To open an existing scan or restoration (crown, inlay, onlay, etc.) double-click a case on the list or click the Open Restoration button. The case opens in the Planmeca PlanScan Setup tab. Setup tab Use the Setup screen to set the restoration type, occlusal data type, material, and tooth library. -
Page 20: Scanning
As you capture images, the system creates a composite model, revealing any areas that need further scanning. Ensure the power cord is being used on the laptop while scanning. Scan Tab Layout Scan Type Scanner Indicators Model Editing Tools Evaluation Tools Alignment Tools Scanning Planmeca PlanScan User Manual... -
Page 21: Scanner Tips
Scanner Tips Tip can be removed and disinfected while the next tip is being used. See “Cleaning the Scanner Tip” on page 12 for more information. Scanning Tip Sizes There are three tip options for the scanner. The smaller tips are ideal for molar scanning. •... -
Page 22: Scanner Indicators
The autoclave symbol indicates that an autoclave tip is in use. Color Indicator The color symbol indicates that a color tip is in use. Scanning Speed The speed can be adjusted if desired. Left is slower, right is faster. Scanning Planmeca PlanScan User Manual... -
Page 23: Positioning The Scanner For The First Scan
Scanning Overview Scan the restoration site using the Planmeca scanner to capture the image of the tooth (pre-operative or wax-up), preparation, opposing teeth, buccal bite, and/or bite registration. Scanning the restoration site requires proper site preparation, correct placement and movement of the scanner, and a sufficient number of scans to ensure adequate digitalization of the restoration site. -
Page 24: Scanning Live View
An audio tone plays to indicate that the system is capturing data. The system changes the Live View to orange and stops the audio feedback if you have moved too far and the system needs data overlap. Mute or change the volume on your laptop to change the audio feedback. Scanning Planmeca PlanScan User Manual... -
Page 25: Scanning Options
The most recent scan added to the model displays with a color coding to indicate the focal distance of the data added. • Green - close to the tip • Yellow/Orange - middle of the range • Red - end of the range (far away from tip) Note: Any color shown means the scanner IS capturing data. -
Page 26: Adjust The Scanning Field Of View
Data below the height of contour is not as crucial on the adjacent teeth. If areas lack detail, take additional scans. Scanning Planmeca PlanScan User Manual... -
Page 27: Eraser Tool
With a couple of additional scans, the example is greatly improved. Click Data Density View again to return to the normal view. Click the Margin tab or click the Next button when finished with scanning. Eraser Tool Use the Eraser Tool to remove parts of the scanned model. This can be used to remove unnecessary data like extra teeth, tongue, cheek, etc. -
Page 28: Scanning Occlusion Data
• There must be sufficient data of the adjacent teeth in the scans of the preparation and the bite registration in order for the two models to align. • Ensure there are no gaps between the bite registration material and the adjacent teeth. Scanning Planmeca PlanScan User Manual... -
Page 29: Bite Registration Scanning
Have the patient bite down firmly or press the articulated model down firmly for the impression. If trimming of the bite is needed to expose more of the adjacent teeth, trim the bite in the mouth. If you remove and replace it, the bite registration material may not seat properly. Bite registration scanning Goals 100% occlusal data... -
Page 30: Selecting The Bite Registration
Click and drag to highlight the areas of the opposing dentition that would come into contact with the restoration. Click Bite Selection again to deactivate it. Note: Click Reset if you made a mistake and need to start over. Scanning Planmeca PlanScan User Manual... -
Page 31: Scanning Buccal/Opposing
Scanning Buccal/Opposing The opposing teeth are scanned to acquire bite information for the proposal. The buccal bite is scanned to align the preparation model with the opposing model. Scan Opposing On the Setup tab, select Buccal/Opposing. On the Scan tab, select Scan Opposing. Starting with an occlusal view, scan the occlusal surfaces of the opposing dentition. -
Page 32: Scan Buccal Bite
The buccal bite model is translucent on the Alignment screen to aid in evaluation. The buccal bite has an extra Show/Hide Buccal option. This enables you to hide the buccal bite model and evaluate the opposing and prep models. Scanning Planmeca PlanScan User Manual... -
Page 33: Rotating The Models
To align models, drag and drop the buccal bite, pre-op, or bite registration over the prep model. The models will snap into place or will return to their original positions. In Buccal/Opposing cases, the opposing model appears after the prep and buccal bite are aligned. -
Page 34: Scanning A Pre-Op
Activate the scanner and begin the scans with the occlusal of one of the adjacent teeth. Once you have established where you are, you can begin scanning the preparation. Scan the entire preparation and any of the adjacent tooth data that was removed. Scanning Planmeca PlanScan User Manual... -
Page 35: Scanning Impressions
Click Generate Model or press M on the keyboard. Scanning Impressions Remove the excess impression material so that the scanner can get closer for scanning. Note: Any impression material can be used. The system does not require a particular color or type of material. Positioning the Scanner When scanning the impression, ensure the tip of the scanner is pointing towards the distal for the initial scans so that the orientation of the model will be correct. -
Page 36: Scanning The Impression
Note: A message appears; “Inverting the impression model will reset associated margins and restorations. Are you sure?” Click Yes to invert the model. Click the Margin tab and continue with the normal procedure for drawing the margin and designing the proposal. Scanning Planmeca PlanScan User Manual... -
Page 37: Margin Tab
Orientation The Orientation tool is automatically activated when you first access the Margin tab. For Scan Only cases, this step can be skipped. If you are going to design the case, see the Planmeca PlanCAD manual for more information. Margin Tool Clicking the Margin Tool activates the margin editing mode in which various methods are available to create and edit the margin. -
Page 38: Margin Aids
The margin doesn’t have to be perfect, but gaps must be avoided. Click the Paint button again. The system automatically draws the margin. To delete the margin and start over, click the Paint, Trace, or Lasso button. Margin Tab Planmeca PlanScan User Manual... -
Page 39: Trace Tool
Trace tool The Trace tool can be used on any margin, but it is especially recommended for equigingival and subgingival margins. Click the Trace button. The pointer changes to Click Show Features to highlight high contour areas in green. Zoom in and rotate the model until there is a good view of the margin. Position the Trace tool in the middle of the green high contour indication on the margin. -
Page 40: Lasso Tool
You can use either tool or both sequentially, they do not remove previous changes when clicked like the margin drawing tools. Toggle Margin Once the margin is created, Toggle Margin shows or hides the margin. This is helpful in verifying the margin has been drawn correctly. Margin Tab Planmeca PlanScan User Manual... -
Page 41: Move Margin Tool
Move Margin tool Use the Move Margin tool to drag and drop a section of the margin into a new position. Click the Move Margin button. Position the pointer on the margin; click and hold down the mouse button. Note: Area of Influence - Change the tool’s area of influence by dragging the yellow button to increase or decrease the size of the ellipse. -
Page 42: Retract
Retract tool. Click Toggle Margin to view the ditched area without the margin. This is similar to what your STL recipient will see. Click Toggle Retraction to show/hide the virtual ditching. Margin Tab Planmeca PlanScan User Manual... -
Page 43: Multiple Restorations
Multiple Restorations On multiple restoration cases, the tooth number is assigned to each preparation when the margin is drawn. Click the desired tooth number tab. Draw and edit the margin for the selected tooth number. Select the next tooth number. Draw and edit the margin for the selected tooth number. -
Page 44: Drawing Pontic Margins
Click Trace and designate the position and extension of the base of the pontic on the gingival tissue to fit the appropriate contour. Note: Do not go too far down the curve of the gingival tissue or you may not be able to fit the bridge in the block. Margin Tab Planmeca PlanScan User Manual... -
Page 45: Exporting Data
DDX. Exporting a CAD/CAM Case To export a file to share with another Planmeca system, click File - Export - Export CAD/CAM Case. Select the destination folder and enter a file name. Click Save. - Page 46 Note: If the case does not automatically upload, click on the file in Existing Files and click the Add Files button. Note: A PlanScan panel is available in the Dentrix Chart. See Dentrix user manual for details and instructions. Exporting Data...
-
Page 47: Scanner Specifications
Emergo Australia Level 20, Tower II Darling Park 201 Sussex Street Sydney NSW 2000 Model Number: PlanScan P/N: 12370003 Electrical Ratings: 12Vdc, 12W Storage conditions: -29°C to 38°C (-20°F to 100°F) Operating conditions: 20 °C to 28 °C (67.5 °F to 82.5 °F) < 90%... -
Page 48: Packaging And Environmental
This device complies with part 15 of the FCC Rules. Operation is subject to the following two conditions: (1) This device may not cause harmful interference, and (2) this device must accept any interference received, including interference that may cause undesired operation. Scanner Specifications Planmeca PlanScan User Manual... -
Page 49: Guidance And Manufacturer's Declaration - Electromagnetic Emissions
Guidance and Manufacturer’s Declaration - Electromagnetic Emissions The PlanScan is intended for use in the electromagnetic environment specified below. The customer or the user of the PlanScan should assure that it is used in such an environment. Emissions Test Compliance... - Page 50 (50/60 Hz) characteristic of a typical Magnetic field location in a typical commercial or hospital IEC 61000-4-8 environment. Note: Ut is the a.c. mains voltage prior to application of the test level. Scanner Specifications Planmeca PlanScan User Manual...
-
Page 51: Recommended Separation Distances
If the measured field strength in the location in which the PlanScan is used exceeds the applicable RF compliance level above, the PlanScan should be observed to verify normal operation. If abnormal performance is observed, additional measures may be necessary, such as reorienting or relocating the PlanScan. -
Page 52: Planscan Optical Specifications
Recommended separation distances between portable and mobile RF communications equipment and the PlanScan Rated Separation distance according to frequency of transmitter m maximum 150 kHz to 80 MHz 80 MHz to 800 MHz 800 MHz to 2.5 GHz output power of transmitter 0.01... -
Page 53: Labels
Labels Symbols The following symbols are used on various labels on the system. Symbol Definition Authorized Representative in the European community Class 2 electrical product Date of Manufacture DC Current This product must NOT be disposed of with other waste. It is the user’s responsibility to dispose of their waste electrical and electronic equipment by handing it over to an approved reprocessor, or by returning it to E4D Technologies for reprocessing. -
Page 54: Firewire Warning Label
Affixed to the scanner are product identification labels that contain identification and safety information. Be certain to read all product labeling. Note: If any of the labels are missing or illegible, please contact Planmeca After Sales for replacement labels. Note: The labels may have changed since this book was published. -
Page 55: External Components And Connectors
External Components and Connectors When connecting external components to the E4D system, attach only components that have been tested for compliance with IEC 60601-1 or UL 60950. Connectors for attaching external devices conduct low voltages. Avoid touching the connector pins. Internal Fuse FS2 - 1.5A/63V/FF/50A IR UL Listing UL Medical Equipment Listing... -
Page 56: Troubleshooting/Repair
OFF. Failing to send Call Customer Support. restoration Software freezing Low memory Re-start application or re-start system. Mouse not Low batteries Replace batteries. responding Loose mouse dongle Ensure dongle is plugged into a USB port. Troubleshooting/Repair Planmeca PlanScan User Manual...
Need help?
Do you have a question about the PlanScan and is the answer not in the manual?
Questions and answers