Table of Contents
Advertisement
Quick Links
Download this manual
See also:
Operator's Manual
Advertisement
Table of Contents

Related Manuals for Fluke 5500A


Summary of Contents for Fluke 5500A
- Page 1 ® 5500A Multi-Product Calibrator Service Manual PN 105798 August 1995 Rev.5, 4/03 © 1995-2003 Fluke Corporation. All rights reserved. Printed in U.S.A. All product names are trademarks of their respective companies.
- Page 2 Fluke authorized resellers shall extend this warranty on new and unused products to end-user customers only but have no authority to extend a greater or different warranty on behalf of Fluke. Warranty support is available if product is purchased through a Fluke authorized sales outlet or Buyer has paid the applicable international price.
-
Page 3: Table Of Contents
1-14. AC Power (45 Hz to 65 Hz) Specification Summary, PF=1 .... 1-20 1-15. Power and Dual Output Limit Specifications ........1-21 1-16. 5500A Phase Specifications ............. 1-21 1-17. Calculating Power Uncertainty ............1-23 1-18. Additional Specifications ..............1-24 1-19. - Page 4 Frequency ..................3-14 3-17. NORMAL Volts and AUX Volts Phase........... 3-15 3-18. Volts and AUX Current Phase ............3-15 3-19. Remote Commands for 5500A Calibration........3-16 3-20. Generating a Calibration Report............3-18 3-21. Calibration Shifts Report, Printout Format ........3-18 3-22.
- Page 5 Complete List of Error Messages ............4-14 List of Replaceable Parts..............5-1 5-1. Introduction................... 5-3 5-2. How to Obtain Parts................5-3 5-3. How to Contact Fluke ................5-3 5-4. Parts Lists....................5-4 Oscilloscope Calibration Options ............. 6-1 SC600 Option..................6-3 6-1. Introduction................... 6-5 6-2.
- Page 6 5500A Service Manual 6-21. Leveled Sine Wave Mode ..............6-12 6-22. Time Marker Mode ................6-13 6-23. Wave Generator Mode ..............6-13 6-24. Input Impedance Mode (Resistance) ..........6-13 6-25. Input Impedance Mode (Capacitance)..........6-13 6-26. Overload Mode................. 6-13 6-27.
- Page 7 Contents (continued) 6-76. Adjusting the Leveled Sine Wave Function........6-60 6-77. Equipment Setup ................6-61 6-78. Adjusting the Leveled Sine Wave VCO Balance ......6-61 6-79. Adjusting the Leveled Sine Wave Harmonics ......6-62 6-80. Adjusting the Aberrations for the Edge Function ......6-62 6-81.
- Page 8 Adjusting the Aberrations for the Edge Function ......6-117 6-151. Equipment Setup ................6-117 6-152. Adjusting the Edge Aberrations for Board 5500A-4004-1 ..6-118 6-153. Adjusting the Edge Aberrations for Board 5500A-4004 ..... 6-120 6-154. Adjusting the Rise Time for the Edge Function....... 6-122 6-155.
- Page 9 List of Tables Table Title Page 3-1. Required Equipment for Calibration and Verification........... 3-4 3-2. DC Volts Calibration Steps..................3-5 3-3. AC Volts Calibration Steps..................3-5 3-4. DC Current Calibration Steps ................3-7 3-5. AC Current Calibration Steps ................3-8 3-6.
- Page 10 5500A Service Manual 3-37. AC Voltage Accuracy with a DC Offset..............3-40 4-1. Internal Fuse Locations ..................4-14 4-2. Error Message Format.................... 4-14 5-1. Chassis Assembly....................5-5 5-2. Front Panel Assembly .................... 5-8 5-3. Rear Panel Assembly ..................... 5-10 6-1.
- Page 11 Contents (continued) 6-50. DC Voltage Verification at 50 Ω ................6-86 6-51. AC Voltage Verification at 1 MΩ ................. 6-88 6-52. AC Voltage Verification at 50 Ω ................6-89 6-53. AC Voltage Frequency Verification ..............6-91 6-54. Edge Amplification Verification................6-92 6-55.
- Page 12 5500A Service Manual...
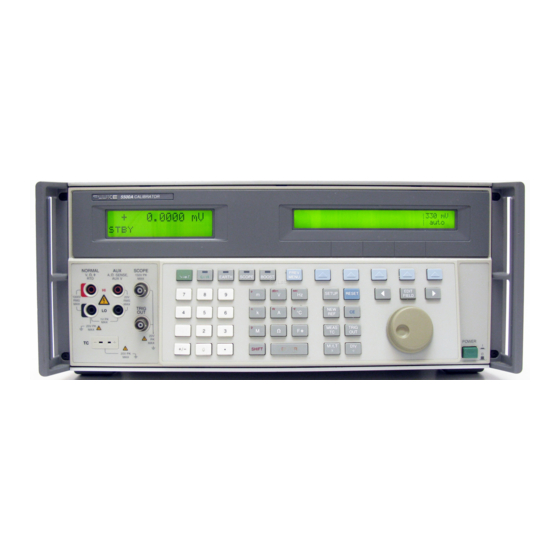
- Page 13 List of Figures Figure Title Page 1-1. 5500A Multi-Product Calibrator ................1-4 1-2. 5500A Calibrator Dimensional Outline ..............1-5 2-1. 5500A Internal Layout ................... 2-3 2-2. Synthesized Resistance Function ................2-4 2-3. Synthesized Capacitance Function................. 2-5 2-4. Current Function ....................2-6 2-5.
- Page 14 5500A Service Manual 6-15. Adjusting the Leveled Sine Wave Balance............6-61 6-16. Adjusting the Leveled Sine Wave Harmonics ............6-62 6-17. Adjusting Short-Term Edge ................... 6-64 6-18. SC300 Block Diagram ................... 6-74 6-19. Equipment Setup for SC300 Square Wave Measurements........6-79 6-20.
-
Page 15: Introduction And Specifications
1-14. AC Power (45 Hz to 65 Hz) Specification Summary, PF=1 .... 1-20 1-15. Power and Dual Output Limit Specifications ........1-21 1-16. 5500A Phase Specifications ............. 1-21 1-17. Calculating Power Uncertainty ............1-23 1-18. Additional Specifications ..............1-24 1-19. - Page 16 5500A Service Manual...
-
Page 17: Introduction
Keys that multiply and divide the output value by 10 to simplify work on meters with calibration points at decade multiples. • Programmable entry limits to restrict levels that may be keyed into the 5500A, to prevent calling up a level that may be harmful to equipment or personnel. •... -
Page 18: Service Information
The following paragraphs detail specifications for the 5500A Calibrator. The specifications are valid after allowing a warm-up period of 30 minutes, or twice the time the 5500A has been turned off. For example, if the 5500A has been turned off for 5 minutes, the warm-up period is 10 minutes. - Page 19 (7 in) µ EDIT SETUP RESET 1000V FIELD TRIG ¡F ¡C 1V PK 20V PK MEAS TRIG POWER MULT ENTER SHIFT 20V PK 47.0 cm (18.5 in) 6.4 cm (2.5 in) For Cable Access om002f.ewps Figure 1-2. 5500A Calibrator Dimensional Outline...
-
Page 20: General Specifications
• Width, 43.2 cm (17 inches), standard rack width • Depth, 63.0 cm (24.8 inches) overall. Weight (without options) 5500A Calibrator, 22 kg (49 lb); 5725A Amplifier 32 kg (70 pounds) Absolute Uncertainty The 5500A specifications include stability, temperature coefficient,... -
Page 21: Dc Voltage Specifications
Introduction and Specifications Specifications 1-5. DC Voltage Specifications Absolute Uncertainty, tcal ± 5 °C Stability Maximum ± (% of output + µV) 24 hours, ± 1 °C Ranges Reso- Burden ± (ppm output + µV) 90 days 1 year lution 3 µV 3 µV 5 ppm + 1 µV... -
Page 22: Dc Current Specifications
5500A Service Manual 1-6. DC Current Specifications Absolute Uncertainty, tcal ± 5 °C Compliance Maximum ± (% of output + µA) Ranges Resolution Voltage Inductive Load 90 days 1 year 0.05 µA 0.05 µA 0.01 µA 1 µH 0 to 3.29999 mA 0.010%... -
Page 23: Resistance Specifications
The floor adder is improved to 0.006 Ω (0 to 10.99 Ω range) and 0.010 Ω (11 to 329.999 Ω) if the 5500A Calibrator is zeroed (ohms zero or instrument zero) within 8 hours and temperature is ±1 °C of zeroing ambient temperature. -
Page 24: Ac Voltage (Sinewave) Specifications
5500A Service Manual 1-8. AC Voltage (Sinewave) Specifications Absolute Uncertainty, tcal ± 5 °C Ranges Frequency Res- ± (% of output + µV) olution Burden 90 days 1 year 20 µV 20 µV 1 µV 50 Ω 1.0 to 32.999 mV 10 to 45 Hz 0.26%... - Page 25 Introduction and Specifications Specifications AC Voltage (Sinewave) Specifications (cont.) Absolute Uncertainty, tcal ± 5 °C Frequency Ranges Resolution Maximum ± (% of output + µV) Burden 90 days 1 year 5725A Amplifier 100 to 1020 V 45 Hz to 1 kHz 0.04 80 mV 0.05...
- Page 26 5500A Service Manual AC Voltage (Sinewave) Specifications (cont.) Maximum Distortion and Noise Ranges Frequency 10 Hz to 5 MHz Bandwidth ± (% output + µV) 0.15% + 90 µV 1.0 to 32.999 mV 10 to 45 Hz 45 Hz to 10 kHz 0.035 + 90...
-
Page 27: Ac Current (Sinewave) Specifications
Introduction and Specifications Specifications 1-9. AC Current (Sinewave) Specifications Absolute Uncertainty, tcal ± 5 °C Res- Com- ± (% of output + µA) Ranges Frequency olution pliance Induc- Voltage tive Load 90 days 1 year 0.15 µA 0.15 µA 0.01 µA 3.0 V rms 1 µH 0.029 to 0.32999 mA 10 to 20 Hz... - Page 28 5500A Service Manual AC Current (Sinewave) Specifications (cont.) Absolute Uncertainty, tcal ± 5 °C Res- Com- ± (% of output + µA) Ranges Frequency olution pliance Induc- Voltage tive Load 90 days 1 year 5725A Amplifier 1.5 to 11 A 45 to 1 kHz 0.08...
-
Page 29: Capacitance Specifications
Introduction and Specifications Specifications 1-10. Capacitance Specifications Absolute Uncertainty, tcal ± 5 °C ± (% of output + nF) Frequency Ranges Resolution Allowed Typical for 90 days 1 year <1% Error 0.33 to 0.4999 nF 0.38% 0.01 nF 0.5% 0.01 nF 0.1 pF 50 to 1000 Hz 10 kHz... -
Page 30: Temperatore Calibration (Thermocouple) Specifications
5500A Service Manual 1-11. Temperatore Calibration (Thermocouple) Specifications Range (°C) Absolute Range (°C) Absolute Type Uncertainty Type Uncertainty Source/Measure, Source/Measure, tcal ± 5 °C, ± (°C) tcal ± 5 °C, ± (°C) 90 days 1 year 90 days 1 year 600 °C to 800 °C... -
Page 31: Temperature Calibration (Rtd) Specifications
Introduction and Specifications Specifications 1-12. Temperature Calibration (RTD) Specifications Absolute Uncertainty, tcal ± 5 °C, ± (°C) RTD Type Range (°C) [1] Minimum Maximum 90 days 1 year -200 °C -80 °C 0.04 °C 0.05 °C Pt 385, 100Ω 0.05 0.05 0.07 0.07... - Page 32 0.13 0.14 Cu 427, 10 Ω [3] -100 [1] Resolution is 0.003 °C. [2] Applies for COMP OFF (to the 5500A Calibrator front panel NORMAL terminals) and 2-wire and 4-wire compensation. [3] Based on MINCO Application Aid No. 18. 1-18...
-
Page 33: Dc Power Specification Summary
Introduction and Specifications Specifications 1-13. DC Power Specification Summary 5500A Calibrator Current Range Voltage Range 3.3 to 8.999 mA 9 to 32.999 mA 33 to 89.99 mA 90 to 329.99 mA Absolute Uncertainty, tcal ± 5 °C, ± (% of watts output) -
Page 34: Ac Power (45 Hz To 65 Hz) Specification Summary, Pf=1
5500A Service Manual 1-14. AC Power (45 Hz to 65 Hz) Specification Summary, PF=1 5500A Calibrator Current Range Voltage Range 3.3 to 8.999 mA 9 to 32.999 mA 33 to 89.99 mA 90 to 329.99 mA Absolute Uncertainty, tcal ± 5 °C, ± (% of watts output) -
Page 35: Power And Dual Output Limit Specifications
The phase adjustment range for dual ac outputs is 0 to ± 179.99 degrees. The phase resolution for dual ac outputs is 0.02 degree. 1-16. 5500A Phase Specifications 1-Year Absolute Uncertainty, tcal ± 5 °C, ( ∆Φ degrees) 10 to 65 Hz... - Page 36 5500A Service Manual 5500A Phase Specifications (cont.) Phase Phase Power Uncertainty Adder due to Phase Error (Φ) (Φ) Watts VARs 10 to 65 Hz 65 to 500 Hz 500 to 1 kHz 1 to 5 kHz 5k to 10 kHz...
-
Page 37: Calculating Power Uncertainty
Introduction and Specifications Specifications 1-17. Calculating Power Uncertainty Overall uncertainty for power output in watts (or VARs) is based on the root sum square (rss) of the individual uncertainties in percent for the selected voltage, current, and power factor parameters: Watts uncertainty power voltage... -
Page 38: Additional Specifications
These specifications are valid after allowing a warm-up period of 30 minutes, or twice the time the 5500A has been turned off. All extended range specifications are based on performing the internal zero-cal function at weekly intervals, or when the ambient temperature changes by more than 5 °C. -
Page 39: Harmonics (2Nd To 50Th) Specifications
Introduction and Specifications Additional Specifications 1-20. Harmonics (2nd to 50th) Specifications Fundamental Voltages Currents Voltages Amplitude Frequency NORMAL AUX Terminals Uncertainty Terminals 10 to 45 Hz 33 mV to 32.9999 V 3.3 mA to 2.19999 A 10 mV to 3.3 V Same % of output as 45 to 65 Hz... -
Page 40: Ac Voltage (Sinewave) Extended Bandwidth Specifications
5500A Service Manual 1-21. AC Voltage (Sinewave) Extended Bandwidth Specifications 1-Year Absolute Uncertainty, Maximum Voltage tcal ± 5 °C, Ranges Frequency Resolution ± (% of output + % of range) %Output %Range Normal Channel (Single Output Mode) 1.0 to 33 mV 0.01 to 10 Hz... -
Page 41: Ac Voltage (Non-Sinewave) Specifications
Introduction and Specifications Additional Specifications 1-22. AC Voltage (Non-Sinewave) Specifications 1-Year Absolute Uncertainty, Trianglewave & Maximum tcal ± 5 °C, Truncated Sine Voltage Frequency ± (% of output + % of range) [2] Ranges Resolution p-p [1] %Output %Range Normal Channel (Single Output Mode) 2.9 to 92.999 mV 0.01 to 10 Hz 5.0%... -
Page 42: Ac Voltage, Dc Offset Specifications
5500A Service Manual 1-23. AC Voltage, DC Offset Specifications 1-Year Absolute Offset Range [1] Offset Range Maximum pk Uncertainty, tcal ± 5 °C [3] (Normal Channel) Signal ± (% Output (dc) + µV) Sinewaves 0.1% + 33 µV 3.3 to 32.999 mV... -
Page 43: Ac Voltage, Squarewave Characteristics
Introduction and Specifications Additional Specifications 1-24. AC Voltage, Squarewave Characteristics Risetime Settling Overshoot Duty Cycle Range Duty Cycle Uncertainty @ 1 kHz Time @ 1 kHz Typical @ 1 kHz Typical Typical <1 µs <10 µs to 1% <2% 1% to 99%, <3.3 V p-p, ±... -
Page 44: Ac Current (Non-Sinewave) Specifications
5500A Service Manual 1-27. AC Current (Non-Sinewave) Specifications 1-Year Absolute Trianglewave & Maximum Uncertainty, tcal ± 5 °C, Truncated Current Frequency ± (% of output + % of range) Sinewave Resolution Ranges [1] %Output %Range 2.9 to 92.999 mA 0.01 to 10 Hz 5.0%... -
Page 45: Ac Current, Squarewave Characteristics (Typical)
Introduction and Specifications Additional Specifications 1-28. AC Current, Squarewave Characteristics (typical) Range Risetime Settling Time Overshoot 25 µs 40 µs to 1% of final value <10% for loads <100 Ω I<4.4 A @ 400 Hz 1-29. AC Current, Trianglewave Characteristics (typical) Linearity to 400 Hz Aberrations 0.3% of p-p value, from 10% to 90% point... - Page 46 5500A Service Manual 1-32...
-
Page 47: Theory Of Operation
Chapter 2 Theory of Operation Title Page 2-1. Introduction................... 2-3 2-2. Encoder Assembly (A2)................ 2-4 2-3. Synthesized Impedance Assembly (A5) ..........2-4 2-4. DDS Assembly (A6) ................2-5 2-5. Current Assembly (A7)................. 2-6 2-6. Voltage Assembly (A8) ................ 2-7 2-7. Main CPU Assembly (A9).............. - Page 48 5500A Service Manual...
-
Page 49: Introduction
2-1. Introduction This chapter provides a block diagram discussion of the calibrator’s analog and digital sections. Figure 2-1 shows the arrangement of assemblies inside the 5500A. The Oscilloscope Calibration Option is described in the Options chapter. The 5500A produces calibration outputs of the following functions and ranges: •... -
Page 50: Encoder Assembly (A2)
5500A Service Manual 2-2. Encoder Assembly (A2) The Encoder assembly (A2) has its own microprocessor and is in communication with the Main CPU (A9) on the Rear Panel through a serial link. Memory for the Encoder assembly is contained in EPROM. The Encoder assembly handles the interface to the Keyboard assembly (A1). -
Page 51: Dds Assembly (A6)
Theory of Operation DDS Assembly (A6) NORMAL = (1 + K) • C NORMAL SCOM om005f.eps Figure 2-3. Synthesized Capacitance Function 2-4. DDS Assembly (A6) The DDS (Direct Digital Synthesis) assembly (A6) contains the following blocks: • References for all voltage and current functions. •... -
Page 52: Current Assembly (A7)
A, and 11 A) and two voltage ranges (330 mV and 3.3 V) to the AUX outputs. The 330 uA range is only available in ac. If a 5725A Amplifier is attached, 5500A current can also be sourced through the 5725A binding posts. -
Page 53: Voltage Assembly (A8)
Theory of Operation Voltage Assembly (A8) 2-6. Voltage Assembly (A8) The Voltage assembly (A8) generates dc and ac voltage outputs in the range 3.3 V and above. It also provides all the inguard supplies referenced to SCOM as described under the heading “Power Supplies.”... -
Page 54: Main Cpu Assembly (A9)
5500A Service Manual 2-7. Main CPU Assembly (A9) The Main CPU (A9) attached to the rear panel assembly communicates with the following assemblies: • Inguard CPU on the DDS assembly (A6) • Display assembly CPU • Serial and IEEE interfaces •... -
Page 55: Calibration And Verification
Frequency ..................3-14 3-17. NORMAL Volts and AUX Volts Phase........... 3-15 3-18. Volts and AUX Current Phase ............3-15 3-19. Remote Commands for 5500A Calibration........3-16 3-20. Generating a Calibration Report............3-18 3-21. Calibration Shifts Report, Printout Format ........3-18 3-22. - Page 56 5500A Service Manual 3-36. Thermocouple Measurement Accuracy..........3-31 3-37. Thermocouple Sourcing Accuracy........... 3-31 3-38. Thermocouple Measuring Accuracy ..........3-31 3-39. DC Power Amplitude Accuracy (NORMAL) ........3-32 3-40. DC Power Amplitude Accuracy (AUX)........... 3-32 3-41. AC Power Amplitude Accuracy (High Voltage)......3-33 3-42.
-
Page 57: Introduction
Introduction 3-1. Introduction Use this chapter as a guide to calibration and for verification of the 5500A’s performance to specifications. You should recalibrate at the end of either a 90-day or 1-year calibration interval. If you recalibrate every 90 days, use the 90-day specifications, which provide higher performance. -
Page 58: Starting Calibration
1. The 5500A automatically programs the outputs listed in the following tables and prompts you to make external connections to appropriate measurement instruments. 2. The 5500A then goes into Operate, or asks you to place it into Operate. -
Page 59: Dc Volts
Calibration and Verification Calibration 3. You are then prompted to enter into the 5500A the value read on the measurement instrument. Note Intermixed with these "output and measure" procedures are internal 5500A calibration procedures that require no action by the operator. -
Page 60: Thermocouple Measuring
1. Apply a copper short to the TC terminals. Allow the temperature of the short to stabilize for 3 minutes. 2. Perform the "zero" calibration as indicated on the 5500A front panel. 3. Remove the copper short as instructed on the 5500A front panel. -
Page 61: Dc Current
3-9. DC Current Use a precision DMM and appropriate precision shunts to measure the 5500A output as Figure 3-2 shows. Enter into the 5500A each of the measured values listed in Table 3-4 when prompted to do so. 5500 A... -
Page 62: Ac Current
Use a Fluke 5790A or equivalent with the appropriate precision shunts and adapter to measure the 5500A output. Refer to the 5790A Operator Manual for operating instructions and connections. Enter into the 5500A each of the measured values listed in Table 3-5 when prompted to do so. -
Page 63: Aux Ac Volts
9.99 Hz 3-13. Resistance Use a precision DMM to measure the resistance output. Figure 3-3 shows the four-wire connections. Enter into the 5500A the measured values of each step listed in Table 3-8 when prompted to do so. 5500A CALIBRATOR... -
Page 64: Resistance Calibration Steps
5500A Service Manual Table 3-8. Resistance Calibration Steps Step 5500A Output Comments 1 Ω Make a four-wire measurement 10 Ω “ 11 Ω “ 32 Ω “ 35 Ω “ 100 Ω “ 110 Ω “ 320 Ω “ 0.35 kΩ... - Page 65 [1] Perform this test using the HP 3458A in the 10 MΩ range and the Fluke 742A-10M in parallel with the 5500A output. Using exactly 10 MΩ, the nominal value displayed on the HP 3458A is 9.66667 MΩ. Figure 3-4 shows the connections and the equation you use to calculate actual resistance.
-
Page 66: Capacitance
3-5. This cable eliminates the need for a four-wire connection. Using the PM6304C LCR meter, HI LEVEL is 2 V and NORMAL LEVEL is 1 V. The 5500A is automatically set to COMP off. Enter into the 5500A the measured values of each step listed in Table 3-9 when prompted to do so. -
Page 67: Capacitance Calibration Steps
Calibration and Verification Calibration Table 3-9. Capacitance Calibration Steps Step 5500A Output (NORMAL) Recommended Stimulus 330 ρF 2 V rms at 1 kHz 499 ρF “ 0.5 ηF “ 1.00 ηF “ 1.10 ηF “ 3.2 ηF “ 3.5 ηF “... -
Page 68: Capacitance, Four-Wire Comp
LO terminals to give the best COMP four-wire operation in Capacitance. Refer to Figure 3-6. Connect the LCR meter INPUT/SENSE HI to the 5500A AUX HI; connect the LCR meter INPUT/SENSE LO to the 5500A NORMAL LO. Enter the LCR reading into the 5500A when prompted. -
Page 69: Normal Volts And Aux Volts Phase
Measure with a phase meter of suitable accuracy as shown in Figure 3-7. Enter into the 5500A the measured values when prompted. The 5500A outputs the voltages shown in Table 3-10. The 5500A is automatically set to LOs open. Output... -
Page 70: Remote Commands For 5500A Calibration
3.00E+00 1.0E+03 3-19. Remote Commands for 5500A Calibration Calibration of the 5500A using remote commands is simple. To access calibration steps described in paragraphs 3-6 through 3-15, simply send the command: CAL_START MAIN To access calibration steps described in paragraphs 3-16 through 3-18, send the... -
Page 71: Jumping To A Specific Calibration Step
1. Connect the appropriate COM port from a PC to the 5500A Serial 1 connector, using a Fluke PM8914 cable. 2. Call up the Terminal program from within Microsoft Windows. Set the communications parameters to match that of the 5500A. -
Page 72: Generating A Calibration Report
Service Manual 3-20. Generating a Calibration Report Three different calibration reports are available from the 5500A, each one either formatted for printing, or in comma-separated variable format for importation into a spreadsheet. Using the REPORT SETUP softkey under UTILITY FUNCTS / CAL, you select lines per page, calibration interval , type of report, format, and which serial port to use. -
Page 73: Calibration Shifts Report, Spreadsheet Format
Hz,+0e+00,V,+0.00000,0.00136 DC330MV_S,-329.999 mV, 0.00 Hz,+0e+00,V,+0.00000,0.00136 DC3_3V_S,+3.30000 V, 0.00 Hz,+0e+00,V,+0.00000,0.00041 DC3_3V_S,-3.30000 V, 0.00 Hz,+0e+00,V,+0.00000,0.00041 (continued) 3-23. Calibration Constant Report, Printout Format FLUKE CORPORATION 5500A CALIBRATION CONSTANT VALUES 5500A S/N ------------------------------------------------------------------------------ NAME ACTIVE STORED DEFAULT SL40MV_F8 1.2800001E-01 1.2800001E-01 1.2800001E-01 1.2800001E-01 SL40MV_F9 1.5000001E-01 1.5000001E-01... -
Page 74: Calibration Constants Report, Spreadsheet Format
(continued) 3-25. Performance Verification Tests The following tests are used to verify the performance of the 5500A Calibrator. If an out-of-tolerance condition is found, the instrument can be re-calibrated using the front panel or the remote interface as described previously in this chapter. -
Page 75: Dc Voltage Amplitude Accuracy (Normal)
3-28. DC Voltage Amplitude Accuracy (AUX) The DC Voltage Amplitude Accuracy test verifies the accuracy of dc voltage at the 5500A Calibrator front panel AUX terminals in the presence of a lower voltage at the NORMAL terminals. Table 3-14 shows the test points. -
Page 76: Dc Current Amplitude Accuracy
3-29. DC Current Amplitude Accuracy The DC Voltage Amplitude Accuracy test verifies the accuracy of dc current at the 5500A Calibrator front panel AUX terminals. See Figure 3-2 and Table 3-4 for test equipment connection instructions. Table 3-15 shows the test points. -
Page 77: Resistance Accuracy
3-30. Resistance Accuracy The Resistance Accuracy test verifies the accuracy of synthesized resistance at the 5500A Calibrator front panel NORMAL terminals. See Figure 3-3 for test equipment connection instructions. For resistances of less than 110 kΩ, use the four-wire COMP option. -
Page 78: Resistance Dc Offset Measurement
290 MΩ [1] 0.403% [1] Perform this test using the HP 3458A in the 10 MΩ range and the Fluke 742A-10M in parallel with the 5500A output. Using exactly 10 MΩ, the nominal value is 9.66667 MΩ. Figure 3-4 shows the connections and the equation you use to calculate actual resistance. -
Page 79: Ac Voltage Amplitude Accuracy (Normal)
3-32. AC Voltage Amplitude Accuracy (NORMAL) The AC Voltage Amplitude Accuracy test verifies the accuracy of ac voltage at the 5500A Calibrator front panel NORMAL terminals. Table 3-18 shows the test points. Table 3-18. AC Voltage Amplitude Accuracy Test (NORMAL) - Page 80 5500A Service Manual Table 3-18. AC Voltage Amplitude Accuracy Test (NORMAL) (cont.) Nominal Value Frequency Measured Value Deviation % 90-Day Spec. (%) (NORMAL) 30 V 9.5 Hz 5.550 30 V 10 Hz 0.118 30 V 45 Hz 0.032 30 V 1 kHz 0.032...
-
Page 81: Ac Voltage Amplitude Accuracy (Aux)
3-33. AC Voltage Amplitude Accuracy (AUX) The AC Voltage Amplitude Accuracy test verifies the accuracy of ac voltage at the 5500A Calibrator front panel AUX terminals in the presence of a voltage at the NORMAL terminals. Leave the NORMAL terminals disconnected. Table 3-19 shows the test points. -
Page 82: Ac Current Amplitude Accuracy
The AC Voltage Amplitude Accuracy test verifies the accuracy of ac current at the 5500A Calibrator front panel AUX terminals. Use a Fluke 5790A with the appropriate precision shunts and adapter to measure the 5500A output. Refer to the 5790A Operator Manual for operating instructions and connections. See Figure 3-2 for connections, and see Table 3-5 for shunt information. -
Page 83: Capacitance Accuracy
3-35. Capacitance Accuracy The Capacitance Accuracy test verifies the accuracy of the synthesized capacitance output at the 5500A Calibrator front panel AUX terminals. Table 3-21 shows the test points. Use the Fluke 6304C LCR Meter with PM9540/BAN output cable as shown in Figure 3-5. -
Page 84: Capacitance Accuracy Test
5500A Service Manual Table 3-21. Capacitance Accuracy Test Nominal Value LCR Stimulus Measured Deviation 90-Day Spec. Frequency Value (F) (NORMAL) 0.35 ηF 1 kHz 3.23% 0.48 ηF 1 kHz 2.46 0.6 ηF 1 kHz 2.05 1 ηF 1 kHz 1.38 1.2 ηF... -
Page 85: Thermocouple Measurement Accuracy
3-37. Thermocouple Sourcing Accuracy The Thermocouple Sourcing Accuracy test checks the accuracy of the thermocouple measuring circuitry. For this test, measure the dc output at the 5500A front panel TC connector with a dc meter (observe polarity on the TC connector). Select External Reference and the linear output 10 µV/°C as the thermocouple “type.”... -
Page 86: Dc Power Amplitude Accuracy (Normal)
5500A Service Manual Table 3-24. Thermocouple Measuring Accuracy Test Input Value Nominal Reading Actual Reading Deviation % 90-Day Spec. (°C) (mV) (TC (mV or %) connector) 0.00 0.003 mV 100 mV 10,000.00 0.008% -100 mV -10,000.00 0.008% 3-39. DC Power Amplitude Accuracy (NORMAL) The DC Power Amplitude Accuracy (NORMAL) test checks the amplitude accuracy of the dc volts at the NORMAL terminals in the presence of DC I at the AUX terminals. -
Page 87: Ac Power Amplitude Accuracy (High Voltage)
Calibration and Verification Performance Verification Tests 3-41. AC Power Amplitude Accuracy (High Voltage) The AC Power Amplitude Accuracy (High Voltage) test checks the current outputs at the AUX terminals in the presence of a high voltage. Use the 5790A, A40 and A40A shunts, and the shunt adapter, as described in the 5790A Operator Manual. -
Page 88: Ac Power Amplitude Accuracy (High Power)
5500A Service Manual 3-43. AC Power Amplitude Accuracy (High Power) The AC Power Amplitude Accuracy (High Power) test checks the accuracy of the ac power output at high power levels. Apply a short to the AUX terminals to provide a low- impedance path for current. -
Page 89: Frequency Accuracy Test
Calibration and Verification Performance Verification Tests Table 3-30. Phase Accuracy Test (cont.) Output Output Frequency Nominal Measured Deviation % 1-Year Spec. Voltage Voltage Phase Value (degrees) (NORMAL) (AUX) (degrees) (degrees) 1 kHz 5 kHz 10 kHz Output Output Frequency Nominal Measured Deviation % 1-Year Spec. -
Page 90: Ac Voltage Amplitude Accuracy, Squarewave (Normal)
3-45. AC Voltage Amplitude Accuracy, Squarewave (NORMAL) The AC Voltage Amplitude Accuracy, Squarewave (NORMAL) test checks the amplitude accuracy at the NORMAL terminals. For this test, use the Fluke 5790A. Refer to the 5790A Operator Manual for operating instructions and connections. For squarewaves, the measured value (in rms) should be exactly 1/2 the nominal value in peak-to-peak. -
Page 91: Ac Voltage Amplitude Accuracy, Squarewave (Aux)
3-46. AC Voltage Amplitude Accuracy, Squarewave (AUX) The AC Voltage Amplitude Accuracy, Squarewave (AUX) test checks the amplitude accuracy at the AUX terminals. For this test, use the Fluke 5790A. Refer to the 5790A Operator Manual for operating instructions and connections. For squarewaves, the measured value (in rms) should be exactly 1/2 the nominal value in peak-to-peak. -
Page 92: Ac Voltage Harmonic Amplitude Accuracy (Normal)
3-47. AC Voltage Harmonic Amplitude Accuracy (NORMAL) The AC Voltage Harmonic Amplitude Accuracy (NORMAL) tests the accuracy of the harmonics from the NORMAL terminals. For this test, set the 5500A output to sinewave. Table 3-34 shows the test points. Table 3-34. AC Voltage Harmonic Amplitude Accuracy (NORMAL) -
Page 93: Ac Voltage Harmonic Amplitude Accuracy (Aux)
3-48. AC Voltage Harmonic Amplitude Accuracy (AUX) The AC Voltage Harmonic Amplitude Accuracy (AUX) tests the accuracy of the 50th harmonic from the AUX terminals. For this test, set the 5500A output to sinewave. Table 3-35 shows the test points. -
Page 94: Ac Voltage Accuracy With A Dc Offset
5500A Service Manual 3-50. AC Voltage Accuracy with a DC Offset The AC Voltage Accuracy with a DC Offset tests the accuracy of the ac output in the presence of a dc offset. For this test, be sure to ac couple the input to the meter. Table 3-37 shows the test points. - Page 95 A Message From Fluke Corporation Some semiconductors and custom IC's can be damaged by electrostatic discharge during handling. This notice explains how you can minimize the chances of destroying such devices 1. Knowing that there is a problem.
- Page 96 8. WHEN REMOVING PLUG-IN ASSEMBLIES 5. USE STATIC SHIELDING CONTAINERS FOR HANDLE ONLY BY NON-CONDUCTIVE HANDLING AND TRANSPORT. EDGES AND NEVER TOUCH OPEN EDGE CONNECTOR EXCEPT AT STATIC-FREE WORK STATION. PLACING SHORTING STRIPS ON EDGE CONNECTOR HELPS PROTECT INSTALLED S.S. DEVICES. 6.
-
Page 97: Maintenance
Chapter 4 Maintenance Title Page 4-1. Introduction................... 4-3 4-2. Access Procedures ................4-3 4-3. Removing Analog Modules.............. 4-3 4-4. Removing the Main CPU (A9)............4-3 4-5. Removing Rear Panel Assemblies............ 4-4 4-6. Removing the Filter PCA (A12)............4-4 4-7. Removing the Encoder (A2) and Display PCAs ......4-4 4-8. - Page 98 5500A Service Manual...
-
Page 99: Introduction
Maintenance Introduction 4-1. Introduction Because this is a high performance instrument, it is not recommended that the user service the boards to the component level. In many different ways it is easy to introduce a subtle long-term stability problem by handling the boards. Access procedures are provided for those who want to replace a faulty module. -
Page 100: Removing Rear Panel Assemblies
5500A Service Manual 4-5. Removing Rear Panel Assemblies Proceed as follows to remove the transformer and the ac line input filter. Figure 4-1 shows an exploded view of the rear panel assemblies. 1. Remove the two rear handles by removing the six Allen screws from the handles. - Page 101 Maintenance Access Procedures om016f.eps Figure 4-1. Exploded View of Rear Panel Assemblies...
- Page 102 5500A Service Manual om017f.eps Figure 4-2. Exploded View of Front Panel Assemblies...
-
Page 103: Diagnostic Testing
Press S followed by UTILITY FUNCTNS, SELF TEST, and DIAG. The menu presents the following choices: OPTIONS and GO ON. Press GO ON to start diagnostics. The 5500A prompts you to remove all cables from the front panel outputs. 4-11. Sequence of Diagnostics Tests After you press the GO NO softkey, an automatic sequence of tests begins. - Page 104 5500A Service Manual 1010 (DDE:FR ) A6 ACV loop fault Assuming the dc voltage tests pass, there are a number of A6 ICs associated with ac voltage that could be suspect. These include U5, U55, U61, U62, U13, U4, U35, U32, U49, U25, U96, U40, U20, U39, U84 and U3.
- Page 105 Maintenance Diagnostic Testing 1023 (DDE:FR ) A6 3.3V sense buffer fault Suspect ICs are U21, U57, and U26 on the A6 assembly. If one of these Ics is bad, it will cause faults on the other A6 sense buffer tests as well. Other suspects on the A6 assembly include relay K3 and resistor network Z5.
- Page 106 5500A Service Manual 1040 (DDE:FR ) A5 interface fault Is the A5 assembly installed? If so, suspect circuitry includes A5 digital ICs U14, U12, or CMOS switch U7, relay K15, and driver IC U15. 1041 (DDE:FR ) A5 X1 input amp fault Suspect ICs on the A5 assembly include U34, U20, U8, U7, Q4, and Q3, as well as the +17, and -17 V supplies and their associated circuitry.
- Page 107 Maintenance Diagnostic Testing 1052 (DDE:FR ) A5 12.75 ohm reference fault Suspect components on the A5 assembly are relay driver ICs U2, U15, U28, U30, and R30 or Z2. 1053 (DDE:FR ) A5 33.25 ohm reference fault Suspect components on the A5 assembly are relay driver IC U2 and resistor network Z2. 1054 (DDE:FR ) A5 100 ohm reference fault Suspect components on the A5 assembly are relay driver IC U2 and resistor network Z2.
- Page 108 5500A Service Manual 1066 (DDE:FR ) A7 Shunt amp fault (3.3 mA) Suspects include U6 and Z2 on the A7 assembly. 1067 (DDE:FR ) A7 Shunt amp fault (33 mA) Suspects include U6 and Z2 on the A7 assembly. 1068 (DDE:FR ) A7 Shunt amp fault (330 mA) Suspects include U6 and Z2 on the A7 assembly.
-
Page 109: Testing The Front Panel
Maintenance Diagnostic Testing 1083 (DDE:FR ) A7 Overcurrent fault +330 mA Suspects include K16, K17, R88, and R92 on the A7 assembly. 1080 (DDE:FR ) A7 Undercurrent fault -330 mA Suspects include R102, R105, Q2, Q8, and U13 on the A7 assembly. 1081 (DDE:FR ) A7 Overcurrent fault -330 mA Suspects include R102, R105, Q2, Q8, and U13 on the A7 assembly. -
Page 110: Internal Fuse Replacement
A3 Motherboard A3F1 to A3F10 806331 4-15. Complete List of Error Messages The following is a list of the 5500A Calibrator error messages. The error message format is shown in Table 4-2. Table 4-2. Error Message Format Error (Message Class :... - Page 111 Maintenance Complete List of Error Messages (DDE:FR D) Hardware relay trip occurred (DDE:FR D) Inguard got impatient (DDE:FR D) A/D fell asleep (DDE:FR D) Inguard watchdog timeout (DDE:FR D) 5725A ROM failure (DDE:FR D) 5725A RAM failure (DDE:FR D) 5725A EEPROM failure (DDE:FR D) 5725A data bus failure (DDE:FR D)
- Page 112 5500A Service Manual (DDE:FR Open thermocouple for RJ cal (DDE:FR D) Encoder not responding VERS (DDE:FR D) Encoder not responding COMM (DDE:FR D) Encoder not responding STAT (DDE:FR Encoder self-test failed (DDE:FR D) Queue from 5725A full (DDE:FR Message over display R side...
- Page 113 Maintenance Complete List of Error Messages (DDE: Can’t edit now (DDE: Can’t set trigger to that now (DDE: Can’t set output imp. now (DDE:FR Compensation is now OFF (DDE: Period must be >= 0 (DDE: A report is already printing (DDE: -SC option not installed (DDE:FR D)
- Page 114 5500A Service Manual 1325 (CME: R Bad hexadecimal block 1326 (CME: R Bad hexadecimal number 1328 (CME: R Bad octal number 1329 (CME: R Too many characters 1330 (CME: R Bad string 1331 (DDE: R OPER not allowed while error pending...
-
Page 115: List Of Replaceable Parts
Chapter 5 List of Replaceable Parts Title Page 5-1. Introduction................... 5-3 5-2. How to Obtain Parts................5-3 5-3. How to Contact Fluke ................5-3 5-4. Parts Lists....................5-4... - Page 116 5500A Service Manual...
-
Page 117: Introduction
Electrical components may be ordered directly from the manufacturer by using the manufacturers part number, or from the Fluke Corporation and its authorized representatives by using the part number under the heading FLUKE STOCK NO. To order components directly from Fluke Corporation, call (toll-free) 800-526-4731. Parts price information is available from the Fluke Corporation or its representatives. -
Page 118: Parts Lists
This instrument may contain a Nickel-Cadmium battery. Do not mix with the solid waste stream. Spent batteries should be disposed of by a qualified recycler or hazardous materials handler. Contact your authorized Fluke service center for recycling information. 5-4. Parts Lists... -
Page 119: Chassis Assembly
List of Replaceable Parts Parts Lists Table 5-1. Chassis Assembly Reference Fluke Stock Description Tot Qty Notes Designator MOTHERBOARD PCA 937375 SYNTHESIZED IMPEDANCE PCA 937388 DDS PCA 937391 CURRENT PCA 937396 A7A1 LOW CURRENT AMPLIFIER PCA 945332 VOLTAGE PCA 937404... - Page 120 5500A Service Manual 5500A (Final Assembly) (5 of 6) om018f.eps Figure 5-1. Chassis Assembly...
- Page 121 List of Replaceable Parts Parts Lists 5500A (A64) (4 of 6) om019f.eps Figure 5-1. Chassis Assembly (cont)
-
Page 122: Front Panel Assembly
5500A Service Manual Table 5-2. Front Panel Assembly Reference Fluke Stock Description Tot Qty Notes Designator KEYBOARD PCA 761049 ENCODER PCA 937370 TC BUTTON PCA 945308 TC CONNECTION PCA 945485 PRINT MATL,REGISTRATION,CAL PROD,ENG 944822 OPERATOR MANUAL 945159 H1-14 SCREW,PH,P,LOCK,STL,6-32,.250 152140 SCREW,CAP,SCKT,SS,8-32,.375... - Page 123 List of Replaceable Parts Parts Lists 5500A (A63) (2 of 6) om020f.eps Figure 5-2. Front Panel Assembly...
-
Page 124: Rear Panel Assembly
5500A Service Manual Table 5-3. Rear Panel Assembly Reference Fluke Stock Description Tot Qty Notes Designator CPU PCA 937409 BINDING HEAD, PLATED 102889 BINDING POST, STUD, PLATED 102707 FUSE,.25X1.25,2.5A,250V,SLOW 851931 F2, F3 FUSE,.25X1.25,1.25A,250V,SLOW 851936 FILTER,LINE,250VAC,4A,W/ENTRY MODULE 944269 FILTER,LINE,PART,VOLTAGE SELECTOR 944272... - Page 125 List of Replaceable Parts Parts Lists MP23 CPU PCA FL10 MP19 5500A (A65) MP17 MP18 (3 of 6) om021f.eps Figure 5-3. Rear Panel Assembly 5-11...
- Page 126 5500A Service Manual 5500A (Wiring Diagram) (6 of 6) om022f.eps Figure 5-4. Wiring Diagram 5-12...
-
Page 127: Oscilloscope Calibration Options
Chapter 6 Oscilloscope Calibration Options • Option 5500A-SC600: see page 6-3. • Option 5500A-SC300: see page 6-65. - Page 128 5500A Service Manual...
-
Page 129: Sc600 Option
Chapter 6 SC600 Option Title Page 6-1. Introduction................... 6-5 6-2. Maintenance..................6-5 6-3. SC600 Specifications................6-6 6-4. Volt Specifications ................6-6 6-5. Edge Specifications ................6-7 6-6. Leveled Sine Wave Specifications ........... 6-8 6-7. Time Marker Specifications ............. 6-9 6-8. Wave Generator Specifications ............ - Page 130 5500A Service Manual 6-36. Edge Amplitude Calibration............. 6-22 6-37. Leveled Sine Wave Amplitude Calibration........6-23 6-38. Leveled Sine Wave Flatness Calibration ......... 6-24 6-39. Low Frequency Calibration ............6-24 6-40. High Frequency Calibration............6-25 6-41. Pulse Width Calibration ..............6-25 6-42.
-
Page 131: Introduction
Table 6-15 under “Equipment Requirements for Calibration and Verification.” The calibration and verification procedures in this chapter are not the ones Fluke uses at the factory. These procedures have been developed to provide you with the ability to calibrate and verify the SC600 at your own site if necessary. -
Page 132: Sc600 Specifications
5500A Service Manual 6-3. SC600 Specifications These specifications apply only to the SC600 Option. General specifications that apply to the Calibrator Mainframe (hereafter termed the Calibrator) can be found in Chapter 1. The specifications are valid under the following conditions: •... -
Page 133: Edge Specifications
SC600 Option SC600 Specifications 6-5. Edge Specifications Table 6-2. Edge Specifications 1-Year Absolute Uncertainty, Edge Characteristics into 50 Ω Load tcal ± 5 °C ≤ 300 ps Rise Time (+0 ps / -100 ps) ± (2% of output + 200 µV) Amplitude Range (p-p) 5.0 mV to 2.5 V Resolution... -
Page 134: Leveled Sine Wave Specifications
5500A Service Manual 6-6. Leveled Sine Wave Specifications Table 6-3. Leveled Sine Wave Specifications Frequency Range Leveled Sine Wave Characteristics 50 kHz 50 kHz to 100 MHz to 300 MHz to into 50 Ω (reference) 100 MHz 300 MHz 600 MHz... -
Page 135: Time Marker Specifications
SC600 Option SC600 Specifications 6-7. Time Marker Specifications Table 6-4. Time Marker Specifications Time Marker 5 s to 50 ms 20 ms to 50 ns to 10 ns 5 ns to into 50 Ω 100 ns 20 ns 2 ns 1-Year Absolute ±(25 + t * 1000) ±... -
Page 136: Pulse Generator Specifications
5500A Service Manual 6-9. Pulse Generator Specifications Table 6-6. Pulse Generator Specifications Pulse Generator Characteristics Positive pulse into 50Ω Typical rise/fall times <1.5 ns Available Amplitudes 2.5 V, 1 V, 250 mV, 100 mV, 25 mV, 10 mV Pulse Width... -
Page 137: Trigger Signal Specifications (Edge Function)
SC600 Option SC600 Specifications 6-12. Trigger Signal Specifications (Edge Function) Table 6-9. Trigger Signal Specifications (Edge Function) Edge Signal Division Typical Amplitude Typical Rise Time Typical Lead Time Frequency Ratio into 50Ω (p-p) ≥ 1 V ≤ 2 ns 1 kHz to 10 MHz off/1 40 ns 6-13. -
Page 138: Overload Measurement Specifications
5500A Service Manual 6-17. Overload Measurement Specifications Table 6-14. Overload Measurement Specifications Source Typical ‘On’ current Typical ‘Off’ current Maximum Time Limit DC or Voltage indication indication AC (1 kHz) 5 V to 9 V 100 mA to 180 mA... -
Page 139: Time Marker Mode
SC600 Option Theory of Operation 6-22. Time Marker Mode There are 3 primary “ranges” of time marker operation: 5 s to 20 ms, 10 ms to 2 µs, and 1 µs to 2 ns. The 5 s to 20 ms markers are generated on the A6 DDS board and are passed to the A50 board. - Page 140 5500A Service Manual LF PWB 50Ω Time Mark II LF Mux. Analog Shaped 2 µs - 10 µs Time Mark III Oscilloscope Calibrator Pulse Shaped Trigger BNC 20 µs - 1 µs Trigger ÷1,10,100,1000 HF PWB Leveled Sine Wave SCOPE...
-
Page 141: Equipment Required For Calibration And Verification
Adapter BNC(f) to 3.5 mm(m) BNC Cable (supplied with SC600) Leveled Sine Wave Amplitude Calibration and Verification Range 5 mV p-p to 5.5 V p-p Fluke 5790A Measurement Standard Frequency 50 kHz Adapter Pomona #1269 BNC(f) to Double Banana Plug Feedthrough 50 Ω... - Page 142 5500A Service Manual Table 6-15. SC600 Calibration and Verification Equipment (cont.) Pulse Width Calibration and Verification High-Frequency Digital Tektronix 11801 with Tektronix SD- Storage Oscilloscope 22/26 sampling head Attenuator 3 dB, 3.5 mm (m/f) Adapter (2) BNC(f) to 3.5 mm(m)
-
Page 143: Sc600 Calibration Setup
SC600 at their own site if they are required to do so. It is strongly recommended that, if possible, you return your unit to Fluke for calibration and verification. The Calibrator Mainframe must be fully calibrated prior to performing any of the SC600 calibration procedures. -
Page 144: Calibration And Verification Of Square Wave Voltage Functions
5500A Service Manual The Calibrator Mainframe must complete a warm-up period and the SC600 must be enabled for at least 5 minutes prior to calibration to allow internal components to thermally stabilize. The Calibrator Mainframe warm-up period is at least twice the length of time the calibrator was powered off, up to a maximum of 30 minutes. -
Page 145: Voltage Hp3458A Settings
For this application, if making measurements of a signal > 1 kHz, the HP 3458A has been known to have .05% to .1% peaking. For these signals, lock the HP 3458A to the 1V range. HP 3458A (Front) 5500A-SC600 SC600 Cable 5500A CALIBRATOR 50 Ω... -
Page 146: Setup For Sc600 Edge And Wave Gen Square Wave Measurements
5500A Service Manual 6-32. Setup for SC600 Edge and Wave Gen Square Wave Measurements The setup to measure the topline and baseline of Edge and Wave Generator signals differs slightly from the Voltage Square Wave method described above. The HP 3458A is triggered by a change in input level instead of an external trigger. -
Page 147: Dc Voltage Calibration
SC600 Option Calibration and Verification of Square Wave Voltage Functions 6-33. DC Voltage Calibration This procedure uses the following equipment: • Hewlett-Packard 3458A Digital Multimeter • BNC(f) to Double Banana adapter • BNC cable supplied with the SC600 Note Calibrating DC Voltage requires AC Voltage calibration. Refer to Figure 6-3 for the proper setup connections. -
Page 148: Wave Generator Calibration
5500A Service Manual Note The Calibrator Mainframe will warn when the entered value is out of bounds. If this warning occurs recheck the setup and carefully re-enter the reading insuring proper multiplier (i.e., m, u, n, p). If the warning still occurs, repair may be necessary. -
Page 149: Leveled Sine Wave Amplitude Calibration
SC600 Option Calibration and Verification of Square Wave Voltage Functions measurements at each step. Note that in the EDGE function, the topline is very near 0 V, and the baseline is a negative voltage. 3. For each calibration step, take samples for at least two seconds, using the HP 3458A MATH functions to enter the average or mean value. -
Page 150: Leveled Sine Wave Flatness Calibration
5500A Service Manual 5500A CALIBRATOR 5790A AC MEASUREMENT STANDARD NORMAL SCOPE INPUT 1 INPUT 2 -SENSE, 200V PK PREV 1000V RMS MAX 1000V RMS MAX INPUT1 INPUT1 INPUT1 SHUNT INPUT1 AUX V STBY SHELL FLOATING EARTH SCOPE BOOST MENU VIEW UTIL 2.2 mV... -
Page 151: High Frequency Calibration
SC600 Option Calibration and Verification of Square Wave Voltage Functions 6-40. High Frequency Calibration Connect the Calibrator Mainframe SCOPE connector to the power meter and power sensor as described under “Equipment Setup for High Frequency Flatness”. Follow these steps to calibrate high frequency Leveled Sine Wave flatness for the amplitude being calibrated. -
Page 152: Measz Calibration
BNC cable supplied with the SC600. The resistance and capacitance values must be known at this BNC(f) connector. Fluke uses an HP 3458A DMM to make a 4-wire ohms measurement at the BNC(f) connector to determine the actual resistance values and an HP 4192A Impedance Analyzer at 10 MHz to determine the actual capacitance value. - Page 153 SC600 Option Calibration and Verification of Square Wave Voltage Functions 5500A-SC600 5500A CALIBRATOR SC600 BNC(F) Cable NORMAL AUX SCOPE 200V PK -SENSE, AUX V 1000V TRIG 1V PK 20V PK 20V PK om056f.eps Figure 6-5. MeasZ Function Calibration Setup Set the Calibrator Mainframe in Scope Cal mode at the prompt to connect a 50Ω resistor.
-
Page 154: Verification
The procedures in this manual have been developed to provide users the ability to verify the SC600 at their own site if they are required to do so. Fluke strongly recommends that, if possible, you return your unit to Fluke for calibration and verification. -
Page 155: Dc Voltage Verification
SC600 Option Verification 6-44. DC Voltage Verification This procedure uses the following equipment: • Hewlett-Packard 3458A Digital Multimeter • BNC(f) to Double Banana adapter • 50 Ω feedthrough termination • BNC cable supplied with the SC600 For DC voltage verification, refer to Figure 6-3 for the proper setup connections. Set the Calibrator Mainframe to SCOPE mode, with the Volt menu on the display. - Page 156 5500A Service Manual Table 6-19. DC Voltage Verification at 1 MΩ Calibrator Mainframe output HP 3458A Reading (V DC) Tolerance (V DC) 0 mV 0.00004 V 1.25 mV 4.063E-05 V -1.25 mV 4.063E-05 V 2.49 mV 4.125E-05 V -2.49 mV 4.125E-05 V...
-
Page 157: Ac Voltage Amplitude Verification
SC600 Option Verification Table 6-20. DC Voltage Verification at 50Ω Calibrator Mainframe HP 3458A Rdg (V DC) Tolerance (V DC) Reading x correction output 0 mV 0.00004 V 2.49 mV 4.623E-05 V -2.49 mV 4.623E-05 V 9.90 mV 6.475E-05 V -9.90 mV 6.475E-05 V 24.9 mV... - Page 158 5500A Service Manual 1. When making measurements at 1 kHz, set the HP 3458A to DCV, NPLC = .01, TRIG EXT, and the DELAY to .0007 for measuring the topline of the wave form, and the DELAY to .0012 for measuring the baseline of the wave form. Manually lock the HP 3458A to the range that gives the most resolution for the topline measurements.
-
Page 159: Verification At 50 Ω
SC600 Option Verification 6-49. Verification at 50 Ω For the 50 Ω verification, connect the Calibrator Mainframe’s SCOPE connector to the HP 3458A input, using the cable supplied with the Calibrator Mainframe, the external 50 Ω termination, and the BNC(f) to Double Banana adapter. (The 50 Ω termination is closest to the HP 3458A input.) Connect the Calibrator Mainframe TRIG OUT connector to the HP 3458A Ext Trig connector located on the rear of that instrument. -
Page 160: Ac Voltage Frequency Verification
5500A Service Manual 6-50. AC Voltage Frequency Verification This procedure uses the following equipment: • PM 6680 Frequency Counter with an ovenized timebase (Option PM 9690 or PM 9691) • BNC cable supplied with the SC600 5500A-SC600 5500A CALIBRATOR SC600 Cable... -
Page 161: Edge Amplitude Verification
SC600 Option Verification 6-51. Edge Amplitude Verification For the Edge Amplitude verification, connect the Calibrator Mainframe’s SCOPE connector to the HP 3458A input, using the cable supplied with the Calibrator Mainframe, the external 50 Ω termination, and the BNC(f) to Double Banana adapter. (The 50 Ω... -
Page 162: Edge Duty Cycle Verification
5500A Service Manual • BNC cable supplied with the SC600 Refer to Figure 6-6 for proper setup connections. Set the Calibrator Mainframe to SCOPE mode, with the Edge menu on the display. Press O on the Calibrator Mainframe to activate the output. Then follow these steps to verify Edge frequency. - Page 163 DSO’s sampling head through the 3 dB attenuator. Using the second BNC(f) to 3.5 mm(m) adapter and BNC cable, connect the Calibrator Mainframe’s TRIG OUT connector to the 11801’s Trigger Input. Refer to Figure 6-7. 5500A-SC600 Tek 11801 With 5D26 Sampling Head...
-
Page 164: Edge Abberation Verification
• Output cable provided with the SC600 Before you begin this procedure, verify that the 5500A-SC600 is in the edge mode (the Edge menu is displayed), and program it to output 1 V p-p @ 1 MHz. Press O to activate the output. -
Page 165: Tunnel Diode Pulser Drive Amplitude Verification
SC600 Option Verification Connect the Calibrator Mainframe to the oscilloscope refering to Figure 6-7. Set the oscilloscope vertical to 10 mV/div and horizontal to 1 ns/div. Set the oscilloscope to look at the 90% point of the edge signal; use this point as the reference level. Set the oscilloscope to look at the first 10 ns of the edge signal with the rising edge at the left edge of the oscilloscope display. -
Page 166: Leveled Sine Wave Amplitude Verification
5500A Service Manual 6-57. Leveled Sine Wave Amplitude Verification This procedure uses the following equipment: • 5790A AC Measurement Standard • BNC(f) to Double Banana Plug adapter • 50Ω feedthrough termination • BNC cable supplied with the SC600 Refer to Figure 6-17 for the proper setup connections. -
Page 167: Leveled Sine Wave Frequency Verification
SC600 Option Verification 6-58. Leveled Sine Wave Frequency Verification This procedure uses the following equipment: • PM 6680 Frequency Counter with a prescaler for the Channel C input (Option PM 9621, PM 9624, or PM 9625) and ovenized timebase (Option PM 9690 or PM 9691) •... -
Page 168: Leveled Sine Wave Harmonics Verification
5500A Service Manual 6-59. Leveled Sine Wave Harmonics Verification This procedure uses the following equipment: • Hewlett-Packard 8590A Spectrum Analyzer • BNC(f) to Type N(m) adapter • BNC cable supplied with the SC600 Refer to Figure 6-9 for proper setup connections. -
Page 169: Leveled Sine Wave Harmonics Verification
SC600 Option Verification Table 6-31. Leveled Sine Wave Harmonics Verification Calibrator Mainframe Output Frequency Harmonic HP 8590A Reading (dB) Tolerance (@ 5.5 V p-p) 50 kHz -33 dB 50 kHz 3, 4, 5 -46 dB 100 kHz -33 dB 100 kHz 3, 4, 5 -38 dB 200 kHz... -
Page 170: Leveled Sine Wave Flatness Verification
5500A Service Manual 6-60. Leveled Sine Wave Flatness Verification Leveled Sine Wave flatness verification is divided into two frequency bands: 50 kHz to 10 MHz (low frequency) and >10 MHz to 600 MHz (high frequency). The equipment setups are different for each band. Leveled Sine Wave flatness is measured relative to 50 kHz. - Page 171 RESOLN 3 • AUTO FILTER • WATTS • SENSOR TABLE 0 (default) om035f.eps Figure 6-11. Connecting the HP E4418A Power Meter to the HP 8482A or 8481D Power Sensor 5500A CALIBRATOR NORMAL SCOPE -SENSE, 200V PK PREV AUX V STBY...
-
Page 172: Low Frequency Verification
5500A Service Manual 6-63. Low Frequency Verification This procedure provides an example of testing low frequency flatness using a 5.5 V output. Follow the same procedure for testing other amplitudes, only compare results against the flatness specification listed in Table 6-32. -
Page 173: High Frequency Flatness Verification At 5.5 V
SC600 Option Verification 3. Enter 10 MHz into the Calibrator Mainframe. Allow the power meter reading to stabilize, then enter the power meter’s reading in Column B of Table 6-33. 4. Enter the next frequency listed in Table 6-33. Allow the power meter’s reading to stabilize, then enter the reading into Column A of the table. -
Page 174: High Frequency Flatness Verification At 7.5 Mv
5500A Service Manual Table 6-34. High Frequency Flatness Verification at 7.5 mV Calibrator Calibrator Mainframe Mainframe Flatness Spec. (%) Freq. (MHz) 10 MHz ±1.50 ±1.50 ±2.00 ±2.00 ±4.00 ±4.00 ±4.00 ±4.00 ±4.00 ±4.00 ±4.00 ±4.00 Complete Columns A-E as follows: Enter the E4418A present frequency Reading (W). -
Page 175: High Frequency Flatness Verification At 70 Mv
SC600 Option Verification Table 6-36. High Frequency Flatness Verification at 70 mV Calibrator Calibrator Mainframe Mainframe Flatness Spec. (%) Freq. (MHz) 10 MHz ±1.50 ±1.50 ±2.00 ±2.00 ±4.00 ±4.00 ±4.00 ±4.00 ±4.00 ±4.00 ±4.00 ±4.00 Complete Columns A-E as follows: Enter the E4418A present frequency Reading (W). -
Page 176: High Frequency Flatness Verification At 800 Mv
5500A Service Manual Table 6-38. High Frequency Flatness Verification at 800 mV Calibrator Calibrator Mainframe Mainframe Flatness Spec. (%) Freq. (MHz) 10 MHz ±1.50 ±1.50 ±2.00 ±2.00 ±4.00 ±4.00 ±4.00 ±4.00 ±4.00 ±4.00 ±4.00 ±4.00 Complete Columns A-E as follows: Enter the E4418A present frequency Reading (W). -
Page 177: Time Marker Verification
SC600 Option Verification 6-65. Time Marker Verification This procedure uses the following equipment: • PM 6680 Frequency Counter with a prescaler for the Channel C input (Option PM 9621, PM 9624, or PM 9625) and ovenized timebase (Option PM 9690 or PM 9691) •... -
Page 178: Wave Generator Verification
5500A Service Manual 6-66. Wave Generator Verification This procedure uses the following equipment: • 5790A AC Measurement Standard • BNC(f) to Double Banana adapter • 50 Ω feedthrough termination • BNC cable supplied with the Calibrator Mainframe 5500A-SC600 5500A CALIBRATOR... -
Page 179: Verification At 50 Ω
SC600 Option Verification 5. Multiply the rms reading by the conversion factor listed to convert it to the peak-to- peak value. Compare result to the tolerance column. 6-68. Verification at 50 Ω Set the Calibrator Mainframe impedance to 50Ω (The blue softkey under SCOPE Z toggles the impedance between 50Ω... - Page 180 5500A Service Manual Table 6-41. Wave Generator Verification at 1 MΩ Calibrator Calibrator 5790A Conversion 5790A Reading x Tolerance Mainframe Mainframe Reading Factor Conversion Factor (V p-p) Wave Type output (V rms) (V p-p) (@ 10 kHz) square 1.8 mV 2.0000...
- Page 181 SC600 Option Verification Table 6-42. Wave Generator Verification at 50 Ω Calibrator Calibrator 5790A 5790A Rdg x Mainframe Mainframe Reading Conversion Conversion Tolerance V p-p value x Wave output (V rms) Factor Factor (V p-p) (V p-p) correction Type (10 kHz) square 1.8 mV 2.0000...
-
Page 182: Pulse Width Verification
5500A Service Manual 6-69. Pulse Width Verification The following equipment is used to verify the pulse width. • High Frequency Digital Storage Oscilloscope: Tektronix 11801 with Tektronix SD- 22/26 sampling head • 3 dB attenuator, 3.5 mm (m/f) • BNC(f) to 3.5 mm(m) adapter (2) •... -
Page 183: Pulse Period Verification
BNC cable supplied with the SC600. The resistance values must be known at this BNC(f) connector. Fluke uses an HP 3458A DMM to make a 4-wire ohms measurement at the BNC(f) connector to determine the actual resistance values. -
Page 184: Measz Capacitance Verification
BNC(f) connector. The capacitance values must be determined at a 10 MHz oscillator frequency. Fluke uses an HP 4192A Impedance Analyzer at 10 MHz to determine the actual capacitance values. -
Page 185: Overload Function Verification
6-73. Overload Function Verification This procedure uses the following equipment: • 50 Ω feedthrough termination • BNC cable supplied with the Calibrator Mainframe Refer to Figure 6-14 for setup connections. 5500A-SC600 5500A CALIBRATOR SC600 Cable SCOPE NORMAL AUX 200V PK... -
Page 186: Sc600 Hardware Adjustments
5500A Service Manual Set the Calibrator Mainframe to SCOPE mode, with the Overload menu on the display. Connect the BNC cable to the Calibrator Mainframe SCOPE connector. Then follow these steps to verify the overload function. 1. Connect the 50 Ω feedthrough termination to the end of the BNC cable. -
Page 187: Equipment Setup
SC600 Option SC600 Hardware Adjustments 6-77. Equipment Setup This procedure uses the spectrum analyzer. Before you begin this procedure, verify that the Calibrator Mainframe is in leveled sine wave mode (the Levsine menu is displayed), and program it to output 5.5 V p-p @ 600 MHz. Press O to activate the output. Refer to Figure 6-9 for setup connections and connect the Calibrator Mainframe to the Spectrum Analyzer. -
Page 188: Adjusting The Leveled Sine Wave Harmonics
5500A Service Manual 6-79. Adjusting the Leveled Sine Wave Harmonics The following procedure adjusts the harmonics for the leveled sine wave function. Note This procedure should only be used for adjusting the leveled sine wave harmonics. Do not use this procedure as a verification test. The specifications in this procedure are not valid for verification. -
Page 189: Equipment Setup
Note To verify the edge aberrations back to national standards, you should send your Calibrator Mainframe to Fluke, or other facility that has established traceability for aberrations. Fluke, for example, has a reference pulse that is sent to the National Institute of Standards and Technology (NIST) for characterization. - Page 190 5500A Service Manual 11. Set the oscilloscope vertical to 5 mV/div. Check the aberrations. 12. Check for rise time <300 ps at 250 mV, 1 V, and 2.5 V outputs. 1st Aberration 2nd Aberration 3rd Aberration om050f.eps Figure 6-17. Adjusting Edge Aberrations...
-
Page 191: Sc300 Option
Chapter 6 SC300 Option Title Page 6-83. Introduction................... 6-67 6-84. Maintenance..................6-67 6-85. SC300 Specifications................6-68 6-86. Voltage Function Specifications ............6-68 6-87. Edge Function Specifications............6-69 6-88. Leveled Sine Wave Function Specifications........6-70 6-89. Time Marker Function Specifications..........6-71 6-90. - Page 192 Adjusting the Aberrations for the Edge Function ......6-117 6-151. Equipment Setup ................6-117 6-152. Adjusting the Edge Aberrations for Board 5500A-4004-1 ..6-118 6-153. Adjusting the Edge Aberrations for Board 5500A-4004 ..... 6-120 6-154. Adjusting the Rise Time for the Edge Function....... 6-122 6-155.
-
Page 193: Introduction
Table 6-41 under “Equipment Required for Calibration and Verification.” The calibration and verification procedures in this chapter are not the ones Fluke uses at the factory. These procedures have been developed to provide you with the ability to calibrate and verify the SC300 at your own site if necessary. -
Page 194: Sc300 Specifications
Calibrator Mainframe’s frequency output to accommodate for this waveform. For example, the Fluke ScopeMeter® has a calibration point at 1 kHz (1 ms), 100 V, peak-to-peak. To output a period of 1 ms at 100 V peak-to-peak, use a frequency of 356 Hz. -
Page 195: Edge Function Specifications
SC300 Option SC300 Specifications 6-87. Edge Function Specifications 1-Year Absolute Uncertainty, Edge Characteristics into 50 Ω tcal ± 5 °C Amplitude ± (2% of output + 200 µV) Range (p-p) 4.5 mV to 2.75 V Resolution 4 digits ± 10% around each sequence Adjustment Range value (indicated below) Sequence... -
Page 196: Leveled Sine Wave Function Specifications
5500A Service Manual 6-88. Leveled Sine Wave Function Specifications Frequency Range Leveled Sine Wave Characteristics into 50 kHz Reference 50 kHz to 100 MHz 100 to 300 MHz [1] 50 Ω Amplitude Characteristics Range (p-p) 5 mV to 5.5 V Resolution <... -
Page 197: Time Marker Function Specifications
SC300 Option SC300 Specifications 6-89. Time Marker Function Specifications Time Marker into 5s to 100 µs 50 µs to 2 µs 1 µs to 20 ns 10 ns to 2 ns 50 Ω ±(25 + t*1000) ±(25 + t* 15,000) ±... -
Page 198: Trigger Signal Specifications For The Time Marker Function
5500A Service Manual 6-91. Trigger Signal Specifications for the Time Marker Function Time Marker Amplitude into Typical Rise Time Division Ratio [1] 50 Ω (p-p) Period ≥ 1 V ≤ 2 ns 5 to 50 ms off/1 ≥ 1 V ≤... -
Page 199: Wave Generator Mode
SC300 Option Theory of Operation The 5 s to 50 ms markers are generated on the A6 DDS board and are passed to the A50 board. The signal path is also split to drive the external trigger circuitry on the A50 board. - Page 200 5500A Service Manual LF PWB 50Ω Time Mark II LF Mux. Analog Shaped 2 µs - 10 µs Time Mark III Oscilloscope Calibrator Pulse Shaped 20 µs - 1 µs Trigger BNC Trigger ÷1,10,100,1000 HF PWB SCOPE Leveled Sine Wave...
-
Page 201: Equipment Required For Calibration And Verification
Adapter BNC(f) to 3.5 mm(m) BNC Cable (supplied with SC300) Leveled Sine Wave Amplitude Calibration and Verification Range 5 mV p-p to 5.5 V p-p Fluke 5790A Measurement Standard Frequency 50 kHz Adapter Pomona #1269 BNC(f) to Double Banana Plug Feedthrough 50 Ω... - Page 202 5500A Service Manual Table 6-41. SC300 Calibration and Verification Equipment (cont.) Instrument Model Minimum Use Specifications Leveled Sine Wave Frequency Verification Frequency PM 6680 with option (PM 9621, PM 9624, or 50 kHz to 350 MHz, < 1.6 ppm Counter...
-
Page 203: Sc300 Calibration Setup
SC300 at their own site if they are required to do so. It is strongly recommended that, if possible, you return your unit to Fluke for calibration and verification. The unit should be returned with its cable. The Calibrator Mainframe must be fully calibrated prior to performing any of the SC300 calibration procedures. -
Page 204: Calibration And Verification Of Square Wave Functions
5500A Service Manual The Calibrator Mainframe first prompts the user to calibrate the DC Voltage function. If another function is to be calibrated, alternately press the OPTIONS and NEXT SECTION blue softkeys until the desired function is reached. 6-101. Calibration and Verification of Square Wave Functions The AC Voltage and Edge functions have square wave voltages that need to be calibrated and verified. -
Page 205: Dc Voltage Calibration
SC300 Option Calibration and Verification of Square Wave Functions HP 3458A 5500A-SC300 SC300 Cable 5500A CALIBRATOR SCOPE 50 Ω Feedthrough NORMAL AUX 200V PK -SENSE, AUX V Termination 1000V BNC(F) to TRIG Double Banana 1V PK 20V PK Adapter 20V PK om062f.eps... -
Page 206: Ac Square Wave Voltage Calibration
5500A Service Manual 4. Ensure the HP 3458A reading is 0.0 V DC ± 100 µV. 5. Press the GO ON blue softkey. 6. Calibration voltages 33 V and greater will automatically put the Calibrator Mainframe output in standby. When this occurs, press O on the Calibrator Mainframe to activate the output. -
Page 207: Edge Amplitude Calibration
SC300 Option Calibration and Verification of Square Wave Functions Note The Calibrator Mainframe will warn when the entered value is out of bounds. If this warning occurs recheck the setup and carefully re-enter the reading insuring proper multiplier (i.e., m, u, n, p). If the warning still occurs, repair may be necessary. -
Page 208: Leveled Sine Wave Flatness Calibration
5500A Service Manual 1. Connect the BNC cable to the Calibrator Mainframe’s SCOPE connector. Connect the other end of the BNC cable to the 50 Ω feedthrough termination then to the 5790A INPUT 2 using the BNC(f) to Double Banana adapter. -
Page 209: Low Frequency Calibration
SC300 Option Calibration and Verification of Square Wave Functions low frequency band, then the high frequency band for the second amplitude, and so on, until the flatness calibration is complete. Press the OPTIONS and NEXT SECTION blue softkeys until the display reads “Set up to measure leveled sine flatness”. -
Page 210: Verification
The procedures in this manual have been developed to provide users the ability to verify the SC300 at their own site if they are required to do so. Fluke strongly recommends that, if possible, you return your unit to Fluke for calibration and verification. -
Page 211: Dc Voltage Verification At 1 Mω
SC300 Option Verification Make sure the Calibrator Mainframe impedance is set to 50 Ω (The blue softkey under Output Z toggles the impedance between 50 Ω and 1 MΩ). 1. Set the HP 3458A to DCV, Auto Range, NPLC = 10, FIXEDZ = on. 2. -
Page 212: Dc Voltage Verification At 50 Ω
5500A Service Manual Table 6-50. DC Voltage Verification at 50 Ω Nominal Value (dc) Measured Value (dc) Deviation (mV) 1-Year Spec. (mV) 0.0 mV 0.10 5.0 mV 0.11 -5.0 mV 0.11 10.0 mV 0.12 -10.0 mV 0.12 22.0 mV 0.15 -22.0 mV... -
Page 213: Ac Voltage Amplitude Verification
SC300 Option Verification 6-115. AC Voltage Amplitude Verification This procedure uses the following equipment: • Hewlett-Packard 3458A Digital Multimeter • BNC(f) to Double Banana adapter • 50 Ω feedthrough termination (as required) • BNC cable supplied with the SC300 For ac voltage amplitude verification, refer to Figure 6-19 for the proper setup connections. - Page 214 5500A Service Manual Table 6-51. AC Voltage Verification at 1 MΩ Nominal Value (p-p) Frequency Measured Value (p-p) Deviation (mV) 1-Year Spec. (mV) 5.0 mV 10 Hz 0.11 5.0 mV 100 Hz 0.11 5.0 mV 1 kHz 0.11 5.0 mV 5 kHz 0.11...
-
Page 215: Verification At 50 Ω
SC300 Option Verification 6-117. Verification at 50 Ω For the 50 Ω verification, connect the Calibrator Mainframe’s SCOPE connector to the HP 3458A input, using the cable supplied with the Calibrator Mainframe, the external 50 Ω termination, and the BNC(f) to Double Banana adapter. (The 50 Ω termination is closest to the HP 3458A input.) Make sure the Calibrator Mainframe impedance is set to 50 Ω. -
Page 216: Ac Voltage Frequency Verification
5500A Service Manual Table 6-46. AC Voltage Verification at 50 Ω (cont.) Nominal Value Frequency Measured Value Deviation 1-Year Spec. (p-p) (p-p) (mV) (mV) 500.0 mV 10 kHz 1.35 1.0 V 100 Hz 2.60 1.0 V 1 kHz 2.60 1.0 V 10 kHz 2.60... -
Page 217: Edge Amplitude Verification
SC300 Option Verification 1. Set the PM 6680’s FUNCTION to measure frequency on channel A with auto trigger, measurement time set to 1 second or longer, 1MΩ impedance, and filter off. 2. Using the BNC cable, connect the SCOPE connector on the Calibrator Mainframe to PM 6680 channel A. -
Page 218: Edge Frequency Verification
5500A Service Manual Table 6-54. Edge Amplification Verification Peak-to- Calibrator HP 3458A Topline Baseline Peak-to- Peak x Tolerance Mainframe Edge Range Reading Reading Peak Correction (±V) Output 100 mV, 1 kHz 100 mV dc 0.0022 1.00V, 1 kHz 1 V dc 0.0202... -
Page 219: Edge Duty Cycle Verification
SC300 Option Verification 6-121. Edge Duty Cycle Verification This procedure uses the following equipment: • PM 6680 Frequency Counter • BNC cable supplied with the SC300 Refer to Figure 6-21 for proper setup connections. Set the Calibrator Mainframe to SCOPE mode, with the Edge menu on the display. Press O on the Calibrator Mainframe to activate the output. - Page 220 5500A Service Manual 5500A-SC300 Tek 11801 With 5D26 Sampling Head 5500A CALIBRATOR SC300 Cable 3 dB Attenaator 3.5 mm (m/f) SCOPE NORMAL AUX 200V PK -SENSE, AUX V 1000V TRIG 1V PK 20V PK 20V PK BNC(F) to 3.5 mm (m) Adapter om064f.eps...
-
Page 221: Edge Abberation Verification
SC300 Option Verification Rise time measures between these two points om033i.eps Figure 6-23. Edge Rise Time Table 6-56. Edge Rise Time Verification Vertical Calibrator Mainframe Output Axis 11801 Corrected Voltage Frequency (mV/div) Reading Reading Tolerance 250 mV 1 MHz 20.0 <... -
Page 222: Leveled Sine Wave Reference Verification
5500A Service Manual Table 6-57. Edge Aberrations Time from 50% of Rising Edge Typical Edge Aberrations 0 - 10 ns < 22 mV (2.2%) 10 - 30 ns < 12 mV (1.2%) > 30 ns < 7 mV (0.7%) 6-124. Leveled Sine Wave Reference Verification This procedure uses the following equipment: •... -
Page 223: Leveled Sine Wave Frequency Verification
SC300 Option Verification Table 6-58. Leveled Sine Wave Amplitude Verification Calibrator 5790A Reading 5790A Reading x 2.8284 Tolerance Mainframe (V rms) (V p-p) (V p-p) output (@ 50 kHz) 5.0 mV 0.4 mV 10.0 mV 0.5 mV 20.0 mV 0.7 mV 40.0 mV 1.1 mV 50.0 mV... -
Page 224: Leveled Sine Wave Harmonics Verification
5500A Service Manual Table 6-59. Leveled Sine Wave Frequency Verification Calibrator Mainframe PM 6680 Settings PM 6680 Reading Tolerance Frequency (output @ 5.5 V p-p) Channel Filter (Frequency) 50 kHz 1.25 Hz 500 kHz 12.5 Hz 5 MHz 125.0 Hz... -
Page 225: Leveled Sine Wave Harmonics Verification
SC300 Option Verification 3. Set HP 8590A start frequency to the Calibrator Mainframe output frequency. Set HP 8590A stop frequency to 10 times the Calibrator Mainframe output frequency. Set the HP 8590A reference level at +19 dBm. 4. Record the harmonic level reading for each frequency and harmonic listed in Table 6-60. -
Page 226: Leveled Sine Wave Flatness Verification
5500A Service Manual 6-127. Leveled Sine Wave Flatness Verification Leveled Sine Wave flatness verification is divided into two frequency bands: 50 kHz to 10 MHz (low frequency) and > 10 MHz to 300 MHz (high frequency). The equipment setups are different for each band. Leveled Sine Wave flatness is measured relative to 50 kHz. - Page 227 RESOLN 3 • AUTO FILTER • WATTS • SENSOR TABLE 0 (default) OM035f.eps Figure 6-26. Connecting the HP E4418A Power Meter to the HP 8482A or 8481D Power Sensor 5500A CALIBRATOR NORMAL SCOPE -SENSE, 200V PK PREV AUX V STBY...
-
Page 228: Low Frequency Verification
5500A Service Manual 6-130. Low Frequency Verification This procedure provides an example of testing low frequency flatness using a 5.5 V output. Follow the same procedure for testing other amplitudes, only compare results against the flatness specification listed in Table 6-61. -
Page 229: High Frequency Flatness Verification At 5.5 V
SC300 Option Verification 3. Enter 10 MHz into the Calibrator Mainframe. Allow the power meter reading to stabilize, then enter the power meter’s reading in Column B of Table 6-62. 4. Enter the next frequency listed in Table 6-62. Allow the power meter’s reading to stabilize, then enter the reading into Column A of the table. -
Page 230: High Frequency Flatness Verification At 7.5 Mv
5500A Service Manual Table 6-63. High Frequency Flatness Verification at 7.5 mV Calibrator Mainframe Calibrator Mainframe Freq. (MHz) 10 MHz Flatness Spec. (%) ± 1.50 +100 µV ± 1.50 +100 µV ± 1.50 +100 µV ± 2.00 + 100 µV ±... -
Page 231: High Frequency Flatness Verification At 70 Mv
SC300 Option Verification Table 6-65. High Frequency Flatness Verification at 70 mV Calibrator Mainframe Calibrator Mainframe Freq. (MHz) 10 MHz Flatness Spec. (%) ± 1.50 +100 µV ± 1.50 +100 µV ± 1.50 +100 µV ± 2.00 + 100 µV ±... -
Page 232: High Frequency Flatness Verification At 800 Mv
5500A Service Manual Table 6-67. High Frequency Flatness Verification at 800 mV Calibrator Mainframe Calibrator Mainframe Freq. (MHz) 10 MHz Flatness Spec. (%) ± 1.50 +100 µV ± 1.50 +100 µV ± 1.50 +100 µV ± 2.00 + 100 µV ±... -
Page 233: Time Marker Verification
SC300 Option Verification 6-132. Time Marker Verification This procedure uses the following equipment: • PM 6680 Frequency Counter with a prescaler for the Channel C input (Option PM 9621, PM 9624, or PM 9625) and ovenized timebase (Option PM 9690 or PM 9691) •... -
Page 234: Wave Generator Verification
5500A Service Manual Table 6-69. Time Marker Verification Calibrator PM 6680Settings PM 6680 Reading PM 6680 Reading Mainframe Tolerance Channel Filter (Frequency) (Period) Period 4.979 s 24.91E-3 s 2.002 s 4.06E-3 s 50.0 ms 3.75E-6 s 20.0 ms 900E-09 s 10.0.ms... -
Page 235: Verification At 1 Mω
SC300 Option Verification 5500A-SC300 5500A CALIBRATOR SC300 Cable SCOPE NORMAL AUX 200V PK -SENSE, AUX V 1000V TRIG 1V PK 20V PK 50 Ω BNC (F) to 20V PK Double Banana Feed Through Adapter Termination om065f.eps Figure 6-28. Wave Generator Verification Setup Set the Calibrator Mainframe to SCOPE mode, with the Wavegen menu on the display. - Page 236 5500A Service Manual 4. Program the Calibrator Mainframe to output the wave type and voltage listed in Table 6-71. 5. Allow the 5790A reading to stabilize, then record the 5790A rms reading for each wave type and voltage in Table 6-71.
-
Page 237: Sc300 Hardware Adjustments
SC300 Option SC300 Hardware Adjustments Table 6-71. Wave Generator Verification at 50 Ω Calibrator Calibrator Mainframe Mainframe 5790A Conversion 5790A Reading x Tolerance Wave Type output Reading Factor Conversion Factor (V p-p) (@ 10 kHz) (V rms) (V p-p) 250.00 µV square 5.0 mV 2.0000... -
Page 238: Equipment Required
5500A Service Manual 6-137. Equipment Required The following equipment is necessary for performing the hardware adjustments described in this section. The models listed are recommended for providing accurate results. • Standard adjustment tool for adjusting the pots and trimmer caps •... -
Page 239: Adjusting The Aberrations For The Edge Function
SC300 Option SC300 Hardware Adjustments harmonic is greater than or equal to –34dBc The second harmonic will fluctuate, but there is a point at which both harmonics will be at the correct decibel level. -34 dBc -39 dBc 3rd harmonic 2nd harmonic yg127f.eps Figure 6-29. - Page 240 5500A Service Manual 5. Readjust A90R36 to center the first two aberrations about reference level. 6. Readjust A90R13 if necessary to keep the edge signal at 10 ns to be at the reference level. 7. Readjust A90R36 ,A90R35 or A90R12 to obtain equal amplitudes of the aberrations displayed during the first 10 ns to be equally above and below the reference level.
-
Page 241: Sc300 Hardware Adjustments For The A4 Board
SC300 Option SC300 Hardware Adjustments for the A4 Board 6-144. SC300 Hardware Adjustments for the A4 Board Hardware adjustments must be made to the leveled sine and edge functions each time the SC300 is repaired. In addition to the adjustment procedures, this section provides lists of the required equipment and some recommendations on models that have the capabilities required by these procedures. -
Page 242: Adjusting The Leveled Sine Wave Harmonics
5500A Service Manual 3. You need to adjust the wave until the spur disappears. To do this, slowly rotate R44 (shown in the diagram) counterclockwise until the spur just disappears. As you adjust it, the spur will move down the waveform, towards the right. As soon as the spur is gone, stop rotating R44. -
Page 243: Adjusting The Aberrations For The Edge Function
Note To verify the edge aberrations back to national standards, you should send your Calibrator Mainframe to Fluke, or other facility that has established traceability for aberrations. Fluke, for example, has a reference pulse that is sent to the National Institute of Standards and Technology (NIST) for characterization. -
Page 244: Adjusting The Edge Aberrations For Board 5500A-4004-1
6-152. Adjusting the Edge Aberrations for Board 5500A-4004-1 Follow this procedure only if you have Board 5500A-4004-1 (Fluke PN 600749). 1. Adjust the dc offset on the 11801B so the last 500 ns of the peak of the square wave is on the center line. - Page 245 SC300 Option SC300 Hardware Adjustments for the A4 Board Waveform moves as R168 is adjusted R168 Adjusted waveform om039f.eps Figure 6-33. Adjusting the Wave Peak Center with R168 R168 10 ns om040f.eps Figure 6-34. Adjusting Base of Peak with R57 6-119...
-
Page 246: Adjusting The Edge Aberrations For Board 5500A-4004
6-153. Adjusting the Edge Aberrations for Board 5500A-4004 Follow this procedure only if you have Board 5500A-4004 (Fluke PN 937383). 1. Adjust the dc offset on the 11801B so the peak of the square wave is on the center line. - Page 247 SC300 Option SC300 Hardware Adjustments for the A4 Board Typically this board shows aberrations of 1%. Note Aberration adjustments are interactive with rise time adjustments. When you have completed this aberration adjustment, verify the edge rise time to ensure that it remains within tolerance. If it does not, repeat the aberration and rise time adjustments until you achieve the best compromise, within the listed tolerance levels.
-
Page 248: Adjusting The Rise Time For The Edge Function
5500A Service Manual 6-154. Adjusting the Rise Time for the Edge Function This procedure adjusts the edge rise time, and must be performed after repair. Both boards use the same procedure to adjust the rise time. 6-155. Equipment Setup Before you start this procedure, program the Calibrator Mainframe to output 250 mV p- p @ 100 kHz. -
Page 249: Index
Index Capacitance, four-wire comp, 3-14 DC current, 3-7 —5— DC volts, 3-5 5500A phase specifications, 1-21 Frequency, 3-14 How the procedure works, 3-4 —A— NORM volts and AUX current phase, 3-15 NORM volts and AUX volts phase, 3-15 AC current (non-sinewave) specifications, 1-30... - Page 250 Overload Function Specifications, 6-12 —F— —P— Frequency specifications, 1-24 Fuses, internal, 4-14 Performance verification. See Verification Phase specifications, 5500A, 1-21 Power and dual output limit specifications, 1-21 —G— Power supplies, 2-8 General specifications, 1-6 Inguard supplies, 2-8 Outguard supplies, 2-8 —H—...
- Page 251 Index (continued) —S— —T— SC300. Seealso Temperature Calibration (RTD) Specifications, 1-17 Calibration, 6-67, 6-77 Time Marker function Error Message indicating not installed, 6-67 Theory of Operation, 6-13, 6-72 Hardware adjustments, 6-111, 6-115 Verification, 6-51, 6-107 Maintenance, 6-67 Time Marker Function Theory of Operation, 6-72 Specifications, 6-9, 6-71 User’s servicing abilities, 6-67...
- Page 252 5500A Service Manual DC Voltage, 6-21, 6-29 Theory, 2-7 Edge Duty Cycle, 6-36 Voltage function Edge Frequency, 6-35 Theory of Operation, 6-72 Edge rise time, 6-36 Voltage Function Leveled Sine Wave Amplitude, 6-40 Specifications, 6-68 Leveled Sine Wave Frequency, 6-41 Leveled Sine Wave Harmonics, 6-42 —W—...
- Page 253 5500A Service Manual This page is for holding the Reference Document (RD) fields. Do not remove from this master document. All RD fields will be placed after this text.
- Page 288 DS2E-SL2-DC5V RELAY...
Need help?
Do you have a question about the 5500A and is the answer not in the manual?
Questions and answers