Chapters
Table of Contents

Related Manuals for Fluke 5502A


Summary of Contents for Fluke 5502A
- Page 1 5502A Multi-Product Calibrator Operators Manual September 2012 © 2012 Fluke Corporation. All rights reserved. Specifications are subject to change without notice. All product names are trademarks of their respective companies.
- Page 2 Fluke authorized resellers shall extend this warranty on new and unused products to end-user customers only but have no authority to extend a greater or different warranty on behalf of Fluke. Warranty support is available only if product is purchased through a Fluke authorized sales outlet or Buyer has paid the applicable international price.
- Page 3 OPERATOR SAFETY SUMMARY WARNING HIGH VOLTAGE is used in the operation of this equipment LETHAL VOLTAGE may be present on the terminals, observe all safety precautions! To prevent electrical shock hazard, the operator should not electrically contact the output HI or sense HI terminals or circuits connected to these terminals. During operation, lethal voltages of up to 1020 V ac or dc may be present on these terminals.
-
Page 5: Table Of Contents
Local Operation ..................... 1-6 Remote Operation (RS-232) ................1-6 Remote Operation (IEEE-488) ..............1-7 Instruction Manuals ................... 1-8 5502A Getting Started Manual ..............1-8 5502A Operators Manual ................1-8 Contact Fluke Calibration .................. 1-8 Specifications ..................... 1-9 General Specifications ..................1-9 Detailed Specifications .................. - Page 6 5502A Operators Manual Harmonics (2 to 50 ) .................. 1-23 AC Voltage (Sine Wave) Extended Bandwidth ..........1-24 AC Voltage (Non-Sine Wave) ............... 1-24 AC Voltage (Non-Sine Wave) (cont.) ............1-25 AC Voltage, DC Offset ................. 1-26 AC Voltage, Square Wave Characteristics ............ 1-26 AC Voltage, Triangle Wave Characteristics (typical) ........
- Page 7 Verify Watts, VA, VAR Performance ............4-61 Verify Harmonics Volts Performance ............4-63 Verify Harmonics Amps Performance ............4-64 Calibrate a Fluke 51 Thermometer ..............4-65 Verify the Thermometer ................4-65 Calibrate the Thermometer ............... 4-66 Remote Operation ................5-1 Introduction ......................
- Page 8 Extra Space or Tab Characters ..............5-34 Terminators ....................5-35 Incoming Character Processing ..............5-35 Response Message Syntax ................ 5-36 Check 5502A Status ................... 5-37 Serial Poll Status Byte (STB) ................ 5-38 Service Request (SRQ) Line ..............5-40 Service Request Enable Register (SRE) ............ 5-40 Programming the STB and SRE..............
- Page 9 Contents (continued) Remote Commands ................6-1 Introduction ......................6-3 Command Summary by Function ..............6-3 Commands ......................6-10 Maintenance ..................7-1 Introduction ......................7-3 Replace the Mains Power Fuse ................7-3 Replace the Line Fuse ..................7-4 Replace the Current Fuses ................. 7-6 Clean the Air Filter ....................
- Page 10 5502A Operators Manual Pulse Response Calibration Procedure for an Oscilloscope ......9-15 Pulse Response Calibration with a Tunnel Diode Pulser ......9-16 The Leveled Sine Wave Function ..............9-16 Shortcuts to Set the Frequency and Voltage ..........9-17 The MORE OPTIONS Menu ................ 9-18 Sweep Through a Frequency Range ..............
- Page 11 Contents (continued) Sweep through a Frequency Range ............... 10-19 Frequency Response Calibration Procedure for an Oscilloscope ....10-20 Calibrate the Time Base of an Oscilloscope ............10-22 The Time Marker Function ................10-22 Time Base Marker Calibration Procedure for an Oscilloscope ..... 10-23 Test the Trigger ....................
- Page 12 5502A Operators Manual...
- Page 13 Page 1-1. Symbols ........................1-5 2-1. Standard Equipment ....................2-3 2-2. Mains-Power Cord Types Available from Fluke Calibration ........ 2-6 3-1. Front-Panel Features ....................3-4 3-2. Rear-Panel Features ....................3-10 3-3. Factory Defaults for SETUP Menus Power-Up Defaults ........3-22 4-1.
- Page 14 5502A Operators Manual 7-2. Replacement Current Fuses ..................7-6 7-3. Verification Tests for DC Voltage (Normal) ............7-8 7-4. Verification Tests for DC Voltage (AUX) ............. 7-9 7-5. Verification Tests for DC Current (AUX) ............. 7-9 7-6. Verification Tests for Resistance ................7-10 7-7.
- Page 15 Permissible Combinations of AC Voltage and AC Current for Power and Dual Output ....................1-21 2-1. Access the Fuse and Select Line Voltage ............... 2-5 2-2. Line-Power Cord Types Available from Fluke Calibration ........2-6 3-1. Front-Panel Features ....................3-4 3-2. Rear-Panel Features ....................3-10 3-3.
- Page 16 5502A Operators Manual 5-6. Verify the RS-232 UUT Port with IEEE-488 Port ..........5-20 5-7. IEEE-488 Remote Message Coding ............... 5-26 5-8. Status Register Overview ..................5-39 5-9. Serial Poll Status Byte (STB) and Service Request Enable (SRE) ......5-40 5-10.
-
Page 17: Introduction And Specifications
Local Operation ....................1-6 Remote Operation (RS-232) ................1-6 Remote Operation (IEEE-488) ................ 1-7 Instruction Manuals ..................... 1-8 5502A Getting Started Manual ................ 1-8 5502A Operators Manual ................1-8 Contact Fluke Calibration ..................1-8 Specifications ....................... 1-9 General Specifications ..................1-9 Detailed Specifications .................. - Page 18 5502A Operators Manual AC Voltage, Square Wave Characteristics ............1-26 AC Voltage, Triangle Wave Characteristics (typical) ........1-26 AC Current (Non-Sine Wave) ................. 1-27 AC Current (Non-Sine Wave) (cont.) .............. 1-28 AC Current, Square Wave Characteristics (typical) ........1-28 AC Current, Triangle Wave Characteristics (typical) ........1-28...
-
Page 19: Introduction
Voltage and current that can be output at the same time, to an equivalent of 20.9 kW. • 10 MHz reference input and output. Use this to input a high-accuracy 10 MHz reference to move the frequency accuracy to the 5502A, or to put one or more Calibrators in the control of a master 5502A. •... -
Page 20: Safety Information
488.1-1987 and 488.2-1987. • A EIA Standard RS-232 serial data interface to print, show, or move internally stored calibration constants, and for remote control of the 5502A. • A pass-through RS-232 serial data interface to send data to the Unit Under Test (UUT). - Page 21 Conforms to European Union Do not dispose of this product as directives. unsorted municipal waste. Go to the Fluke Calibration website for recycling information. Risk of Danger. Important Hazardous voltage information. See manual.
-
Page 22: Overload Protection
Operation Overview The Calibrator can be operated at the front panel or remotely with the RS-232 or IEEE- 488 ports. For remote operations, software is available to integrate 5502A operation into a wide variety of calibration requirements. Local Operation Typical local operations include front-panel connections to the UUT, and then manual keystroke entries at the front panel to put the Calibrator in the necessary output mode. -
Page 23: Remote Operation (Ieee-488)
The SERIAL 2 TO UUT serial data port connects a UUT to a PC or terminal with the 5502A (see Figure 1-2). This “pass-through” configuration removes the requirement for two COM ports at the PC or terminal. A set of four commands control the operation of the SERIAL 2 TO UUT serial port. -
Page 24: Instruction Manuals
• 5502A Getting Started (PN 4155209) One of each manual above comes with the instrument. Refer to the Fluke Calibration Catalog or speak to a Fluke Calibration sales representative (see “Contact Fluke Calibration” in this chapter) if more printed copies are necessary. The manuals are also available on the Fluke Calibration website. -
Page 25: Specifications
The following tables list the 5502A specifications. All specifications are valid after allowing a warm-up period of 30 minutes, or twice the time the 5502A has been turned off. (For example, if the 5502A has been turned off for 5 minutes, the warm-up period is 10 minutes.) All specifications apply for the temperature and time period indicated. -
Page 26: Detailed Specifications
Weight (without options) ......... 22 kg (49 lb) Absolute Uncertainty Definition ......The 5502A specifications include stability, temperature coefficient, linearity, line and load regulation, and the traceability of the external standards used for calibration. You do not need to add anything to determine the total specification of the 5502A for the temperature range indicated. -
Page 27: Dc Current
Formula 60-T-I minutes any 60 minute period where T is the temperature in °C (room temperature is about 23 °C) and I is the output current in amperes. For example, 17 A, at 23 °C could be provided for 60-23-17 = 20 minutes each hour. When the 5502A is outputting currents between 5 and 11 amps for long periods, the internal self-heating reduces the duty cycle. -
Page 28: Resistance
5502A Operators Manual Resistance Absolute Uncertainty, tcal ±5 °C ±(% of output + floor) Resolution Allowable Current Floor (Ω) Time and temp since ohms Range % of output (Ω) zero cal 90 Day 1 Year 12 hrs ±1 °C 7 days ±5 °C 0 to 10.999 Ω... -
Page 29: Ac Voltage (Sine Wave)
Introduction and Specifications Detailed Specifications AC Voltage (Sine Wave) Absolute Uncertainty, tcal Max Distortion and ±5 °C ±(% of output + μV) Noise 10 Hz to Range Frequency Resolution Max Burden 5 MHz Bandwidth ±(% of output + 90 Day 1 Year floor) 10 Hz to 45 Hz... -
Page 30: Ac Voltage (Sine Wave) (Cont.)
5502A Operators Manual AC Voltage (Sine Wave) (cont.) AUX (Auxiliary Output) [dual output mode only] Absolute Uncertainty, tcal Max Distortion and ±5 °C ±(% of output + μV) Noise 10 Hz to Range Frequency Resolution Max Burden 5 MHz Bandwidth ±(% of output +... -
Page 31: Ac Current (Sine Wave)
5502A is outputting currents between 5 and 11 amps for long periods, the internal self-heating reduces the duty cycle. Under those conditions, the allowable "on" time indicated by the formula and Figure 1-3 is achieved only after the 5502A is outputting currents <5 A for the "off"... -
Page 32: Ac Current (Sine Wave) (Cont.)
5502A is outputting currents between 5 and 11 amps for long periods, the internal self-heating reduces the duty cycle. Under those conditions, the allowable "on" time indicated by the formula and Figure 1-3 is achieved only after the 5502A is outputting currents <5 A for the "off"... -
Page 33: Capacitance
Introduction and Specifications Detailed Specifications Capacitance Absolute Uncertainty, tcal ±5 °C Allowed Frequency or Charge-Discharge Rate [1] [2] [3] ±(% of output + floor) Range Resolution Min and Max to Typical Max for Typical Max for 90 Day 1 Year Meet <0.5 % Error <1 % Error... -
Page 34: Temperature Calibration (Thermocouple)
5502A Operators Manual Temperature Calibration (Thermocouple) Absolute Uncertainty Absolute Uncertainty Source/Measure tcal ±5 °C ± Source/Measure tcal TC Type Range °C Range °C Type °C ±5 °C ± °C 90 Day 1 Year 90 Day 1 Year 600 to 800 0.42... -
Page 35: Temperature Calibration (Rtd)
0.14 0.16 Resolution is 0.003 °C Applies for COMP OFF (to the 5502A Calibrator front panel NORMAL terminals) and 2-wire and 4-wire compensation. Based on MINCO Application Aid No. 18 Phase 1-Year Absolute Uncertainty, tcal ±5 °C, (Δ Φ °) -
Page 36: Ac And Dc Power Specifications
5502A Operators Manual Power Uncertainty Adder due to Phase Error Phase (Φ) Phase (Φ) Watts VARs 10 to 65 Hz 65 to 500 Hz 500 Hz to 1 kHz 1 to 5 kHz 5 to 10 kHz 0.00 % 0.01 % 0.06 %... -
Page 37: Calculate The Uncertainty Specifications Of Power And Dual Output Settings
Introduction and Specifications Detailed Specifications 1020 V 1000 Not Specified 500 V 250 V 33 mA - 20.5 A 32.999 V Voltage 3.3 V 33 mA - 3 A 330 mV Not Specified 100 mV 33 mV 10 mV 10 K - 30 K 100 K 500 K Below... -
Page 38: Examples Of Specified Power Uncertainties At Various Output Settings
5502A Operators Manual Examples of Specified Power Uncertainties at Various Output Settings: Power Absolute Uncertainty as Absolute specified for tcal ±5 °C, ±(% of Uncerainty Selected Output Settings ±(% of output setting) Watts) Voltage Current Phase Phase Selected Frequency Setting... -
Page 39: Additional Specifications
The subsequent paragraphs provide additional specifications for the 5502A Calibrator ac voltage and ac current functions. These specifications are valid after allowing a warm-up period of 30 minutes, or twice the time the 5502A has been turned off. All extended range specifications are based on performing the internal zero-cal function at weekly intervals, or when the ambient temperature changes by more than 5 °C. -
Page 40: Ac Voltage (Sine Wave) Extended Bandwidth
5502A Operators Manual AC Voltage (Sine Wave) Extended Bandwidth 1-Year Absolute Uncertainty Range Frequency Max Voltage Resolution tcal ±5 °C Normal Channel (Single Output Mode) 1.0 to 33 mV Two digits, e.g., 25 mV ±(5.0 % of output 34 to 330 mV 0.01 to 9.99 Hz... -
Page 41: Ac Voltage (Non-Sine Wave) (Cont.)
Introduction and Specifications Additional Specifications AC Voltage (Non-Sine Wave) (cont.) 1-Year Absolute Uncertainty, tcal Square Wave Frequency Max Voltage Resolution ±5 °C, ±(% of output + % of range) Range (p-p) Normal Channel (Single Output Mode) 0.01 to 10 Hz 5.0 + 0.5 Two digits on each range 10 to 45 Hz... -
Page 42: Ac Voltage, Dc Offset
5502A Operators Manual AC Voltage, DC Offset Max Peak 1-Year Absolute Uncertainty, tcal Range (Normal Channel) Offset Range Signal ±5 °C ±(% of dc output + floor) Sine Waves (rms) 3.3 to 32.999 mV 0 to 50 mV 80 mV 0.1 + 33 μV... -
Page 43: Ac Current (Non-Sine Wave)
Introduction and Specifications Additional Specifications AC Current (Non-Sine Wave) Triangle Wave & 1-Year Absolute Uncertainty tcal ±5 °C Max Current Truncated Sine Wave Frequency ±(% of output + % of range) Resolution Range p-p 10 to 45 Hz 0.25 + 0.5 45 Hz to 1 kHz 0.25 + 0.25 Six digits... -
Page 44: Ac Current (Non-Sine Wave) (Cont.)
5502A Operators Manual AC Current (Non-Sine Wave) (cont.) 1-Year Absolute Uncertainty tcal ±5 °C Max Current Square Wave Range p-p Frequency ±(% of output + % of range) Resolution 10 to 45 Hz 0.25 + 0.5 0.047 to 0.65999 mA 45 Hz to 1 kHz 0.25 + 0.25... -
Page 45: Prepare For Operation
Chapter 2 Prepare for Operation Title Page Introduction ......................2-3 Unpack and Inspection ..................2-3 Select Line Voltage ....................2-4 Connect to Line Power ..................2-4 Select Line Frequency ..................2-5 Placement ......................2-6 Airflow Considerations ..................2-7... - Page 46 5502A Operators Manual...
-
Page 47: Introduction
(see “Contact Fluke Calibration” in Chapter 1). A performance test is in the “Maintenance” section of Chapter 7. If you ship the calibrator to Fluke Calibration, use the initial container. If it is not available, you can get a new container from Fluke Calibration with the Calibrator model and serial number. -
Page 48: Select Line Voltage
If it is necessary to use a different type, refer to Table 2-2 and Figure 2-2 for a list and illustration of the line-power plug types available from Fluke Calibration. After you make sure that the line voltage selection is set correctly and that the correct fuse for that line voltage is installed, connect the calibrator to a correctly-grounded three-prong outlet. -
Page 49: Select Line Frequency
Prepare for Operation Select Line Frequency Select Line Frequency The calibrator is shipped from the factory for nominal operation at 60 Hz line frequency. If you use 50 Hz line voltage, re-configure the Calibrator for optimal performance at 50 Hz. To do this: 1. -
Page 50: Placement
You can put the Product on a bench top or install it in a standard-width 24 inch (61 cm) depth equipment rack. For bench-top use, the Calibrator has a non-slip feet. To install the Calibrator in an equipment rack, use the 5502A Rack-Mount Kit, Model Y5537. Instructions to install the Calibrator into a rack come with the kit. -
Page 51: Airflow Considerations
Prepare for Operation Airflow Considerations Airflow Considerations Warning For safe operation and maintenance of the Product, make sure that the space around the Product meets minimum requirements. Baffles put cool air from the fan into the chassis to internally dissipate heat when the Calibrator is in operation. - Page 52 5502A Operators Manual...
-
Page 53: Features
Chapter 3 Features Title Page Introduction ......................3-3 Front-Panel Features .................... 3-3 Rear-Panel Features ..................... 3-3 Softkey Menu Trees ..................... 3-3... - Page 54 5502A Operators Manual...
-
Page 55: Introduction
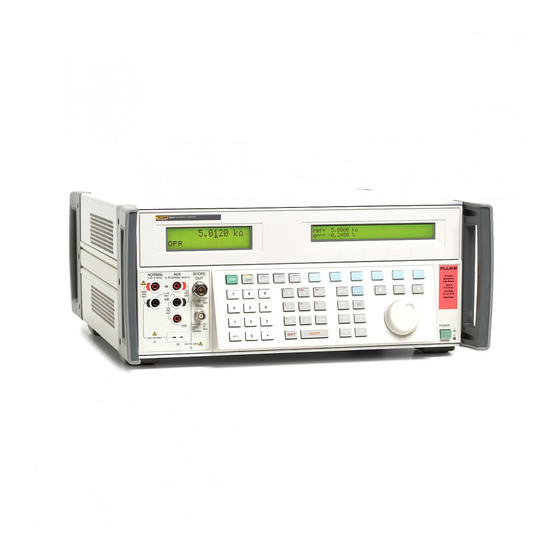
Introduction Introduction Refer to this chapter for the functions and locations of the 5502A Calibrator front and rear-panel features. Please read this information before you use the Calibrator. See the “Front-Panel Operation” section of Chapter 4 for front-panel operation instructions. For remote-operation instructions, see the “Remote Operation”... - Page 56 5502A Operators Manual 5502A CALIBRATOR PREV STBY EARTH SCOPE TRIG MENU EDIT SETUP RESET FIELD MEAS ZERO MULT • SHIFT ENTER POWER gvx005.eps Figure 3-1. Front-Panel Features Table 3-1. Front-Panel Features Output Display The Output Display is a two-line backlit LCD that shows output amplitudes, frequency, and calibrator status.
- Page 57 Features Softkey Menu Trees The STBY (Standby) key puts the Calibrator in standby mode. Standby mode is shown by “STBY” in the lower left corner of the Output Display. In standby mode, the NORMAL, AUX and 20A output terminals are internally disconnected from the Calibrator. The Calibrator starts in standby mode.
- Page 58 5502A Operators Manual 5502A CALIBRATOR PREV STBY EARTH SCOPE TRIG MENU EDIT SETUP RESET FIELD MEAS ZERO MULT • ENTER SHIFT POWER gvx009.eps Figure 3-1. Front-Panel Features (cont.) Table 3-1. Front-Panel Features (cont.) The NEW REF (New Reference) key is active when error mode is in operation, and sets the current output value as a new reference for meter error computation.
- Page 59 Features Softkey Menu Trees The power switch turns on and off Calibrator power. The switch is a latching push-push type. When the switch is latched in, Calibrator power is on. The ZERO CAL key lets you do an ohms zero or a full-zero calibration. ...
- Page 60 5502A Operators Manual 5502A CALIBRATOR PREV STBY EARTH SCOPE TRIG MENU EDIT SETUP RESET FIELD MEAS ZERO MULT • ENTER SHIFT POWER gvx010.eps Figure 3-1. Front-Panel Features (cont.) Table 3-1. Front-Panel Features (cont.) The ENTER key loads a newly-entered output value, shown on the Control Display, into the Calibrator, which shows on the Output Display.
- Page 61 Features Softkey Menu Trees Table 3-1. Front-Panel Features (cont.) The TC (Thermocouple) minijackis used for thermocouple simulation during thermometer calibration, and thermocouple measurements. You must use the correct thermocouple wire and plug when you use this connector. For example, if you will simulate a type-K thermocouple, use type-K thermocouple wire and type-K plug to make connections.
- Page 62 5502A Operators Manual NORMAL ENABLE INSTALLED OPTIONS CALIBRATION - SC600 - SC1100 - PQ SERIAL 2 TO UUT FLUKE CORPORATION EVERETT WA, USA SERIAL 1 FROM HOST NO INTERNAL USER SERVICEABLE PARTS. REFER SERVICE TO QUALIFIED SERVICE PERSONNEL IEEE-488 LR65268C...
- Page 63 Features Softkey Menu Trees Table 3-2. Rear-Panel Features (cont.) Warning To prevent possible electrical shock, fire, or personal injury: • Do not use a two-conductor mains power cord unless you install a protective ground wire to the Product ground terminal before you operate the Product.
- Page 64 5502A Operators Manual SETUP Front Panel Key AK AL Next Section gvx006.eps Figure 3-3. Setup Softkey Menu Tree 3-12...
- Page 65 Features Softkey Menu Trees to X to G to B SHOW SPECS is an online summary of the programmed output specifications. to AG to F to C If self test does not pass, error codes are displayed. (See chapter 7, "Maintenance") to E to D SERIAL # displays the serial number of the instrument.
- Page 66 5502A Operators Manual Actual revision numbers replace the numbers in each of the above. Format NV (non-volatile) Memory should be used with caution. Changes are non reversible. The softkeys function only when the rear-panel CALIBRATION switch is set to ENABLE, except for the softkey SETUP, which is not dependent on the CALIBRATION switch position.
- Page 67 Features Softkey Menu Trees to O to K to I HOST selects the IEEE-488 (GPIB) (factory default) parallel port or RS-232 (serial) port. You cannot operate both IEEE-488 and RS-232 simultaneously. STALL refers to the method of controlling data flow: software control (xon/off), hardware control (rts/cts) or none.
- Page 68 5502A Operators Manual to M REMOTE I/F (Interface) has selections term (terminal) (factory default) and comp (computer). EOL (End of Line character) is either Carriage Return/Line Feed (CRLF), CR (Carriage Return) or LF (Line Feed). to N to K EOF (End of File) indicates the action taken at the end of a file by entering one or two ASCII characters.
- Page 69 Features Softkey Menu Trees GPIB (General Purpose Interface Bus) selects the port address when using the IEEE-488 bus. The factory default is 4. to R to Q DISPLAY BRIGHTNESS and DISPLAY CONTRAST apply to both the Output Display and Control Display.
- Page 70 5502A Operators Manual to S1 to T gvx032.eps Figure 3-4. SETUP Softkey Menu Displays (cont.) 3-18...
- Page 71 Features Softkey Menu Trees to V to U The values set here become the new limits and can be changed only with new entries or returned to factory defaults using Format NV Memory SETUP (see menu F). SHOW SPECS is an online summary of the programmed output specifications. to Y to AC to AA...
- Page 72 AD option installed) 5502A CAL opens the calibration menu. ZERO zeros the 5502A Calibrator. OHMS ZERO zeros the ohms portion of the 5502A Calibrator; ERR ACT (Error Action) set backup, abort, or cont (continue). gjh013eps Figure 3-4. SETUP Softkey Menu Displays (cont.)
- Page 73 Features Softkey Menu Trees to AF GO ON and ABORT softkeys are used in the 5502A Calibrator calibration procedure. (Only if scope option installed) to AF to AG to AH to AJ gjh033.eps Figure 3-4. SETUP Softkey Menu Displays (cont.)
- Page 74 5502A Operators Manual Table 3-3. Factory Defaults for SETUP Menus Power-Up Defaults SETUP Menu Parameter Setting (Figure 3-4) User report string (*PUD string) Cleared > 0.1% Error units SC-600 option overload test safety 10 s timeout Temperature standard its-90 Host interface...
-
Page 75: Front-Panel Operation
Chapter 4 Front-Panel Operation Title Page Introduction ......................4-3 Turn on the Calibrator ..................4-3 Warm up the Calibrator ..................4-4 Use the Softkeys ....................4-4 Use the Setup Menu ..................... 4-4 Use the Instrument Setup Menu ..............4-5 Utility Functions Menu ..................4-6 Use the NV Memory Menu ................ - Page 76 Verify a Model 41 Power Harmonics Analyzer ..........4-61 Verify Watts, VA, VAR Performance ............4-61 Verify Harmonics Volts Performance ............4-63 Verify Harmonics Amps Performance ............4-64 Calibrate a Fluke 51 Thermometer ..............4-65 Verify the Thermometer ................4-65 Calibrate the Thermometer ................. 4-66...
-
Page 77: Introduction
Introduction Warning To prevent possible electrical shock, fire, or personal injury, do not make connections to the output terminals when voltage is present. Standby mode is not sufficient to prevent shock hazard because could be pushed accidently. Push and make sure that the Calibrator is in standby before you make connections to the output terminals. -
Page 78: Warm Up The Calibrator
5502A Operators Manual Warm up the Calibrator When you turn on the Calibrator, let it warm up for 30 minutes to let the internal components become stable. Specifications given in Chapter 1 apply to a Calibrator that has completed its warm-up procedure. -
Page 79: Use The Instrument Setup Menu
Front-Panel Operation Use the Setup Menu • INSTMT SETUP (Instrument Setup) Lets you change the power-up or reset default setting for different instrument parameters. Many of the same parameters in this menu can be changed during operation, but the changes you make during operation are volatile. Change them here to makes them nonvolatile. -
Page 80: Utility Functions Menu
Caution The Format Nonvolatile Memory menu softkeys permanently erase calibration constants. If you push ALL or CAL, this will invalidate the condition of calibration of the 5502A. Push FORMAT NV MEM in the utility functions menu to open: nn067f.eps It is necessary that the rear-panel CALIBRATION switch to be in the ENABLE position for the ALL and CAL softkeys in this menu. -
Page 81: Reset The Calibrator
Front-Panel Operation Reset the Calibrator The softkeys are: • replaces all contents of the EEPROM with factory defaults. This is used by service personnel after they replace the EEPROM, for example. It is not typically necessary. • replaces all calibration constants with factory defaults but keeps the setup parameters unchanged. -
Page 82: Operate And Standby Modes
5502A Operators Manual Note The Calibrator rear-panel CALIBRATION switch does not have to be enabled for this procedure. 1. Turn on the Calibrator and let it warm-up for no less than 30 minutes. 2. Push . 3. Push . This opens the setup menu (see below). -
Page 83: Connect The Calibrator To A Uut
Front-Panel Operation Connect the Calibrator to a UUT • A p-p voltage output (square wave, triangle wave, or truncated sine wave) changes to rms voltage output ≥33 V (sine wave). For example, if a p-p output of 40 V is changed to rms output of 40 V by a change to the wave form with the WAVE softkey, the Calibrator goes to the standby mode. -
Page 84: When To Use Earth
Do not use nickel-plated connectors. For best results use the Fluke Model 5440A-7002 Low Thermal EMF Test Leads, which are made of well-insulated copper wire and tellurium copper connectors. -
Page 85: Four-Wire Versus Two-Wire Connections
Front-Panel Operation Connect the Calibrator to a UUT The Calibrator front panel NORMAL LO terminal is typically isolated from earth (chassis) ground. When it is necessary to make a connection from the NORMAL LO terminal and earth ground, push the key, this lights the key annunciator. When the earth key is pushed, the NORMAL LO terminal is connected to earth ground through approximately 30 Ω. -
Page 86: Cable Connections Instructions
Null out the indication on the UUT with “rel,” “offset,” or “null,” (use the necessary method), and then connect the test leads to the Calibrator. Table 4-1. UUT Connections 5502A Output Figure Reference Resistance 4-2 Resistance - four-wire compensation... - Page 87 Front-Panel Operation Connect the Calibrator to a UUT 5502A CALIBRATOR SENSE INPUT 4-WIRE SENSE SOURCE 5502A SOURCE SENSE gvx014.eps Figure 4-2. UUT Connection: Resistance (Four-Wire Compensation) TRUE RMS MULTIMETER 5502A CALIBRATOR MIN MAX RANGE HOLD PEAK MIN MAX mA A 5502A gvx015.eps...
- Page 88 5502A Operators Manual TRUE RMS MULTIMETER 5502A CALIBRATOR MIN MAX RANGE HOLD PEAK MIN MAX mA A 5502A gvx016.eps Figure 4-4. UUT Connection: Resistance (Compensation Off) TRUE RMS MULTIMETER 5502A CALIBRATOR MIN MAX RANGE HOLD PEAK MIN MAX mA A gvx017.eps...
- Page 89 Front-Panel Operation Connect the Calibrator to a UUT TRUE RMS MULTIMETER 5502A CALIBRATOR MIN MAX RANGE HOLD PEAK MIN MAX mA A gvx018.eps Figure 4-6. UUT Connection: Capacitance (Compensation Off) TRUE RMS MULTIMETER 5502A CALIBRATOR MIN MAX RANGE HOLD PEAK MIN MAX mA A gvx019.eps...
- Page 90 5502A Operators Manual TRUE RMS MULTIMETER 5502A CALIBRATOR MIN MAX RANGE HOLD PEAK MIN MAX mA A gvx020.eps Figure 4-8. UUT Connection: DC Current/AC Current CHART RECORDER INPUT 5502A CALIBRATOR gvx021.eps Figure 4-9. UUT Connection: Temperature (RTD) 4-16...
-
Page 91: Rms Versus P-P Amplitude
Front-Panel Operation RMS Versus p-p Amplitude 5502A CALIBRATOR K/J THERMOMETER ON/OFF HOLD OFFSET Connection wiring must match thermocouple type, e.g., K, J, etc. gvx022.eps Figure 4-10. UUT Connection: Temperature (Thermocouple) RMS Versus p-p Amplitude The Calibrator ranges for sinusoidal ac functions are specified in rms (root-mean-square, the effective value of the wave form). -
Page 92: Auto Range Versus Locked Range
5502A Operators Manual Auto Range Versus Locked Range A softkey is supplied to toggle between the ranging methods auto or locked. This feature is available only for single-output dc volts and dc current outputs. nn063f.eps When you select auto (the default), the Calibrator automatically selects the range that gives the best output resolution. -
Page 93: Set Dc Voltage Output
Front-Panel Operation Set Output Set DC Voltage Output Do these procedures to set a dc voltage output from the front-panel NORMAL terminals. If you make an entry error, push to clear the display, then record the value again. Caution To prevent damage to the UUT, make sure the applied voltage to the UUT is not larger than the rating of the UUT insulation and the connection wires. -
Page 94: Set Ac Voltage Output
5502A Operators Manual 10. Push to turn on the Calibrator output. A softkey name for range is shown on the Control Display in the dc voltage function: nn063f.eps Range (Operating Range) selects autorange (auto) or lock (locked) for the current range. - Page 95 Front-Panel Operation Set Output Output in dBm: Push the numeric keys and decimal point key to record the necessary power output (maximum six numeric keys). For example, 10.0000. For a power output less than 1 mW (negative dBm values), push to append the numeric entry with the negative (−) symbol.
- Page 96 5502A Operators Manual 4. Push the numeric keys and decimal point key to record the necessary frequency output (maximum five numeric keys). Push a multiplier key, if necessary. For example, push the kilo multiplier key . Then push the key. For example, 1.1234 kHz (see below).
-
Page 97: Set Dc Current Output
Front-Panel Operation Set Output Set DC Current Output Do the subsequent procedure to set a dc current output between AUX HI and LO or AUX 20A and LO. Choose the inputs for the current level selected. Current larger than ±3 A is sourced between the AUX 20A and LO terminals. -
Page 98: Set Ac Current Output
5502A Operators Manual A range softkey is shown on the Control Display in the dc current function (operating range). This selects autorange (auto) or lock (locked) for the given range. When auto (the default) is selected, the Calibrator automatically selects the range that gives the best output resolution. -
Page 99: Set Dc Power Output
Front-Panel Operation Set Output 9. Push . The Calibrator erases your entry from the Control Display and copies it into the Output Display (below is typical). nn081f.eps 10. Push to activate the Calibrator output. gvx321f.eps • LCOMP turns inductive compensation on and off. Inductive compensation is available for frequencies to a maximum of 1 kHz at outputs to a maximum of 239.999 mA, and for frequencies to a maximum of 440 Hz more than 239.999 mA. - Page 100 5502A Operators Manual Caution To prevent damage to the UUT, makes sure the applied voltage to the UUT is not larger than the rating of the UUT insulation and the connection wires. 1. Push to clear any output from the Calibrator.
-
Page 101: Set Ac Power Output
Front-Panel Operation Set Output 14. Push . The Calibrator erases your entry from the Control Display and copies it into the Output Display (below is typical). nn083f.eps 15. Push to activate the Calibrator output. When you change the power output levels, you must reenter voltage and current (in either order). - Page 102 5502A Operators Manual Note At voltage outputs of 100 V and above (nominal), the Calibrator usually makes a small high-pitched sound. 5. Push a multiplier key, if necessary. For example, push . 6. Push . 7. The Control Display shows the amplitude of your voltage entry. For example, 123.456 mV (see below).
- Page 103 Front-Panel Operation Set Output 14. Push . The Calibrator erases your entry from the Control Display and copies it into the Output Display (below is typical). nn087f.eps 15. Push to activate the Calibrator output. When you change power output levels, you must reenter voltage and current (in either order).
-
Page 104: Set A Dual Dc Voltage Output
5502A Operators Manual • I WAVE (Current Waveform) Selects the waveform for the current output at the front panel AUX terminals. See “Waveform Types” in this chapter. • “LO”s (Low Potential Output Terminals) The front panel NORMAL LO and AUX LO terminals must be tied together either at the UUT or at the Calibrator. -
Page 105: Set A Dual Ac Voltage Output
Front-Panel Operation Set Output (upper reading) and AUX terminals (lower reading) (see below). nn089f.eps 14. Push . The Calibrator erases your entry from the Control Display and copies it into the Output Display (below is typical). nn090f.eps 15. Push to activate the Calibrator output. A softkey named “LO”s shows on the Control Display (see below). - Page 106 5502A Operators Manual Caution To prevent damage to the UUT, make sure the applied voltage to the UUT is not larger than the rating of the UUT insulation and the connection wires. 2. Push to clear any output from the Calibrator.
- Page 107 Front-Panel Operation Set Output 14. The Control Display shows your voltage and frequency entries. For example, 123.456 mV and 234.567 mV at 1.1234 kHz (see below). nn093f.eps 15. Push . The Calibrator erases your entry from the Control Display and copies it into the Output Display (below is typical).
-
Page 108: Set Resistance Output
NORMAL and AUX outputs, selects internal or external 10 MHz reference, and sets the phase difference between an external master 5502A (using 10 MHz IN/OUT) and the NORMAL output. See “Adjusting the Phase” and “Synchronizing the Calibrator using 10 MHz IN/OUT”... -
Page 109: Set Capacitance Output
Front-Panel Operation Set Output 8. Push . The Calibrator erases your entry from the Control Display and copies it into the Output Display (below is typical). gvx097f.eps 9. Push to start the Calibrator output. The softkeys let you select three lead-compensation settings and ohms zero (see below). nn098f.eps •... - Page 110 5502A Operators Manual 5. Push a multiplier key (preceded with the key) for the necessary output. For example, push then for μF. The other multiplier keys include for pF and for nF. 6. Push .
-
Page 111: Set Temperature Simulation (Thermocouple)
Front-Panel Operation Set Output Set Temperature Simulation (Thermocouple) Note Thermocouples have no electrical isolation. Make sure the thermocouple wire and plug are not changed by extraneous temperature sources. For example, do not put your fingers on the thermocouple plug or wire when you simulate a temperature. - Page 112 5502A Operators Manual 8. Push to activate the Calibrator output. Four softkey names show on the Control Display (see below). Note ° ° The recorded temperature will be changed to 0 C (32 F) if you change between tc and rtd, or change the type of thermocouple (except for a type B °...
-
Page 113: Set Temperature Simulation (Rtd)
Front-Panel Operation Set Output • Out@TC terminal (Output at the front panel TC terminals) Shows the actual dc voltage at the front panel TC terminals. This is a display only, not a softkey function. • TC MENUS (Thermocouple Menu) Shows submenus for thermocouple outputs. o UNITS (Temperature Units) Selects °C or °F as the temperature unit. - Page 114 5502A Operators Manual 4. Push the numeric keys and decimal point key to record the necessary temperature output (maximum six numeric keys). For example, 123.456. 5. For an output in °C, push . For °F, push and then .
-
Page 115: Measure Thermocouple Temperatures
Front-Panel Operation Set Output • Out @ NORMAL displays the location of the output terminals (always NORMAL) for rtd connections. • TYPE (RTD Type) - Selects the rtd curve from a list. • OUTPUT (Temperature Output Device) - Selects the temperature device: thermocouple (tc) or resistance temperature detector (rtd). - Page 116 5502A Operators Manual 3. Push to display the TC menus (see below). nn106f.eps 4. The measured temperature shows in the Output Display (below is typical). (The lower-case m blinks on when a measurement is being taken.) nn107f.eps 4-42...
- Page 117 Front-Panel Operation Set Output • Meas@TC terminal (Measurement at the front panel TC terminals) Shows the actual dc voltage at the front panel TC terminals. This is a display only, not a softkey function. • TC MENUS (Thermocouple Menus) Opens the thermocouple output submenus. o Open TCD (Open Thermocouple Detect) Selects on or off for the Open TCD feature.
-
Page 118: Waveform Types
5502A Operators Manual Waveform Types AC voltage, ac current, dual ac voltage, and ac power functions supply a softkey to select between four different waveform types: sine wave (sine), triangle wave (tri), square wave (square), and truncated sine wave (truncs). When the Calibrator output is sine wave ac power or dual ac voltage, the Control Display shows more softkeys for harmonics and fundamental frequencies. -
Page 119: Square Wave
Front-Panel Operation Waveform Types Square Wave When the wave selection is square, a square wave current or voltage signal is at the Calibrator outputs (Figure 4-13). The variables for the square wave are duty cycle, amplitude, frequency, and dc offset voltage. When a square wave is selected, the Output Display shows amplitude in p-p units. -
Page 120: Set Harmonics
5502A Operators Manual Set Harmonics When the Calibrator outputs dual ac voltages or ac power (sine waves only), the Calibrator sources two signals with adjustable harmonic difference, with a maximum harmonic frequency output of 10 kHz. For example, a 120 V, 60 Hz signal can be set on the front-panel NORMAL terminals, and a 1 V, 300 Hz (5th harmonic) output on the AUX terminals. -
Page 121: Adjust The Phase
Front-Panel Operation Adjust the Phase 4. Push the softkey HARMNIC to record the necessary harmonic (1 to 50), with a maximum frequency output of 10 kHz. For example, record the 7th harmonic (see below). When the control display shows the necessary value, push . nn109f.eps 5. - Page 122 5502A Operators Manual The softkey PHASE is available after you push the WAVE MENUS softkey that shows when outputting dual ac voltages or ac power (shown below for ac power output). gvx070.eps 4-48...
-
Page 123: Record A Phase Angle
Front-Panel Operation Adjust the Phase When one output is a harmonic of the other, the phase shift comes from the phase angle or power factor (cosine) of the harmonic signal. For example, when the AUX output is a 60-Hz signal, and the NORMAL output is a 120 Hz (2nd Harmonic) signal, a phase shift of 60 °... -
Page 124: Record A Dc Offset
5502A Operators Manual nn112f.eps 7. Push . The Calibrator clears your entry from the “New pf=” line and copies it to the “Power Factor =” line of the Control Display. 8. Push one or more times to return to previous menus. -
Page 125: Edit And Error Output Settings
Front-Panel Operation Edit and Error Output Settings 1. Push the softkey WAVE to select the necessary waveform: sine waves (sine), triangle waves (tri), square waves (square), or truncated sine wave (truncs). 2. Push the softkey OFFSET, opening the offset entry display. Record the necessary offset with the numeric keys and decimal point key. -
Page 126: Show The Uut Error
The Calibrator has two methods to show the UUT error. The first method is the “nominal” method that is used in the Fluke Calibration 5700A, 5720A, 5500A, 5520A, 5522A, and 5502A Calibrators. The second method is the “true value” method. Each method is used in this Calibrator. -
Page 127: Use Multiply And Divide
Front-Panel Operation Set Output Limits With the nominal or true-value method, small changes in output value give you a calculated error that is the same. In the example above, the Control display will show the error as -30.0 ppm. The true-value method is useful for large changes in output value. For example, if you apply 10.0000 V to an analog meter, and then adjust the Calibrator output to 11.0000 V so that the analog meter reads exactly 10 V, the true-value method will show nominal= +10.0000 V... -
Page 128: Sample Applications
Push then one or more times to return to a previous menu. Sample Applications • Calibrate a Fluke 80 Series Digital Multimeter (DMM) • Calibrate a Fluke Model 41 Power Harmonics Analyzer for Power and Harmonics • Calibrate a Fluke Model 51 Digital Thermometer 4-54... -
Page 129: How Calibrate An 80 Series Digital Multimeter
Front-Panel Operation Sample Applications How Calibrate an 80 Series Digital Multimeter This example shows the steps necessary to calibrate a Fluke 80 Series DMM. Note These procedures are included here as an example. The 80 Series Service Manual contains the authoritative test and calibration procedures for 80 Series DMMs. - Page 130 5502A Operators Manual TRUE RMS MULTIMETER 5502A CALIBRATOR MIN MAX RANGE HOLD PEAK MIN MAX mA A gvx025.eps Figure 4-15. Cable Connections to Verify 80 Series General Functions 3. Verify the dc voltage function: a. Turn on the DMM and set the function switch to .
- Page 131 Front-Panel Operation Sample Applications c. Verify the error against specifications at the subsequent voltages and frequencies in Table 4-3. Table 4-3. Verification Voltages and Frequencies Voltage Frequency 350 mV 60 Hz, 5 kHz, and 20 kHz 3.500 V 60 Hz, 5 kHz, and 20 kHz 35.00 V 60 Hz, 5 kHz, and 20 kHz 329.0 V...
- Page 132 5502A Operators Manual 7. Verify the ohms function: a. Push on the Calibrator and set the DMM function switch to . b. Set the Calibrator to 190.0 Ω with 2-wire compensation (see Figure 4-3). c. Push . Make sure the error is in specifications limits.
- Page 133 Front-Panel Operation Sample Applications c. Set the Calibrator to 35.0 mA and push . d. Use the output adjustment controls to adjust the Calibrator output for a measurement of +35.00 mA on the DMM. Make sure that the error shown on the control display is in specification limits.
- Page 134 5502A Operators Manual TRUE RMS MULTIMETER 5502A CALIBRATOR MIN MAX RANGE HOLD PEAK MIN MAX mA mA gvx027.eps Figure 4-17. Cable Connections to Verify an 80 Series High Amps Function c. Set the Calibrator output to 3.5 A at 0 Hz and push . Make sure the error is in specification limits.
-
Page 135: Calibrate The Meter
Front-Panel Operation Sample Applications Calibrate the Meter Continue with calibration if there was a range that was out of tolerance in the verification procedure. Note To do the adjustment to calibrate the meter, it is necessary to disassemble the meter. Refer to the diagrams and access procedures in the 80 Series Service Manual. - Page 136 5502A Operators Manual Table 4-4. Watts Performance, Text Screen Calibrator Outputs Performance Limits VAR/KVAR Phase Normal W/KW VA/KVA Model 41 Harmonics Phase V ac @ mV ac @ Only Screen in DEG. 60 Hz 60 Hz 5.0 V 30.0 mV 8.0 V...
-
Page 137: Verify Harmonics Volts Performance
Front-Panel Operation Sample Applications 2. Make sure that the EARTH indicator is illuminated. If not, push . 3. Set the Calibrator output to 5.0 V at 60 Hz on the NORMAL output and 30 mV at 60 Hz on the AUX output. 4. -
Page 138: Verify Harmonics Amps Performance
5502A Operators Manual Table 4-5. Harmonics Performance for Volts, Harmonics Screen 5502A Fluke Performance Limits Normal Output Tester Harmonic Amplitude Harmonic Phase Amplitude Phase cursor (deg.) 7.00 7.00 7.00 7.00 7.00 7.00 11. Push to remove the voltage from the Tester. -
Page 139: Calibrate A Fluke 51 Thermometer
21.9 Calibrate a Fluke 51 Thermometer The Fluke 51 Thermometer measures temperature with a type J or K thermocouple. The Calibrator simulates the two thermocouples. This simplifies the test and calibration. The subsequent section shows how the Calibrator is used to calibrate this thermometer. -
Page 140: Calibrate The Thermometer
K-type thermocouple wire changes to J-type thermocouple wire. Calibrate the Thermometer The subsequent procedure uses “UUT” (Unit Under Test) in place of “Fluke 51”. Use copper hookup wire for all connections other than steps 17 to 20. Caution... - Page 141 Front-Panel Operation Sample Applications Note Specified voltages are necessary for the subsequent steps to be at the inputs μ ° of the Thermometer. With the 10 C type thermocouple selection of the Calibrator, you can choose the output voltage on the TC terminals. 5.
- Page 142 5502A Operators Manual 4-68...
-
Page 143: Remote Operation
Chapter 5 Remote Operation Title Page Introduction ......................5-3 Set up the IEEE-488 Port for Remote Control ............. 5-5 IEEE-488 Port Setup Procedure ..............5-7 Verify the IEEE-488 Port ................5-8 Set up the RS-232 Host Port for Remote Control ..........5-9 RS-232 Host Port Setup Procedure .............. - Page 144 Operators Manual Terminators ....................5-35 Incoming Character Processing ..............5-35 Response Message Syntax ................5-36 Check 5502A Status ..................... 5-37 Serial Poll Status Byte (STB) ................5-38 Service Request (SRQ) Line ............... 5-40 Service Request Enable Register (SRE) ............5-40 Programming the STB and SRE..............
-
Page 145: Introduction
This chapter gives methods to operate the Calibrator by remote control. Warning The 5502A Calibrator can output voltages to a maximum of 1020 V rms and must be programmed with caution to prevent hazardous voltage production without sufficient warning to the operator. - Page 146 IEEE-488 Port IEEE-488 Port 5502A Calibrator Controller System for a UUT without a remote port. 5502A Calibrator Controller System for a UUT with an IEEE-488 remote port. or to 5502A SERIAL 2 RS-232 COM Port TO UUT Port Port 5502A Calibrator Controller System for a UUT with an RS-232 remote port.
-
Page 147: Set Up The Ieee-488 Port For Remote Control
PC to UUT with the Calibrator. You can write your own computer programs with the command set, or use the PC as a terminal and enter individual commands, or you can purchase optional Fluke Calibration MET/CAL Plus software for RS-232 system operations. Typical RS-232 remote configurations are shown in Figure 5-2. - Page 148 System for a UUT with an RS-232 port (via PC). SERIAL 2 RS-232 COM Port TO UUT Port Port 5502A Calibrator Controller System for a UUT with an RS-232 remote port (via 5502A). gjh042.eps Figure 5-2. Typical RS-232 Remote Control Connections...
-
Page 149: Ieee-488 Port Setup Procedure
Remote Operation Set up the IEEE-488 Port for Remote Control IEEE-488 Port Setup Procedure Complete the subsequent procedure to set up the Calibrator for remote operations with the IEEE-488 remote control port. This procedure selects GPIB as the interface and to select the GPIB address for the interface. -
Page 150: Verify The Ieee-488 Port
Calibrator for GPIB operation. Note the GPIB Address Port (default is 4). 2. Connect the PC and Calibrator IEEE-488 ports with a standard IEEE-488 cable. (See Chapter 8, “Accessories,” for IEEE-488 cables available from Fluke Calibration.) 3. From the programs menu, select "NI-488.2M software for...(your operating system)". -
Page 151: Set Up The Rs-232 Host Port For Remote Control
SERIAL 1 FROM HOST port (Figure 5-2). You can record individual commands from a terminal, write your own programs with, for example, a Windows-based language such as Visual Basic, or use optional Windows-based Fluke Calibration software such as MET/CAL Plus. - Page 152 5502A Operators Manual Select To Step 4 nn121f.eps 4. Navigate the softkey selections shown below to select the HOST serial port parameters for the PC COM parameters. (Individual softkey functions are discussed in Chapter 3, “Features.”) If operating the port with a computer program instead of individual commands from a terminal, select Remote I/F comp.
- Page 153 Remote Operation Set up the RS-232 Host Port for Remote Control nn122f.eps 5. Push (not ) several times until the message STORE CHANGES/DISCARD CHANGES appears or, if there were no changes, the reset display. If you select STORE CHANGES, the serial and host port information are kept in the instrument non-volatile memory.
-
Page 154: Verify The Rs-232 Host Port
Null Modem Cable SERIAL 1 FROM HOST COM Port Port 5502A Calibrator Controller gjh044.eps Figure 5-4. RS-232 Host Port Verification Terminal This procedure uses the Terminal accessory supplied with Windows (or equal) to verify RS-232 Host port operation. To use this method, you must select term as the Remote I/F in Step 4 in the procedure “RS-232 Host Port Setup Procedure.”... - Page 155 Remote Operation Set up the RS-232 Host Port for Remote Control 4. Open Terminal from the Accessory group of Program Manager (below). If a terminal configuration file already exists, for example, host.trm, select the necessary file with the Open command from the File menu and go to Step 7. If not, go to Step 5. nn308f.bmp 5.
-
Page 156: Verify Rs-232 Host Port Operation With Visual Basic
5502A Operators Manual The characters REMOTE must have shown on the terminal screen as they were recorded. If they did not show on the screen, but the Control Display changed to REMOTE CONTROL, then see step 4 of the “RS-232 Host Port Setup Procedure”... - Page 157 Remote Operation Set up the RS-232 Host Port for Remote Control 2. Connect the selected COM port on the PC to the Calibrator SERIAL 1 FROM HOST port with a standard null-modem RS-232 cable. (See Appendix C for information on RS-232 cables and connectors.) 3.
-
Page 158: Set Up The Rs-232 Uut Port For Remote Control
5502A Operators Manual Set up the RS-232 UUT Port for Remote Control The SERIAL 2 TO UUT serial data port connects a UUT to a PC or terminal with the Calibrator (Figures 5-1 and 5-2). This “pass-through” configuration removes the requirement for two COM ports at the PC or Terminal. -
Page 159: Verify The Rs-232 Uut Port With Rs-232 Host Port
Remote Operation Set up the RS-232 UUT Port for Remote Control nn125f.eps Verify the RS-232 UUT Port with RS-232 Host Port Choose or adapt one of the subsequent test procedures to verify the Calibrator RS-232 UUT port with the RS-232 Host port. Connect the UUT and PC as shown in Figure 5-5. Note that a modem cable (NOT null modem) is used for UUT connection. -
Page 160: Test Rs-232 Uut Port Operation With A Terminal
RS-232 COM Port TO UUT Port Port 5502A Calibrator Controller gjh045.eps Figure 5-5. Testing the RS-232 UUT Port with RS-232 Host Port Terminal This procedure uses the Terminal accessory supplied with Windows (or equal) to verify RS-232 UUT port operation. -
Page 161: Verify Rs-232 Uut Port Operation With Visual Basic
Remote Operation Set up the RS-232 UUT Port for Remote Control 5. When you complete UUT commands tests, select the Exit command from the File menu to close the Terminal accessory. Verify RS-232 UUT Port Operation with Visual Basic Complete the subsequent procedure to verify RS-232 UUT port operation with the RS- 232 Host port with a Visual Basic test program. - Page 162 SERIAL 2 RS-232 TO UUT Port Port 5502A Calibrator Controller gjh046.eps Figure 5-6. Verify the RS-232 UUT Port with IEEE-488 Port Complete the subsequent procedure to verify RS-232 UUT port operation with the IEEE- 488 port with the Win32 Interactive Control utility.
-
Page 163: Change Between Remote And Local Operation
Remote Operation Change between Remote and Local Operation 7. At the prompt, type the subsequent line to turn on the IEEE interface card: <ibdev 0 4 0 10 1 0> 8. The second number in this line is the primary address of the calibrator. If the address has changed from the factory default, change this line accordingly. -
Page 164: Remote Condition
5502A Operators Manual Remote Condition When the Calibrator is put in remote, with the RS-232 REMOTE command, or with IEEE-488 asserting the REN line, it goes to the remote condition. In the remote condition, the Output Display continues to show the output conditions or measurement as in local operation. -
Page 165: Rs-232 Interface Overview
Remote Operation RS-232 Interface Overview Table 5-1. Operation State Transitions From Front Panel GPIB Message Serial Command Remote MLA (REN True) REMOTE Local Local with Lockout LOCKOUT Local Go to Local Softkey GTL or REN LOCAL False Remote Remote with LOCKOUT Lockout Local... -
Page 166: Ieee-488 Interface Overview
5502A Operators Manual A summary of RS-232 terms, interface lines and mnemonics are shown in Table 5-2. Table 5-2. RS-232 Interface Wiring Mnemonic Description Clear to Send DB-9 Type DB connector, 9 pins DB-25 Type DB connector, 25 pins Data Carrier Detect... - Page 167 Remote Operation IEEE-488 Interface Overview Table 5-3. RS-232 Emulation of IEEE-488 Messages IEEE-488 Message RS-232 Equivalent LOCAL command REMOTE command LOCKOUT command SDC, DCL ^C (<Cntl> C) character [clear the device] ^T (<Cntl> T) character [execute a group trigger] SPE, SPD ^P (<Cntl>...
- Page 168 5502A Operators Manual MESSAGE DATA HAND- DESCRIPTION SHAKE MANAGEMENT MESSAGE NAME Addressed Command Group M AC Attention U UC Data Byte M DD B8 B7 B6 B5 B4 B3 B2 B1 Data Accepted U HS Data Valid U HS Device Clear...
-
Page 169: Use Commands
Remote Operation Use Commands Use Commands Communications between the controller and the Calibrator is made of commands, queries, and interface messages. Although the commands come from the 488.2 standard, they can be used on the IEEE-488 or RS-232 interface, but for some specified RS-232 commands given in “Commands for RS-232 Only.”... -
Page 170: Query Commands
5502A Operators Manual Query Commands Query commands request information. That information is given as the command executes, or the information is put into a buffer until requested. An example of a query, which always completes with a question mark, is, RANGE? This shows the Calibrator primary and secondary outputs. - Page 171 Remote Operation Use Commands Table 5-4. IEEE-488 Interface Messages (Received) Mnemonic Name Function A control line that, when asserted, tells all instruments on the bus that the subsequent data bytes are an interface Attention message. When ATN is low, the subsequent data bytes are interpreted as device-dependent or common commands addressed to a specified instrument.
-
Page 172: Compound Commands
5502A Operators Manual Table 5-5. IEEE-488 Interface Messages (Sent) Mnemonic Name Function A message that occurs when the Calibrator asserts the EOI control line. The Calibrator asserts EOI while it transmits the ASCII character LF for its termination sequence or terminator. -
Page 173: Sequential Commands
For example, OUT 1 V, 1 A, 60 HZ; *WAI You can also use the status commands *OPC and *OPC? to find completion of overlapped commands. (See “Check 5502A Status.”) Sequential Commands Commands that start immediately are sequential commands. -
Page 174: Commands For Rs-232 Only
5502A Operators Manual Commands for RS-232 Only The RS-232 checkbox shows RS-232 interface commands. The IEEE-488 and RS-232 interfaces send commands to the Calibrator as data, but not those IEEE-488 functions that must be implemented as a message as specified in the IEEE-488 standards. -
Page 175: Commands For Ieee-488 Only
Remote Operation Use Commands Commands for IEEE-488 Only The IEEE-488 checkbox shows commands that are used for the IEEE-488 interface. This is all the commands but those used for RS-232 operations. (See “Commands for RS-232 Only.”) All commands are transferred over the IEEE-488 as data, except for the commands LOCAL, REMOTE, and LOCKOUT, which are implemented per IEEE Standards as messages (see Table 5-7). -
Page 176: Extra Space Or Tab Characters
5502A Operators Manual Resistance in units of ohms KOHM Resistance in units of kilohms MOHM Resistance in units of megohms Capacitance in units of nanofarads Capacitance in units of picofarads Capacitance in units of microfarads Capacitance in units of millifarads... -
Page 177: Terminators
Remote Operation Use Commands Terminators Table 5-9 summarizes the terminator characters for the IEEE-488 and RS-232 remote interfaces. Table 5-9. Terminator Characters ASCII Characters Terminator Control Command Language Command Function Terminator Terminator Number Program Carriage Return Chr(13) <Cntrl> M (CR) Line Feed (LF) Chr(10) <Cntrl>... -
Page 178: Response Message Syntax
Floating Example: DC_OFFSET? returns: 1.4293E+00 ASCII characters with quotation mark delimiters. String Example: SRQSTR “SRQ from 5502A”; SRQSTR? returns: “SRQ from 5502A” This type of response is always a keyword. Character Response Data Example: OUT 10V, 100HZ; FUNC? (CRD) returns: ASCII characters followed by EOM. -
Page 179: Check 5502A Status
Remote Operation Check 5502A Status Table 5-10. Response Data Types (cont.) Data Type Description A special data type specified by the IEEE-488.2 standard. This type is used in *PUD? query. It is specified as follows: #(non-zero digit) (digits) (user data) The non-zero digit specifies the number of characters that in the <digits>... -
Page 180: Serial Poll Status Byte (Stb)
5502A Operators Manual Each status register and queue has a summary bit in the Serial Poll Status Byte. Enable registers are used to mask various bits in the status registers and supply summary bits in the Serial Poll Status Byte. For IEEE-488 interface operation, the Service Request Enable Register is used to assert the SRQ control line on detection of status condition or conditions the programmer chooses. - Page 181 Remote Operation Check 5502A Status Instrument Status 8 7 6 5 4 3 2 1 0 Change Enable Registers & & Write using & ISCE0 (1 to 0 transition) & ISCE1 (0 to 1 transition) & ISCE (1 to 0 AND 0 to 1) &...
-
Page 182: Service Request (Srq) Line
Requesting service. The RQS bit is set to 1 whenever bits ESB, MAV, EAV, or ISCB change from 0 to 1 and are enabled (1) in the SRE. When RQS is 1, the 5502A asserts the SRQ control line on the IEEE-488 interface. You can do a serial poll to read this bit to see if the 5502A is the source of an SRQ. -
Page 183: Programming The Stb And Sre
Enable the EAV bit with the example above. ! THIS PROGRAM GENERATES AN ERROR AND CHECKS IT PRINT @6, “OUT 1300V” ! 1300V IS OUT OF 5502A RANGE A% = SPL(6) ! DO A SERIAL POLL IF ((A% AND 72%)=0%)THEN PRINT “EAV and RQS should have been set”... -
Page 184: Program The Esr And Ese
15 errors that have occurred.) Execution error. An error occurred while the 5502A tried to execute the last command. This could be caused, for example, by a parameter being out of range. (The command ERR? fetches the earliest error in the error queue, which contains error codes for the first 15 errors that have occurred.) -
Page 185: Instrument Status Register (Isr)
Remote Operation Check 5502A Status Change the contents of variables A and B into binary, and you can read the status of the registers. For example if A is 32, its binary equal is: 00000000 00100000. Thus, bit 5 (CME) in the ESR is set (1) and the remaining of the bits are reset (0). This means that the Calibrator tried to do an incorrectly formed command. - Page 186 TMPCAL Set to 1 when the 5502A is using temporary (non-stored) calibration data. OPER Set to 1 when the 5502A is in operate, 0 when it is in standby. gjh049.eps Figure 5-11. Bit Assignments for the ISR, ISCEs and ISCR...
-
Page 187: Program The Isr, Iscr, And Isce
! NOTE THAT THE ICSR? COMMANDS CLEAR THE ISCR CONTENTS PRINT @6, “ISR?” ! ASK ISR CONTENTS INPUT @6,A% ! RETRIEVE REGISTER CONTENTS FROM 5502A PRINT @6, “ISCR0?” ! ASK FOR AND CLEAR ISCR0 CONTENTS INPUT @6, B% ! RETRIEVE REGISTER CONTENTS FROM 5502A PRINT @6, “ISCE0?”... -
Page 188: Remote Program Examples
10 INIT PORT 0 \ REMOTE @6 ! PUT THE 5502A INTO THE REMOTE STATE 20 PRINT @6, “*RST;OUT 10V;OPER” ! RESET THE 5502A, PROGRAM IT TO If necessary, use SRQs, first use the *SRE, *ESE, and ISCE commands to enable the necessary event. -
Page 189: Write An Srq And Error Handler
You must change and extend this code as necessary for your procedure. To use SRQs, first use the *SRE, *ESE, and ISCE commands to enable the necessary event. Refer to "Check the 5502A Status" for more information. INIT PORT0 ! IFC the bus... -
Page 190: Verify A Meter On The Ieee-488 Bus
This program selects 10 V dc output, makes sure that the Calibrator is set to 10 V, then triggers a Fluke 45 to get a reading. It shows calibrator output, Fluke 45 indication, and the meter error in ppm. For this program, the Calibrator bus address is 4 and the Fluke 45 bus address is 1. -
Page 191: Get A Thermocouple Measurement
10 REM Set Bus Timeout to 20 seconds, Init IEEE Bus 20 TIMEOUT 20 * 1000 30 INIT PORT 0 40 CLEAR @6 100 REM Reset 5502A, TC measurement mode 110 PRINT @6,”*RST/;/ TC_TYPE J/;/ TC_MEAS FAR” 200 PRINT “Hit Carriage Return to take a Reading” 210 INPUTLINE A$ 220 REM Request the measurement value 230 PRINT @6, “VAL?”... -
Page 192: Input Buffer Operation
5502A Operators Manual Input Buffer Operation As the Calibrator receives each data byte from the controller, it puts the bytes in a part of memory the input buffer. The input buffer holds a maximum of 350 data bytes and operates with first in, first out protocol. -
Page 193: Remote Commands
Chapter 6 Remote Commands Title Page Introduction ......................6-3 Command Summary by Function ................ 6-3 Commands ......................6-10... - Page 194 5502A Operators Manual...
-
Page 195: Introduction
Introduction This chapter documents the IEEE-488/RS-232 remote commands for the Calibrator. Remote commands duplicate procedures that can be started from the front panel in local operation. After the summary table is a complete alphabetical listing of all commands complete with protocol information. Isolated headings in the alphabetical listing give the parameters and responses, plus an example for each command. - Page 196 5502A Operators Manual Table 6-2. Error Mode Commands Command Description Sets the edit field. PRI is specified for the output value in single output functions and the EDIT primary output value in dual output functions. EDIT? Shows the edit field position.
- Page 197 Remote Commands Command Summary by Function Table 6-3. External Connection Command (cont.) Command Description RTD_TYPE? Shows the Resistance Temperature Detector (RTD) type. Sets if the internal temperature sensor or an external reference value is used for TC_REF Thermocouple (TC) outputs and measurements. Shows the source and value of the temperature that is used as a reference for TC_REF? thermocouple simulation and measurement.
- Page 198 5502A Operators Manual Table 6-4. Oscilloscope Commands (cont.) Commands Description VIDEOMARK? Shows the VIDEO mode line marker location. ZERO_MEAS Sets the zero offset for capacitance measurement with the -SC600. ZERO_MEAS? Shows the zero offset for the capacitance measurement with the -SC600.
- Page 199 Remote Commands Command Summary by Function Table 6-5. Output Commands (cont.) Command Description STBY Puts the Calibrator in standby. WAVE Sets the waveforms for ac outputs. WAVE? Shows the waveforms of the output. ZCOMP Starts (2-wire or 4-wire) or deactivates impedance compensation. ZCOMP? Shows if impedance compensation is active and if active, which type.
- Page 200 5502A Operators Manual Table 6-8. Setup and Utility Commands Command Description CLOCK Sets the real-time clock. CLOCK? Queries the real-time clock. DBMZ_D Sets the power-up and reset default impedance used for dBm outputs (ac volts). DBMZ_D? Shows the power-up and reset default impedance used for dBm outputs (ac volts).
- Page 201 Remote Commands Table 6-9. Status Commands Command Description Shows the first error code with an explanation in the Calibrator error queue, and then ERR? removes that error code from the queue. Tells you about an error code. This command shows a string that tells you about the EXPLAIN? error code given as the parameter.
-
Page 202: Commands
5502A Operators Manual Commands The subsequent text is an alphabetical listing of all Calibrator commands and queries. Common commands and device-dependent commands are shown as part of the listing. Each command title includes a graphic that shows remote interface applicability, IEEE- 488 and RS-232, and command group: Sequential, Overlapped, and Coupled. - Page 203 Remote Commands Commands IEEE-488 RS-232 Sequential Overlapped Coupled CLOCK? (Real_Time Clock query) Shows the date and time the real time clock. Response: (character) 1. date in the format YYYY-MM-DD (character) 2. time in the format HH:MM:SS Example: CLOCK? shows 1998-12-04,13:03:50 The clock is set to December 4, 1998, 13:03:50.
- Page 204 5502A Operators Manual (1000 ohms = dBv) Z1000 (1200 ohms) Z1200 Example: DBMZ Z600 IEEE-488 RS-232 Sequential Overlapped Coupled DBMZ? (dBm Impedance query) Shows the impedance used for dBm outputs (ac volts). Response: (character) Impedance keyword Example: DBMZ? shows Z600...
- Page 205 Remote Commands Commands Response: <value> signed offset amplitude Example: DC_OFFSET? shows +1.44E-03 Shows 1.44 mV as the value of the applied dc offset. If +0.00000E+00 is shown, the dc offset is zero. IEEE-488 RS-232 Sequential Overlapped Coupled (Displacement Power Factor command) Sets the displacement power factor (phase angle) between the Calibrator front panel terminals NORMAL and AUX (for sine waves output only).
- Page 206 5502A Operators Manual IEEE-488 RS-232 Sequential Overlapped Coupled EARTH (Earth Ground command) Selects if the Calibrator front panel NORMAL LO terminal is tied to chassis (earth) ground. When set, the Calibrator keeps the earth setting until power off or reset.
- Page 207 Remote Commands Commands IEEE-488 RS-232 Sequential Overlapped Coupled ERR? (Error query) Shows the first error code contained in the Calibrator error queue, and then removes that error code from the queue. After the error code is an explanation of the error code, like, but sometimes has more specified information, than the EXPLAIN? command.
- Page 208 5502A Operators Manual Parameter: <value> (decimal equivalent of the ESE byte, 0 to 255) Example: *ESE 140 Load decimal 140 (binary 10001100) to enable bits 7 (PON), 3 (DDE) and 2 (QYE). IEEE-488 RS-232 Sequential Overlapped Coupled *ESE? (Event Status Enable query) Shows the contents of the Event Status Enable (ESE) register.
- Page 209 Remote Commands Commands IEEE-488 RS-232 Sequential Overlapped Coupled FORMAT (Format command) Use with extreme care. Restores the contents of the nonvolatile memory device to factory defaults. The memory holds calibration constants and setup parameters. You lose all calibration data permanently. The CALIBRATION switch on the rear panel of the Calibrator must be set in the ENABLE position or an execution error occurs, except for FORMAT SETUP.
- Page 210 60 Hz and the frequency of the voltage output on the AUX terminals at the 7th harmonic (420 Hz). The range for the harmonics is 1 to 50. Parameters: <value>, PRI (fundamental at 5502A NORMAL terminals) <value>, SEC (fundamental at 5502A AUX terminals)
- Page 211 2. Model number 3. Serial number 4. Firmware revision levels for the Main CPU+Front Panel CPU+Inguard Example: *IDN? shows FLUKE,5502A,5248000,1.0+1.3+1.8 Shows Fluke manufacturer, model 5502A, serial number 5248000, main firmware version 1.0, encoder firmware 1.3, and inguard PGA 1.8. IEEE-488 RS-232 Sequential...
- Page 212 5502A Operators Manual Example: ISCE0 6272 Load decimal 6272 (binary 0001010001000000) to enable bits 12 (SETTLED), 10 (REMOTE) and 6 (HIVOLT). IEEE-488 RS-232 Sequential Overlapped Coupled ISCE0? (Instrument Status 1 to 0 Change Enable query) Shows the two bytes from the 16-bit ISCE0 register.
- Page 213 Remote Commands Commands IEEE-488 RS-232 Sequential Overlapped Coupled ISCR0? Error! Bookmark not defined. (Instrument Status 1 to 0 Change Register query) Shows and clears the contents of the Instrument Status 1 to 0 Change Register. Response: <value> (decimal equivalent of the 16 bits, 0 to 32767) Example: ISCRO? shows 6272 Shows decimal 6272 (binary 0001010001000000) if bits 12 (SETTLED), 10...
- Page 214 5502A Operators Manual IEEE-488 RS-232 Sequential Overlapped Coupled LIMIT (Limit command) Sets the maximum permitted output magnitude, negative and positive, for voltage and current, which is kept in the Calibrator non-volatile memory. (While saving configuration data in the non-volatile memory, a period of about 2 seconds, the Calibrator does not respond to remote commands.) Negative and positive values must be...
- Page 215 Remote Commands Commands Set the instrument into the front panel lockout condition. The front panel’s controls cannot be used. IEEE-488 RS-232 Sequential Overlapped Coupled LOWS (Low Potential Output Terminals command) Selects if the Calibrator front panel NORMAL LO terminal and AUX LO terminal are internally tied together (default) or are open.
- Page 216 5502A Operators Manual you want to return to the reference value, use the OLDREF command. If editing the output and you want to make the edited value the new reference, use the NEWREF command. Parameter: (None) Example: OLDREF Set the output to the reference value that exists, clearing editing changes.
- Page 217 Remote Commands Commands Example: OPER? shows 1 Shows 1 when the Calibrator is in operate. IEEE-488 RS-232 Sequential Overlapped Coupled *OPT? (Options command) Shows a list of the installed hardware and software options. Responses: <option string>,<option string>,... (options list, separated by commas) 0 (no options are installed) Example: *OPT? shows SC600...
- Page 218 5502A Operators Manual (ohms; 1 kΩ) OUT 1 KOHM (capacitance; 1 μF) OUT 1 UF (temperature; 100 °C) OUT 100 CEL (temperature; 32 °F) OUT 32 FAR (frequency update; 60 Hz) OUT 60 HZ (power; 10 watts @ same frequency) OUT 10 V, 1 A (power ac;...
- Page 219 Remote Commands Commands IEEE-488 RS-232 Sequential Overlapped Coupled OUT_ERR? (Output Error query) Shows the UUT error and units computed by the Calibrator after shifting the output with the INCR command. The return units are PPM (parts per million), PCT (percent), DB (decibels) or 0 if there is no error. The UUT error is not computed when editing frequency.
- Page 220 5502A Operators Manual 2. Format of report: PRINT (designed to be read), SPREAD (designed to be loaded into a spreadsheet ) 3. Calibration interval to be used for instrument specifications in the report: I90D (90 day spec), I1Y (I year spec) 4.
- Page 221 Remote Commands Commands (dc current 33 mA range) DC33MA_A,0 (ac volts 3.3 V range) AC3_3V,0 (ac current 330 mA range) AC330MA_A,0 (ohms 110 Ω range) R110OHM,0 (capacitance 1.1 μF range) C1_1UF,0 (temperature thermocouple source) TCSRC,0 (temperature RTD 110 Ω range) RTD_110,0 (dc power 3.3 V, 3 A ranges) DC3_3V_P,DC3A_AS...
- Page 222 5502A Operators Manual IEEE-488 RS-232 Sequential Overlapped Coupled REMOTE (Remote command) Puts the Calibrator into the remote condition. This command duplicates the IEEE-488 REN (Remote Enable) message. When in the remote condition, the Control Display shows the softkey “REMOTE CONTROL Go to Local.” Push this softkey to change the Calibrator to local operation.
- Page 223 Remote Commands Commands A reset gets the subsequent commands and values: Command Value Command Value CUR_POST RTD_TYPE <RTD_TYPE_D value> DBMZ <DBMZ_D value> SCOPE DC_OFFSET STBY (No output) DUTY 50PCT TC_OFFSET 0 CEL EARTH OPEN TC_OTCD HARMONIC 1, PRI TC_REF LCOMP TC_TYPE <TC_TYPE_D value>...
- Page 224 5502A Operators Manual IEEE-488 RS-232 Sequential Overlapped Coupled RTD_TYPE? (Resistance Temperature Detector Type query) Shows the Resistance Temperature Detector (RTD) type used for RTD temperature simulations. (100-ohm RTD, curve α=0.00385 ohms/ohm/°C) Responses: PT385 (200-ohm RTD, curve α=0.00385 ohms/ohm/°C) PT385_200 (500-ohm RTD, curve α=0.00385 ohms/ohm/°C) PT385_500 (1000-ohm RTD, curve α=0.00385 ohms/ohm/°C)
- Page 225 Remote Commands Commands Shows PT3926 when the RTD default type is a 100-ohm RTD with curve α=0.003926 ohms/ohm/°C. IEEE-488 RS-232 Sequential Overlapped Coupled SP_SET (Host Serial Port Set command) Sets the RS-232-C settings for the Calibrator rear panel SERIAL 1 FROM HOST serial port, which is kept in the Calibrator non-volatile memory.
- Page 226 5502A Operators Manual remote commands.) The SPLSTR is sent to the host over the serial interface when a ^P (<cntl> P) character is sent. The default format is: SPL: %02x %02x %04x %04x where the term %02x (8 bits) means print the value in hexadecimal with 2 hex digits, and %04x (16 bits) means print the value in hexadecimal with 4 hex digits.
- Page 227 Remote Commands Commands where the term %02x (8 bits) means print the value in hexadecimal with 2 hex digits, and %04x (16 bits) means print the value in hexadecimal with 4 hex digits. The string representations are: SRQ: (STB) (ESR) (ISCR0) (ISCR1) See the commands *STB?, *ESR?, ISCR0?, and ISCR1? A typical string in the default format sent to the host is: SRQ: 44 00 0000 1000.
- Page 228 5502A Operators Manual IEEE-488 RS-232 Sequential Overlapped Coupled TC_OFFSET (Thermocouple Temperature Measurement Offset command) Adds a temperature offset to thermocouple measurements (±500 °C). This command does not apply to thermocouple sourcing. Parameters: <value> CEL (offset in Celsius) (optional) <value> FAR...
- Page 229 Remote Commands Commands IEEE-488 RS-232 Sequential Overlapped Coupled TC_REF (Thermocouple Reference command) Sets if the internal temperature sensor (INT) or an external reference value (EXT) is used for Thermocouple (TC) outputs and measurements. If the first parameter is EXT, the second parameter must be the temperature value to use as the reference for the thermocouple reference junction temperature.
- Page 230 5502A Operators Manual IEEE-488 RS-232 Sequential Overlapped Coupled TC_TYPE? (Thermocouple Type query) Shows the Thermocouple (TC) temperature sensor type. When the thermocouple type is changed while you simulate a temperature output, the temperature is changed to 0 °C. Responses: (B-type thermocouple)
- Page 231 Remote Commands Commands IEEE-488 RS-232 Sequential Overlapped Coupled TC_TYPE_D? (Thermocouple Type Default query) Shows the default thermocouple (TC) sensor type. Responses: (B-type thermocouple) (C-type thermocouple) (E-type thermocouple) (J-type thermocouple) (K-type thermocouple) (default) (N-type thermocouple) (R-type thermocouple) (S-type thermocouple) (T-type thermocouple) (10 μV/°C linear output) (% relative humidity) (1 mV/°C linear output)
- Page 232 5502A Operators Manual IEEE-488 RS-232 Sequential Overlapped Coupled *TRG (Trigger Thermocouple Measurement command) Triggers a thermocouple temperature measurement and shows the value of the measurement. Also changes the operating mode to thermocouple measurement if this is not already the operating mode. (This command is equivalent to sending TC_MEAS;*WAI;VAL?)
- Page 233 Remote Commands Commands IEEE-488 RS-232 Sequential Overlapped Coupled UNCERT? (Uncertainties command) Shows specified uncertainties for the current output. If there are no specifications for an output, shows zero. Parameter: 1. (optional) Preferred unit of primary output uncertainty or PCT (default) 2.
- Page 234 5502A Operators Manual Example: "=>" followed by a carriage return and a line feed shows 4,61,62,13,10 IEEE-488 RS-232 Sequential Overlapped Coupled UUT_SEND (Send UUT Data command) Sends data to the UUT serial port in binary block or string data format over the Calibrator rear panel SERIAL 2 TO UUT serial port. The command can be sent over GPIB or RS-232 ports, but applies to SERIAL 2 TO UUT serial port operation.
- Page 235 Remote Commands Commands IEEE-488 RS-232 Sequential Overlapped Coupled UUT_SENDB (Send UUT Binary Data command) Send binary data to the UUT serial port (Calibrator rear panel SERIAL 2 to UUT serial port). Use the UUT_SEND command instead of sending ASCII data. The command can be sent over GPIB or RS-232 ports, but applies to SERIAL 2 TO UUT serial port operation.
- Page 236 5502A Operators Manual IEEE-488 RS-232 Sequential Overlapped Coupled VAL? (Measurement Value command) Shows the last value of the thermocouple temperature or scope impedance measurement. The unit shows the status of the indication. Parameter: (Optional) Units to return Responses: 1. (Float) Measured temperature 2.
- Page 237 Remote Commands Commands IEEE-488 RS-232 Sequential Overlapped Coupled WAVE? (Waveform query) Shows the waveform types for ac outputs. Waveform selections are SINE (sine wave), TRI (triangle wave), SQUARE (square wave), TRUNCS (truncated sine wave), or NONE (waveform does not apply). Responses: <1st waveform>...
- Page 238 5502A Operators Manual IEEE-488 RS-232 Sequential Overlapped Coupled ZERO_MEAS Sets the zero offset for capacitance measurement with the -SC600. Parameter: 1. (boolean) ON (boolean) OFF Example: ZERO_MEAS ON Sets the zero offset to the current measurement value. IEEE-488 RS-232 Sequential...
-
Page 239: Maintenance
Chapter 7 Maintenance Title Page Introduction ......................7-3 Replace the Mains Power Fuse ................7-3 Replace the Line Fuse ..................7-4 Replace the Current Fuses ................... 7-6 Clean the Air Filter ....................7-7 Clean the Calibrator ..................... 7-8 Performance Tests ....................7-8... - Page 240 5502A Operators Manual...
-
Page 241: Introduction
Introduction This chapter tells you how to do the usual maintenance and calibration tasks necessary to keep the 5502A Calibrator in service. See the Service Manual for intensive maintenance tasks like troubleshooting, calibration or repair, and all procedures where it is necessary to open the Calibrator cover. The Service Manual also has complete verification and calibration procedures. -
Page 242: Replace The Line Fuse
5502A Operators Manual Replace the Line Fuse Access the line power fuse from the rear panel. The fuse rating information above the ac power input module shows the correct replacement fuse for each line voltage setting. Table 7-1 shows the fuse part numbers for each line voltage setting. -
Page 243: Replace The Line Fuse
Maintenance Replace the Line Fuse Line Voltage Indicator Changing Line Fuse Changing Line Voltage gjh004.eps Figure 7-1. Accessing the Fuse... -
Page 244: Replace The Current Fuses
5502A Operators Manual Replace the Current Fuses Warning To prevent possible electrical shock, fire, or personal injury: • Replace a blown fuse with exact replacement only for continued protection against arc flash. • Disconnect the mains power cord before you remove the bottom fuse cover. -
Page 245: Clean The Air Filter
Maintenance Clean the Air Filter Clean the Air Filter The air filter must be removed and cleaned each 30 days or more frequently if the calibrator is operated in a dusty environment. The air filter is accessed from the rear panel of the calibrator. -
Page 246: Clean The Calibrator
5502A Operators Manual Clean the Calibrator Clean the case, front panel keys, and display with a soft cloth dampened with water or a non-abrasive weak cleaning solution that will not harm plastics. Caution Do not use aromatic hydrocarbons or chlorinated solvents for cleaning. - Page 247 Maintenance Performance Tests Table 7-4. Verification Tests for DC Voltage (AUX) Range Output Lower Limit Upper Limit 329.999 mV 0.000 mV -0.350 mV 0.350 mV 329.999 mV 329.000 mV 328.551 mV 329.449 mV 329.999 mV -329.000 mV -329.449 mV -328.551 mV 3.29999 V 0.33000 V 0.32955 V...
- Page 248 5502A Operators Manual Table 7-5. Verification Tests for DC Current (AUX) (cont.) Range Output Lower Limit Upper Limit 2.99999 A 1.09000 A 1.08979 A 1.09021 A 2.99999 A -1.09000 A -1.09021 A -1.08962 A 2.99999 A 2.99000 A 2.98906 A 2.99094 A...
- Page 249 Maintenance Performance Tests Table 7-6. Verification Tests for Resistance (cont.) Range Output Lower Limit Upper Limit 109.999 kΩ 33.000 kΩ 32.9971 kΩ 33.0028 kΩ 109.999 kΩ 109.000 kΩ 108.9910 kΩ 109.0089 kΩ 329.999 kΩ 119.000 kΩ 118.9872 kΩ 119.0127 kΩ 329.999 kΩ...
- Page 250 5502A Operators Manual Table 7-7. Verification Tests for AC Voltage (Normal) (cont.) Range Output Frequency Lower Limit Upper Limit 32.999 mV 30.000 mV 50 kHz 29.932 mV 30.068 mV 32.999 mV 30.000 mV 100 kHz 29.877 mV 30.123 mV 32.999 mV 30.000 mV...
- Page 251 Maintenance Performance Tests Table 7-7. Verification Tests for AC Voltage (Normal) (cont.) Range Output Frequency Lower Limit Upper Limit 32.9999 V 30.0000 V 20 kHz 29.9802 V 30.0198 V 32.9999 V 30.0000 V 50 kHz 29.9736 V 30.0264 V 32.9999 V 30.0000 V 90 kHz 29.9404 V...
- Page 252 5502A Operators Manual Table 7-8. Verification Tests for AC Voltage (AUX) (cont.) Range Output, AUX Frequency Lower Limit Upper Limit 329.999 mV 300.000 mV 30 kHz 287.100 mV 312.900 mV 3.29999 V 3.00000 V 9.5 Hz 2.835 V 3.165V 3.29999 V 3.00000 V...
- Page 253 Maintenance Performance Tests Table 7-9. Verification Tests for AC Current (cont.) Range Output Frequency Lower Limit Upper Limit 3.2999 mA 1.9000 mA 1 kHz 1.8983 mA 1.9017 mA 3.2999 mA 1.9000 mA 10 kHz 1.8921 mA 1.9079 mA 3.2999 mA 1.9000 mA 30 kHz 1.8842 mA...
- Page 254 5502A Operators Manual Table 7-9. Verification Tests for AC Current (cont.) Range Output Frequency Lower Limit Upper Limit 2.99999 A 0.33000 A 5 kHz 0.32735 A 0.33265 A 2.99999 A 0.33000 A 10 kHz 0.31840 A 0.34160 A 2.99999 A 1.09000 A...
- Page 255 Maintenance Performance Tests Table 7-10. Verification Tests for Capacitance (cont.) Test Frequency Range Output Lower Limit Upper Limit or Current 3.299 nF 2.0000 nF 1 kHz 1.9824 nF 2.0176 nF 10.999 nF 7.0000 nF 1 kHz 6.9767 nF 7.0233 nF 10.999 nF 10.9000 nF 1 kHz...
- Page 256 5502A Operators Manual Table 7-11. Verification Tests for Thermocouple Simulation Output, °C TC Type Lower Limit, mV Upper Limit, mV 0.00 °C (0.0000 mV) -0.0030 0.0030 100.00 °C (1.0000 mV) 0.99696 1.00304 -100.00 °C (-1.0000 mV) -1.00304 -0.99696 10 μV/°C 1000.00 °C (10.0000 mV)
- Page 257 Maintenance Performance Tests Table 7-13. Verification Tests for Phase Accuracy, V and V Range, Range, Output, Output, Lower Upper Phase ° Normal Frequency Limit ° Normal V Limit° Output, V Output 65 Hz -0.150 0.150 400 Hz -0.900 0.900 1 kHz -2.000 2.000 5 kHz...
- Page 258 5502A Operators Manual Table 7-14. Verification Tests for Phase Accuracy, V and I Range, Range, Output, Output, Lower Upper Phase ° Normal Frequency Limit ° Limit ° Normal V Output, V Output 65 Hz 329.99 mA 300.00 mA -0.15 0.15 30.000 mV...
- Page 259 Maintenance Performance Tests Table 7-15. Verification Tests for Frequency Range, Normal Output, Normal, Frequency Lower Limit Upper Limit Output, V 3.29999 3.00000 119.00 Hz 118.99602 Hz 119.00398 Hz 120.0 Hz 119.99600 Hz 120.00400 Hz 1000.0 Hz 999.974000 Hz 1000.026000 Hz 100.00 kHz 99.99750000 Hz 100.00250000 Hz...
- Page 260 5502A Operators Manual 7-22...
-
Page 261: Accessories
Chapter 8 Accessories Title Page Introduction ......................8-3 Rack Mount Kit ....................8-4 IEEE-488 Interface Cable ..................8-4 5500A/LEADS ..................... 8-4... - Page 262 5502A Operators Manual...
-
Page 263: Introduction
Replacement fuse; 4 A/500 V, Ultra fast, 0.25 x 1.25, ceramic body 3470596 Replacement fuse; 25 A/250 V, Fast, 6.3 X 32 mm MET/CAL Plus Fluke Calibration Metrology Software MET/CAL-IEEE USB IEEE Interface Option. 884X-USB USB to RS-232 Cable Adapter... -
Page 264: Rack Mount Kit
Shielded IEEE-488 Cable 4 m (13 ft) Rack Mount Kit The Y5537 rack mount kit supplies all the hardware necessary to install the 5502A on slides in a 24-inch (61 cm) equipment rack. Instructions are supplied in the kit. (To rack mount the 5725A Amplifier, order kit Y5735.) -
Page 265: Sc600 Oscilloscope Calibration Option
Chapter 9 SC600 Oscilloscope Calibration Option Title Page Introduction ......................9-3 SC600 Oscilloscope Calibration Option Specifications ........9-4 Voltage Function Specifications ..............9-4 Edge Specifications ..................9-4 Leveled Sine Wave Specifications ..............9-5 Time Marker Specifications ................9-5 Wave Generator Specifications ............... 9-5 Pulse Generator Specifications ................ - Page 266 5502A Operators Manual Frequency Response Calibration Procedure for an Oscilloscope ....9-19 Calibrate the Time Base of an Oscilloscope ............9-21 The Time Marker Function ................9-21 Time Base Marker Calibration Procedure for an Oscilloscope ....... 9-22 Test the Trigger SC600 Option ................9-23 Test Video Triggers .....................
-
Page 267: Introduction
SC600 Oscilloscope Calibration Option Introduction Introduction The SC600 Oscilloscope Calibration Option (the SC600 Option) has functions that help you keep your oscilloscope’s accuracy by verifying and calibrating the subsequent oscilloscope qualities: • Vertical deflection qualities are calibrated and verified. The VOLT function lets you compare the voltage gain to the graticule lines on the oscilloscope. -
Page 268: Sc600 Oscilloscope Calibration Option Specifications
SC600 Oscilloscope Calibration Option Specifications These specifications apply only to the SC600 Oscilloscope Calibration Option. General specifications that apply to the 5502A Calibrator can be found in Chapter 1. The specifications are correct given the 5502A is operated with the conditions specified in Chapter 1, and has completed a warm-up period of no less than two times the length of time the Calibrator was powered off, to a maximum of 30 minutes. -
Page 269: Leveled Sine Wave Specifications
SC600 Oscilloscope Calibration Option SC600 Oscilloscope Calibration Option Specifications Leveled Sine Wave Specifications Leveled Sine Wave Frequency Range Qualities into 50 Ω 50 kHz (reference) 50 kHz to 100 MHz 100 to 300 MHz 300 to 600 MHz Amplitude Qualities (for measuring oscilloscope bandwidth) Range (p-p) 5 mV to 5.5 V <100 mV: 3 digits... -
Page 270: Pulse Generator Specifications
5502A Operators Manual Pulse Generator Specifications Positive pulse into 50 Ω Pulse Generator Qualities Typical rise/fall times <2 ns Available Amplitudes 2.5 V, 1 V, 250 mV, 100 mV, 25 mV, 10 mV Pulse Width Range 4 ns to 500 ns 5 % of pulse width ±2 ns... -
Page 271: Overload Measurement Specifications
To use the external trigger and see its signal with the calibration signal, connect the TRIG output to A different channel. See your oscilloscope manual for instructions to connect and see an external trigger. 5502A CALIBRATOR gvx036.eps Figure 9-1. -
Page 272: The Output Signal
5502A Operators Manual gjh050.eps The Output Signal If you have selected VOLT mode from the SCOPE menu, see the subsequent description. The Control Displays shows as follows with VOLT mode selected: gjh051.eps The location of the output signal is shown on the Control Display (the display on the right side). -
Page 273: Key In A Value
SC600 Oscilloscope Calibration Option Start the SC600 Option Key in a Value The subsequent example is for use in the LEVSINE mode. To key a specific value directly into the Calibrator from its front panel: 1. Key in the value you want to record, including the units and prefixes. For example, to record 120 mV push ... -
Page 274: Use And
5502A will beep. If you need to reach a different range of values, turn the knob quickly to jump to the new range. - Page 275 SC600 Oscilloscope Calibration Option Calibrate the Voltage Amplitude on an Oscilloscope gjh052.eps You can push the MODE softkey to move through the functions in the sequence shown, or you can push to return directly to the SCOPE menu. Each menu item is given below: •...
-
Page 276: The V/Div Menu
5502A Operators Manual The V/DIV Menu The V/DIV menu, shown below, sets the number of volts denoted by each division on the oscilloscope. This menu gives alternative methods for changing the output amplitude that can be more convenient for certain oscilloscope applications. To access the V/DIV menu, push V/DIV from the Volt menu. -
Page 277: Amplitude Calibration Procedure For An Oscilloscope
(1 MΩ for this example). Verify that the key on the 5502A is illuminated, indicating that the signal is connected. 2. Key in the voltage level that is recommended for your oscilloscope. For example to record 30 mV, push ... -
Page 278: Calibrate The Pulse And Frequency Response On An Oscilloscope
TD PULSE Push once to turn the Tunnel Diode Pulser drive signal on, again to turn the Pulser drive off. This signal sources up to 100 V p-p to drive a Tunnel Diode Pulser (Fluke Part Number 606522, Tektronix 067-0681-01, or equivalent. •... -
Page 279: Pulse Response Calibration Procedure For An Oscilloscope
Do the subsequent sample procedure to calibrate the pulse response. 1. Connect the 5502A to Channel 1 on the oscilloscope. Select 50Ω impedance or use a 50Ω termination directly at the oscilloscope input. Verify that the key is illuminated, indicating that the signal is connected. -
Page 280: Pulse Response Calibration With A Tunnel Diode Pulser
5502A Operators Manual Pulse Response Calibration with a Tunnel Diode Pulser You can use the Calibrator to drive a tunnel diode pulser. This lets you see pulse edge rise times as fast as 125 ps. The Calibrator sources a maximum pulser drive signal of 100 V p-p at 100 kHz. The recommended (and default) output setting is 80 V p-p at 100 kHz. -
Page 281: Shortcuts To Set The Frequency And Voltage
SC600 Oscilloscope Calibration Option Calibrate the Pulse and Frequency Response on an Oscilloscope gjh056.eps You can push the MODE softkey to move through the functions in the sequence shown, or you can push to return directly to the SCOPE menu. •... -
Page 282: The More Options Menu
5502A Operators Manual The MORE OPTIONS Menu When you select MORE OPTIONS, you open options that give you more control of the frequency and voltage. To access the MORE OPTIONS menu, push the softkey below MORE OPTIONS in the Levsine menu. -
Page 283: Sweep Through A Frequency Range
SC600 Oscilloscope Calibration Option Calibrate the Pulse and Frequency Response on an Oscilloscope The default range setting is “auto” which must always be used unless you are troubleshooting discontinuities in your oscilloscope’s vertical gain. The range setting will go to “auto” after you are out of levsine mode. •... - Page 284 Operators Manual Do the subsequent sample procedure to calibrate the frequency response. 1. Push the key on the 5502A to reconnect the signal. Select 50 Ω impedance or use a 50 Ω external termination directly at the oscilloscope input.
-
Page 285: Calibrate The Time Base Of An Oscilloscope
SC600 Oscilloscope Calibration Option Calibrate the Time Base of an Oscilloscope gl010i.bmp 6. Push to remove the input signal. 7. Do this procedure again for the remaining channels on your oscilloscope. Calibrate the Time Base of an Oscilloscope The horizontal deflection (time base) of an oscilloscope is calibrated with a method equivalent to the vertical gain calibration. -
Page 286: Time Base Marker Calibration Procedure For An Oscilloscope
5502A Operators Manual Each option in the Marker menu is given below. • OUTPUT @ SCOPE terminal (50Ω) Shows the location of the signal output. If the signal does not show on the oscilloscope, push . To disconnect the signal, push . -
Page 287: Test The Trigger Sc600 Option
SC600 Oscilloscope Calibration Option Test the Trigger SC600 Option Note You can record the equivalent frequency as an alternative to the time marker value. For example, you can record 5 MHz for 200 ns. 3. Set the time base of your oscilloscope to show 10 time markers. The time markers must align with the oscilloscope divisions, as shown in the example below. - Page 288 5502A Operators Manual The wave generator is available through the Wavegen menu, shown below. To access this menu, push the softkey below MODE until “wavegen” shows, see below. gjh061.eps You can push the MODE softkey to go through the functions in the sequence shown, or you can push ...
-
Page 289: Test Video Triggers
SC600 Oscilloscope Calibration Option Test Video Triggers Test Video Triggers gjh062.eps You can push the MODE softkey to move through the functions in the sequence shown, or you can push to return directly to the OTHER modes menu. Each option in the Video menu is given below. •... -
Page 290: Verify Pulse Capture
5502A Operators Manual Verify Pulse Capture gjh063.eps You can push the MODE softkey to move through the functions in the sequence shown, or you can push to return directly to the OTHER modes menu. Each option in the PULSE menu is given below. -
Page 291: Measure Input Resistance And Capacitance
SC600 Oscilloscope Calibration Option Measure Input Resistance and Capacitance Measure Input Resistance and Capacitance gjh064.eps You can push the MODE softkey to move through the functions in the sequence shown, or you can push to return directly to the OTHER modes menu. Each option in the Impedance/Capacitance (MEAS Z) menu is given below. -
Page 292: Test Overload Protection
5502A Operators Manual 1. Set the oscilloscope for 1 MΩ input impedance. Note that input capacitance tests cannot be done with 50 Ω input impedance. 2. Use the MEASURE softkey to select “cap”. 3. With the output cable connected to the Calibrator but not connected to the oscilloscope, push the SET OFFSET softkey to cancel stray capacitances. -
Page 293: Remote Commands And Queries
SC600 Oscilloscope Calibration Option Remote Commands and Queries Do the subsequent procedure to verify the overload protection of an oscilloscope: 1. Connect the Calibrator to Channel 1 on the oscilloscope. 2. Select the voltage type (DC or AC) with the OUT VAL softkey. 3. - Page 294 5502A Operators Manual Table 9-1. SCOPE Command Parameters (cont.) Parameter Description/Example Oscilloscope EDGE mode. Programs 25 mV peak-to-peak, 1 MHz, output at the SCOPE BNC, standby if from OFF or previously in standby. FUNC? shows EDGE. EDGE Example: SCOPE EDGE; OUT 0.5 V, 5 kHz (Edge, 0.5 V peak-to-peak, 5 kHz.)
- Page 295 SC600 Oscilloscope Calibration Option Remote Commands and Queries SCOPE (IEEE-488, RS-232, Sequential) Programs the SC600 oscilloscope calibration option hardware, if installed. The instrument settings are determined by this command’s parameter. Once in SCOPE mode, use the OUT command to program new output. OPER, STBY, *OPC, *OPC?, and *WAI all operate as given in Chapter 6.
- Page 296 5502A Operators Manual (Wave Generator, 1 V peak- SCOPE WAVEGEN; OUT 1V, 1 kHz to-peak, 1 kHz.) (Video trigger; 100% SCOPE VIDEO; OUT 100PCT amplitude) (Pulse output, 100ns width SCOPE PULSE; OUT 100NS,1US pulses every 1 microsecond) (Impedance measurement SCOPE MEASZ mode) (Overload test mode;...
-
Page 297: Edge Function Commands
SC600 Oscilloscope Calibration Option Remote Commands and Queries Parameters: (None) RANGE Programs the instrument range in PULSE, MEAS Z, and OVERLD modes. Parameters: TP0DB Sets the range to 2.5 V in pulse mode. Sets the range to 1.0 V in pulse mode. TP8DB Sets the range to 250 mV in pulse mode. -
Page 298: Video Function Commands
5502A Operators Manual Video Function Commands VIDEOFMT (IEEE-488, RS-232, Sequential) Selects the format for VIDEO mode. Parameters: NTSC, PAL, PALM (for PAL-M), or SECAM Example: VIDEOFMT SECAM VIDEOFMT? (IEEE-488, RS-232, Sequential) Shows the VIDEO mode format. Parameters: None Response: NTSC, PAL, PALM (for PAL-M), or SECAM... -
Page 299: Impedance/Capacitance Function Commands
SC600 Oscilloscope Calibration Option Remote Commands and Queries TLIMIT? (IEEE-488, RS-232, Sequential) Shows the programmed OPERATE time limit for the OVERLD mode signal. Response: <Integer> Time limit in seconds. TLIMIT_D (IEEE-488, RS-232, Sequential) Sets the default OPERATE time limit for the OVERLD mode signal. Parameters: 1 to 60 (seconds) Example: TLIMIT_D 15... -
Page 300: Verification Tables
5502A Operators Manual Verification Tables The verification test points are supplied here as a guide when verification to 1-year specifications is necessary. Table 9-2. SC600 Option DC Voltage Verification (1 MΩ output impedance unless noted) Nominal Value (V dc) Measured Value (V dc) Deviation (V dc) 1-Year Spec. - Page 301 SC600 Oscilloscope Calibration Option Verification Tables Table 9-2. SC600 Option DC Voltage Verification (cont.) (1 MΩ output impedance unless noted) Nominal Value (V dc) Measured Value (V dc) Deviation (V dc) 1-Year Spec. (V dc) -0.499 0.0002895 0.00029 -0.5 0.00029 1.35 0.000715 -1.35...
- Page 302 5502A Operators Manual Table 9-3. SC600 Option AC Voltage Amplitude Verification (cont.) (1 MΩ output impedance unless noted) Nominal Value Measured Value 1-year Spec. Frequency (Hz) Deviation (V p-p) (V p-p) (V p-p) (V p-p) -0.11 1000 0.00015 1000 0.00054 -0.5...
- Page 303 SC600 Oscilloscope Calibration Option Verification Tables Table 9-5. SC600 Option Wave Generator Amplitude Verification (1 M output impedance) (cont.) Nominal Value Frequency Measured Deviation 1-Year Spec. Wave Shape (V p-p) (Hz) Value (V p-p) (V p-p) (V p-p) square 0.219 1000 0.00667 square...
- Page 304 5502A Operators Manual Table 9-6. SC600 Option Wave Generator Amplitude Verification (50 output impedance) Nominal Value Frequency Measured Deviation 1-Year Spec. Wave Shape (V p-p) (Hz) Value (V p-p) (V p-p) (V p-p) square 0.0018 1000 0.000154 square 0.0064 1000 0.000292...
- Page 305 SC600 Oscilloscope Calibration Option Verification Tables Table 9-6. SC600 Option Wave Generator Amplitude Verification (50 output impedance) (cont.) Nominal Value Frequency Measured Deviation 1-Year Spec. Wave Shape (V p-p) (Hz) Value (V p-p) (V p-p) (V p-p) triangle 0.109 1000 0.00337 triangle...
- Page 306 5502A Operators Manual Table 9-8. SC600 Option Leveled Sine Wave Verification: Frequency Nominal Value Measured Value Frequency Deviation (Hz) 1-Year Spec. (Hz) (V p-p) (Hz) 50 kHz 0.125 500 kHz 1.25 5 MHz 12.5 50 MHz 500 MHz 1250 Table 9-9. SC600 Option Leveled Sine Wave Verification: Harmonics...
- Page 307 SC600 Oscilloscope Calibration Option Verification Tables Table 9-9. SC600 Option Leveled Sine Wave Verification: Harmonics (cont.) Nominal Value Measured Deviation 1-Year Spec. Harmonic Frequency (V p-p) Value (dB) (dB) (dB) 2nd harmonic 4 MHz 3rd+ harmonic 4 MHz 2nd harmonic 8 MHz 3rd+ harmonic 8 MHz...
- Page 308 5502A Operators Manual Table 9-10. SC600 Option Leveled Sine Wave Verification: Flatness (cont.) Nominal Value Measured Value 1-Year Spec. Frequency Deviation (V p-p) (V p-p) (V p-p) (V p-p) 0.005 480 MHz 0.0003 0.005 570 MHz 0.0003 0.005 580 MHz 0.0003...
- Page 309 SC600 Oscilloscope Calibration Option Verification Tables Table 9-10. SC600 Option Leveled Sine Wave Verification: Flatness (cont.) Nominal Value Measured Value 1-Year Spec. Frequency Deviation (V p-p) (V p-p) (V p-p) (V p-p) 0.01 50 kHz 0.01 30 MHz 0.00025 0.01 70 MHz 0.00025 0.01...
- Page 310 5502A Operators Manual Table 9-10. SC600 Option Leveled Sine Wave Verification: Flatness (cont.) Nominal Value Measured Value 1-Year Spec. Frequency Deviation (V p-p) (V p-p) (V p-p) (V p-p) 0.039 390 MHz 0.00166 0.039 400 MHz 0.00166 0.039 480 MHz 0.00166...
- Page 311 SC600 Oscilloscope Calibration Option Verification Tables Table 9-10. SC600 Option Leveled Sine Wave Verification: Flatness (cont.) Nominal Value Measured Value 1-Year Spec. Frequency Deviation (V p-p) (V p-p) (V p-p) (V p-p) 0.07 600 MHz 0.0029 0.099 50 kHz 0.099 30 MHz 0.001585 0.099...
- Page 312 5502A Operators Manual Table 9-10. SC600 Option Leveled Sine Wave Verification: Flatness (cont.) Nominal Value Measured Value 1-Year Spec. Frequency Deviation (V p-p) (V p-p) (V p-p) (V p-p) 0.25 360 MHz 0.0101 0.25 390 MHz 0.0101 0.25 400 MHz 0.0101...
- Page 313 SC600 Oscilloscope Calibration Option Verification Tables Table 9-10. SC600 Option Leveled Sine Wave Verification: Flatness (cont.) Nominal Value Measured Value 1-Year Spec. Frequency Deviation (V p-p) (V p-p) (V p-p) (V p-p) 590 MHz 0.0161 600 MHz 0.0161 50 kHz 30 MHz 0.0121 70 MHz...
- Page 314 5502A Operators Manual Table 9-10. SC600 Option Leveled Sine Wave Verification: Flatness (cont.) Nominal Value Measured Value 1-Year Spec. Frequency Deviation (V p-p) (V p-p) (V p-p) (V p-p) 290 MHz 0.0261 360 MHz 0.0521 390 MHz 0.0521 400 MHz 0.0521...
- Page 315 SC600 Oscilloscope Calibration Option Verification Tables Table 9-10. SC600 Option Leveled Sine Wave Verification: Flatness (cont.) Nominal Value Measured Value 1-Year Spec. Frequency Deviation (V p-p) (V p-p) (V p-p) (V p-p) 580 MHz 0.2201 590 MHz 0.2201 600 MHz 0.2201 Table 9-11.
- Page 316 5502A Operators Manual Table 9-13. SC600 Option Edge Verification: Duty Cycle Nominal Value Measured Value Deviation Frequency 1-Year Spec. (%) (from 50%) (V p-p) 1 MHz Table 9-14. SC600 Option Edge Verification: Rise Time Nominal Value Measured Value 1-Year Spec.
- Page 317 SC600 Oscilloscope Calibration Option Verification Tables Table 9-16. SC600 Option Marker Generator Verification Period (s) Measured Value (s) Deviation (s) 1-Year Spec. (s) 0.0251 s 0.00405 s 0.05 3.75E-06 s 0.02 5E-8 0.01 2.5E-8 1e-7 2.5E-13 5e-8 1.25E-13 2e-8 5E-14 1e-8 2.5E-14 5e-9...
- Page 318 5502A Operators Manual Table 9-19. SC600 Option Input Impedance Verification: Resistance Nominal Value (Ω) Measured Value (Ω) Deviation (Ω) 1-Year Spec. (Ω) 40 Ω 0.04 Ω 50 Ω 0.05 Ω 60 Ω 0.06 Ω 600000 Ω 600 Ω 1000000 Ω...
-
Page 319: Sc300 Oscilloscope Calibration Option
Chapter 10 SC300 Oscilloscope Calibration Option Contents Page Introduction ......................10-3 SC300 Oscilloscope Calibration Option Specifications ........10-4 Volt Function Specifications ................10-4 Edge Function Specifications ................10-5 Leveled Sine Wave Function Specifications ........... 10-5 Time Marker Function Specifications ............. 10-6 Wave Generator Specifications ............... - Page 320 5502A Operators Manual Time Base Marker Calibration Procedure for an Oscilloscope ....... 10-23 Test the Trigger ....................10-24 Summary of Commands and Queries ..............10-25 Verification Tables ....................10-28 10-2...
-
Page 321: Introduction
SC300 Oscilloscope Calibration Option Introduction Introduction The SC300 Oscilloscope Calibration Option (the SC300 Option) has functions that help you keep your oscilloscope’s accuracy by verifying and calibrating the subsequent oscilloscope qualities: • Vertical deflection qualities are calibrated and verified. The VOLT function lets you compare the voltage gain to the graticule lines on the oscilloscope. -
Page 322: Sc300 Oscilloscope Calibration Option Specifications
SC300 Oscilloscope Calibration Option Specifications These specifications apply only to the SC300 Oscilloscope Calibration Option. General specifications that apply to the 5502A Calibrator can be found in Chapter 1. The specifications are correct given the 5502A is operated with the conditions specified in Chapter 1, and has completed a warm-up period of no less than two times the length of time the Calibrator was powered off, to a maximum of 30 minutes. -
Page 323: Edge Function Specifications
SC300 Oscilloscope Calibration Option SC300 Oscilloscope Calibration Option Specifications Edge Function Specifications 1-Year Absolute Uncertainty, tcal ± Edge Characteristics into 50 Ω 5°C Amplitude 4.5 mV to 2.75 V ±(2 % of output + 200 μV) Range (p-p) Resolution 4 digits ±10 % around each sequence value (shown Adjustment Range below) -
Page 324: Time Marker Function Specifications
5502A Operators Manual Time Marker Function Specifications Time Marker into 50 Ω 5 s to 100 µs 50 µs to 2 µs 1 µs to 20 ns 10 ns to 2 ns ±(25 + t *1000) ppm ±(25 + t *15,000) ±25 ppm... -
Page 325: Oscilloscope Connections
5502A to one of the channel connectors on your oscilloscope (see Figure 8-3). To use the external trigger, connect the TRIG connector on the 5502A to the external trigger connection on your oscilloscope. To use the external trigger and see its signal with the calibration signal, connect the TRIG connector to a different channel. -
Page 326: The Output Signal
The location of the output signal is shown on the Control Display (the display on the right side). If your 5502A is connected, but the output does not show on the oscilloscope, you can have the 5502A in standby mode. -
Page 327: Adjust The Output Signal
Start the Oscilloscope Calibration Option Adjust the Output Signal The 5502A gives different methods to change the settings for the output signal during calibration. Since many adjustments of the output signal are necessary for oscilloscope calibration, the three available methods to change these settings for oscilloscope calibration are summarized below. -
Page 328: Use And
5502A will beep. If it is necessary to go to a different range of values, turn the knob quickly to jump to the new range. -
Page 329: Calibrate The Voltage Amplitude On An Oscilloscope
Apply the signal from the 5502A in Volt mode. The voltages that you must use for calibration, and the graticule line divisions that are necessary to be matched, can be different for different oscilloscopes. -
Page 330: The V/Div Menu
5502A Operators Manual The V/DIV Menu The V/DIV menu, shown below, sets the number of volts shown by each division on the oscilloscope. This menu gives alternative methods to change the output amplitude that can be more convenient for special oscilloscope uses. To access the V/DIV menu, push V/DIV from the Volt menu, see below. -
Page 331: Shortcuts To Set The Voltage Amplitude
(1 MΩ for this example). Make sure that the key on the 5502A is lit. This shows that the signal is connected. 2. Key in the voltage level that is recommended for your oscilloscope. For example to record 20 mV, push , then push . -
Page 332: Calibrate The Pulse And Frequency Response On An Oscilloscope
5502A Operators Manual The example below shows the gain at 20 mV to be 4 divisions, at 5 mV per division. gl006i.bmp 4. Change the calibration voltage to the subsequent value that is recommended for your oscilloscope model, and do this procedure again at the new voltage level. Make sure that the gain is correct with reference to the specifications in your manual. -
Page 333: Pulse Response Calibration Procedure For An Oscilloscope
Do the subsequent sample procedure to calibrate the pulse response. 1. Connect the 5502A to Channel 1 on the oscilloscope. Select 50Ω impedance or use a 50 Ω termination at the oscilloscope input. Make sure that the key is lit. This shows that the signal is connected. -
Page 334: The Leveled Sine Wave Function
5502A Operators Manual 4. Adjust the time base on your oscilloscope to the fastest position available (20.0 or 50.0 ns/div), see below. Pulse aberrations gl007i.eps 5. Make sure that your oscilloscope shows the correct rise time and pulse aberration properties. -
Page 335: Shortcuts To Set The Frequency And Voltage
SC300 Oscilloscope Calibration Option Calibrate the Pulse and Frequency Response on an Oscilloscope Each option in the Levsine menu is shown below. • OUTPUT @ SCOPE terminal (50Ω) Shows the location and impedance of the signal output. If the signal does not show on the oscilloscope, push . To disconnect the signal, push . -
Page 336: The More Options Menu
5502A Operators Manual The MORE OPTIONS Menu When you select MORE OPTIONS, you open options that give you more control over the frequency and voltage. To access the MORE OPTIONS menu, push the softkey below MORE OPTIONS in the levsine menu, see below. -
Page 337: Sweep Through A Frequency Range
SC300 Oscilloscope Calibration Option Calibrate the Pulse and Frequency Response on an Oscilloscope • RANGE The softkeys toggle between two settings: “auto,” which adjusts the range limit automatically in accordance with the voltage level, and “locked,” which sets the available voltages to one range. There are six range limits in Levsine mode: 10 mV, 40 mV, 100 mV, 400 mV, 1.3 V, and 5.5 V. -
Page 338: Frequency Response Calibration Procedure For An Oscilloscope
Do the subsequent sample procedure to calibrate the frequency response. 1. Push the key on the 5502A to reconnect the signal. Select 50 Ω impedance or use a 50 Ω external termination directly at the oscilloscope input 2. Adjust the sine wave settings in the Output Display to the calibration recommendations in your oscilloscope manual. - Page 339 SC300 Oscilloscope Calibration Option Calibrate the Pulse and Frequency Response on an Oscilloscope 4. Increase the frequency to 60 MHz (for 100 MHz instruments), or 150 MHz (for 200 MHz instruments). To key in 60 MHz, push and then push .
-
Page 340: Calibrate The Time Base Of An Oscilloscope
5502A Operators Manual Calibrate the Time Base of an Oscilloscope The horizontal deflection (time base) of an oscilloscope is calibrated with a method not unlike the vertical gain calibration. A time marker signal is made from the Calibrator and the peaks of the signal are aligned to the graticule line divisions on the oscilloscope. -
Page 341: Time Base Marker Calibration Procedure For An Oscilloscope
SC300 Oscilloscope Calibration Option Calibrate the Time Base of an Oscilloscope Time Base Marker Calibration Procedure for an Oscilloscope This sample procedure uses the Time Marker function to verify the horizontal deflection (time base) of your oscilloscope. See your manual for the oscilloscope for the time base values recommended for calibration. -
Page 342: Test The Trigger
5502A Operators Manual 4. Do this procedure again for all time marker values recommended for your oscilloscope. Do this again for digital and analog mode as necessary. It can be necessary to change some oscilloscopes magnification while you calibrate in analog mode. -
Page 343: Summary Of Commands And Queries
SC300 Oscilloscope Calibration Option Summary of Commands and Queries Each option in the Wavegen menu is given below. • OUTPUT @ SCOPE Shows the location of the signal output. If the signal does not show on the oscilloscope, push . To disconnect the signal, push . •... - Page 344 5502A Operators Manual IEEE-488 RS-232 Sequential Overlapped Coupled SCOPE Programs the oscilloscope calibration option hardware, if installed. The instrument settings are sensed by this parameter of this command. When in SCOPE mode, use the OUT command to program new output.
- Page 345 SC300 Oscilloscope Calibration Option Summary of Commands and Queries IEEE-488 RS-232 Sequential Overlapped Coupled SCOPE? Shows the current mode of operation for the oscilloscope. Shows OFF if the oscilloscope is off. Parameter: (None) Response: <character> (Shows OFF, VOLT, EDGE, LEVSINE, MARKER, or WAVEGEN.) IEEE-488 RS-232...
-
Page 346: Verification Tables
5502A Operators Manual Verification Tables At the Fluke Calibration factory, the SC300 Option is verified to its specifications at the subsequent test points. The verification test points are given here as a guide when verification is necessary. Table 10-1. Voltage Function Verification: AC Voltage into a 1 MΩ Load... - Page 347 SC300 Oscilloscope Calibration Option Verification Tables Table 10-1. Voltage Function Verification: AC Voltage into a 1 MΩ Load (cont.) Deviation Nominal Value (p-p) Frequency Measured Value (p-p) 1-Year Spec. (mV) 50.0 V 10 Hz 125.10 mV 50.0 V 100 Hz 125.10 mV 50.0 V 1 kHz...
- Page 348 5502A Operators Manual Table 10-2. Voltage Function Verification: AC Voltage into a 50 Ω Load (cont.) Deviation Nominal Value (p-p) Frequency Measured Value (p-p) 1-Year Spec. (mV) 2.0 V 100 Hz 5.10 mV 2.0 V 1 kHz 5.10 mV 2.0 V 5 kHz 5.10 mV...
- Page 349 SC300 Oscilloscope Calibration Option Verification Tables Table 10-4. Voltage Function Verification: DC Voltage into a 1 MΩ Load Nominal Value Measured Value (dc) Deviation (mV) 1-Year Spec. (dc) 0.0 mV 0.10 mV 5.0 mV 0.11 mV -5.0 mV 0.11 mV 22.0 mV 0.15 mV -22.0 mV...
- Page 350 5502A Operators Manual Table 10-5. Edge Function Verification Pulse Response Time Nominal Value (p-p) Frequency 1-Year Spec. (ηs) 25.0 mV 1 MHz 400 ps 250.0 mV 1 MHz 400 ps 250.0 mV 10 kHz 400 ps 250.0 mV 100 kHz 400 ps 250.0 mV...
- Page 351 SC300 Oscilloscope Calibration Option Verification Tables Table 10-7. Wave Generator Function Verification: 50 Ω Load Nominal Measured Value Deviation 1-Year Waveform Frequency Value (p-p) (p-p) (mV) Spec. Square 5.0 mV 10 kHz 0.25 mV Square 10.9 mV 10 kHz 0.43 mV Square 44.9 mV 10 kHz...
- Page 352 5502A Operators Manual Table 10-8. Leveled Sine Wave Function Verification: Amplitude (cont.) Measured Value Deviation Nominal Value (p-p) Frequency 1-Year Spec. (p-p) (mV) 400.0 mV 50 kHz 8.200 mV 500.0 mV 50 kHz 1.200 mV 1.3 V 50 kHz 26.200 mV 2.0 V...
- Page 353 SC300 Oscilloscope Calibration Option Verification Tables Table 10-9. Leveled Sine Wave Function Verification: Flatness (cont.) Deviation Nominal Value (p-p) Frequency Measured Value (p-p) 1-Year Spec. (mV) 10.0 mV 160 MHz 0.30 mV 10.0 mV 200 MHz 0.30 mV 10.0 mV 220 MHz 0.30 mV 10.0 mV...
- Page 354 5502A Operators Manual Table 10-9. Leveled Sine Wave Function Verification: Flatness (cont.) Deviation Nominal Value (p-p) Frequency Measured Value (p-p) 1-Year Spec. (mV) 100.0 mV 220 MHz 2.10 mV 100.0 mV 235 MHz 2.10 mV 100.0 mV 250 MHz 2.10 mV 400.0 mV...
- Page 355 SC300 Oscilloscope Calibration Option Verification Tables Table 10-9. Leveled Sine Wave Function Verification: Flatness (cont.) Deviation Nominal Value (p-p) Frequency Measured Value (p-p) 1-Year Spec. (mV) 1.3 V 250 MHz 26.10 mV 5.5 V 500 kHz 82.5 mV 5.5 V 1 MHz 82.5 mV 5.5 V...
- Page 356 5502A Operators Manual Table 10-11. Marker Generator Function Verification Nominal Interval Measured Interval Deviation 1-Year Spec. 25.12 ms 2.00s 4.05 ms 1.03 ms 262.50 μs 500.00 ms 45.00 μs 200.00 ms 12.50 μs 100.00 ms 3.75 μs 50.00 ms 20.00 ms 900.000 ns...
- Page 357 An object that makes or embodies a physical quantity to be standardized, for example a Fluke Calibration 732A DC Voltage Reference Standard. base units Units in the SI system that are dimensionally independent. All other units are derived...
- Page 358 5502A Operators Manual buffer 1. An area of digital memory for temporary storage of data. 2. An amplifier stage before the final amplifier. burden voltage The maximum sustainable voltage across the terminals of a load. compliance voltage The maximum voltage a constant-current source can supply.
- Page 359 The part of the uncertainty specification of an instrument that is typically a set offset plus noise. Floor can be shown as units, such as microvolts or counts of the least significant digit. For the 5502A, the floor specification is combined with set range errors in one term to find total uncertainty.
- Page 360 5502A Operators Manual life-cycle cost The consideration of all elements that contribute to the cost of an instrument through its useful life. This includes initial purchase cost, service and maintenance cost, and the cost of support equipment. linearity The relationship between two quantities when a change is the first quantity is directly proportional to a change in the second quantity.
- Page 361 The stated maximum end of a measurement span of a device. Typically, a measurement device can measure quantities for a specified percentage overrange. (The absolute span that includes overrange capability is named “scale.”) In the 5502A, range and scale are identical.
- Page 362 5502A Operators Manual repeatability The degree of agreement among independent measurements of a quantity under the same conditions. resistance A property of a conductor that finds the amount of current that will flow when a given amount of voltage exists across the conductor. Resistance is measured in ohms. One ohm is the resistance through which one volt of potential will cause one ampere of current to flow.
- Page 363 Glossary specifications An accurate statement of the set of requirements satisfied by a measurement system or device. stability A measure of the freedom from drift in value over time and over changes in other variables such as temperature. Note that stability is not the same as uncertainty. standard A device that is used as an exact value for reference and comparison.
- Page 364 5502A Operators Manual true power The actual power (real power) used to cause heat or work. Compare to “apparent power.” true value Also named legal value, the accepted, consensus, for example, the correct value of the quantity that is measured.
-
Page 365: B Ascii And Ieee-488 Bus Codes
Appendix B ASCII and IEEE-488 Bus Codes... - Page 366 5502A Operators Manual...
- Page 367 ASCII and IEEE-488 Bus Codes ASCII DEV. MESSAGE ASCII BINARY BINARY DEV. MESSAGE OCTAL DECIMAL OCTAL DECIMAL CHAR. 7654 3210 ATN=TRUE CHAR. 7654 3210 ATN=TRUE BELL SPACE " & < > fb-01.eps...
- Page 368 5502A Operators Manual...
- Page 369 The IEEE-488 connector on the rear panel connects with an IEEE-488 standard cable. The pin assignments of the rear-panel IEEE-488 connector are shown in Figure C-1. IEEE-488 connection cables are available from Fluke Calibration as shown in Table C-1. See Chapter 8, “Accessories,” for order information.
- Page 370 Operators Manual Serial Connectors The two 9-pin serial connectors on the rear panel of the 5502A Calibrator are used to interface with a computer, or controller, and an instrument serial port. The pin assignments of the rear-panel serial connectors are in conformance to EIA/TIA-574 standard and are shown in Figures C-2 (Host) and C-3 (UUT).
- Page 371 RS-232/IEEE-488 Cables and Connectors Serial Connectors 5502A NULL MODEM CABLE SERIAL 1 FROM HOST SERIAL 2 MODEM CABLE RS-232 TO UUT RLSD gjh069.eps Figure C-4. Serial Port Connections (DB-9/DB-9)
- Page 372 5502A Operators Manual 5502A NULL MODEM CABLE SERIAL 1 FROM HOST MODEM CABLE RS-232 SERIAL 2 TO UUT RLSD gjh071.eps Figure C-5. Serial Port Connections (DB-9/DB-25)
-
Page 373: D Error Messages
36 text characters procedure or interrupted procedure DDE Device-Specific Error, R Error is queued to the caused by the 5502A because of remote interface as it occurs some condition, for example, overrange EXE Execution Error, caused by... - Page 374 5502A Operators Manual (DDE:FR D) A/D fell asleep (DDE:FR D) Inguard watchdog timeout (DDE:FR) Inguard is obsolete (DDE:FR D) Inguard parity error (DDE:FR D) Inguard overrun error (DDE:FR D) Inguard framing error (DDE:FR D) Inguard fault error (DDE:FR D) Inguard fault input error...
- Page 375 Error Messages Error Messages (DDE: ) Cannot enter watts by itself (DDE: ) Output exceeds user limits (DDE: ) Duty cycle must be 1.0-99.0 (DDE: ) Power factor must be 0.0-1.0 (DDE: ) Cannot select that field now (DDE: ) Edit digit out of range (DDE: ) Cannot switch edit field now...
- Page 376 5502A Operators Manual (DDE:FR ) That requires a -SC600 option (DDE: ) Time limit must be 1s-60s (DDE: ) Cannot set ref. phase now (DDE: ) ZERO_MEAS reading not valid (DDE: ) Slave cannot send SYNCOUT (DDE: FR) That takes a -SC1100 option...
- Page 377 Error Messages Error Messages 1322 (CME: R ) Bad character 1323 (CME: R ) Bad decimal number 1324 (CME: R ) Exponent magnitude too large 1325 (CME: R ) Bad hexadecimal block 1326 (CME: R ) Bad hexadecimal number 1328 (CME: R ) Bad octal number 1329...
- Page 378 5502A Operators Manual...
Need help?
Do you have a question about the 5502A and is the answer not in the manual?
Questions and answers