Table of Contents
Advertisement
Quick Links
Advertisement
Table of Contents

Related Manuals for SHOWTEC Galactic G-30


Summary of Contents for SHOWTEC Galactic G-30
- Page 1 VERSION:2.0 This manual contains important laser system safety and operation information. Read and understand all instructions prior to powering on laser unit the first time, to avoid laser eye injury and to avoid breaking the law. Keep this manual in a safe place for future reference.
-
Page 2: Before Use
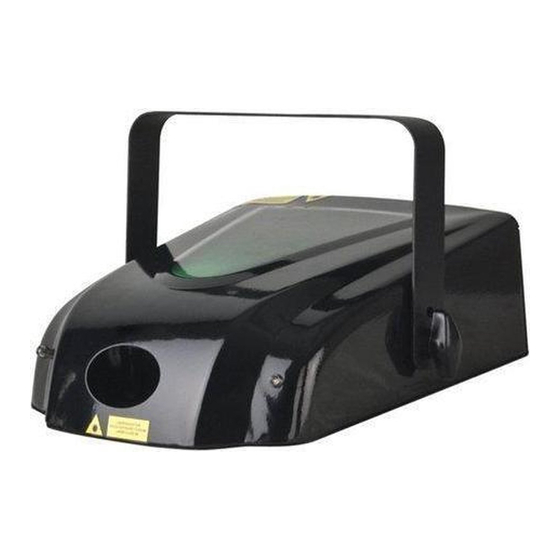
USER MANUAL 1. FEATURES This device has been designed to produce decorative effect lighting and is used light show systems. SPARK is done with bran-new metal mode design, big difference from traditional mini laser projector. The high quality open loop 5kpps scanner is small size ,fast speed, stable scanning, never missing step and fleshing. -
Page 3: Safety Instructions
USER MANUAL 3. SAFETY INSTRUCTIONS: Every person involved with installation and maintenance of this device have to: -be qualilfied -follow the instructions of this manual CAUTION! Be careful with your operations. Witch a high voltage you can suffer a dangerous electric shock when touching th wires! To protect the environment, please try to recycle the packing material as much as possible. -
Page 4: Laser Safety Instructions
USER MANUAL Check that the available voltage is not higher than the one stated on the rear panel of the unit. The power cord should always be in perfect condition: switch the unit immediately off when the power cord is squashed or damaged. Never let the power-cord come into contact with other cables. -
Page 5: Overhead Rigging
USER MANUAL This laser may only be used for shows. The operation of a class 3B show laser is only allowed if the operation is controlled by a skilled and well-trained operator. Depending on the classification, operating a laser product can produce laser radiation that may cause permanent eye damage and /or skin damage. -
Page 6: Connection To The Mains
USER MANUAL Before rigging make sure that the installation area can hold a minimum point load of 10 times the device’s weight. Always use a certified safety cable that can hold 12 times the weight of the device when installing the unit. This secondary safety attachment should be installed in a way that no part of the installation can drop more than 20cm if the main attachment fails. -
Page 7: Dmx-512 Connection/Connection Between Fixtures
USER MANUAL 5.2 DMX-512 connection/connection between fixtures The fixture is equipped with 3-pin XLR sockets for DMX input and output. The sockets are wired in parallel. Only use a shielded twisted-pair cable designed for 3-pin XLR-plugs and connectors in order to connect the controller with the fixture or one fixture with another. - Page 8 USER MANUAL Building a master/slave-chain: Connect the DMX-output of the master fixture in the data-chain with the DMX-input of the first slave, Always connect output with the input of the next slave until all slaves are connected. Caution: It’s necessary to insert the XLR termination plug (with 120Ohm) into the input of the master fixture and into the output of the last slave fixture in the link in order to ensure proper transmission on the data link.
- Page 9 USER MANUAL 6. Earth Enclose: Used to connect to the earth. 7. Easy Controller: Used to connect to optional easy controller CA-8. 8. COOLING FAN: used to cool the components inside the enclosure. Make sure to never cover this fan outlet! 9.
- Page 10 USER MANUAL 7. HOW TO SET UP AND CONTEROL THE UNIT Regular breaks during operation are essential to maximize the life of this device as it is not designed for continual use. Do not switch the unit on and off in short time intervals as this reduces the lamp life.
-
Page 11: Slave Mode
USER MANUAL 7.2 AUTO RUNNING STAND-ALONE MODE: Press “FUNC” button till to the “AUT” letter is shown on LED DISPLAY. Press “ENTER” to select this “AUT” mode. When “AUT” mode is selected, the laser is operating in AUTO RUNNING STAND-ALONE MODE. It is running laser show with preprogram. The laser is operating this mode until next setting. - Page 12 USER MANUAL 7.4、EASY REMOTE CONTROL MODE : Press “FUNC” button till to the “CA8” letter is shown on LED DISPLAY. Press “ENTER” to select this “CA8” mode. When “CA8” mode is selected, the laser is operating in EASY REMOTE CONTROL MODE. It could be controlled by the optional CA-8 easy controller as function list below.
-
Page 13: Dmx512 Control Mode
USER MANUAL 7.5 DMX512 CONTROL MODE: Press “FUNC” button till to the DMX address is shown on LED DISPLAY. Press “UP” or “DOWN” to set the DMX address Press “ENTER” to select DMX CONTROL MODE and confirm the DMX address. !... -
Page 14: Dmx Protocol
USER MANUAL 8. DMX PROTOCOL 8.1 DMX CHANNEL LIST: 通道 DMX512 值 控制内容 Laser Block Out 000-063 064-127 Music Control Stand Alone Mode 128-191 Auto Running Stand Alone Mode 192-255 DMX Mode 000-063 Pattern Group 1 LINE 064-127 Pattern Group 2 TUNNEL 128-191 Pattern Group 3... - Page 15 USER MANUAL 8.2 PATTERN LIST IN CHANNEL 3: Group 1 Group 2 Group 3 Group 4 000-031 032-063 064-095 096-127 128-159 160-191 192-223 224-255...
- Page 16 USER MANUAL 9. OUTPUT LASER ADJUSTMENT 9.1 To adjust the output laser beam position and direction. 9.2 X/Y AXIS ZOOMING ADJUSTMENT...
-
Page 17: Maintenance
USER MANUAL 10. MAINTENANCE Make sure the area below the installation place is free from unwanted persons during servicing Switch off the unit , unplug the mains cable and wait until the unit has been cooled down. During the inspection the following points should be checked: All screws used for installing the device and any of its parts should be tightly fastened and may not be corroded Housings, fixations and installations spots( ceiling, truss, suspensions) should... -
Page 18: Circuit Diagram
USER MANUAL 11. CIRCUIT DIAGRAM B 5 0 K... -
Page 19: Specifications
USER MANUAL 12. SPECIFICATIONS Mains Input: AC100~240V, 50/60Hz Fuse: 250V 1.5A slow blow(20mm glass) Scanning Angle: 0~±20º Laser Diode Blanking: 1~1000Hz Sound Control: Internal microphone DMX connections: 3pin XLR male / female DMX channels: 8 channels Laser Power: 30mW Green CW laser (λ=532nm) Laser radiation class: Laser Safety Standard: EN60825-1:1994+A1:2002+A2:2002...
Need help?
Do you have a question about the Galactic G-30 and is the answer not in the manual?
Questions and answers