
Subscribe to Our Youtube Channel
Related Manuals for SHOWTEC Phantom 130 Spot


Summary of Contents for SHOWTEC Phantom 130 Spot
- Page 1 MANUAL ENGLISH Phantom 130 Spot Ordercode: 40073 Highlite International B.V. – Vestastraat 2 – 6468 EX – Kerkrade – the Netherlands...
-
Page 2: Table Of Contents
Phantom 130 Spot Table of contents Warning ....................................2 Safety Instructions ................................. 2 Operating Determinations ............................4 Rigging .................................... 4 Connection with the mains............................5 Return Procedure ................................6 Claims ....................................6 Description of the device ..............................7 Features ..................................7 Frontside.................................. -
Page 3: Warning
Save the carton and all packing materials. In the event that a fixture must be returned to the factory, it is important that the fixture be returned in the original factory box and packing. Your shipment includes: ● Showtec Phantom 130 Spot ● Pro power cable (1,5 m) ●... - Page 4 ● If your Showtec device fails to work properly, discontinue the use immediately. Pack the unit securely (preferably in the original packing material), and return it to your Showtec dealer for service.
-
Page 5: Operating Determinations
Phantom 130 Spot ● For replacement use fuses of same type and rating only. ● The user is responsible for correct positioning and operating of the device. The manufacturer will not accept liability for damages caused by the misuse or incorrect installation of this device. -
Page 6: Connection With The Mains
Phantom 130 Spot The Phantom can be placed on a flat stage floor or mounted to any kind of truss with quick locks and a clamp. Improper installation can cause serious injuries and/or damage of property! Connection with the mains Connect the device to the mains with the power-plug. -
Page 7: Return Procedure
Phantom 130 Spot Return Procedure Returned merchandise must be sent prepaid and in the original packing, call tags will not be issued. Package must be clearly labeled with a Return Authorization Number (RMA number). Products returned without an RMA number will be refused. Highlite will not accept the returned goods or any responsibility. -
Page 8: Description Of The Device
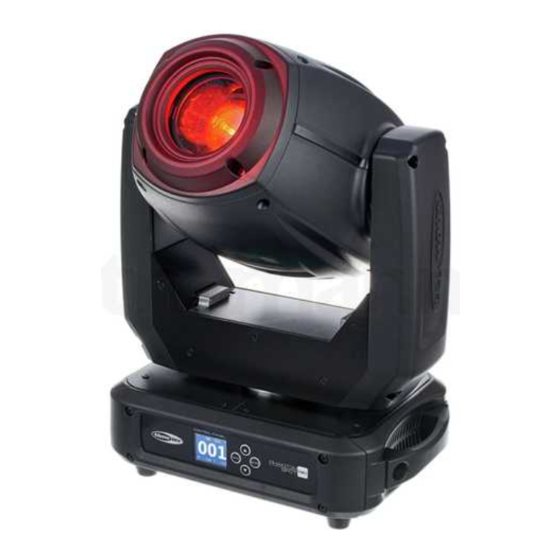
Phantom 130 Spot Description of the device Features The Phantom 130 Spot is a moving head with high output and great effects. ● Input voltage: 100-240V AC, 50/60Hz ● Power consumption: 270W ● Light source: 1 x 130W White LED ●... -
Page 9: Backside
08) 3-pin DMX signal connector OUT Installation Remove all packing materials from the Phantom 130 Spot. Check if all foam and plastic padding is removed. Connect all cables. Do not supply power before the whole system is set up and connected properly. -
Page 10: Control Modes
Phantom 130 Spot Control Modes There are 5 modes: • Stand-alone (Auto) • Manual • Sound-controlled • Master/Slave • DMX-512 (12CH, 16CH) One Phantom (Auto, Manual) 01) Fasten the effect light to a firm trussing. Leave at least 0,5 meter on all sides for air circulation. -
Page 11: Multiple Phantoms (Dmx Control)
Phantom 130 Spot Multiple Phantoms (DMX Control) 01) Fasten the effect light to a firm trussing. Leave at least 0,5 meter on all sides for air circulation. 02) Always use a safety cable (ordercode 70140 / 70141). 03) Use a 3-pin XLR cable to connect the Phantoms and other devices. -
Page 12: Fixture Linking
FL083 (3 m), FL086 (6 m), FL0810 (10 m), FL0820 (20 m). ● DAP Audio DMX adapter: 5-pin/3-pin. Ordercode FLA29. ● DAP Audio DMX adapter: 3-pin/5-pin. Ordercode FLA30. The Phantom 130 Spot can be operated with a controller in control mode or without the controller in stand-alone mode. Ordercode: 40073... -
Page 13: Control Panel
If not, the problem may be: • The XLR cable from the controller is not connected with the input of the Phantom 130 Spot. • The controller is switched off or defective, the cable or connector is detective, or the signal wires are swapped in the input connector. -
Page 14: Menu Overview
Phantom 130 Spot Menu Overview Ordercode: 40073... -
Page 15: Main Menu Options
Phantom 130 Spot Main Menu Options DMX Addressing DMX mode / Master-Slave / Auto / Sound-controlled / Manual Pan and Tilt Reverse / Screen Reverse / Pan and Tilt Angle / Sound Sensitivity / Wireless Enable / Wireless Unlink / Reset / Factory Reset... -
Page 16: Built-In Programs Mode
Phantom 130 Spot Built-in Programs Mode You can run the auto programs when using the Phantom. 01) While in the main menu, press the UP/DOWN buttons until the display shows 02) Press the ENTER button to open the menu. 03) Press the UP/DOWN buttons to select one of the 5 modes: 1. -
Page 17: Manual Mode
Phantom 130 Spot 5. Manual Mode 01) Press the UP/DOWN buttons until the display shows MANUAL. 02) Press the ENTER button to activate the Manual mode. 03) The display will show: 04) Press the UP/DOWN buttons to choose one of the following options: ●... -
Page 18: Advanced Settings
Phantom 130 Spot Advanced Settings 01) While in the main menu, press the UP/DOWN buttons until the display shows 02) Press the ENTER button to open the menu. 03) The display will show: 04) Press the UP/DOWN buttons to toggle between the following options: ●... -
Page 19: Dmx Channels
Phantom 130 Spot DMX Channels 12 Channels Channel 1 – Horizontal movement (Pan) Move the slider up, in order to move head horizontally (PAN). Gradual head adjustment from one end of the slider to the other (0-255, 128-center). The head can be turned by 540° and stopped at any position you wish. - Page 20 Phantom 130 Spot Channel 6 – Rotating Gobo wheel + Gobo Shake Open / White 8-15 Gobo 1 (Glass) 16-23 Gobo 2 (Metal) 24-31 Gobo 3 (Metal) 32-39 Gobo 4 (Metal) 40-47 Gobo 5 (Metal) 48-55 Gobo 6 (Metal) 56-63...
-
Page 21: Channels
Phantom 130 Spot Channel 9 – Prism Not functional Prism 1 (6-facet circular prism) 7-65 Prism 1clockwise rotation (CW) prism effect from slow to fast 66-123 Prism 1counterclockwise rotation (CCW) prism effect from slow to fast 124-127 Prism 1 128-131... - Page 22 Phantom 130 Spot Channel 6 – Dimmer intensity 0-255 From dark to brightest Channel 7 – Strobe Not functional 8-15 Open 16-131 Synchronized strobe, from low to high frequency 132-167 Fast close/slow open strobe, from low to high frequency 168-203...
- Page 23 Phantom 130 Spot Channel 10 – Gobo rotation 0-63 Gobo indexing 64-145 Clockwise rotation (CW) from slow to fast 146-149 Stop 150-231 Counterclockwise rotation (CCW) from slow to fast 232-255 Gobo bouncing, from quick short bounce to longer rotation bounce Channel 11 –...
- Page 24 Phantom 130 Spot Channel 15 – Channel Functions Not functional 8-15 Blackout during Pan/Tilt movement 16-23 Blackout during color wheel movement 24-31 Blackout during gobo wheel movement 32-39 Blackout during Pan-Tilt/color wheel movement 40-47 Blackout during Pan-Tilt/gobo wheel movement 48-55...
-
Page 25: Maintenance
04) The electric power supply cables must not show any damages or material fatigue. The Phantom 130 Spot requires almost no maintenance. However, you should keep the unit clean. Otherwise, the fixture’s light output will be significantly reduced. Disconnect the mains power supply, and then wipe the cover with a damp cloth. -
Page 26: Glass Gobo Orientation
Phantom 130 Spot Fig. 07 03) Remove the lamp cover by unscrewing the 4 screws (see fig. 07). 04) Gently tilt the head so that the small metal housing can slide out more easily. 05) Turn the gobo wheel, with the gobo you want to remove, to the upside. -
Page 27: Rotating Gobo Wheel + Static Gobo Wheel + Color Wheel
Phantom 130 Spot Rotating Gobo Wheel + Static Gobo Wheel + Color Wheel Rotating gobo wheel Static gobo wheel Color wheel Fig. 09 Ordercode: 40073... -
Page 28: Troubleshooting
Suspect three potential problem areas as: the power supply, the LED, the fuse. 01) Power supply. Check if the unit is plugged into an appropriate power supply. 02) The LED. Return the Phantom to your Showtec dealer. 03) The fuse. Replace the fuse. See page 24 for replacing the fuse. - Page 29 Phantom 130 Spot Problem Probable cause(s) Remedy One or more No power to the fixture. Check if power is switched on and fixtures do not cables are plugged in. function at all Primary fuse blown. Replace fuse. Fixtures reset The controller is not connected.
-
Page 30: Product Specifications
Phantom 130 Spot Product Specifications Model: Showtec Phantom 130 Spot Input voltage: 100-240V AC, 50/60Hz Power consumption: 270W (full output) DMX linking: 30pcs Fuse: F5AL/250V Dimensions: 330 x 210 x 460 mm (LxWxH) Weight: 13,1 kg Operating and Programming: Signal pin OUT:... -
Page 31: Dimensions
Phantom 130 Spot Dimensions Ordercode: 40073... - Page 32 ©2019 Showtec...
Need help?
Do you have a question about the Phantom 130 Spot and is the answer not in the manual?
Questions and answers