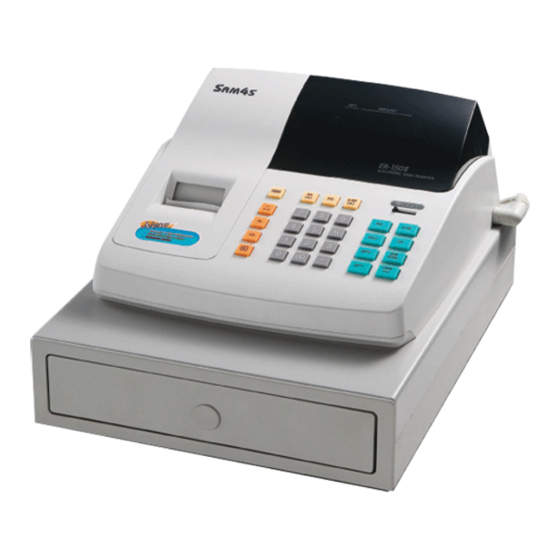
Sam4s ER-150 II Operation Manual
Electronic cash register
Hide thumbs
Also See for ER-150 II:
- Operation manual (28 pages) ,
- Programming & operation manual (31 pages) ,
- Operation manual (3 pages)

Related Manuals for Sam4s ER-150 II


Summary of Contents for Sam4s ER-150 II
- Page 1 ER-150 ELECTRONIC CASH REGISTER OPERATION MANUAL All specifications are subject to change without notice.
-
Page 2: Table Of Contents
ONTENTS Initial Set Up Instructions ..................3 Unpack the cash register........................3 Inserting the paper ..........................3 Clear Memory and Initialize ................4 Setting the Date and Time .................. 4 Receipt or Journal Setup ........................4 Features ....................... 5 Mode Switch ............................5 Display ..............................5 Keyboard ............................6 Key Functions .............................7 Programming ....................... -
Page 3: Initial Set Up Instructions
NITIAL NSTRUCTIONS The following instructions describe how to unpack and start up the cash register. Unpack the cash register • Remove the cash register from the packaging • Locate the following items. 1 roll of 57mm Non thermal paper 1 rewind spindle for use with the journal roll option OADING APER The register has a single 57mm non thermal paper roll, which can be used either... -
Page 4: Clear Memory And Initialize
LEAR EMORY AND NITIALIZE WARNING – This procedure will clear all sales and program information, and need once only be carried out as part of the initial setup procedure. Move the mode slide switch on the front of the register to the P position •... -
Page 5: Features
EATURES Mode Switch The cash register has a mode switch located on the front right of the cabinet. This is used to control the operations of the register such as reporting and programming OFF R Turns the cash register off, allowing no operation Used to enter sales transaction. -
Page 6: Keyboard
EATURES Keyboard The cash register has a function keyboard which is used to carry out the operations of the machine. The features of these keys are explained below. OFF R X Z P FEED X/RF #/NS − − − − CALC DPT2 TOTAL... -
Page 7: Key Functions
EATURES Key Functions FEED When pressed advances the printer paper. These “Number keys” are used to enter the numeric amounts 0 - 9, 00 i.e. enter 100 for £1 These “Department” keys are used to classify the items sold and DPT1 memorize the quantities and amounts in their own categories For Example... -
Page 8: Programming
ROGRAMMING Changing of the pre-programmed system settings takes place with the mode switch in the P position. Receipt or Journal Printing This determines if the printer is to act as a receipt print and provided customer copies. Alternatively if the paper is to be wound onto the journal take-up spool for manager review of the days sales. -
Page 9: Tax, Decimal Point Information
ROGRAMMING Tax, Decimal Point information This option controls the settings i.e. how many Decimal places are used on this register and what type of vat control is required. To Change Settings • Ensure the slide switch is in the P position •... -
Page 10: Department Status
ROGRAMMING Department status The two department keys are used to analyze the sales made into reporting categories For example totaling the sales made by DPT1 as food and DPT2 as a non food category. Certain settings outside of the norm can be programmed to the department. The following options control, whether the department is using tax or acting as a single immediate cash off item To Change Settings... -
Page 11: Setting The % Key
ROGRAMMING Setting the % key The % key can be programmed to act as either a %+ or %–, with a preset rate. This can then adjust the sale total accordingly. To Change Settings • Ensure the slide switch is in the P position On the number keys type in the answer for question •... -
Page 12: System Settings Choice 1
ROGRAMMING System Settings choice 1 The following sequence can be used to change the basic system settings. To Change Settings • Ensure the slide switch is in the P position On the number keys type in the answer for question •... -
Page 13: System Settings Choice 2
ROGRAMMING System Settings choice 2 The following sequence can be used to change the basic system settings. To Change Settings • Ensure the slide switch is in the P position On the number keys type in the answer for question •... -
Page 14: Register
EGISTER This section provides examples of register operations, following the sequences will assist practicing the features. If an error occurs during register pressing the C key will clear the error tone All operations in this section should be carried out with the mode switch in the R position OFF R X Example Receipts... -
Page 15: No Sale Operation
EGISTER No Sale Operation A no sale operation opens the cash drawer outside of a sale and the financial report records the no sale activity counter. • Ensure the slide switch is in the R position Press the #/NS key •... -
Page 16: Department Operation
EGISTER Department Operation Department keys are used to classify the items sold and memorize the quantities and amounts in their own categories For Example DPT1 could be used for FOOD and DPT2 for NON FOOD sales Example Sale • Ensure the slide switch is in the R position •... -
Page 17: Department Single Item
EGISTER Department Single Item Department keys are used to classify the items sold and memorize the quantities and amounts in their own categories Departments can also be pre-programmed as single item sales, which means the moment the price is entered the drawer will open immediately without the need to press cash or the option to sell further items If another department is pressed prior to selling a single item sale this would negate the use of the single item and the cash key must be pressed to finish the sale... -
Page 18: Minus (-) Key Operation
EGISTER Minus (-) Key Operation It is possible to enter a minus amount from a sale by entering the required value and pressing the (-) key. The following procedure will report the total gross without the minus adjustment being removed from the sale values. The net value (less minus) will be reported alongside the ∗... -
Page 19: Percentage (%) Item Discount
EGISTER Percentage (%) Item discount It is possible to remove a preset %- amount from an item price or add a %+ amount to the item this type of % depends on how the % key is programmed. The following procedure will report the less or plus adjustment total to the item. This is possible as the % key is pressed immediately after the Department key allowing net reporting to the item along with the usual ∗1 Net and CA totals. -
Page 20: Percentage (%) Subtotal Discount
EGISTER Percentage (%) Subtotal discount It is possible to remove a preset %- amount from a Subtotal value or add a %+ amount to the sale depending on how the % key is programmed. The following procedure will report the total without the minus/plus adjustment as the % key is pressed after the SUBTOTAL is pressed. -
Page 21: Merchandise Return (X/Rf) Operation
EGISTER Merchandise Return Operation The X/RF acts as a Refund key in addition to a multiplication. If pressed before selling an item the price will be registered as a negative, allowing return of the item sold immediately after the RF key Example Sale •... -
Page 22: Voiding Last Item (Vd)
EGISTER The void key can be used to correct mistakes by removing the last item sold, as shown in the example below. Voiding last Item (VD) Shown below is an example of correcting the last item. Example Sale • Ensure the slide switch is in the R position •... -
Page 23: Voiding Previous Item (Vd)
EGISTER The void key can be used to correct mistakes of any item within the current sale as shown in the example below. Voiding Previous Item (VD) The following Example will remove any item previously sold within a sale. Example Sale •... -
Page 24: Tendering Cash Sale (Ca) Operation
EGISTER Tendering Cash Sale Operation The register allows payment by cash with the option to calculate the change amount due as shown in the example below. Example Sale • Ensure the slide switch is in the R position • Type in the price of the item on the number keys accounting for two decimals i.e. -
Page 25: Split Tendering (Ca & Ch) Operation
EGISTER Split Tendering (CA & CH) Operation The register allows the payment by both Cash and Charge within the same sale as shown by the example below. Example Sale • Ensure the slide switch is in the R position • Type in the price of the item on the number keys accounting for two decimals i.e. -
Page 26: Received On Account (Ra) Operation
EGISTER Received on Account (RA) Operation It is possible to register monies added to the cash drawer which do not relate to a sale i.e. the amount of float added in to the drawer at the start of the day Example Sale •... -
Page 27: Calculator Operation
EGISTER Calculator Operation The register will also act as a calculator, During this operation values are not added into the sales totals and the register operates as a simple calculator Example Calculator • Ensure the slide switch is in the R position •... -
Page 28: Reporting
EPORTING Report Options The register has two reporting modes X to Print reports and Z to Print and Reset report data. The following table below shows the report selections available • Ensure the slide switch is in either X to read reports or Z to Print and Reset •... -
Page 29: Example Financial Daily Report
EPORTING Example Financial Daily Report Shown below is how to print the financial report and an example of the report The report can be set to show items with 0’s or not depending on the system option program. • Ensure the slide switch is in either X to print Z to reset all totals to zero •... -
Page 30: Example Period To Date Report
EPORTING Example Period to Date Report Shown below is how to print the Period-To-Date report and an example The report can be set to show items with 0’s or not depending on the system option program. • Ensure the slide switch is in either X to print Z to reset all totals to zero •... -
Page 31: Maintenance
AINTENANCE Recommendations Shown below are common recommendations regarding the care of this product. Recommendation Avoid excess dust and extreme temperatures. Be certain that the AC cord poses no danger of accidental tripping and that it is inserted firmly into the outlet Use no chemicals or abrasives while cleaning cabinet or keyboard. -
Page 32: Specification
PECIFICATION Below are shown the technical specifications for this product. Specification Reg. Size 325 mmW × 420 mmL× 225 mmH DIMENSIONS Net weight 5.3 kg Size 325 mmW × 420 mmL 95 mmH DRAWER Weight 3.3 kg Lock switch Slide switch Positions 5 (off, r, x, z, p) MODE KEY...
Need help?
Do you have a question about the ER-150 II and is the answer not in the manual?
Questions and answers