Table of Contents
Advertisement
Quick Links
Download this manual
See also:
Instructional Manual
Advertisement
Table of Contents

Related Manuals for Dake TB-16


Summary of Contents for Dake TB-16
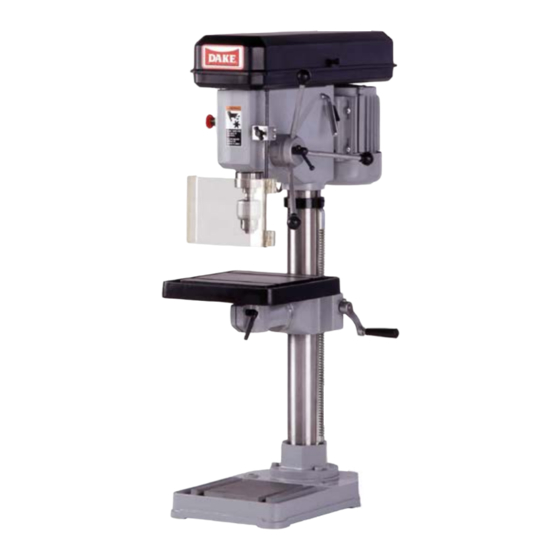
- Page 1 TB & SB Series Drill Presses OWNERS MANUAL BENCH AND FLOOR DRILL PRESS TB-16 Series & SB-16-25-32-Series FOR YOUR OWN SAFETY AND OPTIMUM OPERATION READ INSTRUCTION MANUAL BEFORE OPERATING DRILL PRESS RETAIN THIS MANUAL FOR FURTHER REFERENCE...
-
Page 2: Table Of Contents
• Speed adjustment and belt tensioning page 13 • Proper drill speeds for materials and bit diameter page 14 • Dake safety features page 14 • Exploded diagram TB / SB 16 page 15 • Parts list TB / SB 16 page 16 •... -
Page 3: Model Specifications
42-1/2” 64” 71” 71” Weight 155 lbs. 210 lbs. 397 lbs. 463 lbs. ELECTRICAL DIAGRAMS CAUTION 20 AMP circuit breaker is recommended for the TB-16 and SB-16 models. 30 AMP circuit breaker is recommended for the SB-25 110 volt model. -
Page 4: Drill Press Installation
4. Install your drill press on a sturdy level floor surface, or work bench. (TB-16) The machine must be anchored to the floor or workbench securely. Machine is top heavy. 5. Connect appropriate power to the machine. Make sure circuit breakers are suitable for the machine. -
Page 5: Safety Points
SAFETY POINTS BEFORE USE, ALL SAFETY POINTS MUST BE READ AND UNDERSTOOD! Before the DRILL PRESS is used, the instruction manual with this machine must be read and understood. This manual offers safe operation instructions. Offered below are safety instructions designed for the drill press and general safety instructions that apply to most machinery. -
Page 6: Power Warning
2. FOR SAFE OPERATION For your own safety read the instruction manual before operating DRILL PRESS. DANGER HIGH VOLTAGE TURN OFF THE POWER BEFORE SERVICE 1. SWITCH the POWER OFF before setting, inspecting lubricating, cleaning or changing the drill bit. 2. -
Page 7: General Safety Instructions
GENERAL SAFETY INSTRUCTION DANGER Continued 8. Use the right tool. Do not force the tool, or use the machine to do a job for which it was not designed. 9. Wear proper apparel. No loose clothing, gloves, necktie, rings or other jewelry to get caught in moving parts. - Page 8 4. SAFETY INSTRUCTIONS FOR DRILL PRESS SAFETY INSTRUCTIONS FOR DRILL PRESS CAUTION 1. Wear eye protection. 2. Do not wear gloves, necktie, rings or loose clothing. 3. Clamp work piece or brace against column to prevent rotation. 4. Use recommended speed for drill bits and sizes and work piece materials. 5.
-
Page 9: Voltage Warning And Grounding Instructions
5. VOLTAGE WARNING VOLTAGE WARNING WARNING 1. Before connecting the machine to a power source (receptacle, outlet… etc.) Know your incoming voltage supply. (220, 208 etc.) 2. A power source with voltage greater than that specified for the machine can result in serous injury to the user, and machine damage. Using a power source with voltage less than that of the machines rating can damage the motor and other components. - Page 10 7. OPERATION (PROCEDURE) Drill / Chuck Installation: To show greater detail chuck guard is in the open position in POWER MUST BE OFF BEFORE photos. CHUCK GUARD MUST IN MAKING ANY ADJUSTMENTS! PLACE DURING OPERATION! TURN POWER OFF! Before inserting drill bits, chucks or arbors, always clean out spindle hole and taper hole with a clean cloth.
-
Page 11: Operation And Set-Up Instructions
Table tilting adjustment: Using an adjustable or box wrench loosen table level lock bolt. Carefully tilt the table to the degree needed, as read on the angle index scale located on the table rotation point. Retighten nut securely. Note: Never tilt table if any material or fixturing is on it. - Page 12 TURN P POWER OFF! Wait until machine has come to a complete stop before proceeding with speed change! Speed adjustment: Open the pulley cover to expose the pulleys and drive belts. Loosen the belt tension lock handles. Choose the proper speed for the drilling operation.
-
Page 13: Tooling Removal
Tooling removal: Before removing the chuck or bit from the machine, be sure the spindle has come to a complete stop and power is off. If needed rotate spindle by hand to align the spindle and quill openings. Insert the wedge removal tool, while supporting the tooling tap the wedge to remove the tooling. -
Page 14: Speed Adjustment And Belt Tensioning
TB & SB 16 SB 25 SB 32 MODEL PULLEY STEPS RPMs RPMs RPMs 1 - 7 = 240 rpm = 270 rpm = 270 rpm 1 - 6 = 420 rpm = 400 rpm = 410 rpm 2 - 7 = 450 rpm = 450 rpm = 450 rpm... -
Page 15: Proper Drill Speeds For Materials And Bit Diameter
1745 1,530 1,220 1,020 SB-25 1-1/8 SB-32 1-1/4 SAFETY FEATURES OF DAKE DRILL PRESSES CHUCK / CHIP GUARD CE CERTIFIED ELECTRONICS Membrane covered On / Off push buttons FOR OPERATOR SAFETY, ALWAYS USE PROPER Low voltage, thermo protection POSITIONED CHUCK GUARD. -
Page 17: Exploded Diagram Tb / Sb
PARTS LIST for TB-16 / SB-16 Item Item Description TB-16 SB-16 Description TB-16 SB-16 Base TB-16 301002 301001 Motor 300993 300993 Flange 301003 301004 Switch 301024 301024 Spring Washer (4x) 13mm 13mm Spring & Cap Base 301025 301025 Screw 300999... - Page 19 PARTS LIST for SB–25 / SB-32 Item Item Description SB-25 SB-32 Description SB-25 SB-32 Base 301040 301041 Spring & Cap 301063 301064 Flange 301042 301043 Motor Pulley 301065 301065 Spring Washer (4x) 13 mm 13 mm Belt 301066 301066 Screw 300999 300999 Screw (4x)
Need help?
Do you have a question about the TB-16 and is the answer not in the manual?
Questions and answers