Table of Contents
Advertisement
Quick Links
Download this manual
See also:
Installation Manual
Advertisement
Table of Contents

Subscribe to Our Youtube Channel
Related Manuals for Hughes Jupiter HT1000


Summary of Contents for Hughes Jupiter HT1000
- Page 1 HT1000 Satellite Modem User Guide 1039111-0001 Revision A October 17, 2012 11717 Exploration Lane, Germantown, MD 20876 Phone (301) 428-5500 Fax (301) 428-1868/2830 http://www.Datasheet4U.com...
- Page 2 The information in this document is subject to change without notice. Hughes Network Systems, LLC makes no warranty of any kind with regard to this material, including, but not limited to, the implied warranties of merchantability and fitness for a particular purpose.
-
Page 3: Table Of Contents
Contents Understanding safety alert messages....5 Messages concerning personal injury ..... . 5 Messages concerning property damage . - Page 4 Configuring a computer to use DHCP ..... 29 Configuring Windows 7 to use DHCP ....29 Configuring Windows Vista to use DHCP .
-
Page 5: Understanding Safety Alert Messages
Understanding safety alert messages Safety alert messages call attention to potential safety hazards and tell you how to avoid them. These messages are identified by the signal words DANGER, WARNING, CAUTION, or NOTICE, as illustrated below. To avoid possible property damage, personal injury, or in some cases possible death, read and comply with all safety alert messages. -
Page 6: Safety Symbols
Safety symbols The generic safety alert symbol calls attention to a potential personal injury hazard. It appears next to the DANGER, WARNING, and CAUTION signal words as part of the signal word label. Other symbols may appear next to DANGER, WARNING, or CAUTION to indicate a specific type of hazard (for example, fire or electric shock). -
Page 7: Overview
Chapter 1 Overview This user guide describes the features and operation of the HT1000 satellite modem, which provides Internet access by satellite. This guide also gives pertinent reference information. This guide applies to users in the United States and Canada. In this user guide satellite modem and modem both refer to the HT1000 satellite modem. -
Page 8: Operating Environment
Operating environment Observe the following requirements for the modem's operating environment. Ventilation and heat sources The modem must be adequately ventilated and kept away from sources of heat. NOTICE • Do not block any of the modem's ventilation openings. • Leave 6 inches of space around the top and sides of the modem to ensure adequate ventilation and prevent overheating. - Page 9 Click Chat with Us! 4. Call a Customer Care representative. If none of these options helps you, call Hughes Customer Care at 1 (866) 347-3292. For modems purchased from a value-added reseller (VAR) in the United States or Canada: If you purchased this product from a Hughes VAR, do not contact Hughes.
- Page 10 Chapter 1 • Overview 1039111-0001 Revision A...
-
Page 11: System Control Center
Chapter 2 System Control Center The System Control Center is a set of screens and links you can use to monitor your broadband service and troubleshoot the satellite modem in the event of a problem. The System Control Center provides access to system status, configuration information, and online documentation. - Page 12 attention. Refer to Indicator links on page 13 for more additional information about indicator links. Figure 2: System Control Center home page before activation Figure 3 shows the System Control Center home page after service activation. The System Status indicator is green which means that all functions are working within normal parameters.
-
Page 13: Indicator Links
System Status indicator. Figure 5: System Status indicator colors and meanings Note: Hughes maintains a Fair Access Policy (FAP). This policy establishes an equitable balance in Internet access for all HughesNet subscribers. Hughes assigns a Download Allowance to each service plan that limits the amount of data that may be continuously downloaded within specified time periods. -
Page 14: Parameters Bar
The table below identifies the destination page for each link Table 1: Destination pages Indicator Destination Description System Status System Status page Gives important information about the satellite router’s operational status. System Information System Information page General information screen that identifies software and hardware versions and other important satellite connection information. -
Page 15: Center Panel Text Links And Information
Center panel text links and information The System Control Center home page center panel includes the following text links and informational panels once service is activated.: Figure 7: System Control Center Help panel HELP area - Gives you access to the HughesNet Web Portal, which Welcome to HughesNet contains a variety of useful tools, resources, and information. -
Page 16: Side Panel
Side panel The following links appear on the left panel of each System Control Center screen as shown in Figure 8. Figure 8: Side panel links - Opens the System Control Center home page. Home - Opens the Connectivity Test page, which you can use to test the Connectivity Test connection between the satellite modem and the NOC. -
Page 17: System Status Page
System Status page The System Status page lists parameter information vital to the proper operation of the HT1000. Available system status values (as shown in Figure 9) may vary, depending on how your satellite modem is configured. Figure 9: System Status page Chapter 2 •... -
Page 18: System Information Page
Connectivity Test Use the Connectivity Test link on the side panel to check the connectivity to the Hughes Network Operations Center (NOC). To test your connectivity: 1. Click the link on the side panel. The Terminal - Gateway Connectivity Test Connectivity Test appears in the center of the screen. - Page 19 2. Click the link as shown in Figure 11. Start the test Figure 11: Connectivity Test Start 3. The Terminal - Gateway Connectivity Test panel appears indicating the test has started, as shown in Figure 12. Figure 12: Connectivity Test started screen Chapter 2 •...
-
Page 20: Built In Self Test
When the test completes, the results appear in the center panel. Figure 13 shows the results of the test. Figure 13: Connectivity Test results Built in Self Test Use the Built in Self Test link on the side panel to check the connectivity of the satellite modem. - Page 21 2. The test results appear below the link as shown in Figure 14. Figure 14: Built in Self Test screen Chapter 2 • System Control Center 1039111-0001 Revision A...
-
Page 22: Help
HELP Welcome to HughesNet - The HughesNet web portal contains a variety of useful tools, resources, and information. Access to the HughesNet portal is determined by your service plan. Figure 15 shows the Welcome screen. Figure 15: Welcome to HughesNet screen Chapter 2 •... - Page 23 - Navigates to the Customer Care web page (Figure 16) where you can Customer Care manage various facets of your account. Figure 16: Customer Care web page Additional Premium Services - Gives you access to additional services and self-help information. Chapter 2 •...
- Page 24 Chapter 2 • System Control Center 1039111-0001 Revision A...
-
Page 25: Leds
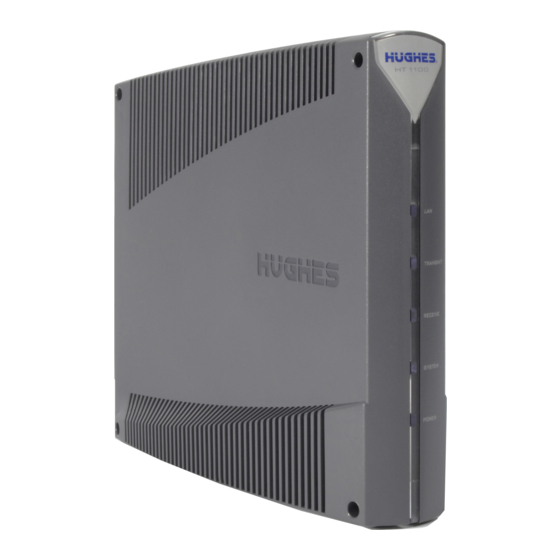
Chapter 3 LEDs The satellite modem has five LEDs on the front panel, as shown in Figure 17. By their appearance (on, off, blinking, or flashing) the LEDs indicate the modem's operating status. The front panel LEDs are all blue when lit. Figure 17: Front panel LEDS on the HT1000 Table 2 explains what the modem status is when the LEDs are on, off, or blinking. - Page 26 intermittently turns off briefly. Flashing means the LED alternates between on and off for periods of ½ sec to 1 sec. Table 2: Front panel LED indications Appearance Status Satellite modem is connected to a computer network card or Ethernet device Blinking Transmitting and/or receiving data...
-
Page 27: Lan Port Leds
LAN port LEDs Green and orange LEDs on the LAN (Ethernet) port on the modem's rear panel indicate link status and speed, as explained in Figure 18. Figure 18: LAN port LEDs Chapter 3 • LEDs 1039111-0001 Revision A... - Page 28 Chapter 3 • LEDs 1039111-0001 Revision A...
-
Page 29: Computer Settings
Appendix A Computer settings For proper operation of the satellite modem, you may have to change certain settings on the computer that is connected to the modem. Instructions are provided for configuring a computer to support DHCP. The following sections explain this procedure. Understanding the modem address and computer address The satellite modem and any computer or computers that connect to it must each have their own identifying network address. - Page 30 If you do not see a Local Area Connection link or if a red X appears next to the link, the network is not installed correctly. Check your network configuration and connections. You cannot configure your system if the red X is present. Figure 19: Network and Sharing Center –...
- Page 31 7. Highlight the appropriate TCP/IP connection (usually Internet Protocol Version 4). Be careful not to uncheck the checkbox. Properties 8. Click The Internet Protocol Properties dialog appears as shown in Figure 21. Figure 21: Internet Protocol Properties – Windows 7 9.
-
Page 32: Configuring Windows Vista To Use Dhcp
Configuring Windows Vista to use DHCP 1. From the Windows desktop, select Start > Settings > Network Connections. A list of network adapters appears as shown in Figure 19. The Local Area Connection-NIC Card icon must appear under the LAN or High-Speed Internet heading. -
Page 33: Configuring Windows Xp To Use Dhcp
5. Highlight the appropriate TCP/IP connection. Be careful not to uncheck the checkbox. Properties 6. Click The Internet Protocol Properties dialog appears as shown in Figure 24. Figure 24: Internet Protocol Properties – Windows Vista 7. Ensure that both the Obtain an IP address automatically and Obtain DNS server address automatically options are selected. - Page 34 A list of network adapters appears as shown in Figure 25. A Local Area Connection icon must appear under the LAN or High-Speed Internet heading. If it does not, the network is not installed correctly. Figure 25: Network connections – Windows XP Note: If a red X appears next to the Local Area Connection icon, check your connections.
-
Page 35: Configuring A Mac Computer To Use Dhcp
The Internet Protocol Properties dialog appears as shown in Figure 27. Figure 27: Internet Protocol Properties – Windows XP 8. On the General tab, ensure that both the Obtain an IP address automatically and Obtain DNS server address automatically options are selected. If not, select them. - Page 36 2. Under Internet & Network, click the Network icon. The Network screen appears as shown in Figure 28. Figure 28: Mac Network screen 3. Ensure that the TCP/IP tab is selected. 4. Select Using DHCP from the Configure drop-down list as shown in Figure 29. The IP Address field becomes disabled.
-
Page 37: Standards Compliance
Appendix B Standards compliance The HT1000 satellite modem has been certified to comply with the standards listed in Table 3. Additional information follows the table. Table 3: HT1000 standards compliance Category Standard Safety UL60950-1 for the USA CAN/CSA-C22.2 No. 60950-1 for Canada Electromagnetic Interference (EMI) FCC Part 15 for the USA ICES-003 for Canada... -
Page 38: Electromagnetic Interference (Emi)
Type of equipment: Two-way Hughes system Model number: HT1000 (1502573) Canada Class B warning The two-way Hughes system (HT1000) complies with the Canadian ICES-003, Class B standard. Cet appareil numérique de la classe B est conforme á la norme NMB-003 du Canada. -
Page 39: Acronyms And Abbreviations
Acronyms and abbreviations DHCP – Dynamic host configuration protocol ESN – Electronic Serial Number FAP – Fair Access Policy LAN – Local area network NetBEUI – Extended User Interface (network transfer protocol) Networking requirements SAN – Site account number VAR – Valued-added reseller •... - Page 40 • Acronyms and abbreviations 1039111-0001 Revision A...
-
Page 41: Index
Index Computer IP address 29 System Control Center Computer requirements 8 Help 15 Contact information 8 home page 11 indicator links 13 links 15, 16 parameters bar 14 DHCP settings 29 Status page 16 Download allowance 15 System Information page 16 Fair Access Policy 13 FAP –... - Page 42 • Index 1039111-0001 Revision A...
Need help?
Do you have a question about the Jupiter HT1000 and is the answer not in the manual?
Questions and answers