
Subscribe to Our Youtube Channel
Related Manuals for Stryker 1115


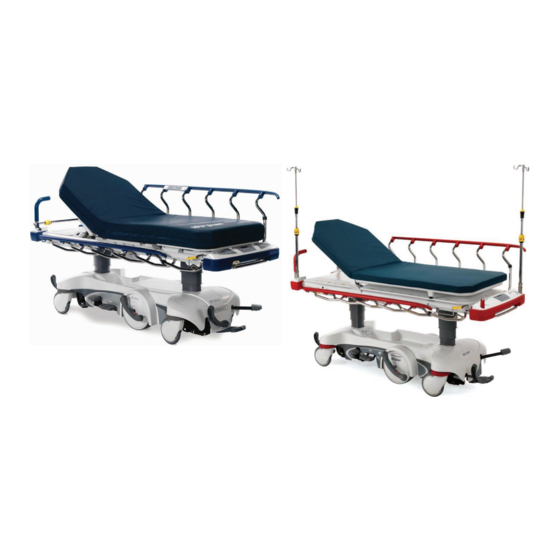
Summary of Contents for Stryker 1115
- Page 1 Prime Series® Stretcher Big Wheel® 1115 Operations Manual 2017/12 B.2 1115-309-001 REV B www.stryker.com...
- Page 2 sample text...
- Page 3 Warning; non-ionizing radiation No pushing Do not store the oxygen bottle Do not lubricate Catalogue number Serial number Batch code For US Patents see www.stryker.com/patents CE mark EC REP Manufacturer Date of manufacture Safe working load Maximum patient weight www.stryker.com...
- Page 4 Contact your local distributor for disposal information. Lubricate Lift here U.S.A. English text below this symbol is intended for USA audiences only CANADA English text below this symbol is intended for Canada audiences only Top view Bottom view Head end 1115-309-001 REV B www.stryker.com...
- Page 5 Symbols Foot end Patient foot end, left www.stryker.com 1115-309-001 REV B...
- Page 6 sample text...
-
Page 7: Table Of Contents
Raising or lowering the gatch - non-electric litter - not available with Prime X option........29 Raising or lowering the gatch - electric litter option - not available with Prime X option........29 Positioning the recovery chair - not available with Prime X option ..............30 www.stryker.com 1115-309-001 REV B... - Page 8 Disinfecting the product ........................52 Disinfecting the mattress ........................52 Preventive maintenance ........................... 54 EMC information ............................. 55 Warranty ............................... 59 Warranty exclusion and damage limitations .................... 59 To obtain parts and service ......................... 59 Return authorization........................... 59 1115-309-001 REV B www.stryker.com...
- Page 9 Table of Contents Damaged product..........................59 International warranty clause ....................... 59 www.stryker.com 1115-309-001 REV B...
-
Page 10: Warning/Caution/Note Definition
Note: Provides special information to make maintenance easier or important instructions clearer. 1115-309-001 REV B www.stryker.com... -
Page 11: Summary Of Safety Precautions
• Always secure the IV pole to the IV caddy when you transport the product. • Always store the IV caddy when not in use to avoid product damage. www.stryker.com 1115-309-001 REV B... - Page 12 Do not apply the steer pedal when the Big Wheel is resting on a threshold or other raised area. The force required to apply the Big Wheel will be higher than normal which may cause product damage. 1115-309-001 REV B www.stryker.com...
- Page 13 • Avoid stacking or placing equipment adjacent with other equipment to prevent improper operation of the products. If such use is necessary, carefully observe stacked or adjacent equipment to make sure that they are operating properly. www.stryker.com 1115-309-001 REV B...
-
Page 14: Pinch Points
Summary of safety precautions Pinch points Figure 1: Prime X option 1115-309-001 REV B www.stryker.com... -
Page 15: Introduction
Product Description The Stryker Model 1115 Prime Series® stretcher with Big Wheel® is a wheeled device which consists of a platform mounted on a wheeled frame that is designed to support patients in a horizontal position. A stretcher provides the operator with a method of transporting patients within the interior of a healthcare facility by health professionals or trained representatives of the facility. -
Page 16: Expected Service Life
0° to 90° (± 5°) Gatch height 5.5 in. (14 cm) minimum Not applicable Trendelenburg/Reverse +17° to -17° (± 3°) Trendelenburg 2.5 in. 2.5 in. 2.5 in. Minimum clearance 6.4 cm 6.4 cm 6.4 cm nominal nominal nominal 1115-309-001 REV B www.stryker.com... - Page 17 6.0 VDC 6.0 VDC Optional electric litter (available on Scale system option Optional electric lift Prime only) 1 x Rechargeable Lithium Ion Battery Battery type Not applicable Pack (0058-135-000) Battery voltage Not applicable 10.8 VDC, 2.4Ah www.stryker.com 1115-309-001 REV B...
- Page 18 Battery voltage 10.8 VDC, 4.8 Ah Not applicable Stryker reserves the right to change specifications without notice. Note: This product is not suitable for use in the presence of a flammable anesthetic mixture with air or with oxygen or nitrous oxide.
-
Page 19: Product Illustration - Prime Base
700 hPa 500 hPa Product illustration - Prime base Figure 2: Prime base Base hood storage Casters with integrated wheel covers Big Wheel Hydraulic release pedal Brake steer control pedal Pump pedal Bumpers, integrated Uni-lower pedal www.stryker.com 1115-309-001 REV B... -
Page 20: Product Illustration - Prime Litter
Drop seat Fowler backrest with Lift Assist® (Prime X option) BackSmart™ foot end operator controls option BackSmart pop-up push handles option Pump rack Fowler backrest release handle Gatch pump handle option BackSmart scale system option Gatch release handle option BackSmart siderail, Glideaway 1115-309-001 REV B www.stryker.com... -
Page 21: Position Adjustment Button Identification
Gatch down Fowler backrest down Gatch up Lock or unlock patient controls Patient position LED indicator - patient controls unlocked Fowler backrest up LED indicator - patient controls locked Scale button identification Figure 5: Scale buttons www.stryker.com 1115-309-001 REV B... - Page 22 The display shuts off after Zero until the display reads REL. approximately 40 seconds. Release the Zero button. The display will flash 000.0 and then will display 000.0 (not flashing). The system is not zeroed until the 000.0 stops flashing. 1115-309-001 REV B www.stryker.com...
-
Page 23: Applied Parts - Electric Litter Option
Introduction Applied parts - electric litter option Figure 6: Type B applied parts - Electric litter option www.stryker.com 1115-309-001 REV B... -
Page 24: Applied Parts - Prime X Option
Portage, MI 49002 To view your operations or maintenance manual online, see https://techweb.stryker.com/. Have the serial number (A) of your Stryker product available when calling Stryker Customer Service or Technical Support. Include the serial number in all written communication. 1115-309-001 REV B... -
Page 25: Serial Number Location
Introduction Serial number location Figure 7: Serial number location Date of manufacture The year of manufacture is the first 2 digits of the serial number. www.stryker.com 1115-309-001 REV B... -
Page 26: Setup
5. Raise and lower the electric Fowler backrest (head section). 6. Raise and lower the electric gatch (foot section). For product with the scale system option-electric litter option (with or without Chaperone option): 1. Complete the setup checklist above. 2. Charge the batteries. 1115-309-001 REV B www.stryker.com... -
Page 27: Operation
Do not leave the product at a higher height. • Always remove any devices that may be in the way before you raise or lower the litter. • Do not sit on the end of the product. The product may tip. www.stryker.com 1115-309-001 REV B... -
Page 28: Lowering The Non-Electric Litter
Always remove any devices that may be in the way before you raise or lower the litter. • Do not sit on the end of the product. The product may tip. CAUTION Do not use the hydraulics on the base to raise the product with a patient lift under the product. 1115-309-001 REV B www.stryker.com... -
Page 29: Lowering The Electric Litter Option
(C) until the litter is flat. Positioning the product in Reverse Trendelenburg WARNING Always remove any devices that may be in the way before you raise or lower the litter. www.stryker.com 1115-309-001 REV B... -
Page 30: Transporting A Patient Without The Big Wheel
When the Big Wheel is applied, the product is raised and the foot end casters are elevated. The product rests on the head end casters and the Big Wheel to make the product easier to steer. 1115-309-001 REV B www.stryker.com... -
Page 31: Transporting A Patient With The Big Wheel
To position or stow the head end push handles: Pivot the handles (A) up from the head end of the product (Figure 10 on page 26). Push down on the handles to lock them into position. www.stryker.com 1115-309-001 REV B... -
Page 32: Raising The Siderail
The operator must determine how much restraint is needed to make sure that the patient is safe. • You can use the foot end of the siderails as a push or pull device. • Siderails only lock in the full up position. 1115-309-001 REV B www.stryker.com... -
Page 33: Lowering The Siderail
Operator control panel - electric litter option - not available with Prime X option WARNING Always operate the product when all operators are clear of the mechanisms. www.stryker.com 1115-309-001 REV B... -
Page 34: Locking And Unlocking The Patient Control Panel Lockout - Electric Litter Option - Not Available With Prime X Option
Always keep hands and fingers clear of the Fowler backrest release handles and the Fowler backrest frame when you lower the Fowler backrest. • Always use caution when you raise a pneumatic Fowler backrest while a patient is on the product. Use proper lifting techniques and get help, if necessary. 1115-309-001 REV B www.stryker.com... -
Page 35: Raising Or Lowering The Gatch - Non-Electric Litter - Not Available With Prime X Option
The weight capacity of the gatch is 200 lb (90.7 kg). • Do not sit or stand on the gatch. • Always use caution when you attempt to lower the gatch while the product is unpowered. Gravity may cause a rapid drop of the gatch. www.stryker.com 1115-309-001 REV B... -
Page 36: Positioning The Recovery Chair - Not Available With Prime X Option
(Raising the non-electric litter on page 21 Raising the electric litter option on page 22). Place the product into the Reverse Trendelenburg position (Positioning the product in Reverse Trendelenburg on page 23). Reverse steps to lower the product to the flat position. 1115-309-001 REV B www.stryker.com... -
Page 37: Storing Objects In The Base Hood
Always use the retractable cord reel to store the power cord inside the base when you transport the product. To extend the power cord, pull the power cord out from the retractable cord reel (A) to the desired length (Figure 13 on page 32). www.stryker.com 1115-309-001 REV B... -
Page 38: Scale System Option
Raise the foot end push handles before you attempt to operate the scale system option. Use the scale system control panel to operate the scale system option (Scale button identification on page 15). 1115-309-001 REV B www.stryker.com... -
Page 39: Replacing The Batteries For The Scale System Option - Non-Electric Litter
) appears in the display if there is a loose connection or if the scale is not operating. If you attempt to operate the scale again and the error appears, contact Stryker Technical Support. Note: To meet the scale accuracy claim, the patient surface must be in the flat position (Fowler backrest and gatch down). -
Page 40: Setting The Chaperone Option Alert Pattern
Press and hold both Zero and lb/kg together for 6 seconds until SET appears on the display to save your selected volume level. Release Zero and lb/kg. Note: The volume level you selected appears on the display. A brief sample of the volume level confirms your volume level setting. 1115-309-001 REV B www.stryker.com... -
Page 41: Accessories
Accessories These accessories may be available for use with your product. Confirm availability for your configuration or region. Call Stryker Customer Service: 1-800-327-0770. Name Part number Defibrillator tray 1105-045-200 Defibrillator tray/foot extender 1105-045-400 Footboard/chart holder 1105-045-500 Foot supports 1105-045-022 1115-130-000 Oxygen bottle holder, upright Push handles, 26”... -
Page 42: Attaching The Defibrillator Tray
Do not use the defibrillator tray as a push/pull device. Product damage may occur. • Always raise the foot end push handles when you use accessories (such as the defibrillator tray/foot extender, footboard/chart holder, upright oxygen bottle holder) or the accessories will not function. 1115-309-001 REV B www.stryker.com... -
Page 43: Converting The Defibrillator Tray/Foot Extender To A Defibrillator Tray
Use the strap to secure devices to the defibrillator tray. Notes • Do not use the defibrillator tray/foot extender as a push/pull device. Product damage may occur. • Do not attach items to the foot extender. Figure 14: Defibrillator tray/foot extender www.stryker.com 1115-309-001 REV B... -
Page 44: Converting The Defibrillator Tray/Foot Extender To A Foot Extender
Pivot the IV caddy to the desired position. Turn the knob (A) counterclockwise to loosen the pole clamp (C). Pivot the knob (A) away from the arm connection assembly (B). Open the clamp (C). Place the IV pole into the clamp (C). 1115-309-001 REV B www.stryker.com... -
Page 45: Positioning Or Stowing The Foot Supports - Not Available With Prime X Option
Loosen the knee knob (A) at the top of the foot supports to adjust the side-to-side angle of the foot supports (Figure 16 on page 40). Tighten the knee knob (A) to lock the foot supports in the desired position. www.stryker.com 1115-309-001 REV B... - Page 46 Defibrillator tray/foot extender • Serving tray holder/footboard • Footboard/chart holder • Foot end IV poles Notes • Do not use the foot supports to store patient belongings. • Do not use the foot supports as a push/pull device. 1115-309-001 REV B www.stryker.com...
-
Page 47: Positioning The Two-Stage Permanently Attached Iv Pole Option
Do not hang IV bags that exceed 40 lb (18 kg) on the IV pole. • Always make sure that the IV pole is at a low height to pass safely through door openings when you transport a patient. Figure 18: Positioning the 2 stage permanently attached IV pole www.stryker.com 1115-309-001 REV B... -
Page 48: Positioning The Three-Stage Permanently Attached Iv Pole Option
Always make sure that the IV pole is at a low height to allow the pole to pass safely through door openings when you transport a patient. Figure 19: Positioning the three-stage permanently attached IV pole 1115-309-001 REV B www.stryker.com... -
Page 49: Attaching And Positioning The Removable Iv Pole
Do not place objects that exceed 40 lb (18 kg) in the upright oxygen bottle holder. • Always use caution if the defibrillator tray/foot extender, footboard/chart holder, or upright oxygen bottle holder is attached to avoid pinching your fingers when you position the foot end push handle option. www.stryker.com 1115-309-001 REV B... -
Page 50: Extending Or Stowing The Serving Tray Holder/Footboard
Always refer to the applicable state and federal restrictions and regulations and the appropriate facility protocols before you use any restraint strap or device. There are eight patient restraint strap tie-in locations on the litter assembly for attaching patient restraint straps (Figure 21 on page 45 Figure 22 on page 45). 1115-309-001 REV B www.stryker.com... -
Page 51: Positioning The Upright X-Ray Cassette Holder - Prime X Option
Insert the lower retainer guides (A) under the Fowler backrest weldment bar (Figure 23 on page 46). Raise the cassette holder until the retainer guides latch onto the Fowler backrest weldment. Make sure that the cassette holder is secure. www.stryker.com 1115-309-001 REV B... -
Page 52: Positioning The Lateral X-Ray Cassette Holder - Prime X Option
Always use caution when you take X-rays with the Fowler backrest in the upright position or when you use a lateral cassette. • Always use extra caution when you use a mattress thicker than 2.5 in. or a mattress overlay with Prime X option. 1115-309-001 REV B www.stryker.com... -
Page 53: Inserting Or Removing X-Ray Cassettes - Prime X Option
Always use caution when you take X-rays with the Fowler backrest in the upright position or when you use a lateral cassette. Prime X option provides both an articulating radiographic support surface and a platform below the patient support surface for X-ray cassette placement. Working with medical X-ray systems, the radiographic support surface allows the www.stryker.com 1115-309-001 REV B... - Page 54 • Do not use a mattress with a thickness greater than 4 in. with Prime X option. • Do not use a C-Arm with Prime X option. Prime X option is not compatible with a C-Arm. 1115-309-001 REV B www.stryker.com...
-
Page 55: Cleaning
Cleaning the product using a cart washer Stryker Medical recommends using a standard hospital surgical cart washer to power wash the stretcher a maximum of once per year for the life of the product. To clean the product with a cart washer: If the product is equipped with the electric litter or electric lift option, unplug the power cord from the wall outlet before you transport or clean the product. -
Page 56: Cleaning The Mattress
Do not iron, dry-clean, or tumble dry the mattress, as this will cause malfunction and damage the product. • The mattress cover must be completely dry before you store, add linens, or place a patient on the mattress to prevent impairment of the product performance. 1115-309-001 REV B www.stryker.com... -
Page 57: Remove Iodine
Use standard household cleansers or vinyl cleansers and a soft bristle brush on troublesome spots or stains. Pre- soak dried-on soil. Laundering Laundering is not recommended. Laundering may substantially decrease the useful life of the mattress. www.stryker.com 1115-309-001 REV B... -
Page 58: Disinfecting
Phenolic disinfectant (active ingredient - o-phenylphenol) • Chlorinated bleach solution (5.25% bleach diluted 1 part bleach to 100 parts water which equals 520 ppm available chlorine (40 mL of a 5.25% bleach solution per 4000 mL water)) 1115-309-001 REV B www.stryker.com... - Page 59 • Frequent or prolonged exposure to higher concentrations of disinfectant solutions may prematurely age the cover fabric. • The use of accelerated hydrogen peroxides or quaternaries that contain glycol ethers may damage the cover. www.stryker.com 1115-309-001 REV B...
-
Page 60: Preventive Maintenance
Remove product from service before you perform the preventive maintenance inspection. Check all items listed during annual preventive maintenance for all Stryker Medical products. You may need to perform preventive maintenance checks more often based on your level of product usage. Service only by qualified personnel. -
Page 61: Emc Information
Electric Litter and Optional Scale System can help prevent electromagnetic interferences by maintaining a minimum distance between portable and mobile RF communications equipment (transmitters) and the Optional Electric Lift or Electric Litter and Optional Scale System as recommended below, according to the maximum output power of the communications equipment. www.stryker.com 1115-309-001 REV B... - Page 62 Surge ±1 kV line(s) to line(s) ±1 kV line(s) to line(s) Mains power quality should IEC 61000-4-5* ±2 kV line(s) to earth ±2 kV line(s) to earth be that of a typical commercial or hospital environment. 1115-309-001 REV B www.stryker.com...
- Page 63 P is the maximum output power rating of the transmitter in watts (W) according to the transmitter manufacturer and d is the recommended separation distance in meters (m). Field strengths from fixed RF transmitters, as determined by an electromagnetic site www.stryker.com 1115-309-001 REV B...
- Page 64 Optional Electric Lift or Electric Litter and Optional Scale System. Over the frequency range 150 kHz to 80 MHz, field strengths are less than 3 V/m. *Applies to optional electric litter only. 1115-309-001 REV B www.stryker.com...
-
Page 65: Warranty
Stryker’s obligation under this warranty is expressly limited to supplying replacement parts and labor for, or replacing, at its option, any product which is, in the sole discretion of Stryker, found to be defective. If requested by Stryker, products or parts for which a warranty claim is made shall be returned prepaid to the factory. Any improper use or any alteration or repair by others in such manner as in Stryker’s judgment affects the product materially and... - Page 66 Stryker Medical 3800 E. Centre Avenue Portage, MI 49002 2017/12 1115-309-001 REV B www.stryker.com...
Need help?
Do you have a question about the 1115 and is the answer not in the manual?
Questions and answers