
Related Manuals for Stryker 1115


Summary of Contents for Stryker 1115
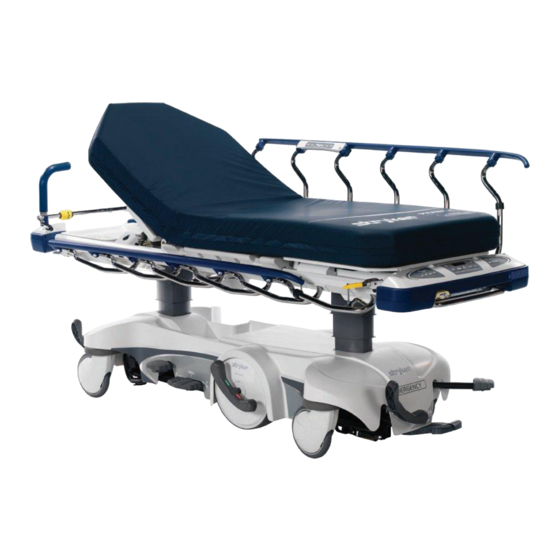
- Page 1 Prime™ Series Stretcher 1115 Big Wheel Operations Manual For parts or technical assistance call: USA: 1-800-327-0770 2012/09 D.3 1115-109-001 REV D www.stryker.com...
-
Page 3: Table Of Contents
Operating the Optional Scale System - Electric Litter Option Without Chaperone (Not Available With Prime X Option) Charging the Optional Scale System Battery Pack - Electric Litter Option (Not Available With Prime X Option) Operating the Optional Scale System - Electric Litter Option With Chaperone (Not Available With Prime X Option) www.stryker.com 1115-109-001 REV D... - Page 4 Recycling Passport ..............1115-109-001 REV D...
-
Page 5: Symbols And Definitions
Dangerous Voltage Protective Earth Terminal Protection from Liquid Jet IPX6 Return To Table of Contents www.stryker.com 1115-109-001 REV D... -
Page 6: Warning/Caution/Note Definition
NOTE Provides special information to make maintenance easier or important instructions clearer. Return To Table of Contents 1115-109-001 REV D www.stryker.com... -
Page 7: Introduction
INTENDED USE OF PRODUCT The Stryker Model 1115 Prime Series Stretcher is a wheeled device which consists of a platform mounted on a wheeled frame that is designed to support patients in a horizontal position. The device has siderails and has the option available to support the temporary or permanent placement of I.V. - Page 8 I.V. caddy and may include other options as described in the operations manual. Return To Table of Contents 1115-109-001 REV D www.stryker.com...
-
Page 9: Specifications
1” under 1” under the Big 2.5 cm the Big 2.5 cm the Big 2.5 cm Wheel Wheel Wheel Attenuation Equivalent Maximum Value Not applicable (Aluminum Equivalence) Allowed is 1.7 mm Al Return To Table of Contents www.stryker.com 1115-109-001 REV D... - Page 10 Battery Voltage Not applicable 10.8V , 4.8Ah Stryker reserves the right to change specifications without notice. Note: Equipment not suitable for use in the presence of a flammable anesthetic mixture with air or with oxygen or nitrous oxide. Return To Table of Contents 1115-109-001 REV D www.stryker.com...
-
Page 11: Specifications - Optional Scale System (Non-Electric Litter/Electric Litter Option)
500 hPa * To meet this accuracy claim, the patient surface must be in the flat position (fowler and gatch down) and the stretcher cannot exceed 5 degrees of Trendelenburg/reverse Trendelenburg. Return To Table of Contents www.stryker.com 1115-109-001 REV D... -
Page 12: Product Illustration - Electric Litter Option
Handle Optional Foot Push Pedal End Nursing Uni-Lower Controls Brake/Steer Pedal Siderail Control Pedal Integrated Brake/Steer Release Option Bumpers Control Pedal Casters with Integrated Wheel Covers Figure 1: Electric Litter Option Return To Table of Contents 1115-109-001 REV D www.stryker.com... -
Page 13: Product Illustration - Prime X Option
Clear View Siderail Technology Release Optional Pump Rack Pump Pedal Siderail Uni-Lower Pedal Brake/Steer Integrated Brake/Steer Control Pedal Bumpers Option Casters with Control Pedal Integrated Wheel Covers Figure 2: Prime X Option Return To Table of Contents www.stryker.com 1115-109-001 REV D... -
Page 14: Contact Information
Stryker Medical 3800 E. Centre Avenue Portage, MI 49002 Please have the serial number (A) of your Stryker product available when calling Stryker Customer Service or Technical Support. Include the serial number in all written communication. SERIAL NUMBER LOCATION Figure 3: Serial Number Loction... -
Page 15: Summary Of Safety Precautions
Special attention should be given when performing X-Rays with the stretcher’s fowler in the upright position and also when performing X-Rays using a lateral cassette. Return To Table of Contents www.stryker.com 1115-109-001 REV D... - Page 16 Summary of Safety Precautions WARNING (CONTINUED) • The Prime X option is not recommended for use with a Stryker Pioneer mattress or a mattress with a thickness greater than four inches and is not compatible for use with a C-Arm.
- Page 17 • Before returning the unit to service after cleaning, ensure that the unit is functioning properly by verifying that all labels are intact, raise/lower the stretcher height, brake/steer pedal locks properly in both positions, latch/unlatch the siderails, and raise/lower the fowler and gatch. Return To Table of Contents www.stryker.com 1115-109-001 REV D...
- Page 18 • Some cleaning products are corrosive in nature and may cause damage to the product if used improperly. If the products suggested above are used to clean Stryker patient handling equipment, measures must be taken to ensure that the stretcher is wiped with a damp cloth soaked in clean water and thoroughly dried following cleaning. Failure to properly rinse and dry the stretcher will leave a corrosive residue on the surface of the stretcher, possibly causing premature corrosion of critical components.
- Page 19 Summary of Safety Precautions PINCH POINTS - PRIME X OPTION Figure 4: Pinch Points - Prime X Option Return To Table of Contents www.stryker.com 1115-109-001 REV D...
-
Page 20: Setup Procedures
Modifying the unit will also void its warranty. • This stretcher is not intended for pediatric use or for patients under 50 lb. This stretcher is intended for use by trained hospital personnel only. Return To Table of Contents 1115-109-001 REV D www.stryker.com... -
Page 21: Operation Guide
Figure 5: Brake System Note: The bottom of the brake pads should be cleaned regularly to prevent wax or floor remnant buildup. Steer/Brake functions (head end) Brake/Steer functions (foot end) Figure 6: Steer/Brake Functions Return To Table of Contents www.stryker.com 1115-109-001 REV D... -
Page 22: Operating The Base Controls - Side Control Hydraulics
• Leave the stretcher height in the lowest position when the patient is left unattended. Leaving the stretcher height in a raised position could increase the chance of patient falls and injury. Head End Figure 7: Stretcher Base Controls - Side Control Figure 8: Side Base Control Label Return To Table of Contents 1115-109-001 REV D www.stryker.com... -
Page 23: Operating The Base Controls - Optional Three-Sided And Four-Sided Control Hydraulics
Head End Figure 9: Stretcher Base Controls - Optional Three-Sided and Four-Sided Control Figure 11: Figure 10 : Side Base Three-Sided or Four-Sided Control Label Label A Return To Table of Contents www.stryker.com 1115-109-001 REV D... -
Page 24: Raising And Lowering The Litter Height - Optional Electric Lift
• Leave the stretcher height in the lowest position when the patient is left unattended. Leaving the stretcher height in a raised position could increase the chance of patient falls and injury. Return To Table of Contents 1115-109-001 REV D www.stryker.com... -
Page 25: Adjusting Trendelenburg/Reverse Trendelenburg Positions - Side Control Hydraulics
Note: The higher the litter is before pedal (B), (C), or (D) is activated, the greater the Trendelenburg or reverse Trendelenburg angle will be. (Maximum Trendelenburg angle is +17°. Maximum reverse Trendelenburg angle is -17°.) Return To Table of Contents www.stryker.com 1115-109-001 REV D... -
Page 26: Operating The Big Wheel
Do not engage the steer pedal when the Big Wheel is resting on a threshold or other raised area. The force required to engage the Big Wheel will be higher than normal, possibly causing damage. Return To Table of Contents 1115-109-001 REV D www.stryker.com... -
Page 27: Operating The Siderails
To avoid injury or damage to the equipment, do not allow the siderail to lower on its own. Note: There is a dual siderail latch option available with latches on both ends of the stretcher. Return To Table of Contents www.stryker.com 1115-109-001 REV D... -
Page 28: Operating The Siderail Patient Controls - Optional Electric Litter (Not Available With Prime X Option)
Press to lower the gatch (foot section) Gatch Up Press to raise the gatch (foot section) Fowler Up Press to raise the fowler (head section) Fowler Down Press to lower the fowler (head section) Return To Table of Contents 1115-109-001 REV D www.stryker.com... -
Page 29: Operating The Foot End Nursing Controls - Optional Electric Litter (Not Available With Prime X Option)
Press to lower the gatch (foot section) Gatch Up Press to raise the gatch (foot section) Fowler Up Press to raise the fowler (head section) Fowler Down Press to lower the fowler (head section) Return To Table of Contents www.stryker.com 1115-109-001 REV D... -
Page 30: Using Patient Control Lockout - Optional Electric Litter (Not Available With Prime Xoption)
The push handles were designed for use while transporting the stretcher. Avoid using other parts of the stretcher as push/pull devices because damage could occur. Figure 18: Push Handles Open Figure 19: Push Handles Stored Return To Table of Contents 1115-109-001 REV D www.stryker.com... -
Page 31: Operating The Pneumatic Fowler - Non-Electric
• Keep hands/fingers clear of the area around the fowler release handle and the fowler frame when lowering the fowler. Injury could result if care is not taken when lowering the fowler. Figure 20: Pneumatic Fowler - Prime Figure 21: Pneumatic Fowler - Prime X Option Return To Table of Contents www.stryker.com 1115-109-001 REV D... -
Page 32: Operating The Fowler - Optional Electric Litter (Not Available With Prime X Option)
Injury could result if care is not taken when lowering the fowler. • Powered stretcher mechanisms can cause serious injury. Operate stretcher only with persons clear of mechanisms. Figure 22: Fowler - Electric Option Return To Table of Contents 1115-109-001 REV D www.stryker.com... -
Page 33: Operating The Optional Gatch - Non-Electric (Not Available With Prime X Option)
Figure 25. WARNING To avoid the risk of injury, ensure that the gatch prop rod is fully raised and securely placed into position (Figure 25). Figure 25: Gatch Return To Table of Contents www.stryker.com 1115-109-001 REV D... -
Page 34: Operating The Gatch - Optional Electric Litter (Not Available With Prime X Option)
Figure 26: Gatch - Electric Option CAUTION The weight capacity of the gatch is 200 lb. Do not sit or stand on the gatch. Injury or damage to the equipment could occur. Return To Table of Contents 1115-109-001 REV D www.stryker.com... -
Page 35: Operating The Recovery Chair (Not Available With Prime X Option)
34). WARNING Use caution when operating the recovery chair while a patient is on the stretcher. Powered stretcher mechanisms can cause serious injury. Operate stretcher only with persons clear of mechanisms. Return To Table of Contents www.stryker.com 1115-109-001 REV D... -
Page 36: Using The Base Hood For Storage
• Do not use the cutout for the oxygen bottle holder on the base hood for the storage of oxygen bottles or patient belongings. Note: Clean the base hood storage area regularly. Figure 28: Base Hood Storage Return To Table of Contents 1115-109-001 REV D www.stryker.com... -
Page 37: Using The Optional Pump Rack
Note: The pump rack is an option that may have been installed at the foot end of the stretcher. The choice was made at the time that the stretcher was purchased. The pump rack (A) can be used for the storage and transportation of stretcher equipment (Figure 29). Figure 29: Pump Rack Return To Table of Contents www.stryker.com 1115-109-001 REV D... -
Page 38: Using The Optional Retractable Cord Reel - Electric Lift/Litter Option
To unplug, grasp the mold near the outlet and pull the cord in a direction parallel to the floor (not at an angle). Figure 30: Optional Retractable Cord Reel Return To Table of Contents 1115-109-001 REV D www.stryker.com... -
Page 39: Operating The Optional Scale System
(stretcher exit) has a battery backup option, so the standby icon indicates when the unit is unplugged and operating with battery backup. The chaperone option also allows you to set zone controls to alert an operator when a patient may be attempting to exit the stretcher. Return To Table of Contents www.stryker.com 1115-109-001 REV D... -
Page 40: Operating The Optional Scale System - Non-Electric Litter
If the system is functional, “Good” will display and the scale system is ready to use. If the malfunction is still present, the display shows “Err” again. Call Stryker technical support at 800-327-0770. To meet the accuracy claim as stated in the product specification on... -
Page 41: Replacing The Optional Scale System Batteries - Non-Electric Litter
Reinstall the screws and the cover. If the display is flashing “Lo batt”, then the batteries are drained and the scale system is disabled. Replace the batteries with four new AA batteries as described above. Return To Table of Contents www.stryker.com 1115-109-001 REV D... -
Page 42: Operating The Optional Scale System - Electric Litter Option Without Chaperone (Not Available With Prime X Option)
If there is a loose connection or a malfunctioning component, the display will show “Err”. Attempt the function again. If the malfunction is still present, the display shows “Err” again. Call Stryker technical support at 800-327-0770. To meet the accuracy claim as stated in the product specification on... -
Page 43: Charging The Optional Scale System Battery Pack - Electric Litter Option (Not Available With Prime X Option)
When the unit is stationary, you should plug the power cord into a power source whenever possible. The optional scale system - electric litter option requires one 10.8V Li-Ion battery pack (0058-134-000). When fully discharged, the battery pack requires approximately 3 hours of charging time to recharge. Return To Table of Contents www.stryker.com 1115-109-001 REV D... -
Page 44: Operating The Optional Scale System - Electric Litter Option With Chaperone (Not Available With Prime X Option)
“000.0”. The system is not zeroed until the “000.0” stops flashing. 000.0 (solid) For the most accurate results, always zero the scale system before putting a new patient on the stretcher. The display shuts off after approximately 40 seconds. Return To Table of Contents 1115-109-001 REV D www.stryker.com... -
Page 45: Operating The Chaperone (Stretcher Exit) Option (Not Available With Prime X Option)
If there is a loose connection or a malfunctioning component, the display will show “Err”. Attempt the function again. If the malfunction is still present, the display shows “Err” again. Call Stryker technical support at 800-327-0770. To meet the accuracy claim as stated in the product specification on... -
Page 46: Operating The Chaperone (Stretcher Exit) Option - Optional Setup (Not Available With Prime X Option)
Press and hold the Zero (3) button and the lb/kg (4) button together for 6 seconds until “Set” appears on the display (5) to save your selected setting. Release both buttons. The display (5) shows “L (1-4)”. A brief sample of your selected volume will confirm your sound setting. Return To Table of Contents 1115-109-001 REV D www.stryker.com... -
Page 47: Using X-Ray Cassettes - Prime X Option
WARNING The Prime X option is not recommended for use with a Stryker Pioneer mattress or a mattress with a thickness greater than four inches and is not compatible for use with a C-Arm. -
Page 48: Using The Defibrillator Tray
• Do not use the foot extension/defibrillator tray as a push/pull device because equipment damage could occur. Figure 37: Foot Extension/ Defibrillator Tray - Foot End Return To Table of Contents 1115-109-001 REV D www.stryker.com... -
Page 49: Using The Footboard/Chartholder
To avoid the risk of injury to the patient or user or damage to the I.V. pole while transporting the stretcher, make sure that the I.V. caddy is securely tightened on the I.V. pole. Return To Table of Contents www.stryker.com 1115-109-001 REV D... -
Page 50: Operating The Foot Supports (Not Available With Prime X Option)
Loosen the knee knob (A), rotate the foot supports to the position shown in the Figure 41 below. Tighten to secure in place using the knee knob (A). Figure 40: Foot Support Components Figure 41: Foot Supports In Stored Position Return To Table of Contents 1115-109-001 REV D www.stryker.com... - Page 51 The following options cannot be purchased if the foot support option is selected: • Foot End Pop-Up Steering Handles • Defibrillator Tray • Defibrillator Tray/Foot Extender/Chart Service • Serving Tray Holder/Footboard • Footboard/Chart Holder • Foot End I.V. Poles Return To Table of Contents www.stryker.com 1115-109-001 REV D...
-
Page 52: Operating The Two-Stage Permanently Attached I.v. Pole
• To avoid damage while transporting the stretcher, verify that the I.V. pole is at a low enough height to allow it to safely pass through door openings and under light fixtures. • Do not use the I.V. pole as a push/pull device because equipment damage could occur. Return To Table of Contents 1115-109-001 REV D www.stryker.com... -
Page 53: Operating The Three-Stage Permanently Attached I.v. Pole
• To avoid damage while transporting the stretcher, verify that the I.V. pole is at a low enough height to allow it to safely pass through door openings and under light fixtures. • Do not use the I.V. pole as a push/pull device because equipment damage could occur. Return To Table of Contents www.stryker.com 1115-109-001 REV D... -
Page 54: Operating The Removable I.v. Pole
To install and use the siderail pads, tuck the siderail pad between the mattress and siderail. Then, attach the Velcro® straps around the top of the siderail to secure the pad to the siderail. Figure 47: Removable I.V. Pole Return To Table of Contents 1115-109-001 REV D www.stryker.com... -
Page 55: Using The Upright Oxygen Bottle Holder
• Do not use the serving tray holder/footboard as a push/pull device because equipment damage could occur. Figure 50: Serving Tray - Foot End Figure 49: Serving Tray Return To Table of Contents www.stryker.com 1115-109-001 REV D... -
Page 56: Using The Restraint Straps
This unit allows the use of ankle, chest, wrist, and body restraints. See Figures 51 and 52 for restraint strap attachment points. Do not attach restraints straps to the siderail. Stryker makes no recommendation for the use of restraints. WARNING • Physical restraints, even if properly secured, may result in serious harm to patients and caregivers. -
Page 57: Using The Upright X-Ray Cassette Holder
Lift up on the upright cassette holder to release the lower retainer guides (A) on the upright cassette holder from the fowler weldment bar (Figure 54). Figure 54: Upright X-Ray Cassette Holder Figure 53: Upright X-Ray Cassette Holder Inside View Outside View Return To Table of Contents www.stryker.com 1115-109-001 REV D... -
Page 58: Using The Lateral Cassette Holder
Remove the lateral cassette holder from between the mattress and patient platform. Press down on the release button to close the lateral cassette holder. Store the lateral cassette holder as appropriate. Figure 55: Lateral Figure 56: Lateral Cassette Holder Cassette Holder Return To Table of Contents 1115-109-001 REV D www.stryker.com... -
Page 59: Cleaning
• Do not replace the mattress on the stretcher until the unit is completely dry. RECOMMENDED CART WASHING CLEANING METHOD Stryker Medical recommends using a standard hospital surgical cart washer to power wash the stretcher a maximum of once per year for the life of the unit. -
Page 60: Mattress Cleaning
Some cleaning products are corrosive in nature and may cause damage to the product if used improperly. If the products suggested above are used to clean Stryker patient handling equipment, measures must be taken to ensure that the stretcher is wiped with a damp cloth soaked in clean water and thoroughly dried following cleaning. Failure to properly rinse and dry the stretcher will leave a corrosive residue on the surface of the stretcher, possibly causing premature corrosion of critical components. - Page 61 Rinse surfaces which have been exposed to the solution with clear water before returning mattress to service. Note: Failure to follow the above directions when using these types of cleaners may void this product’s warranty. Return To Table of Contents www.stryker.com 1115-109-001 REV D...
-
Page 62: Preventative Maintenance
Preventative Maintenance At a minimum, preventative maintenance should be performed annually. A preventative maintenance program should be established for all Stryker Medical equipment. Preventative maintenance may need to be performed more frequently based on the usage level of the product. -
Page 63: Preventative Maintenance
_____ No damage to the fowler skin and foot skin (Prime X Option) _____ No damage to the head and foot trays (Prime X Option) Product Serial Number: Completed by: ____________________________________________ Date: _____________________ Return To Table of Contents www.stryker.com 1115-109-001 REV D... -
Page 64: Emc Information
Note: U is the a.c. mains voltage prior to applications of the test level. * Applies to Optional Electric Lift/Litter only Return To Table of Contents 1115-109-001 REV D www.stryker.com... - Page 65 At 80 MHz and 800 MHz, the separation distance for the higher frequency range applies. Note 2 These guidelines may not apply in all situations. Electromagnetic propagation is affected by absorption and reflection from structures, objects and people. Return To Table of Contents www.stryker.com 1115-109-001 REV D...
- Page 66 Optional Electric Lift/Litter and Optional Scale System. Over the frequency range 150 kHz to 80 MHz, field strengths are less than 3 V/m. * Applies to Optional Electric Lift/Litter only Return To Table of Contents 1115-109-001 REV D www.stryker.com...
- Page 67 IEC 61000-3-2 * low voltage power supply network that supplies buildings used for domestic purposes. Voltage Fluctuations Flicker Emissions Complies IEC 61000-3-3 * * Applies to Optional Electric Lift/Litter only. Return To Table of Contents www.stryker.com 1115-109-001 REV D...
-
Page 68: Warranty
Stryker’s obligation under this warranty is expressly limited to supplying replacement parts and labor for, or replacing, at its option, any product which is, in the sole discretion of Stryker, found to be defective. If requested by Stryker, products or parts for which a warranty claim is made shall be returned prepaid to the factory. Any improper use or any alteration or repair by others in such manner as in Stryker’s judgment affects the product materially and adversely... -
Page 69: Service Contract Programs
Service during regular business hours (8-5) * Replacement parts and labor for products under PM contract will be discounted. ** Does not include any disposable items, I.V. poles (except for Stryker permanently attached poles), mattresses, batteries, or damage resulting from abuse. -
Page 70: Recycling Passport
1070-110-360 Rev C (Reference Only) 1070-110-365 Rev C (Reference Only) 1070-110-270 Rev C (Reference Only) 1070-110-370 Rev B (Reference Only) Item Recycling/Material Code Important Information (1008-037-820) Scale Control Non-Backlit Keypad Assembly Return To Table of Contents 1115-109-001 REV D www.stryker.com... - Page 71 Recycling Passport Assembly part number: 1070-117-600 Rev C(Reference Only) - 26” 1070-117-300 Rev B (Reference Only) - 30” 1070-110-265 (Reference Only) Item Recycling/Material Code Important Information (1008-037-057) Load Cell Return To Table of Contents www.stryker.com 1115-109-001 REV D...
- Page 72 Recycling Passport Rev A Assembly part number: 1070-037-300 (Reference Only) - 30” Item Recycling/Material Code Important Information (1008-037-057) Load Cell Return To Table of Contents 1115-109-001 REV D www.stryker.com...
- Page 73 Recycling Passport Rev E Assembly part number: 1070-237-020 (Reference Only) Item Recycling/Material Code Important Information (1008-037-830) Scale Control Assembly (1070-137-029) AA Battery Assembly Return To Table of Contents www.stryker.com 1115-109-001 REV D...
- Page 74 Recycling Passport Rev L Assembly part number: 1008-010-302 (Reference Only) Item Recycling/Material Code Important Information (1008-015-820) Patient Lockout Assembly Return To Table of Contents 1115-109-001 REV D www.stryker.com...
- Page 75 Recycling Passport Assembly part number: 1008-011-320 Rev B (Reference Only) - Right 1008-011-330 Rev B (Reference Only) - Left Item Recycling/Material Code Important Information (1008-011-016) Siderail Keypad, Right (1008-011-017) Siderail Keypad, Left Return To Table of Contents www.stryker.com 1115-109-001 REV D...
- Page 76 Recycling Passport Rev B Assembly part number: 1008-015-020 (Reference Only) Item Recycling/Material Code Important Information (1008-015-800) Staff Control Assembly Return To Table of Contents 1115-109-001 REV D www.stryker.com...
- Page 77 Recycling Passport Rev G Assembly part number: 1070-010-100 (Reference Only) Item Recycling/Material Code Important Information (0058-135-000) Li-ION Smart Battery Pack (1008-237-850) Scale Control Assembly Return To Table of Contents www.stryker.com 1115-109-001 REV D...
- Page 78 Recycling Passport Rev G Assembly part number: 1070-010-100 (Reference Only) Item Recycling/Material Code Important Information (1008-037-810) Scale Control Backlit Keypad Assembly Return To Table of Contents 1115-109-001 REV D www.stryker.com...
- Page 79 Recycling Passport Rev G Assembly part number: 1070-010-200 (Reference Only) Item Recycling/Material Code Important Information (0058-134-000) Li-ION Smart Battery Pack (1008-237-840) Scale/ Chaperone Control Assembly Return To Table of Contents www.stryker.com 1115-109-001 REV D...
- Page 80 Recycling Passport Rev G Assembly part number: 1070-010-200 (Reference Only) Item Recycling/Material Code Important Information (1008-037-800) Scale/ Chaperone Keypad Assembly Return To Table of Contents 1115-109-001 REV D www.stryker.com...
- Page 81 Recycling Passport Rev F Assembly part number: 1018-015-305 (Reference Only) Item Recycling/Material Code Important Information (1008-002-800) Non-Lift Control PCB Assembly Return To Table of Contents www.stryker.com 1115-109-001 REV D...
- Page 82 Recycling Passport Rev F Assembly part number: 1018-015-405 (Reference Only) Item Recycling/Material Code Important Information (1008-002-810) Lift Control PCB Assembly Return To Table of Contents 1115-109-001 REV D www.stryker.com...
- Page 84 Stryker Medical 3800 E. Centre Ave. Portage, Michigan 49002 Stryker France S.A.S. ZAC - Avenue Satolas Green 69881 MEYZIEU Cedex France 2012/09 1115-109-001 REV D www.stryker.com...
Need help?
Do you have a question about the 1115 and is the answer not in the manual?
Questions and answers