
Related Manuals for COMAC ANTEA 50 B


Summary of Contents for COMAC ANTEA 50 B
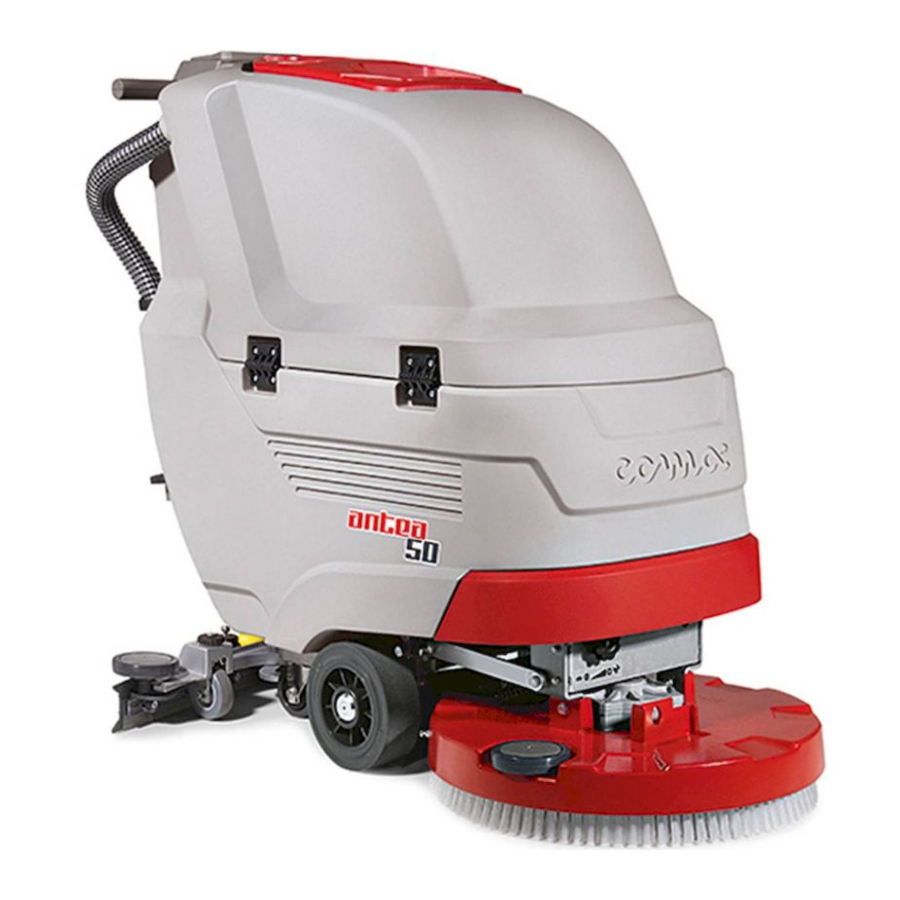
- Page 1 ANTEA - VERSA SCRUBBING MACHINES USE AND MAINTENANCE MANUAL ORIGINAL INSTRUCTION DOC. 10056728 - Ver. AC - 05-2016...
-
Page 3: Table Of Contents
CONTENTS CONTENTS ............................3 SYMBOLS USED IN THE MANUAL ....................5 PURPOSE AND CONTENT OF THE MANUAL ..................6 TARGET GROUP ..........................6 STORING THE USE AND MAINTENANCE MANUAL ................6 ON DELIVERY OF THE APPLIANCE ....................6 INTRODUCTORY COMMENT ......................6 IDENTIFICATION DATA ........................6 TECHNICAL DESCRIPTION .......................6 INTENDED USE ...........................6 SAFETY ...............................6 REGISTRATION PLATE ........................7... - Page 4 INSTALLING THE BRUSH (BTS versions) ..........................32 ASSEMBLING THE SQUEEGEE .............................33 FILLING THE SOLUTION TANK WITH WATER ........................33 DETERGENT SOLUTION ................................34 PREPARING TO WORK ........................35 WORK ..............................36 STARTING WORK (B versions) ..............................36 SCRUBBING AND DRYING (B versions) ..........................36 SCRUBBING WITHOUT DRYING (B versions) ........................37 DRYING (B versions) ................................37 STARTING THE WORK ACTIVITIES (versions BT - BTS - BTO) ....................38 SCRUBBING AND DRYING (versions BT - BTS - BTO) ......................38...
-
Page 5: Symbols Used In The Manual
The descriptions contained in this document are not binding. The company therefore reserves the right to make any modifications at any time to elements, details, or accessory supply, as considered necessary for reasons of improvement or manufacturing/commercial requirements. The reproduction, even partial, of the text and drawings contained in this document is prohibited by law. The company reserves the right to make any technical and/or supply modifications. -
Page 6: Purpose And Content Of The Manual
PURPOSE AND CONTENT OF THE MANUAL The aim of this manual is to provide customers with all the information needed to use the appliance in the safest, most appropriate and most autonomous way. It includes information concerning technical aspects, safety, operation, appliance downtime, maintenance, spare parts and scrapping. -
Page 7: Registration Plate
REGISTRATION PLATE The registration plate is located on the lower portion of the recovery tank, inside the appliance, and contains the following information: 1. The weight of the batteries used to power the appliance (expressed in Kg). 2. The gross weight of the appliance (expressed in Kg). 3. -
Page 8: Technical Data (Antea)
ANTEA ANTEA ANTEA 50 ANTEA 50 TECHNICAL DATA (ANTEA) 50 B 50 BT Rated power of the device 1100 1200 1000 Working width Working capacity up to 1250 1780 1750 1780 Maximum gradient with full load Standard squeegee width Disc brush (number / diameter) No. -
Page 10: Technical Data (Versa)
VERSA VERSA VERSA TECHNICAL DATA (VERSA) 55BT 65BT 50BTS Rated power of the device 1415 1415 1200 Working width Working capacity up to 1960 2295 1750 Maximum gradient with full load Standard squeegee width Disc brush (number / diameter) No. / Ø mm 2 / 290 2 / 340 Disc brush rotations... -
Page 12: General Safety Regulations
GENERAL SAFETY REGULATIONS The regulations below must be carefully followed in order to avoid harm to the operator and damage to the appliance. CAUTION: • Carefully read the labels on the appliance. Do not cover them for any reason and replace them immediately if they become damaged. - Page 13 main switch (and then removing the key from the ignition) and disconnecting the battery connector from the electrical system connector (valid for BT - BTS - BTO versions). • Children must be supervised to ensure they do not play with the device.
- Page 14 • If the appliance is used in dangerous areas (for example, gas stations), the relative safety standards should be observed. The appliance must never be used in environments with a potentially explosive atmosphere. • Do not place any liquid containers on the appliance. •...
-
Page 15: Symbols Used On The Appliance
SYMBOLS USED ON THE APPLIANCE SYMBOLS PRESENT ON THE REGISTRATION PLATE Direct current symbol: Used on the appliance's registration plate to indicate that the appliance is powered by a DC power supply. Battery symbol: Used on the appliance's registration plates to indicate the mass of the batteries used to power the appliance (expressed in Kg). -
Page 16: Symbols Used On The Instrument Panel (Version B)
Warning label (versions without built-in battery charger): Affixed to the appliance in order to warn the operator to read the user and maintenance manual (this document) before using the appliance. It also shows certain procedures to be applied for the proper care of the appliance. Solution tank filter daily care warning label: Affixed to the appliance in order to remind the operator to clean the solution tank filter after each use of the appliance. -
Page 17: Display Screens (Versions Bt - Bts - Bto)
Brush head command symbol (versions with PM): Used on the control panel to indicate the brush head command button of the appliance. Water quantity adjustment symbol (versions with CDS): Used on the control panel to indicate the button for adjusting the water level in the device water circuit. Detergent percentage adjustment symbol (versions with CDS): Used on the control panel to indicate the button for adjusting the percentage of detergent in the device water circuit. - Page 18 The adjacent image shows the “SCRUBBING AND DRYING IN ECO- MODE with EXTRA PRESSURE" work screen for the PM versions. The symbol in the middle of the screen identifies the type of work being carried out. In this case, both the brush head unit and the squeegee unit are in contact with the ground.
- Page 19 The adjacent image shows the “SCRUBBING ONLY” work screen for the BTS versions. The symbol in the middle of the screen identifies the type of work being carried out. In this case, only the brush head unit is in contact with the ground.
- Page 20 The adjacent image indicates the “BRUSH UNCOUPLING” for the BT versions. The symbol in the middle of the screen indicates the activation of the sequence for releasing the brush from the brush-holder plate on the brush head. The adjacent image identifies “EMERGENCY SWITCH ACTIVE”. The symbol in the middle of the screen indicates that currently the emergency button has been activated.
-
Page 21: Preparing The Appliance
PREPARING THE APPLIANCE HANDLING THE PACKED APPLIANCE Since the packaging elements (plastic bags, staples, etc.) are a potential source of danger, they should not be left within the reach of children, disabled persons, etc. Gross weight of device, including packaging, is: 95kg 105kg ATTENTION: it is recommended that all the packaging... -
Page 22: How To Unpack The Appliance (Versions With Pm)
HOW TO UNPACK THE APPLIANCE (versions with PM) The appliance is contained in specific packaging, to remove the 3. Check that the appliance is off, if not, set the main switch (1) appliance do as follows: to “0”, turning the key (2) a quarter of a turn to the left (Fig.1). Remove the key from the instrument panel. -
Page 23: How To Transport The Appliance
ATTENTION: This process must be carried out by qualified 14. Turn off the appliance, turning the main machine switch (1) to "0", and turn the key (2) a quarter turn to the left ( Fig.1). Remove the personnel. key from the instrument panel. 15. -
Page 24: Component Positioning
COMPONENT POSITIONING The basic components of the appliance are as follows: 4. Solution tank cap/measuring device (Fig.3). 5. Tube for quick filling of the solution tank (Fig.3). 1. Knob for adjusting the work speed (B versions) (Fig.1). 6. Tube for solution tank level/drainage (Fig.4). 2. -
Page 25: Appliance Safety
APPLIANCE SAFETY The stages for making the appliance safe, and thereby allowing all ATTENTION: the place designated for this operation must the operations to be carried out in complete safety, are as follows: comply with current environmental protection regulations. 1. For BT versions, make sure the electronic brake is engaged by 3. -
Page 26: Inserting Batteries Into The Device
INSERTING BATTERIES INTO THE DEVICE The batteries must be housed in the special compartment beneath 2. Check that the recovery tank is empty, if not, empty it with the tube the recovery tank and should be handled using lifting equipment that (2) on the left side of the appliance (Fig.2) (read the paragraph is suitable in terms of both weight and its coupling system. -
Page 27: Connecting Batteries To The System Of The Appliance
CONNECTING BATTERIES TO THE SYSTEM OF THE APPLIANCE The batteries should be connected so as to obtain a total The various phases for inserting the batteries in the battery voltage of 24V. compartment are as follows: ATTENTION: it is recommended that all installation and 1. -
Page 28: Recharging The Batteries (Versions With Built-In Battery Charger)
RECHARGING THE BATTERIES (versions with built-in battery charger) The battery must be charged prior to the first use, and when it doesn't could either damage it, or be damaged through contact with it. provide enough power for tasks that could formerly be performed without difficulty. -
Page 29: Hour Meter (B Versions)
HOUR METER (B versions) The device's control panel contains the hour meter display (1), which shows the total usage time (Fig.1). The numbers before the "." symbol identify hours, while the number that follows it indicates hour decimals (an hour decimal corresponds to six minutes). The flashing “:”... -
Page 30: Installing The Brush (Antea B - Bt)
INSTALLING THE BRUSH (ANTEA B - BT) For packaging reasons, the brush is supplied disassembled from the 3. If the splash guard is present, release the retainer spring (2) on device. To assemble it on the brush head unit, proceed as follows: the brush head splash guards (Fig.2). -
Page 31: Assembling The Brush Head Splash Guard (Versa Bt)
ASSEMBLING THE BRUSH HEAD SPLASH GUARD (VERSA BT) For packaging reasons, the brush head splash guard is supplied ATTENTION: these operations must be carried out using disassembled from the device, and must be assembled on the brush protective gloves to avoid any possible contact with the edges head unit as follows: or tips of metal objects. -
Page 32: Installing The Brush (Bts Versions)
14. Disconnect the connector of the general system (8) from the 18. When the brush rotation is prevented, turn until the button on the connector of the batteries (9) (Fig.9). brush is engaged in the coupling spring, present on the brush- holder plate. -
Page 33: Assembling The Squeegee
ASSEMBLING THE SQUEEGEE For packaging reasons, the squeegee unit is supplied disassembled 2. Make sure the squeegee unit support is raised off the floor. If from the device, and must be assembled on the squeegee support it isn't, turn the squeegee control lever (1) on the back of the as follows: machine in the direction shown by the arrow (Fig.1). -
Page 34: Detergent Solution
• Using the optional system for automatic clean water top-up (5) 5. Fill with clean water, at a temperature not higher than 50°C and (Fig.5). This system has a float for avoiding any overflow. not lower than 10°C. The amount inside the tank can be seen by means of the level tube (6) (Fig.6) on the front left of the seat. -
Page 35: Preparing To Work
PREPARING TO WORK Before beginning to work, it is necessary to: “CHECKING AND CLEANING THE BRUSH (BT VERSION)”, or the paragraph titled “CHECKING AND CLEANING THE BRUSH 1. Make sure that the recovery tank is empty, if not, empty it (BTS VERSION)”). -
Page 36: Work
WORK STARTING WORK (B versions) To start working, do as follows: 3. Press the main system control button (1) so it is in the “work” position (Fig.1). 1. Make all the checks listed in “PREPARING TO WORK”. 2. Get in the driving seat, behind the machine. ATTENTION: when the main system control button is functioning, the LED inside it is activated. -
Page 37: Scrubbing Without Drying (B Versions)
SCRUBBING WITHOUT DRYING (B versions) To carry out “SCRUBBING WITHOUT DRYING” tasks, proceed as 3. Activate the brush head gearmotor using the brush control switch follows: (2) (Fig.2). 4. By activating the dead man's lever (3), the machine will start to 1. -
Page 38: Starting The Work Activities (Versions Bt - Bts - Bto)
STARTING THE WORK ACTIVITIES (versions BT - BTS - BTO) To start working, do as follows: ATTENTION: The symbol in the top right indicates the charge level of the batteries. 1. Make all the checks listed in “PREPARING TO WORK”. 2. -
Page 39: Scrubbing Without Drying (Versions Bt - Bts - Bto)
As soon as the dead man's levers are pressed the traction motor, ATTENTION: If the appliance has to be switched off with the brush head motor and vacuum motor will start working. As a result, brush head and the squeegee unit still in contact with the floor, the solenoid valve will also begin working and detergent solution will when switched on the work display will show the symbols (3) be delivered to the brush. -
Page 40: Drying Without Scrubbing (Versions Bt - Bts - Bto)
As soon as the dead man's levers are pressed the traction motor, work display will show the symbol (3), indicating that when it brush head motor and vacuum motor will start working. As a result, was switched off it was carrying out scrubbing (Fig.3). the solenoid valve will also begin working and detergent solution will be delivered to the brush. -
Page 41: Regulating The Detergent Solution
REGULATING THE DETERGENT SOLUTION To adjust the amount of detergent solution on the brush, proceed 3. During the first few meters, check that the quantity of solution is as follows: enough to wet the floor, but not so much as to come out of the splash guard;... -
Page 42: Reverse Movement (Versions Bt - Bts - Bto)
REVERSE MOVEMENT (versions BT - BTS - BTO) This machine is equipped with electronically controlled traction. To 3. Check that the squeegee unit is raised off the floor, adjusting the reverse, proceed as follows: lever (3) on the back of the device if necessary (Fig.3). 4. -
Page 43: Eco-Mode (Bt - Bts - Bto - Versions)
ECO-MODE (BT - BTS - BTO - versions) This appliance has an eco-mode function, which reduces the energy (1) on the instrument panel (Fig.1). absorption. When the eco-mode is active, the symbols for the working programs To activate or deactivate the eco-mode function just press the button will change, only the contours will remain visible, like the example in Fig.2 where scrubbing in eco-mode symbol is shown. -
Page 44: At The End Of The Work
AT THE END OF THE WORK At the end of the work, and before carrying out any type of key (6) a quarter turn to the left (Fig.5). Remove the key from the maintenance, perform the following operations: instrument panel. 13. -
Page 45: Maintenance
MAINTENANCE RECOMMENDED MAINTENANCE OPERATIONS TYPE OF MAINTENANCE CHECKING AND CLEANING THE RECOVERY TANK CHECKING AND CLEANING THE SOLUTION TANK CAP-FILTER CHECKING AND CLEANING THE DEBRIS HOPPER (BTS versions) RECHARGING THE BATTERIES CHECKING AND CLEANING THE SQUEEGEE UNIT CHECKING AND CLEANING THE VACUUM HOSE CHECKING AND CLEANING THE RECOVERY TANK FILTER-FLOAT CHECKING AND CLEANING THE SOLUTION TANK CHECKING AND CLEANING THE BRUSH (B versions) -
Page 46: Checking And Cleaning The Solution Tank Cap-Filter
7. Insert the clamp (3) of the recovery tank cover in the slot (4) on to remove the sludge that has accumulated at the bottom of the the recovery tank cover support (Fig.5). tank. 8. Rinse the inside with a jet of water, if necessary use a spatula 9. -
Page 47: Checking And Cleaning The Squeegee Unit
CHECKING AND CLEANING THE SQUEEGEE UNIT ATTENTION: these operations must be carried out using The careful cleaning of the whole vacuum unit ensures better drying and cleaning of the floor as well as a longer vacuum motor life. To protective gloves to avoid any possible contact with the edges carry out the cleaning of the squeegee body, proceed as follows: or tips of metal objects. -
Page 48: Adjusting The Squeegee Unit
Check the wear of the rear rubber blade on the squeegee unit; if the 4. Remove the vacuum hose (2) from the vacuum nozzle (3) on the edge of the rubber in contact with the floor is worn, replace it (though squeegee unit (Fig.2). -
Page 49: Checking And Cleaning The Recovery Tank Filter-Float
CHECKING AND CLEANING THE RECOVERY TANK FILTER-FLOAT Careful cleaning of the recovery tank filter-float guarantees better ATTENTION: users are advised to always wear protective cleaning of the floor as well as a longer vacuum motor lifespan. gloves, to avoid the risk of serious injury to hands. Proceed as follows to clean the recovery tank filter-float: 3. -
Page 50: Brush Control And Maintenance (Antea B)
BRUSH CONTROL AND MAINTENANCE (ANTEA B) Careful cleaning of the brush guarantees better cleaning of the floor 4. Press the dead man's levers (3) repeatedly three times (over the as well as a longer brush head gearmotor lifespan. To clean the span of one minute) (Fig.3). -
Page 51: Brush Control And Maintenance (Versa 55-65 Bt Without Pm)
BRUSH CONTROL AND MAINTENANCE (VERSA 55-65 BT without PM) Careful cleaning of the brush guarantees better cleaning of the floor simultaneously rotate the brush (4) according to the direction as well as a longer brush head gearmotor lifespan. To clean the indicated in the image (Fig.4). -
Page 52: Checking And Cleaning The Brush (Bts Versions)
18. Clean the brush under running water to remove any impurities ATTENTION: these operations must be carried out using from its bristles. Check that the bristles are not worn; in the event protective gloves to avoid any possible contact with the edges of excessive wear, replace the brush (the bristles should be at or tips of metal objects. -
Page 53: Cleaning The Water System (B Versions)
CLEANING THE WATER SYSTEM (B versions) Prior to any extended periods of disuse, do the following: 4. Verify that the quantity of detergent solution in the solution tank is suitable for the type of work you wish to carry out, otherwise fill 1. -
Page 54: Cleaning The Water System (Bt - Bts - Bto Versions)
CLEANING THE WATER SYSTEM (BT - BTS - BTO versions) Prior to any extended periods of disuse, do the following: 4. Verify that the quantity of detergent solution in the solution tank is suitable for the type of work you wish to carry out, otherwise fill 1. - Page 55 ATTENTION: the device will not start to move (either forward supplying the detergent solution to the brush. 17. Wait a few minutes, normally 2 – 4 minutes, to allow the dosing or backward) if the potentiometer adjustment knob (9) is set to minimum.
-
Page 56: Troubleshooting
TROUBLESHOOTING This chapter lists the most common problems linked with the use of the appliance. If you are unable to resolve the problems with the information given here, please contact your nearest assistance centre. PROBLEM POSSIBLE CAUSE SOLUTION Make sure the main switch is in the work position, the The main switch is OFF (B versions). - Page 57 PROBLEM POSSIBLE CAUSE SOLUTION If the battery charge level is critical, perform a Check the battery charge level, check the symbol on complete charging cycle (read “RECHARGING THE the control display. BATTERIES” or “RECHARGING THE BATTERIES (VERSIONS WITH BUILT-IN BATTERY CHARGER)”).
- Page 58 PROBLEM POSSIBLE CAUSE SOLUTION Make sure that the squeegee is free of obstructions (read paragraph “CHECKING AND CLEANING THE SQUEEGEE UNIT”). Make sure that the vacuum hose is free of obstructions The vacuum unit is obstructed. (read paragraph “CHECKING AND CLEANING THE VACUUM HOSE”).
-
Page 59: Disposal
DISPOSAL To dispose of the appliance, take it to a demolition centre or an authorised collection centre. Before scrapping the appliance, it is necessary to remove and separate out the following materials, then send them to the appropriate collection centres in accordance with applicable environmental hygiene regulations: •... -
Page 60: Ec Declaration Of Conformity
FLOOR SCRUBBING MACHINES mod. ANTEA 50 B, ANTEA 50 BT, ANTEA 50 BTS, ANTEA 50 BTO, VERSA 55BT, VERSA 55BT PM, VERSA 65BT, VERSA 65BT PM, VERSA 50BTS comply with the provisions of Directives: •... -
Page 61: Ec Declaration Of Conformity
FLOOR SCRUBBING MACHINES mod. ANTEA 50 B CB, ANTEA 50 BT CB, ANTEA 50 BTS CB, ANTEA 50 BTO CB, VERSA 55BT CB, VERSA 55BT PM CB, VERSA 65BT CB, VERSA 65BT PM CB, VERSA 50BTS CB comply with the provisions of Directives: •... - Page 62 NOTES...
- Page 64 COMAC S.p.A. - Via Maestri del Lavoro, 13 - 37059 S. Maria di Zevio - Verona - Italy Tel. +39 045 8774222 – Fax +39 045 8750303 – E-mail:com@comac.it www.comac.it...
Need help?
Do you have a question about the ANTEA 50 B and is the answer not in the manual?
Questions and answers